Table of Contents
Advertisement
Available languages
Available languages
Quick Links
Advertisement
Chapters
Table of Contents

Related Manuals for iRest EASYQ


Summary of Contents for iRest EASYQ
- Page 1 EASYQ (A166) MASSAGE CHAIR User manual Instrukcja obsługi...
-
Page 2: Table Of Contents
Thanks for purchasing this product. Please read this manual instruction carefully in order to know how to use this product correctly before operation. Please pay more attention to some important safety warning and keep this manual book properly for future use. Note: Our company reserves the right to change and explain the design of the product. - Page 3 Safety Precautions (must be observed) Please read all relevant instructions carefully before use. The notes marked here will help you to use the product safely and correctly. In order to clearly indicate the extent of harm and damage, precautions are divided into "Warning"...
-
Page 4: Safety Precautions
Safety Precautions (must be observed) Important safety warnings Do not allow children to touch any movable part of this product. Use the well-grounded power supply unit suitable for this product. Pull out the plug after use or before cleaning to avoid any physical injury or damage to the product. - Page 5 Safety Precautions (must be observed) Product service and maintenance This product should be maintained by the service center designated by the manufacturer only. No user should disassemble or maintain it without permission. Do not forget to turn off the main power switch after usage. Do not use this product if the power socket becomes loose.
-
Page 6: Installation Parts
Installation Parts Calf installation instructions 1. Insert the isolation parts into the lower leg hooks respectively (Figure 1). 2. Lift the lower leg, insert the lower leg hook correspondingly, and then insert the pin shaft. Finally, insert the R-shaped pin into the pin shaft (Figure 2). 3. -
Page 7: Place Massage Chair
Place Massage Chair Installation placement Make sure there is enough space for the massage chair can be tilted at least 30 cm. CAUTION Do not expose the massage chair directly to high temperature environment due to sunlight(such 30cm as: in front of heating equipment), and place it to where can avoid high temperature and direct sunlight. - Page 8 Place Massage Chair Move method Use the rear casters to move the massage chair.Move the chair by tilting it down and backward about 45° as shown in the diagram. CAUTION NOTE: Excessive force to title will cause the chair to tip over completely and product damage.
-
Page 9: Before Use
Before Use Check around Make sure that there are no people, pets and other objects around the unit. CAUTION Make sure there are no foreign objects in the gaps of the machine Before massaging, make sure that no foreign objects are caught in the CAUTION legs, feet, etc. - Page 10 Before Use Turn on the power Caution Schematic diagram Turn on the power Plug in power cord of power on switch ("I" position) R IN R IN P U T /O F /O F Please check the power cord and plug for damage before use. Please supply power to this product in accordance with the working power requirements of this product's calibration.
-
Page 11: Product Structure
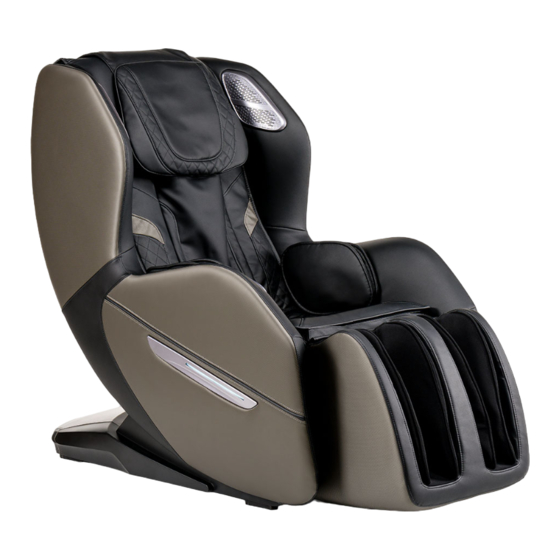
Product Structure Parts description Horn cover Head cushion Back cushion Buttoks Control air bag panel Assembly Armres decoration, decoration light Calf massage Mechanism Armrest Assembly Side cover... - Page 12 Product Structure Function distribution Both sides Of the head 3d digital audio Music playback Head Neck to seat Back roller massage Waist heating Heating function Armrest Usb charging port Buttoks Voice control Airbag massage Built-in voice control Microphone Calf Airbag massage Sole Roller massage...
- Page 13 Product Structure I. Introduction to the armrest controller Speed Width Auto Roller Mode...
- Page 14 Product Structure 1.Display: - Display the massage mode and timing. 2.Voice recognition hole: - Wake up voice control recognition function. 3.Heating function key: - Turn on or off the heating function. 4.Power: - Turn on/off all massage functions 5.Massage area adjustment button: - Adjust the massage position upward.
-
Page 15: Operation Instructions
Operation Instructions II. Start massage Press the power button to start the massage and the massage chair will automatically recline. When you hear “Bi Bi” (display HH), you can adjust to the shoulder position by the up and down buttons. Without adjustment within 5 seconds, the massage automatically starts. - Page 16 Operation Instructions B) Manual Massage Display Name Button Massage feature State Kneading: The speed is adjustable; the indicator light I is on. Tapping: speed and width are adjustable; indicator light II is on. Kneading and tapping: The speed is Mode Mode adjustable;...
- Page 17 Operation Instructions D) Heating function Display Name Button Massage feature State Turn on the heating function. Heat Turn off the heating function. E) Air pressure massage Display Name Button Massage feature State Short press this button to select the weak strong air pressure function: weak, strong, and closed.
-
Page 18: Massage Close
Operation Instructions III. Voice Control Mode • When the massage chair is turned on or in standby mode, the sound “Hi Alice” or “Hey Alice” will be produced to enable the voice control function. • After such function is enabled successfully, the massage chair will reply “I am here.” At this moment, once a corresponding voice control entry to be implemented is given within six seconds, the corresponding voice control function can be performed after a reply is received from the massage chair;... - Page 19 Operation Instructions IV. Operation Instructions for Bluetooth Speaker Play 1. Enter the smart device main menu. Open "Settings" and select the "Bluetooth" option. Open "Bluetooth", and Bluetooth will automatically "Search for a New Bluetooth Device". 2. The smart device will search for the corresponding Bluetooth model (e.g. IMCM- XXXX).
-
Page 20: Cleaning And Maintenance
Cleaning And Maintenance Cleaning synthetic leather and plastic parts Wipe the leather with a soft, dry cloth. Do not use chemicals such as thinner, gasoline, alcohol, etc. to clean the unit. When using commercially available leather care products (rags), please follow the instructions for use. -
Page 21: Troubleshooting
Troubleshooting When the calf mechanism or the backrest reaches a certain position, Fault press the corresponding adjustment button and it will no longer change, and a continuous "beep, beep" sound will be emitted. Due to product structure design and ergonomic requirements, this product Solution has a limited protection design for the limit state of attitude adjustment. -
Page 22: Product Specifications
Product specification Model name: iREST EASYQ Symbol: A166 Name: Massage Chair Rated voltage: 220-240V~ 50Hz/60Hz Rated power input: 90W Rated time: 20Min Safety structure: Class I Material introduction: PVC, PA, steel parts and electric & electron parts MATERIAL LEATHER CLOTH WOOD Bluetooth frequency range and power of 2.5 mW... - Page 23 EASYQ (A166) MASSAGE CHAIR Instrukcja obsługi...
- Page 24 Dziękujemy za zakup urządzenia. Prosimy o dokładne zapoznanie się z niniejszą instrukcją obsługi, aby przed uruchomieniem fotela masującego dowiedzieć się, jak prawidłowo z niego korzystać. W szczególności prosimy o zapoznanie się z przeciwwskazaniami oraz zasadami bezpiecznego użytkowania. Uwaga: Sprzedawca zastrzega sobie prawo do wprowadzania zmian w projekcie urządzenia i jego opisie.
- Page 25 Środki ostrożności (muszą być przestrzegane) Przed użyciem należy uważnie przeczytać wszystkie istotne instrukcje. Zawarte tu wskazówki pomogą bezpiecznie i prawidłowo korzystać z urządzenia. Aby wyraźnie wskazać zakres możliwych urazów i uszkodzeń, które mogą być spowodowane nieprawidłowym użytkowaniem, informacje zostały opatrzone nagłówkiem "Ostrzeżenie"...
-
Page 26: Środki Ostrożności
Środki ostrożności (muszą być przestrzegane) Ważne ostrzeżenia dotyczące bezpieczeństwa Nie wolno pozwalać dzieciom dotykać ruchomych części urządzenia. Należy używać dobrze uziemionego źródła zasilania, odpowiedniego dla tego urządzenia. Aby uniknąć obrażeń lub uszkodzenia urządzenia, po zakończeniu użytkowania lub przed czyszczeniem należy wyjąć wtyczkę z gniazdka. Urządzenie należy obsługiwać... - Page 27 Środki ostrożności (muszą być przestrzegane) Serwis i konserwacja urządzenia To urządzenie powinno być konserwowane wyłącznie przez centrum serwisowe wyznaczone przez producenta. Żaden użytkownik nie powinien demontować ani naprawiać urządzenia samodzielnie. Nie wolno zapominać o wyłączeniu zasilania po zakończeniu użytkowania. Nie wolno korzystać z urządzenia, jeżeli gniazdo wtykowe się obluzuje.
-
Page 28: Elementy Montażowe
Części montażowe Instrukcja montażu masażera łydek 1. Włóż części separujące do zaczepów dolnej części modułu na nogi (rysunek 1). 2. Unieś moduł, włóż odpowiednio zaczepy, a następnie włóż kołek blokujący. Na koniec włóż bolec w kształcie litery R do otworu w wałku (Rysunek 2). 3. -
Page 29: Umieszczenie Fotela Masującego
Umieszczenie fotela masującego Miejsce montażu Upewnij się, że jest wystarczająco dużo miejsca, ponieważ fotel masujący potrzebuje do rozłożenia co najmniej 30 cm. UWAGA Nie wystawiaj fotela masującego bezpośrednio na działanie wysokiej temperatury (np. przed urządzeniami grzewczymi) i promieni słonecznych; 30cm umieść... - Page 30 Umieszczenie fotela masującego Metoda przemieszczania Użyj tylnych kółek do przesuwania fotela masującego. Przesuń fotel, przechylając go do tyłu do około 45°, jak pokazano na rysunku. UWAGA UWAGA: Nadmierna siła przy wychylaniu spowoduje całkowite przewrócenie się fotela i uszkodzenie urządzenia. 1.Przed przemieszczeniem należy prawidłowo wyłączyć...
-
Page 31: Przed Użyciem
Przed użyciem Sprawdzenie otoczenia Upewnij się, że wokół urządzenia nie ma ludzi, zwierząt domowych i innych przedmiotów. UWAGA Upewnij się, że w szczelinach urządzenia nie ma żadnych przedmiotów Przed masażem upewnij się, że w podnóżku, przy stopach itp. nie znajdują się żadne obce UWAGA przedmioty. - Page 32 Przed użyciem Włączanie zasilania Uwaga Podłączenie Schemat Włącz przełącznik kabla zasilającego podłączenia zasilania zasilania (pozycja "I") R IN R IN P U T /O F /O F Przed użyciem należy sprawdzić, czy przewód zasilający i wtyczka nie są uszkodzone. Zasilanie tego urządzenia należy dostarczać zgodnie z wymaganiami dotyczącymi mocy roboczej tego urządzenia.
-
Page 33: Budowa Urządzenia
Budowa urządzenia Opis poszczególnych elementów Poduszka Osłona za głowę głośnika Poduszka na plecy System Panel masażu sterujący pośladków Osłona podłokietnika Oświetlenie dekoracyjne Mechanizm masażu łydek Podłokietnik Pokrywa boczna... - Page 34 Budowa urządzenia Rozmieszczenie funkcji Po obu stronach głowy Cyfrowy dźwięk 3d, Odtwarzanie muzyki Głowa Od karku do bioder Masaż rolkowy pleców Ogrzewanie Podłokietnik talii Port Funkcja ładowania USB ogrzewania Sterowanie Pośladki głosem Masaż poduszkami Wbudowana powietrznymi kontrola głosowa, mikrofon Łydka Masaż...
- Page 35 Budowa urządzenia I. Prezentacja panelu sterowania w podłokietniku Speed Width Auto Roller Mode...
- Page 36 Budowa urządzenia 1. Wyświetlacz: - Wyświetla tryb masażu i czas jego trwania 2. Mikrofon do rozpoznawania głosu: - Wywołuje funkcję rozpoznania komend głosowych 3. Przycisk funkcji ogrzewania: - Włącza lub wyłącza funkcję ogrzewania. 4. Zasilanie: - Włączanie/wyłączanie wszystkich funkcji fotela. 5.
-
Page 37: Instrukcja Obsługi
Instrukcja obsługi II. Rozpoczęcie masażu Naciśnij przycisk zasilania, aby rozpocząć masaż, a fotel masujący automatycznie się rozłoży. Kiedy usłyszysz przerywany sygnał dźwiękowy (wyświetlacz HH), możesz dostosować pozycję barków za pomocą przycisków góra/dół. Jeżeli nie dokonasz regulacji w ciągu 5 sekund, masaż rozpocznie się automatycznie. Domyślnie ustawiony jest masaż... - Page 38 Instrukcja obsługi B) Masaż ręczny Symbol na Nazwa Przycisk Funkcja masażu wyświetlaczu Ugniatanie: Prędkość jest regulowana; wskaźnik I jest podświetlony. Oklepywanie: prędkość i szerokość są regulowane; wskaźnik II jest podświetlony. Ugniatanie i oklepywanie: Prędkość jest Mode Mode regulowana; wskaźnik III jest podświetlony. Shiatsu: prędkość...
- Page 39 Instrukcja obsługi D) Funkcja ogrzewania Symbol na Nazwa Przycisk Funkcja masażu wyświetlaczu Włączenie funkcji ogrzewania. Ogrzewanie Wyłączenie funkcji ogrzewania. E) Masaż poduszkami powietrznymi Symbol na Nazwa Przycisk Funkcja masażu wyświetlaczu Naciśnij krótko ten przycisk, aby wybrać weak strong funkcję masażu poduszkami powietrznymi: Tryb słaby, mocny i wyłączony.
- Page 40 Instrukcja obsługi III. Tryb sterowania głosem • Kiedy fotel do masażu jest włączony lub znajduje się w trybie czuwania, komenda "Hi Alice" lub "Hey Alice" sprawia, że funkcja sterowania głosem zostaje aktywowana. • Po pomyślnym włączeniu tej funkcji fotel do masażu odpowie "I am here" [Jestem.]. W tym momencie, gdy w ciągu sześciu sekund zostanie podana odpowiednia komenda głosowa, która ma zostać...
-
Page 41: Zakończenie Masażu
Instrukcja obsługi IV. Instrukcja obsługi głośnika Bluetooth 1. Wejdź do menu głównego urządzenia smart. Otwórz "Ustawienia" i wybierz opcję "Bluetooth". Otwórz "Bluetooth", a urządzenie automatycznie "Wyszuka nowe urządzenie Bluetooth". 2. Urządzenie smart odnajdzie odpowiednie połączenie (np. IMCMXXXX). Kliknij przycisk "Połącz". Jeżeli pojawi się pytanie, czy sparować z urządzeniem, wystarczy wybrać... -
Page 42: Czyszczenie I Konserwacja
Czyszczenie i konserwacja Czyszczenie skóry syntetycznej i elementów plastikowych Przetrzyj skórę miękką, suchą szmatką Nie używaj do czyszczenia urządzenia środków chemicznych, takich jak rozcieńczalnik, benzyna, alkohol itp. Używając dostępnych w sprzedaży środków do pielęgnacji skóry, postępuj zgodnie z instrukcją obsługi. Jeśli skóra syntetyczna jest szczególnie brudna, wytrzyj ją... -
Page 43: Rozwiązywanie Problemów
Rozwiązywanie problemów Kiedy podnóżek lub oparcie osiągną określoną pozycję, naciskasz odpowiedni przycisk regulacji, ale nie następuje żadna zmiana i emitowany jest przerywany Problem sygnał dźwiękowy. Ze względu na konstrukcję urządzenia i wymagania ergonomiczne, urządzenie Rozwiązanie ma ograniczoną ochronę dla stanu granicznego regulacji położenia. Po osiągnięciu granicy pojawi się... -
Page 44: Specyfikacja Techniczna Urządzenia
Specyfikacja urządzenia Nazwa modelu: iREST EASYQ Symbol: A166 Nazwa: Fotel do masażu Napięcie znamionowe : 220-240V~ 50Hz/60Hz Moc znamionowa : 90W Czas znamionowy : 20Min Struktura bezpieczeństwa: Klasa I Użyte materiały: PCV, PA, części stalowe oraz części elektryczne i elektroniczne TWORZYWA SKÓRA...
Need help?
Do you have a question about the EASYQ and is the answer not in the manual?
Questions and answers