
Subscribe to Our Youtube Channel
Related Manuals for REI mesa 2.0


Summary of Contents for REI mesa 2.0
- Page 1 M O B I L I T Y E N H A N C E D S P E C T R U M A N A L Y Z E R Us e r Ma n u a l R e s e a r c h E l e c t r o n i c s I n t e r n a t i o n a l , L L C...
- Page 2 MESA® 2.0 DELUXE CASE CONTENTS 11. Whip Antenna* 1. MESA Unit* 12. Battery Charger 2. (2) Lithium-Ion Batteries* - Partially stored under Down Converter - Stored under unit 13. Power Plug with International adapters 3. Visible Light/Infrared Probe 14. GPS Adapter Stored under Locator Probe 15.
- Page 3 This document is intended to provide guidance and instruction on using the MESA 2.0 – Mobility Enhanced Spectrum Analyzer for finding hidden electronic devices. This manual contains proprietary information intended solely for use with the MESA 2.0 product. The overall effectiveness of this product, and of any surveillance countermeasure, is dependent on the threat level and the user’s ability to properly use the appropriate equipment.
- Page 4 Revision 2.3 © COPYRIGHT RESEARCH ELECTRONICS INTERNATIONAL REI products are designed and intended for legal commercial applications. However, because laws and regulations vary from state to state and country to country, it is the sole responsibility of the purchaser and user/operator to check and comply with all applicable laws and regulations for the possession and operation of this equipment before and after making a purchase.
-
Page 5: Table Of Contents
Probes, Antennas, and Accessories ......................13 Audio Transformer Batteries ........................18 Connecting the Antenna & Probes ......................19 Powered Connector Cable (only included with the MESA 2.0 Deluxe) ..........19 Manual Selection of Probes ........................ 20 Display ..............................21 Status Bar ..............................22 Mode Settings Menu ........................... - Page 6 ITU Region ............................102 Power-Down Cache Setting ......................102 Snap-to-Peak Setting ......................... 102 Save Settings ............................. 103 Factory Reset ............................ 104 MESA 2.0 Specifications ........................105 Receiver ............................. 105 Features ............................105 Power ..............................105 Mechanical ............................106 Environmental ........................... 106...
-
Page 7: Warnings And Cautions
Warnings and Cautions MESA 2.0 CAUTION: Any changes or modifications not expressly approved by REI could void the user’s authority to operate the equipment. The MESA is for professional use only. For your safety do not use the MESA if: o The MESA cables or plugs become frayed or otherwise damaged. - Page 8 Using the Lithium-Ion batteries in a manner not specified by this user’s guide may override the equipment’s built-in protection mechanisms. Keep out of the reach of children. Dispose of Lithium-Ion batteries in accordance with local regulations.
-
Page 9: Equipment Description
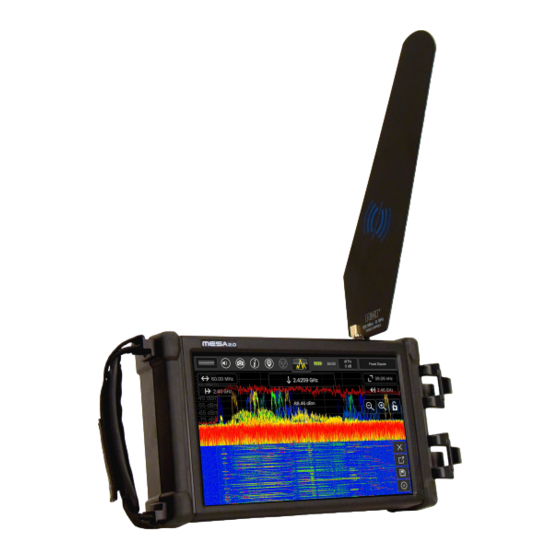
Equipment Description MESA 2.0 Unit ® 1. Touch Screen Display - user interface for MESA 2. Battery Door (on the bottom of the unit) - conceals battery compartment 3. Speaker (on the back of the unit) - used to output audio from the unit 4. - Page 10 Note: Only a single USB thumb drive (see pg. 100 for compatible formats) at a time is supported. Even if a USB hub is connected, only a single storage USB drive is supported. 11. QMA Connector (RF Input) with Quick Disconnect - for connecting the included REI antennas or other RF antennas 12.
-
Page 11: Cleaning And Maintenance
The MESA 2.0 is a swept spectrum analyzer featuring a bar graph representation of the spectrum and is used to locate transmitters by monitoring the RF signal strength. When searching for unknown transmitters, it is advised to remove or disable any known transmitters from the target sweep area (i.e.,... -
Page 12: Inserting The Battery
Inserting the Battery The battery-operated MESA provides for truly hand-held, portable spectrum analysis. To insert a battery: 1. Locate the battery door latch on the rear of the MESA near the bottom edge of the unit. 2. Supporting the MESA unit with both hands, place a thumb on the battery door latch. 3. -
Page 13: Power Control And Charging
Power Control and Charging To turn on the MESA unit, ensure that a charged battery is in the unit or connect the supplied AC adapter and press and hold the power button (see page 8) until it begins flashing. During operation, to turn off the MESA unit, press and hold the power button until the "Power Off"... -
Page 14: Mesa ® 2.0 Packages
2.0 Packages ® The MESA 2.0 is available in two packages (Basic and Deluxe) with varying probes, antennas, and accessories. Below is a chart showing which probes, antennas, and accessories are included in each package (note that this is subject to change). Additional information can be found in the Probes, Antennas, and Accessories section on the following pages. - Page 15 Whip Antenna (30 MHz - 6 GHz) The Whip / Dipole is a versatile, omnidirectional, near-field probe used for locating RF transmitters up to 6 GHz. MCP Multi-Carrier Probe (100 kHz - 60 MHz, 5 MHz - 2 GHz) The MCP (Multi-Carrier Probe) extends the functionality of the MESA with the addition of different connectors to allow for the analysis of suspicious signals: an AC power plug and coaxial connectors.
- Page 16 VLF Loop Antenna (10 kHz - 30 MHz) The VLF Loop Antenna is an omnidirectional antenna used for locating low-frequency signals below 30 MHz. Down Converter Directional Antenna (500 MHz - 12 GHz) The Down Converter Antenna is a directional antenna that operates in 2 user-selectable bands: Band 1: 500 MHz - 6 GHz Band 2: 6 GHz - 12 GHz When using Band 2, the Down Converter Antenna converts signals occurring above the standard 6 GHz...
- Page 17 Directional Antenna (70 MHz - 500 MHz) This flag-shaped antenna provides directional coverage for lower-frequency signal detection. It is a powered probe and must be used with one of the powered connector cables (see page 19). Locator Probe (20 MHz - 6 GHz) The Locator Probe is omnidirectional and is attenuated for use in high RF environments and for locating an RF signal to within a few inches.
- Page 18 Ultrasonic Probe (15 kHz - 80 kHz) The ultrasonic probe detects sound waves operating above the upper limit of human hearing capabilities. The ultrasonic probe is a powered probe and must be used with one of the powered connector cables (see page 19). Audio Transformer (300 Hz - 20 kHz) The Audio Transformer is a balanced audio coupler to provide electrical isolation for audio testing.
-
Page 19: Audio Transformer Batteries
For additional information on storing GPS information, see page 23. Audio Transformer Batteries The audio transformer, which is an accessory probe included with the MESA 2.0 Deluxe package, requires two A23C batteries, which are customer replaceable. To replace the audio transformer batteries: 1. -
Page 20: Connecting The Antenna & Probes
When connecting the powered connector cable to the MESA 2.0, it is important to align the power pin on the cable with the power contact pad on the MESA 2.0 for the connector to snap into place. -
Page 21: Manual Selection Of Probes
Manual Selection of Probes The MESA detects any REI-supplied antenna or probe that is connected and will automatically adjust the MESA settings, such as span or default mode, for best working with that probe. The MESA will also allow manual selection of the probe connected. -
Page 22: Display
6. Stop Frequency — when tapped, a dialog box will appear to allow the setting of the stop frequency. Allowable stop frequencies will depend on the REI probe connected. 7. Lock Screen — Press to lock the screen. A second press will unlock the screen. This feature locks... -
Page 23: Status Bar
functions in the status bar will continue to work with the screen locked. Press and hold the lock symbol for at least 5 seconds to initiate Locked Monitor Mode. Locked Monitor Mode enables the MESA to be locked for overnight or extended monitoring to keep others from tampering with the device or settings. -
Page 24: Gps Location
GPS Location When the MESA is receiving GPS coordinates it will tag saved files with GPS information. It will also tag signals in signal lists with GPS coordinates. Note: In order to receive GPS coordinates, the GPS Adapter (see page 18) must be inserted into one of the MESA's USB ports. - Page 25 The MESA provides a High Contrast View of the GPS screen to help with viewing the screen outdoors in sunlight. To access the High Contrast View, press the High Contrast View button at the bottom center of the GPS screen. To return to the Normal View, press the Normal View button. Note: It may take up to 20 seconds after selecting High Contrast View for the display to change GPS coordinates are not very well received indoors.
-
Page 26: Network Status And Setup
Network Status and Setup Tap the Network Icon to access the Network Status and Setup dialog. There are several tabs in the Network Status and Setup to assist with configuring network settings for the MESA. For further details see Network Configuration on page 90. Battery Life The battery icon provides a visual representation of the remaining battery life. -
Page 27: Setting The Time Zone, Date, And Time
Setting the Time Zone, Date, and Time Having accurate time and date information on the MESA is critical for ensuring that the timestamps on saved files and signal lists are accurate and reliable. Tapping the time display in the status bar will open a small dialog box with the date. Press "Edit" in this dialog box to set the time zone, time, &... -
Page 28: Attenuator/Preamp
Attenuator/PreAmp Since the MESA is a highly sensitive receiver, very strong signals can have an overloading effect on the circuitry. Receiver overload is evidenced by strong signals appearing at harmonic frequencies and/or from intermodulation distortion. The built-in attenuator should be turned on to reduce or eliminate the RF overload. - Page 29 Navigating Spectrum Mode The MESA unit is capable of scanning and displaying a large portion of the RF spectrum. To fully analyze the RF energy in a given location, it may be necessary to focus on smaller portions of the RF spectrum at a time.
- Page 30 REI uses internal shielding to minimize these false spurs, but they may be visible when zoomed in to very narrow resolution bandwidths.
- Page 31 To view cached peaks: 1) After enabling cached peaks, connect an antenna or probe that supports nearly the full 6 GHz bandwidth of the MESA, such as the Fixed Dipole Antenna. 2) Notice at full span, the resolution bandwidth is 312.50 kHz. Zoom in 2 times using the Zoom In onscreen button.
- Page 32 Mode Settings The mode settings menu can be opened from the top left button on the screen by tapping the drawer icon in the status bar. The settings available in this menu will change depending on the Mode that the MESA is currently in.
- Page 33 When first selected, the Average Peak option will temporarily display a slider bar to custom set the number of traces to be averaged. (The range option is 2-64 with a default of 16.) Move the slider bar to select the desired number. The bar will disappear after a few seconds. Persistence Trace This option toggles the display of the persistence trace.
- Page 34 Waterfall This option toggles the display of the waterfall. The waterfall captures a series of traces and displays them in a waterfall format. This is a quick way to observe the RF spectrum over a period of time and easily identify intermittent transmissions such as burst transmitters. The following options are available from the Waterfall sidebar: ...
- Page 35 Alerts This option enables alerts whenever the signal level monitored exceeds a specified threshold. Three types of alerts are available: audio alerts, visual alerts, and haptic alerts. When the alert feature is selected from the mode menu, a dialog box appears. The following adjustments are available from the dialog box: Threshold Level - Use the slider bar to set how far above the peak trace a signal should be before it triggers an alert.
- Page 36 To enable the I/Q Recording feature, the frequency span of the MESA 2.0 must be 14 MHz or less and a USB drive with available space must be inserted into the USB port. (See pg. 100 note on supported file systems.)
- Page 37 Three possible file types are available for the I/Q Recording files: iq-tar, idq (IRIS), & Raw. iq-tar (default): a binary format that includes meta-information (e.g. sample rate) about the data. The iq-tar container packs several files into a single .tar archive file. The iq-tar files can be read by equipment that supports Rohde &...
- Page 38 The RSSI option in the Mode Settings Menu turns the RSSI feature on. The spectrum portion of the graph will be compressed and displayed on the top half of the screen. The RSSI feature will be displayed on the bottom half of the screen. The two vertical lines in the spectrum (pictured below) represent the RSSI Window or the area of the spectrum whose relative signal strength is represented by the RSSI graph.
- Page 39 Generate Signal List This option will generate a signal list based on a reference peak trace. 1) Select Generate Signals List from the Mode Menu 2) When dialog box appears, set desired threshold level using the slider bar 3) Press Activate...
- Page 40 The reference peak trace will collect for a minimum of five seconds. After this, continue collecting the peak trace for as long as desired. The longer the peak trace is collected, the more accurate it will be and the more likely it will include any suspect signals present. 4) When ready, press Generate Signal List.
- Page 41 Signal List This option toggles the display of the signal list window. The spectrum portion of the graph is compressed and displayed on the top half of the screen, while the signal list displays on the bottom half of the screen. If no signal list is currently open in memory, the signal list window will be empty.
- Page 42 Note: The I/Q Recording option is only available in the Mode Settings Menu at spans of 14 MHz and below. The circle around the sound icon will be gold when it is available. A trigger-based I/Q Recording is also available on the MESA 2.0 (see page 35). To record I/Q Data: 1.
- Page 43 There are two duration options available: Max: Will record at the maximum IQ buffer size up to 10 seconds. Partial: Will record at half the maximum. The available duration for each option depends upon the frequency span of the spectrum. To increase the available durations, decrease the frequency span.
- Page 44 Audio Demod Settings With Audio Demod active, audio demod settings are available at the top of the oscilloscope: Demod Type: Select from three different options - Auto, FM, and AM. Filter Bandwidth: Select from three different bandwidths - 200 kHz, 20 kHz, and 5 kHz. Audio Recording It is possible to record small snippets of demodulated audio with the MESA.
-
Page 45: Smartbars
Selection Input (see page 20) but be aware that SmartBars will show portions of the spectrum that may not be supported by the probe. Note: REI advises the use of a blocking capacitor when using 3 party probes to avoid any negative... - Page 46 Starting SmartBars™ 1. Select SmartBars from the Mode Menu at the top center of the screen. 2. From the SmartBars Signal Control dialog box, select either Fast Scan or Signal Resolution. Fast Scan mode uses a resolution bandwidth of 312.5 kHz for spans of 200 MHz and wider, which results in a faster sweep speed.
- Page 47 Note: During the collection of the reference trace, the screen can be locked with a pin code to prevent tampering with the collection of the reference trace. Press and hold the lock icon on screen for at least 5 seconds. Then follow the onscreen prompts. For additional details regarding locked monitor mode, see page 90.
- Page 48 Navigating SmartBars™ Mode Note: The screenshots below show the Fast Scan version of SmartBars. However, navigation works the same in both Fast Scan and Signal Resolution modes. After starting SmartBars, the spectrum will be displayed as 20 individual SmartBars which represent the full range of the connected probe.
- Page 49 Tapping a SmartBar will select it. The selected peak trace bar will change to gray. The selected live trace bar will change to white. Tapping a selected SmartBar will zoom in to the portion of the spectrum represented by the span of the selected SmartBar.
- Page 50 Tapping one of the sub-bars will select it. Tapping a selected sub-bar will zoom in to the portion of the spectrum represented by the span of the sub-bar displayed as a trace graph. (To return to the SmartBars view, repeatedly press Zoom Out until the displayed span is greater than 200 MHz.
- Page 51 Signal Resolution SmartBars™ Upon starting Signal Resolution SmartBars Mode, a new, blank signal list is generated. The MESA monitors and compares the reference trace to the current live trace. Any time a signal in the live trace exceeds the reference trace by the user-defined threshold, the MESA will add a signal to the signal list. A merging algorithm is employed so that over time signals such as frequency hoppers or FM transmitters, which initially appear as several distinct, closely spaced signals are eventually grouped into one signal with a larger bandwidth as the envelope of this signal begins to fill in with peaks.
- Page 52 Mode Settings The mode settings menu can be opened from the top left button on the screen. The settings available in this menu will change depending on the current mode selected. Even within the SmartBars mode, the options available in the Mode Settings Menu will change depending on whether SmartBars is still displayed, or if it is zoomed in far enough to display the spectrum traces.
- Page 53 Alerts This option enables alerts whenever the signal level exceeds a specified threshold. It operates very similarly to the way Alerts operate in Spectrum Mode. Three types of alerts are available: audio alerts, visual alerts, and haptic alerts. When the alert feature is selected from the mode menu, a dialog box appears. The following adjustments are available from the dialog box: Threshold Level - Use the slider bar to set how far above the initial reference trace a signal should be before it triggers an alert.
-
Page 54: Mobile Bands
Signal List This option toggles the display of the signal list window on the bottom half of the screen. If no signal list is currently open in memory, the signal list window will be empty. For additional details on the signal list window, see page 81. Mobile Bands Mobile bands mode displays up to 8 bar graphs at once. - Page 55 Mobile Band bar graphs are more than a simple power graph. To view the spectrum behind a given bar tap on a bar graph. The spectrum is displayed with a span that covers the selected graph. Green vertical dashed lines represent the boundaries of the bar graph that was selected. In the spectrum display, the normal functions are available such as peak, persistence, signal lists, etc.
- Page 56 Pressing Zoom In will reduce the frequency span. Pressing Zoom Out will increase the frequency span. Zooming out beyond the selected band’s frequency limits will return to the discrete bands screen. Pressing Zoom Out on the discrete bands will return to the Mobile Bands screen. Editing Mobile Bands The default bands are set up to cover commonly found cellular, Bluetooth, and Wi-Fi devices.
- Page 57 1. Select Edit Mobile Band from the Mode Settings Menu in the upper left corner of the screen or tap on the frequency range at the bottom of one of the bars. The Mobile Bands Edit dialog will appear. 2. From this dialog, Start and Stop frequencies of each range can be edited. Tap the frequency to be edited.
- Page 58 4. The screen will return to the Mobile Bands Edit dialog with the settings from the recalled configuration. 5. To apply the configuration, press the “x” in the upper right corner of the dialog. A dialog box will ask for confirmation of saving changes. Mode Settings The mode settings menu can be opened from the top left button on the screen.
- Page 59 Edit Mobile Band This option provides a way to manually set up frequencies and to add/remove bands from the display with a range of 1-8 bands. Restore Defaults This option restores the 8 default mobile bands at 700-790 MHz, 800-850 MHz, 850-920 MHz, 1.70-1.85 GHz, 1.90-2.10 GHz, 2.40-2.50 GHz, 2.50-2.60 GHz, 5.14-5.90 GHz.
- Page 60 With the Jammer Detector feature enabled, please notice the following alerts: If the MESA is exposed to a possible jammer, an alert "Possible Jammer/Interference detected" will appear in the Alerts dialogue at the top of the screen. The alert will be latched and will remain on screen until the user dismisses it by pressing the "x"...
- Page 61 If the receiver is overloaded due to an extremely strong signal in the area, it may mask the presence of a jammer. If this occurs, the alert "Signal Overload" will appear in the Alerts dialogue and all bands will be highlighted in red.
- Page 62 Jammer Detector Settings The Jammer Detector Settings, available from the Mode Settings Menu at the top left of the screen, allow for the configuration of the Jammer Detector feature. Feature This option enables or disables the Jammer Detector feature. Power This option determines the required power level threshold to trigger a jammer alert.
- Page 63 Audio Alert This option will enable or disable an audible tone when a jamming alert is experienced. Haptic Alert This option will enable or disable haptic feedback when a jamming alert is experienced. Logging This option enables or disables the Jammer/Interference Detector log. The log will record when possible jamming or interference is detected and also when it is no longer detected.
-
Page 64: Wi-Fi
The MESA 2.0 combines both a Wi-Fi module and a spectrum analyzer. The MESA 2.0 is capable of both identifying a list of WiFi networks and viewing the RF spectrum of those networks using MESA’s spectrum analyzer. MESA 2.0 scans the wireless networks in range and displays a list of found devices by mac address, network name (if available), power level, and number of channels. - Page 65 “Inactive” from previous scans will be preserved. Collection Filtering The MESA 2.0 collects data (in packets called frames) from all WiFi devices within range. It may be helpful to filter this collection and narrow it to the desired search area. From the Mode Menu, Collection Filtering provides 2 ways to selectively reduce the amount of data being collected: adjusting RSSI Threshold and ignoring NC Clients.
- Page 66 -60 (or further, if necessary) to exclude devices outside the target sweep area. Without this adjustment, the MESA 2.0 may issue a warning (see WiFi Load Warning section on the next page) and become sluggish without intervention. If adjustment of the Threshold Setting does not resolve the issue,...
- Page 67 WiFi Load Warning When encountering unusually large amounts of WiFi traffic, the MESA 2.0 will alert the user to adjust the Threshold setting. A popup dialog warning box will appear with two options: A) Stop Scanning Adjust Threshold If “Stop Scanning” is selected, the scan will be stopped but not cleared. Follow the instructions on Collection Filtering (see page 64) to adjust the Threshold setting to narrow the search to the target area.
- Page 68 Access Point (AP), Client, or Not Connected (NC) Client found during the scan will be added to the list. On the initial WiFi scan, the MESA 2.0 requires a minimum 15-second scan, allowing the MESA adequate time to scan several sweeps of all the individual WiFi channels.
- Page 69 However, if continued scanning is desired and the user has not cleared the list, the START button can be pressed, and the scan will be continued. New devices will be added to the list, as they are discovered, without the existing list being automatically reordered. Evaluating the WiFi Scan Results After stopping the scan, there are several options for evaluating the results: Sorting the WiFi Display List...
- Page 70 2) Select one of the values from the resulting pop-up list. SSID/Name Column In this column, the MESA 2.0 will identify WiFi devices by several parameters. First, the device will be classified as an Access Point (AP) or a Client and indicate this by a symbol:...
- Page 71 1) Ensure that a thumb drive (see pg. 100 for file system compatibility) is inserted into one of the USB ports on the MESA 2.0. 2) Select Save List from the Mode Settings Menu. (Note: This option will be grayed out and unavailable unless there is a thumb drive inserted into one of the USB ports.)
- Page 72 Clearing the Device List The device list may be cleared at any time both during live scanning and after the scan is stopped. There are three options for clearing devices from the list: 1) Clear Unchecked: This option will clear only devices that have not been identified as Friendly, Threat, or Inactive by the user and are still labeled as Unknown with a yellow question mark.
- Page 73 Channel List at the bottom left of the Detail View along with the number of frames sent by the individual channel. While in Detail View, the MESA 2.0 will repeatedly scan all channels sequentially in the Channel List looking for transmissions from...
- Page 74 Main Screen list. There are several possible reasons for this: o An Access Point may be connected to a Client that itself is not in range of the MESA 2.0. o A Client is sending probe requests for an AP that it was formerly connected with. An example would be a phone searching for a favorite coffee shop’s saved WiFi router.
- Page 75 Occasionally an Access Point, when handling large amounts of data, will create an additional virtual device. This “device” may be identified by the MESA 2.0 as a Client. Physically, it will be the same device as the original AP that created it. In conclusion: Allowing the MESA to scan for a few minutes will better classify found devices.
- Page 76 a. The green dashed vertical lines represent the frequency span of a device’s channel(s). If in Detail View, a specific channel has been selected, the frequency span will be displayed for that channel only. If there is no channel selected, the frequency span will include all the channels.
- Page 77 6) View Histogram From the Detail View, the received signal strength can be viewed over time by pressing the RSSI Hist button. The Detail View screen is still visible above the histogram window. Selecting the gears icon brings up a Timespan box to allow selection of the desired time period visible in the histogram window.
-
Page 78: Bluetooth
To close the Detail View screen and return to the WiFi list, press Close located above the ID box. Bluetooth The MESA 2.0 scans for both Bluetooth Standard (Classic)—such as cell phones—and Bluetooth LE (Low Energy) and can detect Bluetooth devices through version 5.0, including BLE. - Page 79 Bluetooth Scanning To begin a scan in Bluetooth Mode, select “Start.” Devices will be added to the list as they are discovered. During the scan, the device list can be ordered by Address, Name, or dBm by tapping on the top of each column.
- Page 80 Evaluating Device List Press “Stop” to end or pause the scan. Select an individual device in the list by tapping once to highlight it. The highlighted device’s signal strength will be displayed in the RSSI Bar Graph. Both Latest and Current power of the device will be displayed above the RSSI bar graph.
- Page 81 Saving the Device List The device list can be saved both during a scan and after the scan is stopped. First, ensure a thumb drive (see pg. 100 for format compatibility) is inserted into one of the USB ports. Then, select “Save List” under the Mode Settings Menu.
-
Page 82: Additional Features
Additional Features Signal List Window A signal list for storage and recall for frequencies of interest along with additional information such as signal amplitude, bandwidth, threat level, the number of times that signal has been seen, location, and Band ID information. Signal lists can be automatically generated through either the Generate Signal function (see page 38) or the SmartBars Signal Resolution mode (see page 50). - Page 83 signal was seen. For Spectrum Mode signal list generation or when adding a signal manually to the signal list, this field will be equal to the First Seen field. Count - In SmartBars Signal Resolution Mode, if a periodic and repetitive signal is detected, this field will automatically keep track of the number of times the signal appears.
- Page 84 Removing Signals To remove a signal from the signal list: 1) Tap the signal in the signal list so that the row is highlighted. 2) Press the "Remove" button at the bottom of the signal list. Viewing Details of Signals For each of the signals in the signal list, all the details can be viewed in one concise screen: 1) Highlight the signal to view details.
- Page 85 2) Press the "Go/Merge" button. 3) A dialog box will appear asking for confirmation to merge the highlighted signals. Press "Yes" to confirm. Note: Some information may be lost when manually merging signals. For example, if two signals that have different information in the probe field are merged, the merged signal will only retain the information from one of the signals.
- Page 86 Saving the Signal List It is possible to save a signal list to a USB thumb drive (see pg. 100 for file system computability) to access from a PC or from an OSCOR Blue or OSCOR Green. Signal lists are saved in .csv format and may be opened with a spreadsheet program such as Microsoft Excel.
- Page 87 Merging the Signal List If desired, a newly generated Signal List can be merged with a previously saved list. To Merge a Signal List: 1) Ensure a USB thumb drive (see pg. 100 for file system compatibility) is inserted into one of the USB ports of the MESA.
- Page 88 Open a Previously Saved Signal List It is possible to open a signal list that was previously saved on the MESA. 1) Ensure that the previously saved signal list (in CSV format) is on a USB thumb drive (see pg. 100) that is inserted into one of the USB ports on the MESA.
-
Page 89: Image Viewer & Audio Player
Image Viewer & Audio Player The Image Viewer and Audio Player are located within the System Menu. The System menu can be accessed at the top of the Mode Settings Menu in any of the five modes (Spectrum, SmartBars, Mobile Bands, WiFi, Bluetooth). - Page 90 Tap the "x" in the upper right corner of the image viewer to close the viewer. With the Audio Player, any audio files that the MESA previously stored on a USB drive also can be selected from a list and replayed. At the bottom of the audio player screen, the left and right arrows help select the file.
-
Page 91: Locked Monitor Mode
After 10 more unsuccessful attempts to unlock the MESA, a delay of 60 seconds will occur. Increasingly longer delays will occur with further incorrect entries. If unable to successfully unlock the MESA device, email support@reiusa.net, or call (931-537-6032) during REI's normal business hours (M – F 8:00 am – 4:30 pm CST) -
Page 92: Network Configuration
Network Configuration The network settings can be accessed from the network icon at the top of the screen and the System Menu. The network settings screen has five tabs: Info: The Status subtab shows the current state of the link and VNC. When connected to a network via Ethernet cable, the Link shows “Up”... - Page 93 VNC: The VNC subtab allows users to enable a VNC server. The VNC server allows users to view and control a MESA from a remote location. A password must be set before the VNC will be enabled. This password will be required at the remote viewer. After enabling the VNC server, the MESA can be controlled by the touchscreen or via a remote viewer.
- Page 94 Setup: The Networking subtab enables/disables Ethernet. The General subtab allows users to set the hostname (for example this is the name that will show up in a list of devices connected to a router). The Ethernet MAC Address subtab allows users to set a custom MAC address, generate a random address, or restore the default address.
-
Page 95: Vnc Operation
IPv6: Displays the IPv6 settings. By default, these settings are set to automatic, but this tab offers the ability to manually set the address, prefix length, and gateway. There is also the option to turn on privacy settings. When privacy settings are turned on the MESA changes its address daily. VNC Operation How to start VNC Server The MESA can be remotely accessed using the built-in Ethernet port. - Page 96 4. Select VNC Tab. 5. Set a VNC password.
- Page 97 6. Return to the VNC tab and enable the server. A VNC status Update window should appear and display a “VNC Server Running …” message. How to start VNC Viewer 1. Start the VNC viewer and enter the IP address that was recorded in the VNC setup.
- Page 98 The viewer will request the password set in the VNC server. The MESA server image should appear on the viewer screen. Now the MESA can be remotely controlled using a mouse. In spectrum mode, a left mouse double click on the mouse will zoom in and a right mouse click will zoom out.
-
Page 99: Down Converter Directional Antenna Operation
The start and stop frequencies change depending on the down converter state. After selecting the desired band, press the "x" to close the Input Info dialog box. Note: The MESA Down Converter is available in the MESA 2.0 Deluxe Package. Universal RF Antenna Input The MESA automatically detects any of the REI-provided probes when connected and automatically sets up the correct Span, Start Frequency, and Stop Frequency for the connected probe. - Page 100 2. In the Input Info dialog box, select “Universal RF” from the drop-down menu. 3. Select “Apply”. Several powered probes are included with the MESA 2.0 Deluxe package, such as the Down Converter Antenna (500 MHz – 12 GHz) and the Directional Antenna (70 MHz – 500 MHz). In order to use these probes with the Universal RF option, it will be necessary to press the “Power On”...
-
Page 101: Updating Software
6. At the end of the software update, the MESA will automatically restart. Note: The MESA 2.0 is shipped with a USB thumb drive formatted with the file system FAT32. If using a user-supplied USB thumb drive, please ensure it is formatted with FAT32 (or exFAT). Only MESA 2.0 (and MESA 1.0) units installed with the latest software update will support the exFAT file system. -
Page 102: System Menu
System Menu Several system settings are available in the Systems Menu, which is located at the top of the Mode Settings Menu. Brightness This setting adjusts the brightness of the Touch Screen Display. Version The software version and unit serial number can be displayed in this dialog. Image Viewer Screenshots taken with the MESA can be viewed on the MESA in the Image Viewer. -
Page 103: Itu Region
Screenshots (default setting = "screenshot") Waterfall Images (default setting = "waterfall") Signal Lists (default setting = "signals") Audio Recordings (default setting = "audio") I/Q Recordings (default setting = “iq” The Job Prefix field can be used to add a global prefix to all saved files. If the Job Prefix field is defined then this text is prepended to any file name (along with the prefix for specific file types) created by the MESA. -
Page 104: Save Settings
The MESA can save custom user settings to export to additional MESA devices. It can also be used to save these custom settings in case the device needs to be sent to REI for service. This requires a USB thumb drive to be inserted into either USB port. -
Page 105: Factory Reset
Importing Device Settings After inserting the USB thumb drive containing the settings file to be imported, select Settings Import under the System Menu. The Import Dialog Box will appear, then select Begin Import. The MESA unit will not automatically ask the user if they wish to import settings, the user must initiate this. When the import is complete, the user must select “X”... -
Page 106: Mesa 2.0 Specifications
MESA 2.0 Specifications Receiver Sweep Speed >200 GHz/second Operating Freq. Range 10 kHz – 6 GHz /*12 GHz Resolution Bandwidth Variable depending on span: 0.0380 kHz to 312.5 kHz Instantaneous Bandwidth 25 MHz 312.5 kHz RBW with Pre-amp: -90 dBm DANL - Noise Floor 9.765 kHz RBW with Pre-amp: -110 dBm... -
Page 107: Mechanical
Mechanical Unit Dimensions 5 x 8 x 2 in /13 x 20 x 5 cm Unit Weight 2.4 lbs./1.1 kg including battery Case Dimensions 6 x 15 x 18.5 in / 16 x 38 x 47 cm Case /Contents Weight 15 lbs./ 6.8 kg Environmental Operating temperature -10°...
Need help?
Do you have a question about the mesa 2.0 and is the answer not in the manual?
Questions and answers