Table of Contents
Advertisement
Original User's Instructions
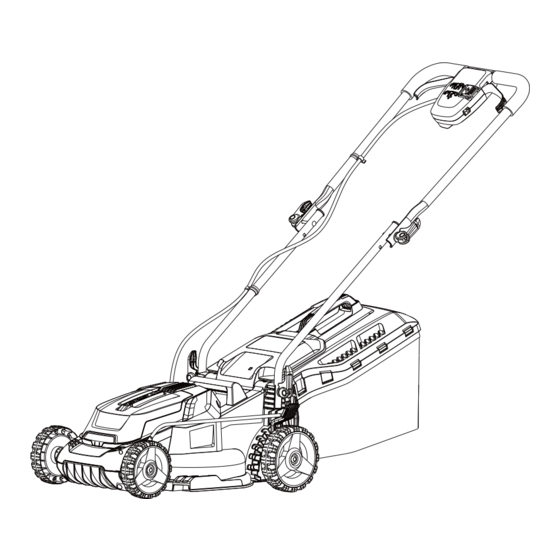
36V (2x18V) 34cm Cordless Lawnmower
SKU: 44788
WHAT'S IN THE BOX
Mower x 1
Grass collection bag x 1
PLEASE KEEP THESE INSTRUCTIONS FOR FURTHER REFERENCE
Upper hadnle x 1
Grip handle for
grass collection bag x 1
If you do not have all these items, please contact:
www.toolstation.com/contact
Telephone 0345 6460997
Email info@toolstation.com
Lower handle
locking knob
with washer x 2
Charger x 1
Upper handle
locking knob
with washer x 2
Battery pack x 2
Lower handle x 2
Advertisement
Table of Contents

Related Manuals for TOOLSTATION Hawksmoor CLM36LW


Summary of Contents for TOOLSTATION Hawksmoor CLM36LW
- Page 1 Battery pack x 2 grass collection bag x 1 Lower handle x 2 Grass collection bag x 1 If you do not have all these items, please contact: www.toolstation.com/contact Telephone 0345 6460997 Email info@toolstation.com PLEASE KEEP THESE INSTRUCTIONS FOR FURTHER REFERENCE...
-
Page 2: Specification
SPECIFICATION • Single lever cutting height adjustment • Removable battery for convenient storage and charging • Carry handle for easy transport • Foldable handles for compact storage • Bagging and rear discharge TECHNICAL DATA Sku/Model 44788/CLM36LW Voltage 36V (2x18V) No Load Speed 4200 /min Cutting Diameter 34 cm... - Page 3 Noise Information A weighted sound pressure L = 97 dB(A) = 3.0 dB(A) A weighted sound power = 92.6 dB(A) = 1.9 dB(A) Wear ear protection. Vibration Information Typical weighted vibration a = 3.6 m/s , uncertainty K = 1.8 m/s WARNING: The vibration emission value during actual use of the power tool can differ from the declared value depending on the ways in which the tool is used dependant on the following examples and other variations on how the tool is used:...
- Page 4 EXPLANATIONS AND SYMBOLS, CAUTIONS AND WARNINGS Read instruction handbook before operation this machine Keep bystanders away Warning! Wear eye and ear protection Beware of sharp blades. Blades continue to rotate after the motor is switched off- Remove disabling device before maintenance. Batteries may enter water cycle if disposed improperly, which can be hazardous for ecosystem.
- Page 5 Li-Ion battery This product has been marked with a symbol relating to ‘separate collection’ for all battery packs and battery pack. It will then be Li-I on recycled or dismantled in order to reduce the impact on the environment. Battery packs can be hazardous for the environment and for human health since they contain hazardous substances.
-
Page 6: Health And Safety
HEALTH AND SAFETY ORIGINAL INSTRUCTIONS PRODUCT SAFETY GENERAL SAFETY WARNINGS WARNING! Read all safety warnings and all instructions. Failure to follow the warnings and instructions may result in Carefully read the instructions for the safe operation of the machine. Save all warnings and instructions for future reference. - This appliance is not intended for use by persons (including children) with reduced physical, sensory or mental capabilities, or lack of experience and knowledge, unless they have been given... -
Page 7: Operation
c) Before using, always visually inspect to see that the blades, blade bolts and cutter assembly are not worn or damaged. Replace worn or damaged blades and bolts in sets to preserve balance. Replace damaged and unreadable labels. 3. OPERATION b) Avoid operating the equipment in wet grass, where feasible;... -
Page 8: Maintenance And Storage
damage and make repairs before restarting and operating the lawnmower if the lawnmower starts to vibrate abnormally (check immediately) – inspect for damage. – replace or repair any damaged parts. – check and tighten any loose parts. 4. MAINTENANCE AND STORAGE a) Keep all nuts, bolts and screws tight to be sure the equipment is in safe working condition;... - Page 9 this instruction and use the correct charging procedure. j) Do not maintain battery pack on charge when not in use. k) After extended periods of storage, it may be necessary to charge and discharge the battery pack several times to obtain maximum performance.
- Page 10 Additional safety instructions for your battery charger 1. Before charging, read the instructions. 2. Do not charge a leaking battery. 3. Do not use chargers for works other than those for which they are designed. 4. Before charging, ensure your charger is matching the local AC supply.
-
Page 11: Component List
COMPONENT LIST Safety key Upper handle Upper handle locking knob Lower handle Cable clip Grip handle for grass collection bag Switch lever Grass collection bag Battery pack (See Fig. E) Cutting height adjusting lever Battery charger (See Fig. E) Wheel Blade (See Fig. -
Page 12: Assembly And Use
ASSEMBLY AND USE NOTE: To reduce the risk of injury, user must read instruction manual. Intended Use This product is intended for domestic lawn mowing. WARNING: Before assembly and adjusting to the mower, ensure the mower is turned off and the battery pack is removed. - Page 13 2. GRASS COLLECTION BAG ASSEMBLY Front part Back part 1) Align the front and back parts of the grip handle for grass collection bag with the front and rear slots on the grass collection bag. (See Fig. B1) 2) Press the front part of the grip handle down, then push the handle forward a little.
-
Page 14: Before Operation
5. ADJUSTING THE CUTTING HEIGHT (SEE FIG. D) WARNING! Stop, release switch lever and wait until the motor stops before adjusting cutting height. The blades continue to rotate after the machine is switched off, a rotating blade can cause injury. CAUTION: Do not touch rotating blades. -
Page 15: Cutting Area
Light Status Charging Red on Fully Charged Green on 2. TO REMOVE OR INSTALL BATTERY PACK 1) Open the battery housing cover. Depress the battery release button and remove the battery pack from the mower. (See Fig. 2) After recharging, insert the battery pack into the mowerr’s (See Fig. - Page 16 operation. 2) For best performance, please ensure use a fully charged battery pack and always cut off 1/3 or less of the grass height. 3) Walk slowly when cutting long grass, so as to have more effective cutting and properly discharge the clippings. 4) Avoid cutting wet grass, otherwise it will stick to the underside of the deck and the clippings cannot be collected or discharged properly.
-
Page 17: Care And Cleaning
CARE AND CLEANING WARNING! Before all maintenance and care work: Switch off the mower and wait until the mower has stopped. Remove the safety key, and remove the battery packs. WARNING: Wear protective gloves. NOTE: To ensure long and reliable service, perform the following maintenance procedures regularly. -
Page 18: Blade Sharpening
3) Unscrew and remove the blade blot (17) using a spanner (not supplied) by turning it in an anti-clockwise direction. 4) Remove the blade. (See Fig. I2) 5) To re-assemble, position the blade with the cutting edges towards the ground. Then securely tighten the blade bolt (17) using a spanner (not supplied) by turning it in a clockwise direction. -
Page 19: Troubleshooting
TROUBLE SHOOTING Problem Possible Cause Corrective Action The machine Possible clogging Check underneath the machine and clear out as nec- does not essary (always wear gardening gloves). work, or stop Battery not fully charged Charge the battery. suddenly Battery not inserted (properly) Inserting the Battery properly. - Page 20 Product Description: 36V (2x18V) 34cm Cordless Lawnmower 1. Toolstation Limited, Express Park, Bristol Road, Bridgwater, Somerset TA6 4RN This declaration of conformity is issued under the sole responsibility of Toolstation 2. Object of the declaration The object of the declaration described above is in conformity with the relevant Community...
-
Page 21: Environmental Information
BS EN 60335-1, BS EN 60335-2-77, BS EN 62233, BS EN ISO 3744, BS EN 55014-1 BS EN 55014-2, BS EN 60335-2-29, BS EN 61000-3-2, BS EN 61000-3-3 4. Additional information: Signed for and on behalf of Toolstation Limited Paul Field 01/01/2021 ENVIRONMENTAL INFORMATION When your heater comes to the end of its life or you choose to update or upgrade it by replacing it, please do not dispose of it with your normal household waste. -
Page 22: Customer Support
If you are a consumer and you experience a problem with your Toolstation product, which is found to be defective due to faulty materials or workmanship within the Guarantee Period, this Toolstation Guarantee will cover repair or - at the discretion of Toolstation –...
Need help?
Do you have a question about the Hawksmoor CLM36LW and is the answer not in the manual?
Questions and answers
Looking for a picture is inside the paddle switch on and off box. The circle Spring inside the box has come off and I need to how it goes back on for safety reason?