
Related Manuals for TOOLSTATION HAWKSMOOR Y0J-SP03-4036ZA


Summary of Contents for TOOLSTATION HAWKSMOOR Y0J-SP03-4036ZA
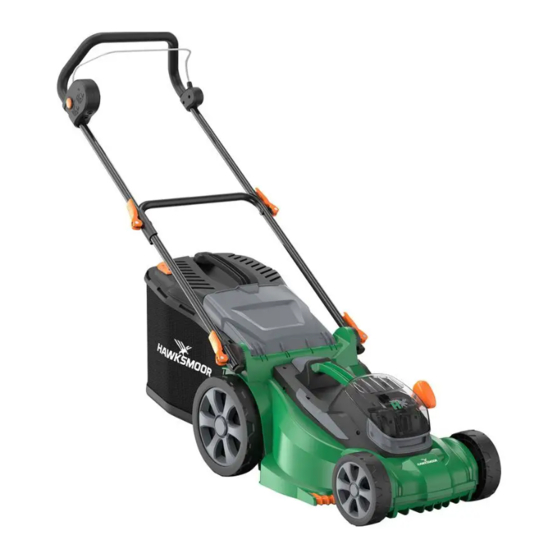
- Page 1 Original User’s Instructions 2x18V 40cm Brushless Cordless Lawn Mower SKU: 23984 READ BEFORE USE PLEASE KEEP THESE INSTRUCTIONS FOR FURTHER REFERENCE...
-
Page 2: Table Of Contents
CONTENT ∫ WHAT’S IN THE BOX ---------------------------------------------------------- 3 ∫ SPECIFICATIONS -------------------------------------------------------------- 4 ∫ EXPLANATIONS AND SYMBOLS, CAUTIONS AND WARNINGS ---------- 5 ∫ IMPORTANT SAFETY WARNINGS -------------------------------------------- 7 ∫ PRODUCT DESCRIPTION AND IDENTIFICATIONS ------------------------ 16 ∫ ASSEMBLY AND OPERATING INSTRUCTIONS -----------------------------17 ∫... -
Page 3: What's In The Box
WHAT'S IN THE BOX Lawn mower with upper handle Lower handle Grass collection bag Lower handle Teeth clamp Upper handle Cable clip quick release quick release lever x 2 lever (curved bolt head) x 2 Battery pack x 2 Charger If you do not have all these items, please contact: www.coreservice.co.uk Hotline: +44 01904 947568... -
Page 4: Specifications
SPECIFICATION Technical Data Model Y0J-SP03-4036ZA Nominal voltage of product with battery 36V d.c. (2X18V 4AH) No-load cutting speed 3400/min 40cm Cutting width Cutting height 25-75mm, 7 positions Capacity of grass bag Net weight approx. 13.4kg Measured sound pressure level(L 79.1dB(A), K=3dB(A) 94.62dB(A), K=1.14dB(A) Measured sound power level(L Guaranteed sound power level... -
Page 5: Explanations And Symbols, Cautions And Warnings
EXPLANATIONS AND SYMBOLS, CAUTIONS AND WARNINGS To reduce the risk of injury, the user must read the instruction manual carefully. Avoid using the machine in the rain. Wait until all machine components have completely stopped before touching them. Keep bystanders away. Objects thrown by the product could hit the user or other bystanders. - Page 6 WEEE symbol. Waste electrical products should not be disposed of with household waste. Please recycle where facilities exist. Check with your local authority or local store for recycling guidelines. The product complies with the applicable European directives and an evaluation method of conformity for these directives was done.
-
Page 7: Important Safety Warnings
IMPORTANT SAFETY WARNINGS General Safety Instructions Warning: Please read the following instructions carefully, failure to do so could lead to serious personal injury. When using the electric lawnmower, basic safety precautions, including the following, should always be followed to reduce the risk of fire,electric shock and personal injury. - Page 8 Training • Read the instructions carefully. Be familiar with the controls and the proper use of the equipment. • Never allow children or people unfamiliar with these instructions to use the lawnmower. Local regulations can restrict the age of the operator. •...
- Page 9 • Only operate the product in daylight or in good artificial light. • Do not expose tool and charger to rain or wet conditions. If a tool or charger is exposed to moisture it will increase the risk of electric shock, battery damage, fire or explosion. •...
- Page 10 • Stop the product and remove the safety key/battery pack from the machine and make sure that all moving parts have come to a complete stop: ∂ Whenever you leave the product unattended. ∂ Before clearing blockages or unclogging chute. ∂...
- Page 11 • Do not short-circuit a battery pack. Do not store battery packs haphazardly in a box or drawer where they may short- circuit each other or be short-circuited by conductive materials. When battery pack is not in use, keep it away from other metal objects, like paper clips, coins, keys, nails, screws or other small metal objects, that can make a connection from one terminal to another.
- Page 12 • Recharge only with the charger specified by manufacturer. Do not use any charger other than that specifically provided for use with the equipment. A charger that is suitable for one type of battery pack may create a risk of fire when used with another battery pack.
- Page 13 • Do not abuse the cord of charger. Never use the cord for carrying, pulling or unplugging the charger. Keep cord away from heat, oil, sharp edges or moving parts. Damaged or entangled cords increase the risk of electric shock. •...
- Page 14 • This charger can be used by children aged from 8 years and above and persons with reduced physical, sensory or mental capabilities or lack of experience and knowledge if they have been given supervision or instruction concerning use of the appliance in a safe way and understand the hazards involved.
- Page 15 • Every deep discharge cycle decreases the capacity of battery pack. To prolong battery life, it is recommended that you charge the battery every six months within extended periods of time when the product is not in use. • Have your tool repaired by an authorized service agent. This tool is manufactured in accordance with the relevant safety regulations.
-
Page 16: Product Description And Identifications
PRODUCT DESCRIPTION AND IDENTIFICATIONS 12. Grass comb 1. Switch box with on/off button 2. Cable clip x 2 13. Battery pack + Charger 14. Cutting height adjustment lever 3. Power cord protection sheath 15. Rear wheel 4. Lower handle 5. Grass full indicator 16. -
Page 17: Assembly And Operating Instructions
ASSEMBLY AND OPERATING INSTRUCTIONS NOTE: To reduce the risk of injury, user must read instruction manual. Intended Use This product is intended for domestic lawn mowing. WARNING: Before assembly and adjusting to the mower, ensure the mower is turned off and the battery pack is removed. WARNING: Ensure the battery pack is disconnected from the mower before making the assembly. - Page 18 Attach the lower handle to the lawn mower Mount the locking cams on the lower handle (4) onto the clamp base on the machine. There are 3 angle marking lines on the tooth cams base. Carefully aline the mark arrow on the tooth cams to the corresponding angle marking line on both sides.
- Page 19 Fitting the cable clip Ensure that the cable clips(19) supplied are used to fix the cable to the lower handle and upper handle. Attach the grass bag Attach the grass collection bag to the frame by fixing the plastic hooks onto the side. www.coreservice.co.uk Hotline: +44 01904 947568 Email support@coreservice.co.uk...
- Page 20 Lift the safety flap with one hand and hook in the grass collection bag. Release the safety flap to secure the grass collection bag in position. BEFORE OPERATION WARNING: The charger and battery pack are specially designed to work together so do not attempt to use any other devices.
- Page 21 Checking battery capacity Press the battery capacity level button to check the charging level of the battery pack. The status/ remaining capacity will be shown on the battery charging level indication light. 3 Green LED on Battery pack fully charged 2 Green LED on Battery pack 65% charged 1 Green LED on...
- Page 22 Charging light indicator Red LED on, Green LED off Charger ready Red LED off, Green LED flashes Battery pack charging Red LED off, Green LED on Battery pack fully charged Red LED flashes, Green LED flashes Battery pack defected Red LED on, Green LED on Battery pack too cold or hot Red LED Green LED...
- Page 23 Removing and inserting the battery pack Insert the battery pack Open the battery pack compartment cover(8). Align the battery packs with its compartment of the tool. Push the battery packs with sufficient force into the compartment until you hear a click. This means the battery packs are locked in position, then close the battery pack compartment cover.
- Page 24 Safety key This lawn mower is fitted with a safety key, this prevents the accidental startup of your cordless lawn mower. The safety key has been designed to totally disable the lawn mower when it is removed. Setting the cutting height Release switch lever and wait until the motor stops before adjusting cutting height.
- Page 25 Switching on and off Switch on: 1. Press and hold the safety button on the side of the switch box with one hand. 2. Pull the switch lever towards the handle and hold it with the other hand. 3. Release the safety button. Switch off: Release the switch lever.
- Page 26 Mower overload protection To prevent overload conditions, do not try to cut too much grass at one time. Slow down your cutting pace or raise the cut height. Your mower has built-in overload circuit protection. When the mower is overloaded, the mower will stop. Switch the mower off and check to see if grass has collected beneath the deck and clear it if necessary, then restart the mower.
-
Page 27: Care And Cleaning
CARE AND CLEANING Maintenance and Storage WARNING: Before performing any maintenance or cleaning work, always ensure that the battery pack/safety key has been removed. Wait until the blade has stopped completely and the machine has cooled down. Cleaning Cleaning the product Use a soft brush to remove accumulated dust and debris. - Page 28 WARNING: Replace or re-sharpen the mowing blade at the end of the mowing season. Always have the mowing blade re-sharpened or replaced by a recommended service centre. Unbalanced blades will cause the lawn mower to vibrate violently, which can increase the risk of accidents occurring.
- Page 29 Transport Use the original packaging to ship whenever possible. Comsumable parts Part code Part Name 1254469001 Blade www.coreservice.co.uk Hotline: +44 01904 947568 Email support@coreservice.co.uk...
-
Page 30: Trouble Shooting
TROUBLE SHOOTING Use this section to help you to try and solve any problems you may have: Fault Possible cause Solution Mower fails to start Safety key is not inserted Insert safety key Battery is not correctly inserted Remove battery and reinsert High grass, rear of mower housing Raise the cutting height and blade are dragging in heavy... -
Page 31: Declaration Of Conformity / Performance
Product Description Hawksmoor: 2*18V 40cm Brushless Cordless Lawn Mower 1. Toolstation Limited, Express Park, Bristol Road, Bridgwater, Somerset TA6 4RN This declaration of conformity is issued under the sole responsibility of Toolstation 2. Object of the declaration The object of the declaration described above is in conformity with the relevant Community... -
Page 32: Environmental Information
ENVIRONMENTAL INFORMATION The symbol on the product or its packaging indicates that this product must not be disposed of with your other household waste. Instead, it is your responsibility to dispose of your waste equipment by handing it over to a designated collection point for the recycling of waste electrical and electronic equipment. -
Page 33: Guarantee
Toolstation products are individually tested before leaving the factory. If you are a consumer and you experience a problem with your Toolstation product, which is found to be defective due to faulty materials or workmanship within the Guarantee Period, this Toolstation Guarantee will cover repair or - at the discretion of Toolstation –...
Need help?
Do you have a question about the HAWKSMOOR Y0J-SP03-4036ZA and is the answer not in the manual?
Questions and answers