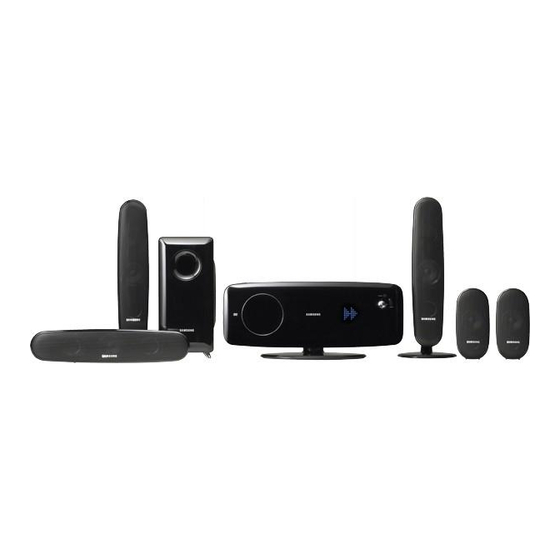
Samsung HT-Q100 Instruction Manual
2.1ch stylish home theater system
Hide thumbs
Also See for HT-Q100:
- Instruction manual (36 pages) ,
- Firmware update manual (6 pages) ,
- Instruction manual (35 pages)

Related Manuals for Samsung HT-Q100


Summary of Contents for Samsung HT-Q100
-
Page 1: Theater System
2.1Ch Stylish Home Theater System HT-Q100 HT-Q100W THIS APPLIANCE IS MANUFACTURED BY: Instruction Manual AH68-01851B COMPACT DIGITAL AUDIO... -
Page 2: Safety Warnings
Safety Warnings Use of controls, adjustments or performance of procedures other than CLASS 1 LASER PRODUCT those specified herein may result in hazardous radiation exposure. KLASSE 1 LASER PRODUKT LUOKAN 1 LASER LAITE CAUTION-INVISIBLE LASER RADIATION WHEN OPEN KLASS 1 LASER APPARAT AND INTERLOCKS DEFEATED, AVOID PRODUCTO LASER CLASE 1 EXPOSURE TO BEAM. -
Page 3: Table Of Contents
Convenient Functions ..... . .55 Before Using Your Home Theater ....19 Operating a TV with the Remote Control . -
Page 4: Do Not Use The Following Types Of Disc
Notes on Discs DVD (Digital Versatile Disc) offers fantastic audio and video, thanks to Dolby Digital surround sound and MPEG-2 video compression technology. Now you can enjoy these realistic effects in the home, as if you were in a movie theater or concert hall. DVD players and the discs are coded by region. -
Page 5: Side Panel
Description —Front Panel— Eject button Disc Insert Hole Display Power ( ) button —Rear Panel— 2.1 Channel Speaker Cooling Fan Output Terminals —Side Panel— Function button Volume control External Digital Optical button Use this to connect external equipment Component Video Output Connect a TV with component video FM Antenna Connector button... -
Page 6: Remote Control
Description —Remote Control— TV button DVD Receiver button POWER button Number(0~9) buttons REMAIN button STEP button SEARCH buttons VOLUME button MENU button INFO button SLIDE MODE button DIGEST button TUNER MEMORY button SLEEP button SLOW, MO/ST button DIMMER button Insert Remote Batteries TUNER button DVD button AUX button... -
Page 7: Before Connecting The Speakers
Subwoofer Insert the black wire into the Connect the connecting plugs to the back black terminal (–) and the red of the Home Theater. • wire into the red (+) terminal, Make sure the colors of the speaker terminals match the colors of the connecting plugs. -
Page 8: Installing The Dvd Player
Installing the DVD player Separate the rear cover(A). Remove the 1 screw of the cover(B). Put the speaker cable connected to the Speaker OUT port into the left groove. Put the cables connected to the Video OUT, Component OUT and Audio IN ports into the right groove. -
Page 9: Hdmi Function
HDMI connection cable, and audio is output through your TV speakers only. • AUDIO OFF : Video is transmitted over the HDMI connection cable only, and audio is output through the home theater speakers only. Note • The default setting value of this product is HDMI AUDIO OFF. -
Page 10: Connecting External Components
Optical Cable (not supplied) Connect the Digital Input (OPTICAL) to the Digital Output on the external digital component. Connect AUX (Audio) In on the Home Theater to Audio Out on the external analog component. • Be sure to match connector colors. -
Page 11: Before Using Your Home Theater
Before Using Your Home Theater Your Home Theater is capable of playing DVD, CD, MP3/WMA and JPEG discs.Depending on the disc you are using, these instructions may vary slightly. Read the instructions carefully before using. To Operate the TV and DVD Player with a Single Remote Control... -
Page 12: Disc Playback
Disc terminology Groups and tracks (DVD-AUDIO) • DVD-audio is divided into several large sections called "groups" and smaller sections called "tracks". Numbers are allotted to these sections. These numbers are called "group numbers" and "track numbers". GROUP 1 GROUP 2 TRACK 1 TRACK 2 TRACK 3... -
Page 13: Mp3/Wma-Cd Playback
MP3/WMA-CD Playback Data CDs (CD-ROM, CD-R, CD-RW) encoded in MP3/WMA format can be played. In Stop mode, use to select Load the MP3/WMA the album, and then disc. press the ENTER button. • • The MP3/WMA menu screen will appear to select the track. -
Page 14: Jpeg File Playback
JPEG File Playback Images captured with a digital camera or camcorder, or JPEG files on a PC can be stored on a CD and then played back with this Home Theater. Slide Mode Load the JPEG disc. Press SLIDE MODE button. -
Page 15: Zoom Function
DivX Playback The functions on this page apply to DIVX disc playback. Skip Forward/Back During playback, press the button. • Goes to the next file whenever you press button, if there are over 2 files in the disk. • Goes to the previous file whenever you press button, if there are over 2 files in the disk. -
Page 16: Checking The Remaining Time
Checking the Remaining Time Press the REMAIN button. • For checking the total and remaining time of a title or chapter being played. Each time the REMAIN button is pressed DVD- DVD- VIDEO AUDIO TITLE ELAPSED GROUP ELAPSED TITLE REMAIN GROUP REMAIN CHAPTER ELAPSED TRACK ELAPSED... -
Page 17: Repeat Playback
Repeat Playback Repeat playback allows you to repeatedly play a chapter, title, track (song), or directory (MP3 file). JPEG Press REPEAT button. • Each time the button is pressed during playback, the repeat playback mode changes as follows: DVD- DVD- VIDEO AUDIO CHAPTER... -
Page 18: Step Function
Step Function Press STEP button. • The picture moves forward one frame each time the button is pressed during playback. • No sound is heard during slow playback and step motion Note playback. Angle Function This function allows you to view the same scene in different angles. Press Cursor Press INFO button. -
Page 19: Subtitle Language Selection Function
Bonus Group / Navigating Pages Bonus Group DVD- AUDIO Some DVD-Audio discs have an extra ‘bonus’ group that requires a 4-digit key number to access. See the disc packaging for details and the-key number. When you play a DVD-Audio disc that has a bonus group, the key number input screen appears automatically. -
Page 20: Playing Media Files Using The Usb Host Feature
You can enjoy media files such as pictures, movies and music saved in an MP3 player, USB memory or digital camera in high quality video with 5.1 channel home theater sound by connecting the storage device to the USB port of the home theater. -
Page 21: Moving Directly To A Scene/Song
Moving Directly to a Scene/Song Moving to a Title/Track Press Cursor , buttons or numeric buttons to select Press INFO button. the desired title/track and then press ENTER button. 01/05 001/040 0:00:37 03/05 001/002 0:00:01 Moving to a Chapter Moving to a Specific Time Press Cursor but- Press Cursor ,... -
Page 22: Setting The Language
Setting the Language OSD (On-Screen Display) language is set to English by default. In Stop mode, press MENU button. MOVE ENTER EXIT Note • To select another language, select OTHER and enter the language code of your country. (See voir page 41 62 for language codes) AUDIO, SUB TITLE and DISC MENU language can be selected. -
Page 23: Setting Tv Screen Type
Setting TV Screen type Depending on your TV type (Wide Screen or conventional 4:3), you can select the TV's aspect ratio. In Stop mode, press MENU button. MOVE ENTER EXIT Press Cursor button to move to ‘TV DISPLAY’ and then press ENTER button. -
Page 24: Setting Parental Controls (Rating Level)
Setting Parental Controls (Rating Level) Use this to restrict playback of adult or violent DVDs you do not want children to view. In Stop mode, press MENU button. ENTER MOVE EXIT Press Cursor Press Cursor button to move to button to select the desired ‘PARENTAL’... -
Page 25: Setting The Wallpaper
MOVE SELECT RETURN EXIT Select this to set the Select this to set the desired Samsung Logo image as image as your wallpaper. your wallpaper. JPEG To select one of the 3 wallpaper settings you've made In Stop mode, press MENU button. -
Page 26: Dvd Playback Mode
DVD Playback Mode Some DVD-Audio discs contain DVD-Video as well as DVD-Audio. To play back the DVD-Video portion of the DVD-Audio disc, set the unit to DVD-Video mode. Press the EJECT button and then press the MENU button. MOVE ENTER EXIT Press Cursor button to move to... -
Page 27: Av Sync Setup
AV SYNC Setup Video may look slower than the audio if it is connected to a digital TV. If this occurs, adjust the audio delay time to to match the video. Press Cursor Press the MENU button. to move to ‘Audio’ and then press ENTER button. -
Page 28: Presetting Stations
Presetting Stations Example: Presetting FM 89.1 in the memory Press the TUNER button to select the FM band. Press preset number. • You can select between 1 and 15 presets. • This unit does not receive AM broadcasts. Note Press TUNING/CH to select "89.10". -
Page 29: Adjusting Display Brightness
Convenient Functions Convenient Functions Sleep Timer Function You can set the time that the Home Theater will shut itself off. Press SLEEP button. • Each time the button is pressed, the preset time changes as follows: To confirm the sleep timer setting, press SLEEP button. -
Page 30: Operating A Tv With The Remote Control
TV. • If you do not set the remote control with the code for your brand of TV, the remote control will work on a Samsung TV by default. TV Brand Code List Brand... -
Page 31: Before Calling For Service
Refer to the chart below when this unit does not function properly. If the problem you are experiencing is not listed below or if the instruction below does not help, turn off the unit, disconnect the power cord, and contact the nearest authorized deal- er or Samsung Electronics Service Center. Symptom Check/Remedy •... -
Page 32: Cautions On Handling And Storing Discs
Cautions on Handling and Storing Discs Small scratches on the disc may reduce sound and picture quality or cause skipping. Be especially careful not to scratch discs when handling them. Handling discs Do not touch the playback side of the disc. Hold the disc by the edges so that fingerprints will not get on the surface. -
Page 33: Usb Host Feature Supported Products
Optio-S50 Pentax Digital Camera Optio 33LF Pentax Digital Camera YP-T5 VB Optio MX Pentax Digital Camera YP-53 Digimax-420 Samsung Digital Camera Digimax-400 Samsung Digital Camera Sora PDR-T30 Toshiba Digital Camera Multi Card Reader Coolpix 5900 Nikon Digital Camera Coolpix S1... -
Page 34: Contact Samsung World Wide
Contact SAMSUNG WORLD WIDE ¤ Region Country Customer Care Center Web Site...
Need help?
Do you have a question about the HT-Q100 and is the answer not in the manual?
Questions and answers