Advertisement
Instruction Manual
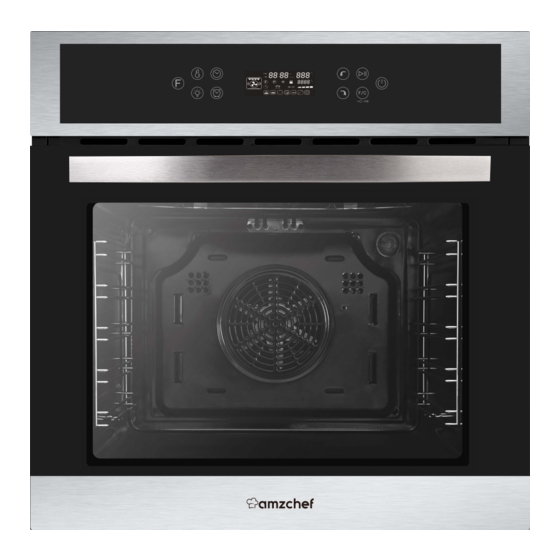
Model: AT7010S04
AC 220-240V 50/60Hz 2800W
Built-in oven
●Thank you so much for purchasing this product.
●This product is for family use only.
●Please read this instruction manual carefully before using the product to ensure the correct and safe use
of this product.
●Pay special attention to Safety Precautions.
●Please safekeeping the Warranty Certificate and the User's manual .
Advertisement

Related Manuals for amzchef AT7010S04


Summary of Contents for amzchef AT7010S04
- Page 1 Instruction Manual Model: AT7010S04 AC 220-240V 50/60Hz 2800W Built-in oven ●Thank you so much for purchasing this product. ●This product is for family use only. ●Please read this instruction manual carefully before using the product to ensure the correct and safe use of this product.
-
Page 2: Table Of Contents
Contents Safety precautions…………....................3 Appliance parts and operation....................7 Usage method........................14 Cleaning and maintenance....................15 Troubleshooting........................20 Installation Instructions......................20 Warranty..........................22... -
Page 3: Safety Precautions
Safety Precautions To prevent the bodily injury and property damage, please be sure to observe the following safety precautions. ■The following icons show the extent of damage caused by incorrect operations. Warning: Indicates a potential hazard that, if unavoidable, may result in death or serious injury. Note: Indicates a potential hazard that, if unavoidable, may result in death or moderate injury. - Page 4 Warning ●Do not alter, disassemble or repair the product by yourself. (To avoid causing fire, electric shock or injury.) For repairs, please contact (Company name) Certification Maintenance Store for consultation. ●Do not clean the oven door glass with a rough scrubber or sharp scraper. (In order to avoid scratches on the surface of glass, resulting in glass crushing.) ●Be sure to use AC power sockets with specifications of AC220V-240V/16A separately.
- Page 5 (Not to affect the normal use of the appliance.) ●Remove packing parts and cushioning materials before use.(To avoid fire causing by temperature raising) ●Remove packing parts and cushioning materials before use.(To avoid fire causing by temperature raising) Safety Precautions Note ●Do not put inflammable materials in the oven.
- Page 6 Use Precautions Slide-in racks Placement Warning In order to ensure the safe use of the grate or tray, it is necessary to insert in the right direction and place the slide-in racks correctly. In addition, you can also refer to the level number displayed in the front of the oven when you open it. (There are five levels altogether.) This ensures that food does not slip out of the back during careful removal from the grate or tray.
-
Page 7: Appliance Parts And Operation
Initial Use Precautions Note: When using oven for the first time, there may be a small amount of smoking and odor, which is a normal phenomenon. Please adjust the temperature of the empty oven to 250 C, and bake it with stereoscopic function for 30 minutes before using it. - Page 8 需 Accessories ·Before first use, please clean all accessories and use soft cloth and neutral detergent to clean the oven. · Only original accessories can be used. ◆ Grate Used for baking and barbecuing ◆ Enameled baking tray Used for cooking large amounts of food, such as damp cakes, pastries, frozen foods, or for collecting fat/spills and gravy ◆...
- Page 9 Appliance parts and operation Control Panel 1. Function selecting button 2. Oven Lamp ON/OFF 3. Alarm/timer button 4. Main display screen 5. Decrease button, can used for heating mode selecting, temperature decrease or time setting. 6. Celsius, Fahrenheit toggle/Child lock 7.
- Page 10 Main display screen Icon Explanation Icon Explanation Heating mode icon Heating mode gear icon clock/duration setting icon clock display icon cooking start time setting Alarm icon icon clock setting digital tube Oven heating icon hour icon Temperature bar display icon minute icon Heat preservation mode icon...
- Page 11 Function heating mode Type of Default Heating Icon heating temperature mode gear At room temperature, air circulation can quickly thaw frozen Defrost F--1 food (without any heat). This is an easy control and fast way to speed up defrosting time and thawing process for ready-made vegetables and butter-filled foods.
- Page 12 Automaticpr ogramm ode Typeof heating Heatingmode gear Defaulttem perature Defaulttime(min) Icon 65℃/149℉ Insulationmode P--1 40℃/104℉ Warmingmode P--2 200℃/392℉ Toastmode P--3 180℃/356℉ Pizzamode P--4 190℃/374℉ Chicken P--5 mode Breadmode P--6 190℃/374℉ Cakemode P--7 200℃/392℉ 180℃/356℉ Beefmode P--8 Operation Operation When the product is connected, the buzzer will sound for 2 seconds and the screen displays “12:00”(as shown in Figure 30) After the flashes stops, the product is turned into the off state.
- Page 13 Setting the heating mode Each time you touch the it will alternate ly show the function heating mode or automatic program heating mode in the screen. Select “ ”as example: (1) choose , touch to o select the the heating from F--1 to F--10 , touch to confirm and the light is lit up.
- Page 14 How to stop the bell ring Touch to stop the bell. If you don’t touch any button, it will stop automatically after 2 minutes. When the bell is off, the oven enters the shutdown state. Childproof lock Your appliance has a childproof lock so that children can not switch it on accidentally or change any settings. 1.Touch and hold for 3 seconds, the shows in the screen indicating locking .
-
Page 15: Cleaning And Maintenance
•If necessary, food can be wrapped in aluminum foil for cooking to make the food more tender. ■ Suggestions on cake and biscuits cooking •Dark metal molds can absorb heat better when baking cakes. •Temperature and cooking time depend on the quality and consistency of the mixture. •To check the cake is ripe or not, at the end of cooking time, insert the metal pole to the top of the cake and then withdraw. - Page 16 ①Open the door to the maximum angle and pull the lock back at the hinge of the door(Figure 1). There are two locks on both sides of the oven door. ②Close the oven door, at about 15 degree, then lift the door, and slowly pull out from the oven.(Figure 2) ③After cleaning, perform the above-mentioned operations in the opposite steps to restore the door to its original condition.
- Page 17 The probe used in the oven is a mechanical physical probe. Do not replace it without authorization. In case of abnormal temperature sensing of the sensor probe, please contact the designated repair shop immediately for replacement. Specifications Model AT7010S04 Voltage 220-240V Rated power 2800W...
-
Page 18: Troubleshooting
Troubleshooting Warranty & Service FAQs and Troubleshooting On no account open the appliance housing! Installation, maintenance and repairs may only be carried out by a suitably qualified and competent person in strict accordance with current national and local safety regulations. Repairs and other work by unqualified persons could be dangerous. - Page 19 ● All furnace covers must be firmly fixed in place and cannot be removed without using special tools. ● Remove the back of the kitchen equipment to ensure the full circulation of air around the oven. ● The oven rack must have at least 45 mm rear clearance. ●...
- Page 20 Installation Instructions Reasonable Fixed Oven Note Two persons are required to assist in the installation of the oven. The oven base must be installed as shown below. 1.Pay attention to the general dimensions required for installation. Unit:mm 2.Convex In order to have the best integration of the kitchen, please install the equipment into the standard 600 mm wide cabinet, so it can achieve a flush effect with the front of the cabinet.
- Page 21 Installation Instructions Before installing the equipment, please ensure that the cabinet meets the following internal empty dimensions. To ensure air circulation, the oven must be installed in accordance with the size and distance shown in the figure below. Convex ■Note: •The oven can be installed in any cabinet with heat resistance. Fix Oven to Cabinet ■Note:...
-
Page 22: Warranty
Warranty Dear Customer, Thank you for choosing AMZCHEF product. We sincerely hope that you are satisfied with it. The manufacturer's warranty covers the product for a period of 12 months from the date of purchase against manufacturing faults. If you encounter any problems during using, please contact us via info@iamzchef.com, we will service you within 24 hours.
Need help?
Do you have a question about the AT7010S04 and is the answer not in the manual?
Questions and answers
What amp breaker is needed or size wire
for the at7010so4
The amzchef AT7010S04 oven is rated at 2800W and operates on 220–240V. To determine the required breaker and wire size:
1. Current Draw:
2800W ÷ 240V = 11.67 amps (rounded up to 12A)
2. Breaker Size:
A 16-amp breaker is appropriate to allow for continuous use with a safety margin.
3. Wire Size:
Use a wire rated for at least 16A. In most regions, this means:
- 2.5 mm² copper wire (metric) or
- 14 AWG copper wire (imperial)
Use a three-pin power cord and ensure installation is done by a licensed electrician.
This answer is automatically generated