Table of Contents
Advertisement
Quick Links
Advertisement
Table of Contents

Related Manuals for Bosch HRG4785 7 Series


Summary of Contents for Bosch HRG4785 7 Series
- Page 1 Oven HRG4785.7 User manual and installation instructions [en]...
-
Page 2: Table Of Contents
en Safety ¡ Keep the instruction manual and the Table of contents product information safe for future refer- ence or for the next owner. ¡ Do not connect the appliance if it has been INFORMATION FOR USE damaged in transit. Safety .............. 2 1.2 Intended use Preventing material damage ....... -
Page 3: Safety
Safety en Loose food remnants, fat and meat juices Hot steam may escape when you open the may catch fire. appliance door. Steam may not be visible, de- ▶ Before using the appliance, remove the pending on the temperature. worst of the food residues and remnants ▶... - Page 4 en Safety If the insulation of the power cord is dam- 1.6 Steam aged, this is dangerous. Follow these instructions when using a steam ▶ Never let the power cord come into contact function. with hot appliance parts or heat sources. WARNING ‒ Risk of scalding! ▶...
- Page 5 Preventing material damage en The outside of the appliance gets very hot WARNING ‒ Risk of harm to health! when the cleaning function is in progress. The cleaning function heats up the cooking ▶ Never hang combustible objects, e.g. tea compartment to a very high temperature so towels, on the door handle.
-
Page 6: Environmental Protection And Saving En- Ergy
en Environmental protection and saving energy If the seal is very dirty, the appliance door will no 2.2 Steam longer close properly during operation. This may dam- Follow these instructions when using the steam func- age the front of adjacent kitchen units. tion. -
Page 7: Childproof Lock
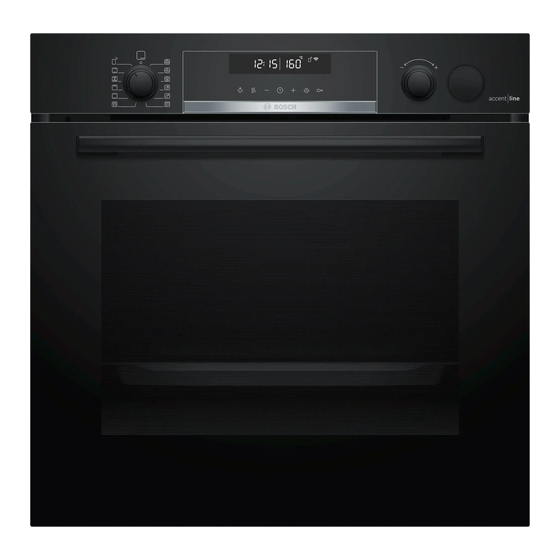
Familiarising yourself with your appliance en Buttons and display Temperature selector The buttons are touch-sensitive surfaces. To se- Use the temperature selector to set the temper- lect a function, simply press lightly on the relev- ature for the type of heating and select settings ant field. - Page 8 en Familiarising yourself with your appliance Symbol Function Empty the water tank Prompt to empty the water tank → "After every steam operation", Page 13 Fill the water tank Prompt to fill the water tank → "Steam", Page 12 Descale Prompt to descale the appliance → "Descaling", Page 27 ...
- Page 9 Familiarising yourself with your appliance en Symbol Function Programme Use programmed setting values for various types of food. → "Programme", Page 17 Cleaning functions ¡ Pyrolytic self-cleaning cleans the cooking compartment almost by itself. → "Pyrolytic self-cleaning ", Page 26 ¡ Descaling your appliance keeps it working properly. → "Descaling", Page 27 Remote start Start and operate the appliance via the Home Connect app.
- Page 10 en Accessories 5 Accessories Use original accessories. These have been made espe- The accessories supplied may differ depending on the cially for your appliance. appliance model. Note: Accessories may become deformed if they get hot. Deformation has no effect on function. As the ac- cessory cools down, it will regain its original shape.
- Page 11 Note: Take any accessories that you will not be using your appliance in our brochures and online: out of the cooking compartment while the appliance is www.bosch-home.com in operation. Accessories vary from one appliance to another. When purchasing accessories, always quote the exact Combining accessories product number (E no.) of your appliance.
- Page 12 en Basic operation Set the type of heating with steam assistance and Switch off the appliance after the specified cooking the temperature. time. Wait until the cooking compartment has cooled Type of heat- Top/bottom heating down. Clean the smooth surfaces with soapy water and a dish cloth.
- Page 13 Steam en Empty the water tank and dry the cooking compart- Fill the water tank with water up to the mark . ment. → "After every steam operation", Page 13 8.2 Reheating With the "Reheating" type of heating, you can gently reheat food that has already been cooked or crisp up day-old baked goods.
- Page 14 en Time-setting options Unscrew the lid on the water tank. Drying the cooking compartment Empty the water tank, clean it with detergent and WARNING ‒ Risk of burns! then rinse it thoroughly with clean water. The appliance becomes hot during operation. Dry all parts with a soft cloth. Allow the appliance to cool down before cleaning.
- Page 15 Time-setting options en Press any button to switch off the timer. 9.4 Setting the end time ‒ You can delay the time at which cooking is due to fin- Changing the timer ish by up to 23 hours and 59 minutes. You can change the timer duration at any time. Notes Requirement: ...
- Page 16 en Meat thermometer Changing the time on the clock Press the button repeatedly until is highlighted in the display. You can change the time on the clock at any time. Use the or button to change the time. Requirement: The function selector must be set to the a The appliance applies the change after a few "Off"...
- Page 17 Programme en 11 Programme The programmes help you to use your appliance to ¡ Unglazed clay prepare different dishes by selecting the optimum set- ¡ Plastic or plastic handles tings automatically. 11.2 Steam 11.1 Cookware for programmes For the steam function, the appliance provides you with You should therefore use heat-resistant cookware that programmes that allow you to prepare food easily and is suitable for temperatures up to 300 °C.
- Page 18 en Programme No. Food Cookware Weight range Add liquid Shelf Information posi- Weight setting tion Deep roasting dish 0.5–2.5 kg As per recipe 2 Place the meat at the 10 Goulash Diced beef or pork, with lid Total weight bottom and cover with vegetables with vegetables Do not sear the meat...
- Page 19 Programme en No. Food Cookware Weight range Add liquid Shelf Information posi- Weight setting tion Roasting dish with 0.5–2.5 kg Cover the Do not sear the meat 23 Leg of lamb, medium Boned, seasoned Weight of meat bottom of the beforehand roasting dish, and add up to 250 g ve- getables if...
-
Page 20: Sabbath Mode
en Childproof lock For some programmes, the button can be 11.5 Setting a programme ‒ used to delay the end. The appliance selects the optimal type of heating, tem- → "Setting the end time", Page 15 perature and cooking time. All you need to do is set a After a few seconds, the programme starts and the the weight. -
Page 21: Basic Settings
Basic settings en Press the button repeatedly until is highlighted Once the time has elapsed, the display shows the on the display. time as zero. The appliance stops heating up and Use the or button to set the time. responds again as usual outside of Sabbath mode. -
Page 22: Home Connect
en Home Connect Press and hold the button for approximately Press and hold the button for approximately four seconds. four seconds. a The first basic setting appears in the display, a The first basic setting appears in the display, e.g. ... - Page 23 Home Connect en Follow the instructions in the Home Connect app. 16.2 Home Connect Settings You can adjust the settings and network settings for Home Connect in the basic settings for your appliance. Setting Selection or display Explanation Connection to the network ...
- Page 24 en Cleaning and servicing 16.4 Software update 16.5 Remote diagnostics Your appliance's software can be updated using the Customer Service can use Remote Diagnostics to ac- software update function, e.g. for the purposes of op- cess your appliance if you contact them, have your ap- timisation, troubleshooting or security updates.
- Page 25 Cleaning and servicing en Appliance front Surface Suitable cleaning agents Information Stainless steel ¡ Hot soapy water To prevent corrosion, remove any patches of limescale, grease, starch or albumin (e.g. egg white) on stainless steel surfaces imme- ¡ Special stainless steel cleaning products diately.
- Page 26 en Pyrolytic self-cleaning Area Suitable cleaning agents Information Water tank ¡ Hot soapy water To remove residual detergent after cleaning, rinse thoroughly with clean water. To dry the water tank after cleaning, leave the water tank to dry with the lid open. Dry the seal on the lid. Do not clean in the dishwasher.
-
Page 27: Descaling
Descaling en Use the temperature selector to set the cleaning set- 18.2 Setting the cleaning function ting. Ventilate the kitchen while the cleaning function is run- ning. Cleaning set- Cleaning Duration in hours ting level WARNING ‒ Risk of harm to health! Approx. 1:15 The cleaning function heats up the cooking compart- ment to a very high temperature so that food left over Medium... - Page 28 en Shelf supports – 50 ml liquid descaler 19.4 Fourth step ( ) – 100 ml water Fill the water tank with 150 ml water and insert it. Pour the descaling solution into the water tank and a At the end of the rinse cycle, : appears in the insert the water tank.
-
Page 29: Shelf Supports
Shelf supports en Push the rail into the front socket until the rail Pull the rail out towards the front until the retainer at also rests against the cooking compartment wall, the back unhooks. and then press this downwards ... - Page 30 en Appliance door Push the retainer in between the lower and the Pull the pull-out rail out as far as it will go and slide upper bar. it back in. Keep the PUSH tab pushed in and swing the pull- out rail inwards until the front retainer ...
-
Page 31: Appliance Door
Appliance door en Note: Ensure that the appliance door slides onto the WARNING ‒ Risk of injury! hinges without any resistance. If you feel any resist- When the hinges are not secured, they can snap ance, check whether you are sliding it in at the cor- shut with great force. - Page 32 en Appliance door Open the appliance door slightly. Dry the door panes and refit them. Push on the left- and right-hand side of the door → "Fitting the door panes", Page 32 cover from the outside until it is released. Remove the door cover . 21.4 Fitting the door panes WARNING ‒ Risk of injury! The hinges on the appliance door move when the door...
-
Page 33: Troubleshooting
Troubleshooting en Open the appliance door slightly and remove the Put the door cover in position and push down on it tea towel. until you hear it click into place. Screw both screws back in on the left and right of the appliance door. - Page 34 en Troubleshooting Fault Cause and troubleshooting The appliance door The childproof lock locks the appliance door. cannot be opened; Use the button to deactivate the childproof lock. ▶ lights up in the dis- → "Childproof lock", Page 20 play.
- Page 35 Disposal en Fault Cause and troubleshooting Build-up of limescale in the appliance. lights up in the dis- play. Run the descaling programme in full. ▶ → "Descaling", Page 27 The power supply has been disconnected or the appliance has been switched off during the ...
-
Page 36: Declaration Of Conformity
2014/53/EU. A detailed Declaration of Conformity can be found on- A detailed RED Declaration of Conformity can be found line at www.bosch-home.co.uk among the additional online at www.bosch-home.com among the additional documents on the product page for your appliance. -
Page 37: How It Works
How it works en 26 How it works Here, you can find the ideal settings for various types 26.3 Notes on roasting and grilling of food as well as the best accessories and cookware. The setting values are based on the assumption that We have perfectly tailored these recommendations to unstuffed, chilled, ready-to-roast poultry, meat or fish is your appliance. - Page 38 en How it works ¡ Meat, poultry and fish can also become crispy in a WARNING ‒ Risk of scalding! covered roasting dish. Use a roasting dish with a Very hot steam may escape when the lid is opened glass lid. Set a higher temperature. after cooking.
- Page 39 How it works en Food Accessories/cook- Shelf pos- Heating Temperature in Steam intens- Cooking ware itions function °C/grill setting time in mins Burger, 3–4 cm thick Wire rack 25-30 Leg of lamb, boned, me- Cookware without 170-180 65-75 dium, 1.0 kg Fish, baked, whole,...
- Page 40 en How it works Food Accessories/cook- Shelf pos- Type of Searing Temperature in Cooking ware ition heating time in °C time in mins mins Veal medallions, 4 cm thick Cookware without lid 50-70 Saddle of lamb, boneless, Cookware without lid ...
-
Page 41: Installation Instructions
Installation instructions en Food Accessories/ Shelf posi- Heating Temperature in Steam in- Cooking cookware tions function °C/grill setting tensity time in mins Hot water sponge cake Springform 150-160 30-35 cake tin, dia- meter 26 cm Hot water sponge cake, Springform 3 + 1 ... - Page 42 en Installation instructions ¡ Observe any available installation instructions for the WARNING ‒ Risk of fire! hob. It is dangerous to use an extended power ¡ Observe different national installation instructions for cord and non-approved adapters. the hob. ▶ Do not use multiple socket strips. 27.4 Installation in a tall unit ▶...
- Page 43 Installation instructions en ¡ Ensure that air exchange is guaranteed in accord- ¡ Contact protection must be guaranteed by the in- ance with the diagram. stallation. Electrically connect the appliance with the protective contact plug Note: The appliance must only be connected to a pro- tective contact socket that has been correctly installed.
- Page 44 en Installation instructions Screw the appliance into place. For handleless kitchens with vertical bar handle strips: Attach a suitable filling piece in order to cover ‒ any sharp edges and to guarantee a safe install- ation. Pre-drill aluminium profiles to establish a screw ‒...
- Page 48 Expert advice for your Bosch home appliances, help with problems or a repair from Bosch experts. Find out everything about the many ways Bosch can support you: www.bosch-home.com/service Contact data of all countries are listed in the attached service directory.
Need help?
Do you have a question about the HRG4785 7 Series and is the answer not in the manual?
Questions and answers