Advertisement
Quick Links
Advertisement

Related Manuals for Zline Autograph AWSZ30CB


Summary of Contents for Zline Autograph AWSZ30CB
- Page 1 Installation Guide and User Manual...
- Page 2 By registering your appliance, you will have easy and accurate SCAN ME access to: ZLINE is fueled by a passion for innovation; A relentless pursuit of bringing the highest end • Technical Support luxury designs and professional features into everyone’s homes. Because we continually strive •...
- Page 3 WARRANTY TABLE OF CONTENTS COVERAGE ZLINE Kitchen and Bath range products will be warrantied for one year from the IMPORTANT SAFETY INSTRUCTIONS original purchase date for the original purchaser of the product. This warranty covers all parts for necessary repairs if any part of the product proves to be defective in PRODUCT SPECIFICATIONS materials or workmanship.
- Page 4 SAFETY INSTRUCTIONS SAFETY INSTRUCTIONS • Do not overcook food. Carefully attend oven if paper, plastic or other combustible materials are placed inside the oven. WARNING • Do not use the cavity for storage purposes. Do not leave paper products, To reduce the risk of fire, electrical shock, injury to persons, or damage when using cooking utensils or food in the cavity when not being used.
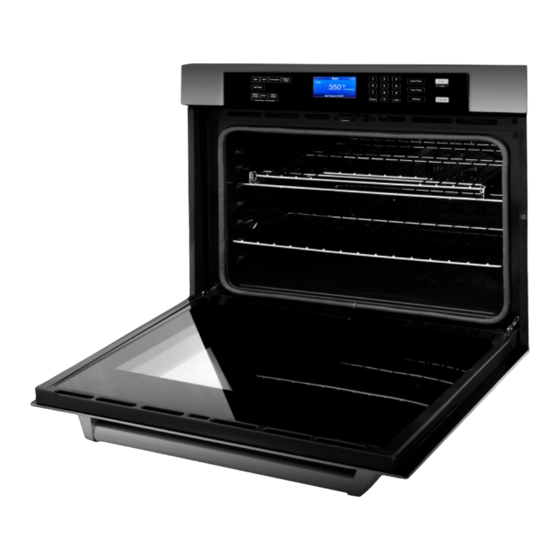
- Page 5 SAFETY INSTRUCTIONS BEFORE INSTALLATION A. Cooling Vents B. Broil Element C. Control Panel SAFETY FOR THE SELF-CLEANING OVEN D. Halogen Light • Before self-cleaning the oven, remove the broiler pan, oven racks (only when not E. Convection Fan and Element made of porcelain), other utensils and excess soft spillage.
- Page 6 BEFORE INSTALLATION BEFORE INSTALLATION Gather the required tools before starting installation. Read and follow the instructions provided with any tools listed here. ELECTRIC SHOCK HAZARD TOOLS NEEDED If codes permit and a separate ground wire is used, it is recommended that a •...
- Page 7 BEFORE INSTALLATION BEFORE INSTALLATION • DO NOT ground to a gas pipe. • DO NOT have a fuse in the NEUTRAL or GROUNDING circuit. A fuse in the WARNING NEUTRAL or GROUNDING circuit could result in an electrical shock. This appliance shall be installed only by authorized persons and in accordance with •...
- Page 8 1 Using two or more people, remove the oven and set it on cardboard INSTALLATION INSTRUCTIONS NOTE: Do not use the handle or any portion of the front frame IMPORTANT: This appliance shall be installed only by authorized 3 Grasp the edges of the oven doo for lifting.
- Page 9 Improper connection of aluminum house wiring and copper bag containing Connect WARNING appliance leads can result in an electrical hazard or re. If the usual ma home has aluminum wiring, only use connectors designed and EXCESSIVE WEIGHT HAZARD inside the oven. UL listed for joining copper to aluminum and precisely follow INSTALLATION INSTALLATION...
- Page 10 3-WIRE CONNECTION (GROUNDED NEUTRAL) - INSTALLATION INSTALLATION U.S.A. ONLY WARNING 3-WIRE CONNECTION (GROUNDED NEUTRAL) - U.S.A. ONLY 4-WIRE CONNECTION (UNGROUNDED NEUTRAL) - U.S.A. AND CANADA • Grounding through the neutral conductor is prohibited for new branch-circuit 2 There are two holes, one on each side of the 4-WIRE CONNECTION (UNGROUNDED NEUTRAL) - ELECTRICAL SHOCK HAZARD rounds the oven cavity.
- Page 11 • Household fuse is intact and tight; or circuit breaker has not 5 Connect the 2 neutral (white) wires H together using a UL listed tripped. wire connector. • Electrical supply is connected. 6 Connect the ground (green or bare) wire FA from the oven cable •...
- Page 12 Time and Control Panel Lockout modes. DISPLAY Press the STOP/CLEAR button to stop any function except Cook OVEN MODE CONTROLS: Time and Control Panel Lockout. TO UNLOCK CONTROL PANEL LIGHT DISPLAY occurs, “12:00” will appear on the display. BAKE, BROIL, CONVEC, WARM/PROOF •...
- Page 13 OPERATION OPERATION COOK TIME SETTINGS • The Cook Time feature allows the oven to be set to cook for a set length of time, • The Settings control allows you to access the menu for additional functions and and then turn off automatically. features.
- Page 14 OPERATION OPERATION TO CHANGE THE CLOCK TO 24-HOUR FORMAT TO ADJUST SOUND VOLUME Press SETTINGS. The various Options will appear in the display. The oven sound is factory preset for High but can be changed to Low. 2. Press “5” on the number keypad. “12/24 HOUR” and “12” will appear in the Press SETTINGS.
- Page 15 OPERATION OPERATION SABBATH MODE CALIBRATION The oven is factory preset with Sabbath Mode Off. See “Oven Temperature Control” on page 29. TO TURN ON/OFF SABBATH MODE DEMO MODE Make sure the oven is turned Off, and the meat probe is not plugged in. NOTE: Press SETTINGS and Press START to go to the next page.
- Page 16 OPERATION OPERATION PREHEATING THE OVEN TO USE THE TEMPERATURE PROBE OVEN CARE • Preheat the oven when using the Bake, Convection Bake and Convection Roast Insert the probe into the food. NOTE: For meats, the probe tip should be inserted modes.
- Page 17 OPERATION OPERATION HIGH ALTITUDE BAKING OVEN DOOR When cooking at high altitude, cooking times may be extended. To avoid oven door glass breakage: • Do not close the oven door if the racks are not fully inserted into the oven cavity OVEN RACKS or if bakeware extends past the front edge of an oven rack.
- Page 18 across the display. into the oven cavity or if bakeware extends past the front 3 Press number 3 on the keypad to increase or number 6 to edge of an oven rack. • Do not set objects on the glass surface of the oven door. OPERATION OPERATION •...
- Page 19 mode, then enter the desired temperature by pressing the (288ºC) will be displayed. the option to set a Cook Time and Start Time before press- number keypad, and then press START. the bakeware. ing START. See “Cook Time” and “Start Time.” •...
- Page 20 OPERATION OPERATION WARM Before seconding proofing, shape the dough, place it in baking pan(s) and Press WARM/PROOF. “Warm” and “Set Temp or Press START” and 140°F will cover loosely with plastic wrap. coated with cooking spray. Follow the same be displayed. placement and control steps above.
- Page 21 is possible. Dehydrates herbs, fruits and vegetables. OPERATION OPERATION shortening. Requires no specialized bakeware. e oven door. Convection broiling allows for extraordinary grilling with ds. “Proof” thicker cuts of food. 8°C) will be CONVECTION BAKE CONVECTION BAKE CONVECTION BROIL CONVECTION BROIL 5 “Convect Roast”...
- Page 22 (77°C) to 550°F (288°C). When using Convection Conversion, enter the normal cooking temperature and time. NOTE: After selecting an Oven Mode and Temperature, you have the option to set a Cook Time and Start Time before The oven door must be closed before setting Convection pressing START.
- Page 23 heatproof glass, glass-ceramic, pottery or other utensils line any part of the oven. Foil is an excellent heat insulator suitable for the oven. and heat will be trapped beneath it. This will alter the cooking When using heatproof glass, reduce temperature by 25°F OPERATION (15°C) from recommended temperature.
- Page 24 onto a paper towel. Protect and polish The entire oven can be safely cleaned with a soapy sponge, rinsed G Stainless Stainless Steel Magic and a soft c ® and dried. If stubborn soil remains, follow the recommended Remove water spots with a cloth damp cleaning methods below.
- Page 25 OPERATION OPERATION DEHYDRATE TIPS CONVECTION BROIL TIPS The circulating heated air at a lower temperature slowly removes the moisture for food • Place rack in the required position needed before turning on the oven. preservation. • Use Convection Broil mode with the oven door closed. •...
- Page 26 OPERATION OPERATION BROIL TIPS FOOD SERVICE TEMPERATURE GUIDELINES FROM FSIS • Place rack in the required position needed before turning on the oven. USDA FOOD SAFETY & INSPECTION SERVICE • Use Broil mode with the oven door closed. 140° F Ham, precooked (to reheat) •...
- Page 27 CLEANING AND MAINTENANCE CLEANING AND MAINTENANCE GENERAL CLEANING PART CLEANING METHOD Before Cleaning, make sure all controls are off and the oven is cool. Always Wash with hot sudsy water. Rinse throughly and dry. Or, follow the instructions printed on the label of the cleaning products. WARNING gently rub with Soft Scrub ®...
- Page 28 OVEN CARE PART CLEANING METHOD MAINTENANCE AND CLEANING PART CLEANING METHOD MAINTENANCE AND CLEANING n Rack (3) Clean with hot sudsy water and sponge or plastic scrubber. Rub stubborn stains with iler Pan Rack vinegar, Windex , ammonia or Bon-Ami ®...
- Page 29 turned off before removing the door. the cycle begins, clean oven interior using a soapy sponge • The oven door is heavy and fragile, and the door front is or plastic scrubber and a solution of detergent and hot water. glass.
- Page 30 MAINTENANCE AND CLEANING TROUBLESHOOTING ZLINE Customer Service is available at 1-614-777-5004. REPLACING AN OVEN LIGHT • Make sure the oven and lights are cool and power to the oven has been turned off before replacing the light bulb(s). POSSIBLE FAULT...
- Page 31 TROUBLESHOOTING TROUBLESHOOTING POSSIBLE FAULT POSSIBLE FAULT FAULT POSSIBLE CAUSE TROUBLESHOOTING Cakes high in middle with Oven door is locked and Turn the oven off at the Oven temperature too high crack on top will not release, even after circuit breaker and wait a Baking time too long cooling.
- Page 32 If was selected. Cleaning. condition persists, note the Oven is heavily Always wipe out loose code number and call ZLINE soiled. soils or heavy spillover at 614-777-5004. before running Self- The oven display does not Turn off power at the main Cleaning.
- Page 33 Installation Guide and User Manual 1.5.0 1-614-777-5004 contact@zlinekitchen.com www.zlinekitchen.com...
Need help?
Do you have a question about the Autograph AWSZ30CB and is the answer not in the manual?
Questions and answers