
Related Manuals for Motorola BR700


Summary of Contents for Motorola BR700
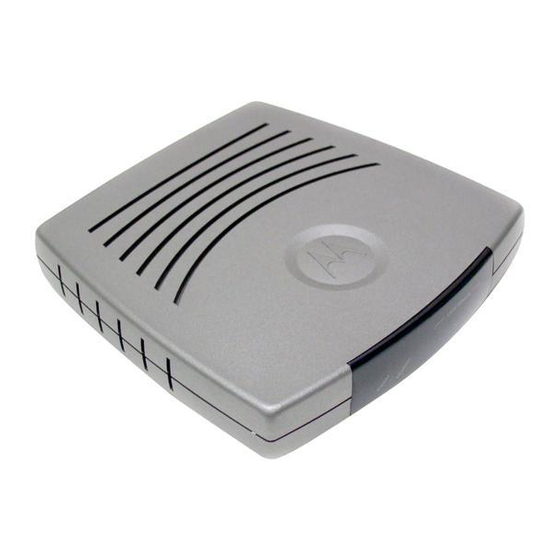
- Page 1 All manuals and user guides at all-guides.com User Guide Ethernet Broadband Router BR700...
- Page 2 Connect the equipment into an outlet on a circuit different from that to which the receiver is connected. • Consult the dealer or an experienced radio/TV technician for help. CAUTION: Changes or modifications not expressly approved by Motorola for compliance could void the user’s authority to operate the equipment.
- Page 3 Motorola, Inc., Broadband Communications Sector, 101 Tournament Drive, Horsham, PA 19044, 1-215-323-1000, declares under sole responsibility that the WR850G, WE800G, WA840G, WN825G, WPCI810G, and BR700 comply with 47 CFR Parts 2 and 15 of the FCC Rules as a Class B digital device. This device complies with Part 15 of FCC Rules.
-
Page 4: Table Of Contents
All manuals and user guides at all-guides.com Contents Section 1:Overview _______________________ 1-1 Features ........................ 1-2 Understanding Your User Guide ................. 1-3 Box Contents ......................1-3 Understanding Functions ..................1-4 Router .........................1-4 TCP/IP.........................1-4 Static IP Address......................1-4 Dynamic IP Address......................1-4 DHCP Server ......................1-5 Simple Home Network Diagram ................ - Page 5 All manuals and user guides at all-guides.com CONTENTS Section 3:Configuration ___________________ 3-1 Using the Configuration Utility................3-1 Log In ........................3-1 Navigation ......................3-2 Help, Restart, and Log Out .................3-2 Configuring Internet Settings................3-3 Internet - Basic ....................3-3 Internet - Advanced.....................3-7 Internet - Network Diagnostic................3-9 Configuring Parental Control Settings ..............3-10 Parental Control - Content Policy ..............3-10 Parental Control - URL Log................3-13...
- Page 6 Section 1:Overview Congratulations on purchasing the Motorola Ethernet Broadband Router BR700. With this router you have entered the world of convenience and independence. Your router enables you to set up your own private network for your PCs to: access the Internet, share a printer, even participate in online gaming.
-
Page 7: Section 1:Overview
Also supported are the NAT and MAC filtering protocols, giving you the choice to share your Internet connection with only those whom you designate. Your Motorola Ethernet Broadband Router BR700 protects and connects you by sharing your files, Internet connection, printers and multi-player games, all in one great unit. -
Page 8: Understanding Your User Guide
Configuration Provides descriptive details for using the Configuration Utility to manage your unit. Glossary List of terms and acronyms Box Contents Your box contains the following: CD-ROM Base Station Stand BR700 Power Supply Quick Start Guide SECTION 1, OVERVIEW... -
Page 9: Understanding Functions
All manuals and user guides at all-guides.com SECTION 1 OVERVIEW Understanding Functions The various technologies and features utilized by your router require some explanation so you can make the correct choices when configuring your router. Router Routers connect two networks together, or in your case, your home network with the Internet (which can be thought of as a very large network). -
Page 10: Dhcp Server
All manuals and user guides at all-guides.com OVERVIEW SECTION 1 DHCP Server A Dynamic Host Configuration Protocol (DHCP) Server assigns IP addresses to clients connected to the router. Client is the general term used to describe any device that connects with your unit. The client (PC, gaming device, etc.) is automatically assigned an IP address every time a device is added to your network, freeing you from manually assigning IP addresses. -
Page 11: Router Physical Description
SECTION 1 OVERVIEW Router Physical Description The following sections describe the physical characteristics of your unit. Back of Router The following illustration shows the BR700 back panel: Reset Power Feature Description Power The receptacle where you plug in the power adapter. - Page 12 All manuals and user guides at all-guides.com OVERVIEW SECTION 1 Feature Description These four ports can connect your LAN with Ports 1-4 Ethernet cables. This enables communication among clients, such as PCs or print servers, on the network. The LAN ports support either 10-BASE-T or 100-BASE-T transmission speeds as well as straight-through and crossover Ethernet cables.
-
Page 13: Front Of Router
All manuals and user guides at all-guides.com SECTION 1 OVERVIEW Front of Router The following illustration shows the BR700 front panel: Local Network The LEDs of the router indicate its operational status. LED Description The underlined items indicate activity on the network. -
Page 14: Section 2:Installation
All manuals and user guides at all-guides.com Section 2:Installation To get your network up and running: Setup your hardware. Insert the CD-ROM for Product Setup. Follow the prompts. If you prefer to setup the router’s software manually, refer to the Manual Software Setup found later in this section. -
Page 15: Vertical Installation
All manuals and user guides at all-guides.com SECTION 2 INSTALLATION Vertical Installation 1 To use the router in a vertical position, insert the router into the supplied base. The router’s foot slides snugly into a notch in the base to keep the unit stable. 2 Follow the installation procedures for connecting and configuring the unit. - Page 16 All manuals and user guides at all-guides.com INSTALLATION SECTION 2 To mount your router on the wall: 1 Print the Wall Mounting Template. 5.1” [129.5mm] The illustration is drawn at a one-to-one scale, which means that when printed, it provides the exact dimensions required to mount the unit.
- Page 17 All manuals and user guides at all-guides.com SECTION 2 INSTALLATION 2 Click the Print icon or choose Print from the File menu to display the Print dialog box: Be sure you print the template at 100% scale and that Fit to page is not checked in the Print dialog box.
- Page 18 All manuals and user guides at all-guides.com INSTALLATION SECTION 2 9 Using a screwdriver, turn each screw until part of it protrudes from the wall, as shown: There must be 4.0 mm (.16 inches) between the wall and the underside of the screw head. The maximum distance from the wall to the top of the screw head is 7.6 mm (.3 in).
-
Page 19: Electrical Connection To Router
All manuals and user guides at all-guides.com SECTION 2 INSTALLATION Electrical Connection to Router Your router does not have an On/Off power switch and therefore will only be powered on by plugging in the power adapter: Reset Power To power supply 1 Connect the power adapter to the router’s Power port, found on the back of the unit. -
Page 20: Connection To Router
All manuals and user guides at all-guides.com INSTALLATION SECTION 2 Connection to Router Reset +12VDC Power When connecting your PC to the router, your PC must be installed first with an Ethernet adapter. You need two Ethernet cables for this procedure, one cable to connect the router to the modem and one cable to connect a PC to the router. -
Page 21: Configure Your Computers
All manuals and user guides at all-guides.com SECTION 2 INSTALLATION You have now completed the hardware installation. The next section, Configure Your Computers, steps you through the various configuration options needed for your PCs. Configure Your Computers Each computer that is going to be part of your network needs to “talk” to the router. -
Page 22: Configuring Windows 98Se And Me
All manuals and user guides at all-guides.com INSTALLATION SECTION 2 Configuring Windows 98SE and ME 1 Click Start. 2 Select Settings > Control Panel. 3 Double-click Network. The Network window is displayed: 4 On the configuration tab, select the TCP/IP line the for the appropriate Ethernet adapter. - Page 23 All manuals and user guides at all-guides.com SECTION 2 INSTALLATION 5 Click Properties. The TCP/IP Properties window is displayed: Windows 98SE Windows ME 6 Click the IP Address tab. 7 Select Obtain an IP address automatically. 8 Click OK. 9 Click the Gateway tab and check to make sure that the Installed Gateway field is blank.
-
Page 24: Configuring Windows 2000
All manuals and user guides at all-guides.com INSTALLATION SECTION 2 Configuring Windows 2000 1 Click Start. 2 Select Settings. 3 Select Control Panel. Double-click Network and Dial-Up Connections. Double-click Local Area Connection. 4 Click the Properties button. SECTION 2, INSTALLATION 2-11... - Page 25 All manuals and user guides at all-guides.com SECTION 2 INSTALLATION 5 Ensure the box next to Internet Protocol (TCP/IP) is selected. 2-12 SECTION 2, INSTALLATION...
-
Page 26: Configuring Windows Xp
All manuals and user guides at all-guides.com INSTALLATION SECTION 2 6 Highlight Internet Protocol (TCP/IP) and click the Properties button. 7 Select Obtain an IP address automatically. Click OK twice to exit and save your settings. 8 Restart your computer to save your settings. Configuring Windows XP This configuration assumes you have retained the default interface for Windows XP. - Page 27 All manuals and user guides at all-guides.com SECTION 2 INSTALLATION 5 Double-click Local Area Connection. 6 Click the Properties button. 7 Ensure the box next to Internet Protocol (TCP/IP) is selected. 2-14 SECTION 2, INSTALLATION...
- Page 28 All manuals and user guides at all-guides.com INSTALLATION SECTION 2 8 Click to highlight Internet Protocol (TCP/IP) and click the Properties button. 9 Click Obtain an IP address automatically. Click OK twice to exit and save your settings. SECTION 2, INSTALLATION 2-15...
-
Page 29: Log In
3 Enter the USER ID. The default factory setting is “admin”, without the quotation marks. 4 Enter the PASSWORD. The default factory setting is “motorola”, without the quotation marks. Once you have logged in, for security reasons you should change the User ID and Password. -
Page 30: Configure Your Basic Internet Settings
All manuals and user guides at all-guides.com INSTALLATION SECTION 2 Configure Your Basic Internet Settings The following settings illustrate how to configure your router for accessing the Internet. Detailed descriptions for using the web-based utility follow this section. 1 Log into the router’s Configuration Utility. You are presented with the Internet >... -
Page 31: Static Ip
All manuals and user guides at all-guides.com SECTION 2 INSTALLATION Static IP If you are required to use a permanent IP address for connecting to the Internet, then select Static IP. Your ISP informs you if this is the connection to use. 1 From Connection Mode, select Static IP. -
Page 32: Section 3:Configuration
(the router’s default IP address). Press Enter. The login screen appears. 2 Enter the USER ID. The default factory setting is “admin”, without the quotation marks. 3 Enter the PASSWORD. The default factory setting is “motorola”, without the quotation marks. SECTION 3, CONFIGURATION... -
Page 33: Navigation
All manuals and user guides at all-guides.com SECTION 3 CONFIGURATION 4 Click LOG IN to enter the Router’s Web-based Configuration Utility. Navigation Each of the following subsections provides descriptions for the components of the router’s Configuration Utility – accessible from a web browser. -
Page 34: Configuring Internet Settings
All manuals and user guides at all-guides.com CONFIGURATION SECTION 3 Configuring Internet Settings These screens enable you to configure your Internet settings: Basic Advanced Network Diagnostic Internet - Basic This is the first screen that appears when logging into the web-based utility. - Page 35 All manuals and user guides at all-guides.com SECTION 3 CONFIGURATION The following table provides descriptions for the fields in the Basic window: Field or Button Description WAN Interface Active Your WAN link is active. Inactive Your WAN link is not active. Disabled The WAN interface has been disabled.
- Page 36 All manuals and user guides at all-guides.com CONFIGURATION SECTION 3 Field or Button Description IP Address The router’s IP Address used to connect to your ISP. It is either automatically displayed or manually entered from information provided by your ISP. For example, if DHCP is selected, this is the IP Address that your router is currently using to access the Internet.
- Page 37 All manuals and user guides at all-guides.com SECTION 3 CONFIGURATION Field or Button Description Available when PPPoE or PPTP is selected in Authentication the Connection Mode. Check with your ISP for the proper type of authentication to choose: Auto – The router will offer PAP or CHAP to the server, and the server will determine which PPP Authentication to use.
-
Page 38: Internet - Advanced
All manuals and user guides at all-guides.com CONFIGURATION SECTION 3 Internet - Advanced This screen enables you to adjust additional Internet settings. To access the screen, click INTERNET > ADVANCED. Click APPLY to save changes, click CANCEL to undo unsaved changes. Field or Button Description WAN Ethernet... - Page 39 All manuals and user guides at all-guides.com SECTION 3 CONFIGURATION Field or Button Description Clone WAN MAC Your router has the ability to duplicate the MAC Address address of your PC’s network adapter into the router’s WAN MAC address. To avoid calling your ISP and changing the MAC address that is registered with the ISP, follow these instructions: 1 Click to enable the feature.
-
Page 40: Internet - Network Diagnostic
All manuals and user guides at all-guides.com CONFIGURATION SECTION 3 Internet - Network Diagnostic This screen helps you troubleshoot problems that might occur. To access the screen, click INTERNET > NETWORK DIAGNOSTIC. Ping An Internet utility used to determine whether a particular IP address is online by sending out a packet (block of data) and waiting for a response. -
Page 41: Configuring Parental Control Settings
All manuals and user guides at all-guides.com SECTION 3 CONFIGURATION Configuring Parental Control Settings The settings described in this section enable you to tailor the type of content you want to allow your router to access. You create a policy that defines content access. - Page 42 All manuals and user guides at all-guides.com CONFIGURATION SECTION 3 To access the screen, click PARENTAL CONTROL > CONTENT POLICY. Click APPLY to save changes, click CANCEL to undo unsaved changes. Field Description Content Policy Enables or disables the Content Policy feature. The default is disabled.
- Page 43 All manuals and user guides at all-guides.com SECTION 3 CONFIGURATION Field Description Denied URL The URL that the recipient of the policy isn’t able to access. For example, a Kid Policy would not be able to access: www. xxx. com. Separate multiple URLs with semicolons.
-
Page 44: Parental Control - Url Log
All manuals and user guides at all-guides.com CONFIGURATION SECTION 3 To create a policy, follow this procedure: 1 Enter a Name in the Policy Name field. 2 Decide if you want to Allow or Deny a URL. You can add more than one URL, separated by semicolons. -
Page 45: Configuring Networking Settings
All manuals and user guides at all-guides.com SECTION 3 CONFIGURATION Field Description Time Displays the time of access. Displays the PC’s MAC address. Visited URL The URL (website) that the PC has accessed. Configuring Networking Settings The Configuring Networking subsections describe the settings that enable you to configure your router to work with your Local Area Network (LAN). - Page 46 All manuals and user guides at all-guides.com CONFIGURATION SECTION 3 To access the screen, click NETWORKING > DHCP SERVER. Click APPLY to save your settings or CANCEL to cancel changes. Field Description LAN MAC Displays the LAN MAC address of the router. Address This field cannot be edited.
- Page 47 All manuals and user guides at all-guides.com SECTION 3 CONFIGURATION Field Description LAN Subnet Mask Enables you to create your own Subnet Mask for your network. The Subnet Mask determines which portion of a destination LAN IP address is the network portion and which portion is the host portion.
-
Page 48: Networking - Dns Proxy
All manuals and user guides at all-guides.com CONFIGURATION SECTION 3 Field Description Reserved Leases The DHCP reserves a set IP addresses. However, if you require a specific IP for a specific device, such as a print server: To reserve a lease: 1 Enter a new MAC Address. - Page 49 Field Description LAN Private Host Displays the current Host name for the router. Name The default is “br700” (all lower case, without quotation marks). Host Table Displays the Host Name assignments. IP Address Enter the IP Address that has been statically assigned for the LAN device.
-
Page 50: Networking - Routing
All manuals and user guides at all-guides.com CONFIGURATION SECTION 3 Networking - Routing You can define up to 20 static routes that specify the Network Destination, Subnet Mask, Gateway, Interface, and Metric. You configure the Network Routing Table here. RIP (Routing Information Protocol) versions 1 and 2 are routing protocols that are part of the TCP/IP protocol standard. -
Page 51: Networking - Ddns
All manuals and user guides at all-guides.com SECTION 3 CONFIGURATION Field Description RIPv2 Transmit Enables or disables RIPv2 Transmit. The default is disabled. Routing Table To add a Routing Entry: 1 Enter a Destination IP Address, Subnet Mask, Gateway IP. 2 Select WAN or LAN Interface. - Page 52 All manuals and user guides at all-guides.com CONFIGURATION SECTION 3 To access the screen, click NETWORKING > DDNS. Click APPLY to save your settings or CANCEL to cancel changes. Field Description DDNS Enables or disables DDNS. The default is disabled. DDNS Server Select the desired DDNS service provider.
-
Page 53: Networking - Nat
All manuals and user guides at all-guides.com SECTION 3 CONFIGURATION Networking - NAT Network Address Translation (NAT) translates multiple IP addresses on a private LAN to one public address that is sent out to the Internet by your ISP. This adds a level of security since the IP address of a PC connected to the private LAN is never transmitted on the Internet. -
Page 54: Networking - Port Trigger
BR700 supports port triggering. The BR700 is configured with port triggering for some common applications. You can also configure additional port triggers if needed. Configuring port triggers for an application requires a Port Trigger entry, explained below. - Page 55 All manuals and user guides at all-guides.com SECTION 3 CONFIGURATION To access the screen, click NETWORKING > PORT TRIGGER. Click APPLY to save your settings or CANCEL to cancel changes. To add a Port Trigger entry: 1 Port Trigger Name: Enter the name of the application. There is a limit of 32 characters for the name.
-
Page 56: Networking - Virtual Server
All manuals and user guides at all-guides.com CONFIGURATION SECTION 3 Networking - Virtual Server The Virtual Server sets up an automatic inbound forwarding mechanism for services running on your home computer, such as web servers, email servers, or other specialized applications. When you use this service, it is suggested that you use Static IP and not DHCP, because the DHCP server may change the IP address during usage. -
Page 57: Networking - Firewall
All manuals and user guides at all-guides.com SECTION 3 CONFIGURATION 6 Schedule: This is an optional feature. Click to enable. Select the time for the forwarding service to be active. To update or remove an entry, select it and then click Update or Remove to perform the action. -
Page 58: Configuring Control Panel Settings
All manuals and user guides at all-guides.com CONFIGURATION SECTION 3 3 Packet Direction: From the drop down box, select either Outgoing or Incoming. 4 Packet Protocol: From the drop down box, select from TCP, UDP, ICMP, or All. 5 Source and Destination: Enter the IP range and Port ranges (0 to 65535). - Page 59 Use this option to change the Password, used to log into the router’s web based utility. It cannot be longer than 63 bytes. A blank password is not allowed. The default is “motorola”. Login Password Re-enter the User Password. Confirm...
-
Page 60: Control Panel - Firmware Update
Model Number, Serial Number, and Firmware Number; enabling you to verify that you are running the most current version. Access this website to check www.motorola.com/broadband/networking for a firmware update. To access the screen, click CONTROL PANEL > FIRMWARE UPDATE. -
Page 61: Control Panel - Time
All manuals and user guides at all-guides.com SECTION 3 CONFIGURATION To reset the router to its original configuration; click Factory Default. To backup your settings, 1 Click Backup. 2 From the pop-up window, choose the destination for the file. 3 Enter a descriptive file name. To restore your settings: 1 Locate the Configuration file on your computer by entering the path to the file or click Browse and navigate to it. -
Page 62: Control Panel - Upnp
All manuals and user guides at all-guides.com CONFIGURATION SECTION 3 Field Description NTP Time If you want the unit to automatically check the Synchronization current time, select to enable this feature. The default is enabled. NTP Server List Lists the current Network Time Protocol (NTP) servers from which you can choose for synchronization. - Page 63 All manuals and user guides at all-guides.com SECTION 3 CONFIGURATION To access the screen, click CONTROL PANEL > EVENT LOG. Click APPLY to save your settings or CANCEL to cancel changes. To setup your event notification: 1 Enter the SMTP Server Name or its IP address. 2 Enter the Recipient Email Address(es).
-
Page 64: Section 4:Troubleshooting
Contact Us If you are unable to locate a solution here, please access our website for the latest information. www.motorola.com/broadband/networking You can also reach us 7 days a week, 24 hours a day at 1-877-466-8646. Hardware Solutions My computer is experiencing difficulty in connecting to the router. -
Page 65: My Broadband Modem Already Uses A Built-In Router
All manuals and user guides at all-guides.com SECTION 4 TROUBLESHOOTING Ensure that your Ethernet adapter is enabled. Check the System Tray at the bottom right of your display to see an icon that looks like a monitor. You can click on this to see the status of your Ethernet adapter. -
Page 66: I Cannot Access The Configuration Utility For The Router
All manuals and user guides at all-guides.com TROUBLESHOOTING SECTION 4 There is a good possibility that the Default Gateway’s IP address is the router’s IP address. You can verify the router’s IP address on the Internet > Basic screen. If you receive a reply (the first word will be Reply…), then your computer is connected to the router. - Page 67 All manuals and user guides at all-guides.com SECTION 4 TROUBLESHOOTING Once the router is reset to factory default setting, re-verify the Ethernet connectivity and IP address issues. Verify you are using the latest version of IE or Netscape. IE 5.2 and below are not supported.
- Page 68 All manuals and user guides at all-guides.com Section 5:Glossary Adapter A device or card that connects a computer, printer, or other peripheral device to the network or to some other device. An adapter connects a computer to a LAN. Address translation See NAT.
-
Page 69: Section 5:Glossary
“leasing” an IP address and subnet mask to each client. It enables the automatic reuse of unused IP addresses: The BR700 is simultaneously a DHCP client and a DHCP server. A DHCP server at the system headend assigns a public IP address to the BR700. - Page 70 A message generated by a device to inform an operator or the network management system that something has occurred. Firewall A security software system on the BR700 that enforces an access control policy between the Internet and the LAN for protection. Firmware Code that is written onto read-only memory (ROM) or programmable read-only memory (PROM).
- Page 71 GLOSSARY Gateway A device that enables communication between networks using different protocols. See also router. The BR700 enables up to 253 computers supporting Ethernet to share a single broadband Internet connection. Graphical User Interface Hexadecimal A base-sixteen numbering system that uses sixteen sequential numbers (0 to 9 and the letters A to F) as base units before adding a new position.
- Page 72 All manuals and user guides at all-guides.com GLOSSARY SECTION 5 Internet Protocol is a set of standards that enable different types of computers to communicate with one another and exchange data through the Internet. IP provides the appearance of a single, seamless communication system and makes the Internet a virtual network.
- Page 73 All manuals and user guides at all-guides.com SECTION 5 GLOSSARY physical network. The MTU places an upper bound limit on the size of a message that can be transferred by the network in a single frame. Messages exceeding the MTU must be fragmented before transmission, and reassembled at the destination.
- Page 74 VPNs developed jointly by several vendors. Private IP Address An IP address assigned to a computer on the BR700 LAN by the DHCP server for a specified lease time. Private IP addresses are invisible to devices on the Internet. See also Public IP Address.
- Page 75 All manuals and user guides at all-guides.com SECTION 5 GLOSSARY A router is often included as part of a network switch. A router can also be implemented as software on a computer. Routing Table A table listing available routes that is used by a router to determine the best route for a packet.
- Page 76 All manuals and user guides at all-guides.com GLOSSARY SECTION 5 checks error in incoming packets, and retransmits packets if requested. TCP/IP The Transmission Control Protocol/Internet Protocol suite provides standards and rules for data communication between networks on the Internet. It is the worldwide Internetworking standard and the basic communications protocol of the Internet.
- Page 77 All manuals and user guides at all-guides.com SECTION 5 GLOSSARY circuit for each line. VoIP enables calls to travel as discrete data packets on shared lines. VoIP is an important part of the convergence of computers, telephones, and television into a single integrated information network.
- Page 78 All manuals and user guides at all-guides.com Visit our website at: www.motorola.com/broadband 494263-001 07/03 MGBI...
Need help?
Do you have a question about the BR700 and is the answer not in the manual?
Questions and answers