
Related Manuals for BuyTricycle Scout

Summary of Contents for BuyTricycle Scout
- Page 1 ASSEMBLY GUIDE Spanish, French, German, Dutch, Italian, Portuguese, Polish : www.buytricycle.com/instructions BuyTricycle Email: help@buytricycle.com Twitter: @BuyTricycle facebook: @BuyTricycle Phone: +44 7856 715212...
-
Page 2: Build Instructions
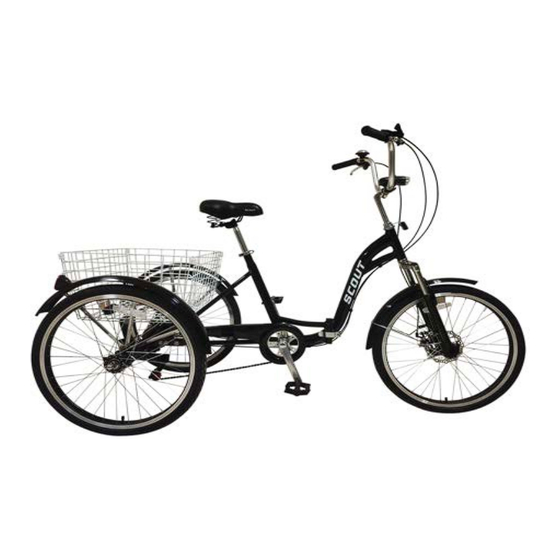
We've tried to make this booklet as user friendly as possible but it is only a guide, so please only attempt the build if you have experience with Tricycle / bicycle assembly, if not seek professional assistance. BuyTricycle will not be held responsible for accidents/injuries due to an improper build, but please do not hesitate to contact us with any questions you may have. - Page 3 ADULT TRIKE PARTS IDENTIFICATION Basket Support Arm Basket Fender Bar Support Bar Axle Begin by attaching the rear axle to the trike frame using the hardware provided (fig.1) and the four bolts already attached to the axle, 3 bolts either side, 4 bolts are pre-inserted in the axle, these may need to be loosened.
- Page 4 The front wheel uses a quick release axle (fig 1a), this must be inserted through the wheel before placing the wheel into the forks and tightening the axle.
-
Page 5: Power Cable
Attach the front fender using hardware . Fig 2 Determine final closing position of lever. Rotate front lever and adjusting nut so the lever will end up just in Fig 2 front of fork. Reposition the lever as necessary if it will not fully close, ensure fully closed before cycling. - Page 6 Fit the chain over the chain wheel, through the rear gear cluster and the Shimano dérailleur and link together using a chain tool. Attach the chainguard using the hardware in Fig 3. Fig 3 You can now proceed to attach the pedals, they are labeled L for the Left side and R for the right. Attach the saddle to the seat pole and insert into the seat tube, tighten with the quick release hatch.
- Page 7 Insert the handlebars into the head-tube, tighten to the required height and angle. Check for the minimum insertion mark on the stem, insert the stem so it is no longer visible. Fix the rear brake cable to the left hand lever, run the cable through the guide hole and along the trike to the rear disc brake.
-
Page 8: Front Disc Brake
The rear cable should be fed into the rear disc brake as shown below, ensure the disc runs smoothly, pull the cable tight and tighten the brake. Front Disc brake Feed the front brake cable down into the front caliper and tighten into place. Test the wheel spins freely and adjust the brakes to ensure stopping capabilities. - Page 9 www.buytricycle.com/instructions...
- Page 10 ADJUSTMENT - Rear Dérailleur: The Low limit screw determines how far the rear derailleur will travel toward the wheel of the bicycle, while the High limit screw determines how far the cage will travel toward the frame. Shift the rear shifter to the largest number Outer side of Top Gear indicated, and place the chain on the Freewheel...
- Page 11 The finishing touches Almost done, just a few finishing touches now, begin by installing the front reflector followed by the wheel reflectors Basket: The basket uses the 2 white bars to attach through the rear axle using the hardware shown below. Folding the tricycle To unfold the tricycle, release the quick release lever and lift handle, this will then allow the frame to be folded.
- Page 12 伀甀 爀 琀 爀 椀 挀 礀 挀 氀 攀 猀 挀 漀 洀攀 眀 椀 琀 栀 昀 漀 氀 搀 椀 渀 最 戀 愀 猀 欀 攀 琀 猀 Ⰰ 琀 漀 猀...
-
Page 13: Parts List
PARTS LIST AXLE HARDWARE X6 CHAIN GUARD HARDWARE X3 FRONT FENDER HARDWARE 4 ARE PRE-INSERTED INTO AXLE FENDER BAR HARDWARE bottom X6 REAR BASKET HARDWARE X4 / FENDER BAR top HARDWARE GEAR CABLE / REAR BRAKE CABLE CABLE CAPS REAR FENDER REFLECTORS PEDALS WHEEL REFLECTORS FRONT WHEEL CAPS (electric trikes only) Quick release axle (non electric Basket support bars x 2 Chain models only) - Page 14 Electric tricycle charging information. Charging instructions 1. Out of the box, the battery is only semi-charged. Charge to its full capacity before first use. 2. For the first three charges, charge the battery for at least 12 hours. 3. Put the female plug of the charger into charging socket of the battery box. Insert the male end of the plug into the outlet.
- Page 15 . Any damages or wear and tear will be between the hours of 7am and 9pm. BuyTricycle can responsibility. BuyTricycle will not be held liable for any injury or deducted from the refund. give an exact time of delivery.
- Page 16 If on the rare occasion there are any problems with your order (such as item arrived damaged in transit) then please drop us an email at help@buytricycle.com and we will deal with the issue to your satisfaction. We would love to see you riding your Tricycle, so please #tricyclescouting to our Twitter or Instagram page and we’d love you to give us a like on our facebook page.
Need help?
Do you have a question about the Scout and is the answer not in the manual?
Questions and answers