Advertisement
Quick Links
Advertisement

Related Manuals for SilverLeaf Electronics VMS 350


Summary of Contents for SilverLeaf Electronics VMS 350
- Page 1 VMS 350 Basic 3-Button Owners Manual...
-
Page 2: Getting Started
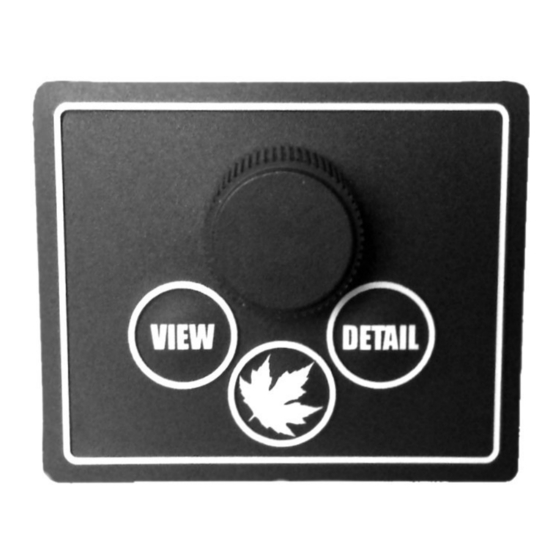
(keyboard options) to the all-video display mode. The VMS 350 Keyboard The VMS 350 is controlled by a small keyboard. The large knob can be turned left or right and can also be pressed. Think of this knob as being the “mouse”... -
Page 3: Home Screen
Turn the knob again to select a gauge, then press the knob to complete your selection. Note: Due to variations in engine configurations, some of the gauges included in the VMS 350 might not be supported by your engine. - Page 4 Whereas most of the gauges are read directly from the engine and transmission, a few gauges are unique to the VMS 350. In particular, the Recent MPG and Real MPG are special data items calculated by the VMS 350 to help you get the best possible fuel economy.
- Page 5 Expanded Keyboard Help Helpful Hint: N/D means Not Detected or not installed; if installed it may be having problems. Three modes; Camera, Gauges or Both. The first “Detail” screen displays Current Trip information. The unit tracks two trips simultaneously. You might use the main trip to track your mileage and fuel, say, each time you leave home, while the “auxiliary”...
- Page 6 Miles to Go You can use the knob to set this value. As you drive, the VMS 350 will count down the miles and provide a current estimate of your Time of Arrival and the amount of Fuel Required. These estimates will be based on the speed and fuel consumption averages for the Main Trip.
- Page 7 Reset Aux Trip items, you can tell the unit to zero out either of the two trip odometers. Once cleared, you cannot “undo” the action. Trip History When you clear the Main Trip odometer, the data is recorded in the Trip History.
- Page 8 you to check for detailed sensor information and, if PressurePro is installed , to move, delete, or add tire sensors as shown later. Use the knob to move from position to position. The top left position corresponds to the curb-side front tire. On the bottom half of the screen the detailed information on the indicated tire sensor is displayed.
-
Page 9: Configuration Screen
Configuration Screen This screen allows you to adjust the time and date, view engine diagnostics and other details, and access other features of the VMS 350. Adjusting the Time and Date Turn the knob to point the cursor at either the Time or Date, then press the knob. - Page 10 • View Communications. This is for troubleshooting and useful during installation. • Tweak Display. This allows you to optimize the VMS 350 for the particular video display, allowing for shifting the screen slightly, brightness and contrast. • Adjust Fuel (Sensor) Settings. This allows you to fine tune the fuel readings, adjust how MPG is factored or to build-in a 'reserve' fuel buffer.
- Page 11 In the event of a detected fault within the house systems, a fault indication may appear. As not all coaches are using these and other specific features, your mileage may vary. Call us for any questions regarding these or other questions.
-
Page 12: Limited Warranty
Limited Warranty The obligation of SilverLeaf Electronics under this warranty shall be limited to repair or replacement (at our option) during the warranty period of any part which proves defective in material or workmanship... - Page 13 SilverLeaf Electronics. The warranty period shall be one year from date of purchase of the VMS 350™, or purchase of the finished coach with the VMS 350™ installed.
Need help?
Do you have a question about the VMS 350 and is the answer not in the manual?
Questions and answers