Advertisement
AC SERVICE STATION
USER MANUAL
We continue to be committed to provide you tools with competitive price.
" Save Half", " Half Price" or any other similar expressions used by us only
represents an estimate of savings you might benefit from buying certain tools
with us compared to the major top brands and doses not necessarily mean to
cover all categories of tools offered by us. You are kindly reminded to verify
carefully when you are placing an order with us if you are actually saving half
in comparison with the top major brands.
Advertisement
Table of Contents

Related Manuals for VEVOR X585


Summary of Contents for VEVOR X585
- Page 1 AC SERVICE STATION USER MANUAL We continue to be committed to provide you tools with competitive price. " Save Half", " Half Price" or any other similar expressions used by us only represents an estimate of savings you might benefit from buying certain tools with us compared to the major top brands and doses not necessarily mean to cover all categories of tools offered by us.
- Page 2 CustomerService@vevor.com This is the original instruction, please read all manual instructions carefully before operating. VEVOR reserves clear interpretation of our user manual. The appearance of the product shall be subject to the product you received. Please forgive us that we won't inform you again if there are any technology or software updates on our product.
-
Page 3: Safety Cautions
1. Instructions 1.1 Safety cautions 1) WARNING :Read all safety warnings, instructions, illustrations and specifications provided with this electric appliance. Failure to follow all instructions listed below may result in electric shock, fire and/or serious injury. Save all warnings and instructions for future reference. 2) ALLOW ONLY QUALIFIED PERSONNEL TO OPERATE THE MACHINE. - Page 4 All repairs must be done by an authorized technician. 6) DO NOT PRESSURE TEST OR LEAK TEST EQUIPMENT AND/OR VEHICLE AIR CONDITIONING SYSTEMS WITH COMPRESSED AIR. Mixtures of air and R1234yf refrigerant can be combustible at elevated pressures. These mixtures are potentially dangerous and can result in fire or explosion causing personal injury and/or property damage.
-
Page 5: Safety Signs
1.2 Safety signs Wear protection goggles Read carefully Don’t use it Grounding protection. outside when it’s raining Wear gloves. Electrical shock hazard. This product is subject to the provision of European Directive 2012/ 19/EC. The symbol showing a wheelie bin crossed through indicates that the product requires separate refuse collection in the European Union. -
Page 6: Exemption Clause
1.3 Exemption clause This device is a high-precision auto repair device, which can cause damage if used improperly. Damage caused by the following circumstances is not covered by the warranty: 1 ) Unauthorized unpacking and replacement of the components of the product;... -
Page 7: Product Details
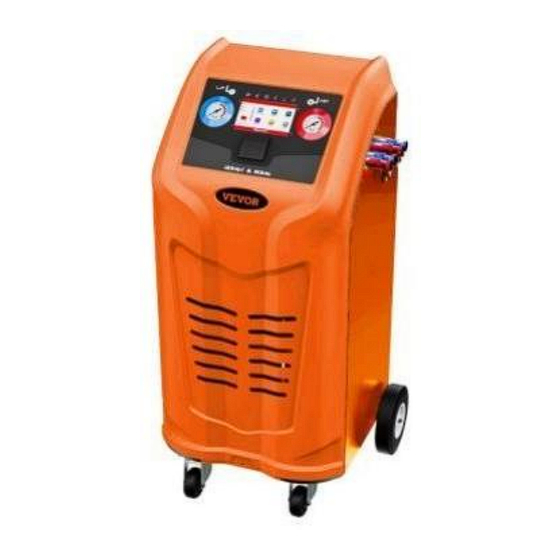
2. . Product details Functions 1) Compatible with R134a and R1234yf Refrigerant; 2) Recovery, vacuum, recharge and leak detection of R134a and 1234yf refrigerants are completely automatic ; 3) Compatible for electric car, gasoline vehicle and hybrid ; 4) Automatic internal system cleaning to avoid the mixing of different refrigerants and compressor oils;... - Page 8 Vacuum capacity: 180L/min; Refrigerant Tank Capacity: 15kg(For both 2) Oil Bottles: 3*350ml ,(Hermetically sealed, PAG/POE/UV/Drain oil) ; Electronic Scales: 5 (134a Refrigerant Tank、1234yf Refrigerant Tank、 PAG/POE/Used oil); Filter Capacity: 100kg; Net Weight: 130kg Dimension (mm): 620*740*1350mm 2.3 Appearance Cooling - 7 -...
- Page 9 - 8 -...
- Page 10 Note: The above picture is for reference only, the specific product appearance and color are subject to the actual product! 3. How to connect to the car 1. Fix red coupler on red hose, and blue couplers on blue hose. 2.
- Page 11 4.Initial Setup Instruction Please follow the steps to install a new machine . 4 . 1 Electronic scale unlock Unscrew the 4 screws on the rear door of the machine, find the tank scale under the R134a and R1234yf tank. Use a hexagon tool to loosen the protection screw.
-
Page 12: Tank Filling
4 .2 Tank Filling. Before the first use, please refill 3 - 6 kgs/7-14 l b s refrigerant in the new machine. 1) Start the machine and select the required refrigerant and oil type. 2) ) Choose the menu “ SETTING” 3) ) Choose “Tank Filling”... - Page 13 4) ) Set the amount for filling and press 5) ) Follow the instruction and press 6) Doing vacuum, please wait. 7) Follow the instruction to next step. Press - 12 -...
- Page 14 8) ) Vacuum completed, follow the instruction and to next press step. 9) Refilling, please wait. 10) Refilling amount completed, close valve and press recover residue in hoses. - 13 -...
-
Page 15: Basic Operations
11) Tank filling completed.Press back to MAIN MENU. Select another type of refrigerant for TANK FILLING. 12)After R134a and R1234yf TANK FILLING.Initial Setup completed. Back to MAIN MENU.You can use the machine now. 5. Basic Operations 5.1 Select the refrigerant type 1) The unit is compatible with R134a and 1234yf refrigerants, please select the required type of refrigerant and oil. - Page 16 2) If the refrigerant and oil type selected this time is the same as that selected in the previous operation, you can go to the next step directly. 3) If the selection is different from the last used refrigerant or oil, system will automatically prompt.
- Page 17 6) ) Hose cleaning completed. Press to next step. Replace the R134a/R1234yf HP hose and start to operate the unit. 7) ) If you need to re-select the type refrigerant, click to back to the interface for selecting the refrigerant. A/C pressure test ) Choose Main menu “A/C pressure check”...
- Page 18 3) Cleaning the hoses. Hose cleaning completed. Choose the process you want to operate. - 17 -...
- Page 19 6) ) Automatic: please refer to the prompts. 7) Manual: Please refer to the prompts. 8) Recovery residue: follow the steps as instructed and press next step. 9) ) Recovering residue, please wait. Follow the instructions, then press - 18 -...
- Page 20 1 1 ) Recovering, please wait. 12) AC pressure check completed. Press to exit. 5.3 Full automatic operation: 1) Choose “Automatic” 2) ) Choose whether to recovery the refrigerant as required, and press to next step. - 19 -...
- Page 21 3) ) Please set the parameter for vacuum or choose defaulted parameter, then press enter. 4) Set the parameter for charge. Click to next step. 5) ) Choose whether to add compressor oil or not, and select the type of compressor oil. Choose whether new oil = drained oil, or set the desired inject amount, click to next step.
- Page 22 6) ) Ensure the value being correct and then press . Otherwise, you can reset it. ) Follow the prompted instructions to operate. 8) Full automatic operation completed. Choose “ print” or not. Press to print. Or press to exit to main menu. - 21 -...
-
Page 23: Manual Operation
5.4 Manual operation Choose menu of “ A/ C pressure check” to next. Choose the process you want to operate 5.4.1 Recovery 1) Choose the mode of recovery, press to next. 2 ) Follow the instructions and press to next step. - 22 -... - Page 24 3) Doing vacuum, please wait. Vacuum completed. Follow the instructions and press next step. 5) Doing recovery, please wait. - 23 -...
- Page 25 6) If you use the mode of deep recovery, it takes more time. Please be patient. 7) ) Recovery completed. Please wait until oil drained. 8) ) Recovery completed. Check the recovery amount and oil drain amount. Touch to print or exit. - 24 -...
- Page 26 5.4.2. Vacuum 1) Set the parameter and press “enter” to confirm. Or use the default setting. Then press 2) Follow the instruction to operate and press to next step. 3) Vacuum in process, wait. - 25 -...
- Page 27 4) Leak testing if you have chosen that function. 5) ) Vacuum completed. Double check all the parameters. press to print, or press back to Main menu. 5.4.3 Charge 1) ) Choose charge and set the parameters, or use default - 26 -...
- Page 28 parameters. Then press to next step. 2) ) Choose yes or no for oil injection and also oil type, set oil amount. Press to next step. 3 ) Double check the parameter to confirm or press to reset it. 4) Oil injection in process, please wait. - 27 -...
- Page 29 5 ) Charging refrigerant, please wait. 6) Follow the instruction to operate, then press to next step. 7) Follow the instruction to operate, then press to next step. - 28 -...
- Page 30 8 ) Balance the pressure, please wait. 9) Follow the instruction to operate and then press to next step. 1 0 ) Make sure the low side valve closed, blue hose disconnected. . 11) Recover the residue refrigerant from hoses. - 29 -...
- Page 31 12) Oil draining. 13) Charge completed. Double check all the parameter. Press Print it or press to exit. - 30 -...
- Page 32 6. Database Choose “ Research“ Choose database. Choose the country of the car model - 31 -...
- Page 33 Check all the information. Insert SD Card to update database. This is only for manufacturer’s use. The users don’t need to operate. The service report is available. - 32 -...
-
Page 34: Maintenance
Maintenance information available. 7. Maintenance Choose “ Maintenance” in main menu Choose the desired function. 7.1 1Replace filter drier - 33 -... - Page 35 1) Check the rest lifetime of filter. If need to replace, then press “ yes” 2 ) ) Recover the refrigerant from filter. Recovery completed. Follow the message and 3 ) ) to next press step. 4 ) Follow the message and press - 34 -...
-
Page 36: Change Pump Oil
5 ) Leak checking. Please wait. 6 ) ) Filter drier replacement completed. Press to exit. 7.2 Change pump oil Check the rest pump oil lifetime. If necessary, choose - 35 -... - Page 37 Warm up the pump oil. ) Warm up completed. Follow the instruction to next step, press to next step. ) Oil replacement completed. - 36 -...
-
Page 38: Scale Calibration
Scale calibration ) Please input the password. ) Choose the desired calibration method and scale. a) Automatic calibration (recommended) - 37 -... - Page 39 a- 1) Calibration completed. Please double check all the parameters. b) Zero calibration b- 1) Follow the message and press b- 2) Ensure the bottle is empty and press “Reset” - 38 -...
- Page 40 b- 3) Reset it to zero, please press “ Yes” b-4) Please wait. b- 5) Calibration completed. - 39 -...
- Page 41 C ) Calibrate the weights. Prepare the weights and enter its correct weight. Press to next step. C- 1) Follow the instruction to operate. Press to next step. C- 2) Follow the instructions to operate. Press To next step. C-3) Doing calibration, please wait. - 40 -...
- Page 42 C-4) Calibration completed. Take out the weight. Leak test 1) Follow the instructions to operate. Press To next step. 2) Leak testing, please wait. - 41 -...
- Page 43 3) If any leak, please check manually. 4) If no leak, test completed. 7.5 Clean tank 1) ) Please follow the instructions to operate. Press to next step.To next step. - 42 -...
- Page 44 2) ) Set the weight needs to be cleanup. Press to next step. 3) ) Clean in process.Please wait. 4) ) Tank cleanup completed. - 43 -...
-
Page 45: Manual Purge
7.6 Manual purge Press to release non- condensable gas. 8. Setting Choose “ Maintenance” from Main menu. Choose the desired functions. 1) Refill the cylinder, please refer to the installation chapter. 2) Lock setting. Please input the password to unlock it before - 44 -... - Page 46 operation. Normally we don’t suggest to lock the machine. 2-1 ) Input the management password, press to continue. 2) Set the using times for locking, press will enable the setting. 2-3) Block setting successfully. - 45 -...
-
Page 47: Troubleshooting
9 Trouble Shooting Display Cause Solution 1. High tank pressure: full Enter “Maintenance” - Manual tank or poor refrigerant Air purge quality 2 . Aging or damaged Change compressor Relay fault C hange Remove dirt or replace with a 4. Solenoid valve leakage new solenoid valve 1. - Page 48 loose, fix the stability sensor screws, and the liquid storage tank fixing screws are loose 3 . Transportation or loose fixing screws make the wall Tighten the fixing screws of the of the liquid storage tank weight after adjustment, contact other parts of the equipment 4 .
- Page 49 3. Check PAG POE and UV solenoid valve for leakage 6 . Filling valve leaks Change 1. The vacuum pump oil is Change deteriorated 2 . Excessive vacuum pump oil, which accumulate Drain oil from vacuum pump to vacuum pump oil in the vacuum pump for a long time middle scale line when vacuuming the A/ C...
- Page 50 Support and E- Warranty Certifi cate https:// www.vevor.com/support Made in China - 49 -...
Need help?
Do you have a question about the X585 and is the answer not in the manual?
Questions and answers
when filling machine with freon does both tank ports on the machine supposed to be in the open position.