Advertisement
Quick Links
MODEL 35950 - 9'
7' DOME TENT
ASSEMBLY INSTRUCTIONS
IMPORTANT: WE ADVISE YOU TO ASSEMBLE THE TENT ONCE BEFORE GOING CAMPING TO BECOME
FAMILIAR WITH THE ASSEMBLY OF THE TENT.
NOTE: PLEASE LOOK AT THE REPLACEMENT PARTS DIAGRAM
TO
SEE HOW YOUR FRAME
IS
ASSEMBLED.
To prolong the life of the tent floor, select a level, clean area for the campsite.
To prevent damage to the zipper, unzip the door to allow air to enter the tent.
STEP
1: Spread tent out flat, floor side down. Unzip door.
STEP 2: Extend flbergaas _ frame sections by pulling out
each section and placing it into the metal ferrul3.
The two longer poles are for the tent frame.
The shorter pole is for the fly.
STEP
3: While making sure sleeves are in line with each
other, slide each fiberglass tent pole through the
sleeves that are opposite each other on the roof of
the tent. Straighten the sleeves along the fiberglass
sections. Position poles so that they form an "X"
across the tent.
STEP
4: Starting at the back corners of the tent, insert pins
located at each corner into the ferrules at the ends
of the fiberglass frame sections. To raise tent,
repeat the same procedure at the front corners.
Flexing the fiberglass frame will be necessary.
NOTE:
It may be necessary to hold the corner of the tent
with the ring and pin in place.
STEP
S: Clip plastic hooks to the fiberglass frame
sections.
STEP 6: Stake down tent by inserting tent stake through the
metal rings and stake loops at the base of the tent,
hammering into ground by using a hammer or
mallet. Make sure to pull tent out even and tight.
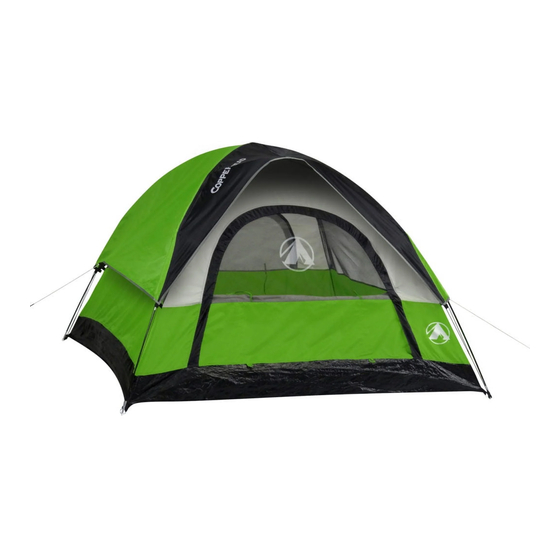
Tent should appear as shown below.
STEP
7: Place the ends of the fiberglass fly pole section
into the pole pockets
on the fly. Flexing the
fiberglass may
be necessary.
STEP
8: Using the ties in the center of the fly, tie the fly
poles into place.
STEP
9: Place fly over tent. Attach hooks on the fly to the
loops located on the tent wall seams. Fasten the
self-fastener at each corner of the fly to the
fiberglass frame.
NOTE:
Tent should appear as shown below.
For your convenience, there is a hanger loop
located inside your tent. This can be used to hang
small camping items.
Also, convenience pockets are provided for storing
small camping gear.
take down tent, follow steps above in the
revt:, se order. Be sure to leave tent unzipped.
Place
into pole bag an Qtakes into stake bag.
To roll tent up, fold into thirds lengthwise
toward the door. At opposite end of the door,
start a small tight roll with poles in pole bag and
roll toward the door. Once rolled, tie a string or
rope around tent to hold into place. Insert into
tent carry bag. Make sure tent is clean and dry
before storing.
Advertisement


Need help?
Do you have a question about the 35950 and is the answer not in the manual?
Questions and answers