
Related Manuals for Nordmende WMI1400NM


Summary of Contents for Nordmende WMI1400NM
- Page 1 Installation and user manual for the integrated washing machine Built-in Washing Machine WMI1400NM...
-
Page 3: Table Of Contents
washing machine contents WARNINGS SPECIFICATIONS INSTALLATION AND ASSEMBLY USING THE APPLIANCE. PRACTICAL TIPS MAINTENANCE AND CLEANING SAFETY AND TROUBLESHOOTING ENVIRONMENTAL WARNINGS... -
Page 4: Warnings
warnings To avoid the risk of fire, electric shocks, injury or damage when using your washing machine, please take the following precautions: This washing machine comes with a Do not climb onto the machine or stand manual that includes operating, maintenance on the open hatch door. -
Page 5: Specifications
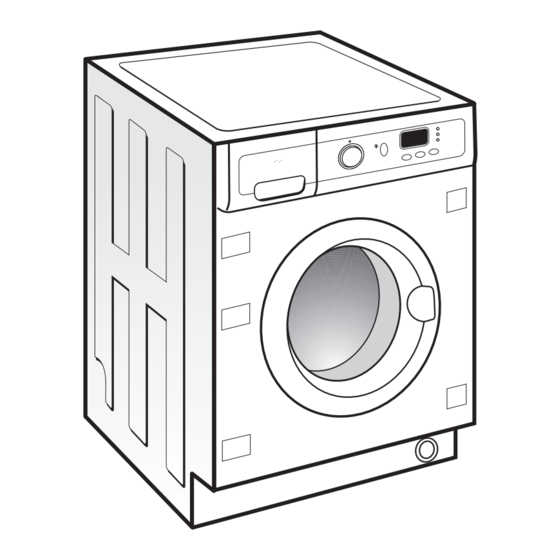
washing machine specifications Power cord Drain hose Control panel Detergent dispenser Stainless steel drum Hatch Accessible filter Adjustable feet ACCESSORIES Water inlet hose. -
Page 6: Installation And Assembly
washing machine installation and assembly UNPACKING AND UNBLOCKING THE WASHING MACHINE UNPACKING a Remove the base, corner protectors and top cover. UNBLOCKING a Remove the screws holding the plastic covers to the back of the washing machine. b Loosen and remove the 3 blocking screws. - Page 7 CONNECTION TO THE MAINS WATER SUPPLY AND DRAINAGE installation and assembly CONNECTION TO THE MAINS WATER SUPPLY The water supply hose is inside the drum: a Connect the bent end of the hose to the threaded inlet of the electrovalve located at the rear of the washing machine.
- Page 8 LEVELLING THE WASHING MACHINE AND CONNECTING IT TO THE MAINS ELECTRICITY SUPPLY installation and assembly LEVELLING Use the adjustable feet to level the washing machine. This will reduce the noise level and prevent it from moving during use. Do not bring the feet too far out, you will achieve better stability.
- Page 9 PRE-CLEANING PRE-CLEANING When your washing machine has been correctly installed, we recommend that you pre-clean the machine. This is to check that the installation, the connections and the drainage are all correct, and to thoroughly clean the inside of the washing machine before any wash programmes are run (see the operating instructions on the following pages).
-
Page 10: Using The Appliance
washing machine using the appliance and practical tips PREPARING GARMENTS FOR WASHING PREPARATION Before placing the clothes in the drum, make sure all the pockets are empty. Any small objects may block the drain pump. SORTING THE CLOTHES a Sort the clothes according to fabric Important and how they are made: We recommend using the delicate... - Page 11 USING DETERGENT AND ADDITIVES using the appliance and practical tips DETERGENT AND ADDITIVES FABRIC SOFTENER a Your washing machine’s detergent PREWASH WASH dispenser has three compartments. b Put the detergent or additive into the detergent dispenser before starting the wash programme. c Liquid detergents may also be used in this washing machine.
- Page 12 SELECTING THE WASH PROGRAMME using the appliance and practical tips start/ stop button screen programme spin and time additional detergent dispenser selector anti-crease delay function button button button start/ stop button screen additional programme spin and time detergent dispenser function selector anti-crease delay...
- Page 13 using the appliance and practical tips When you select the programme, the following information will be displayed: 1 Wash programme phases: Prewash Wash Rinse Spin-drying and draining 2 Spin speed 3 Programme nº (for a few seconds) and then programme duration. 4 Additional functions Easy iron Extra rinse...
- Page 14 Possible option buttons Recommended Programme Fabric type temperature Cotton/Linen Normal cold Cold delicate colours very light soil Cotton/Linen Quick 30ºC whites/colours YES NO very light soil Cotton/Linen Normal 30ºC delicate colours light soil Cotton/Linen Normal 40ºC fast colours light soil Cotton/Linen 5 (*) Normal 60ºC...
- Page 15 Max load Wash kWh/litres min. kWh/litres min. Programme product of clothes description 6 Kg 7 Kg compartment (Kg) Normal wash, rinses, 0,10/49 0,10/54 automatic additive absorption if desired and long final spin SHORT wash, rinses, 0,20/30 0,20/30 automatic additive absorption if desired and long final spin 0,35/49 0,45/54...
- Page 16 SPIN SPEED SELECTION using the appliance and practical tips SPIN-DRYING The wash options must always be selected after choosing the wash programme. Any programme change during selection cancels the previously selected options. a Spin speed selection and anti-crease button The selected programme has its own particular spin speed.
- Page 17 using the appliance and practical tips TIME DELAY Time delay selection button A delay of up to 24 hours can be selected. The delay must be selected after choosing the wash programme. To select the hours of delay, press the clock button.
- Page 18 STARTING UP AND BLOCK FUNCTION SELECTION using the appliance and practical tips STARTING UP Start/Stop button a To start up the washing machine you have to press the Start/Stop button. The minutes remaining until the end of washing and drying will appear on the display at all times.
- Page 19 WASH PROGRAMME PHASES AND POWER CUTS using the appliance and practical tips PROGRAMME PHASES When the programme is running, the programme phase and the time remaining for it to end will appear on the display.. The active phases will appear successively at the top of the display as the programme progresses.
-
Page 20: Maintenance And Cleaning
washing machine maintenance and cleaning MAINTENANCE After each wash, leave the door open for a while to allow the air to circulate freely inside the machine. From time to time, depending on the hardness of your water, it is recommendable to run a full wash cycle using a decalcifying product. - Page 21 CLEANING THE ACCESSIBLE FILTER AND THE OUTSIDE maintenance and cleaning CLEANING THE FILTER Clean the accessible filter if the drain pump is blocked by any foreign objects. a Use a coin to turn the filter cap. b Pull out the filter cap. c Place a container under the drain pump filter to collect any water that comes out of it.
-
Page 22: And Troubleshooting
washing machine safety and troubleshooting If you detect any problems with Indicaor Problems your washing machine, you will probably be able to rectify them No water coming in yourself by consulting the following instructions. Does not drain or spin-dry If this is not the case, unplug the Does not spin-dry appliance and contact the TECHNICAL ASSISTANCE... - Page 23 safety and troubleshooting Why doesn’t the washing If no water is entering, F01 will appear on the display. machine take in water? Indicator F01, no water coming in, this may be due to a cut in the water supply, a tap turned off or a blocked water inlet filter.
- Page 24 safety and troubleshooting Why is there still some water This may be because the dispenser needs cleaning. This simple operation is described in Maintaining and cleaning in the dispenser? the appliance. 1- Cleaning the detergent dispenser. Why can’t I open the hatch immediately after the wash Washing machines today are provided with safety systems has finished?
-
Page 25: Environmental Warnings
environmental warnings eco-note INFORMATION FOR THE CORRECT DISPOSAL OF WASTE ELECTRICAL AND ELECTRONIC APPLIANCES When your appliance is of no further use, it should To highlight the obligation of collaborating with not be disposed of together with general domestic selective waste collection, the product is marked waste. - Page 28 05/09 LJ6A033W8 / B0J6A0900...
Need help?
Do you have a question about the WMI1400NM and is the answer not in the manual?
Questions and answers