
Subscribe to Our Youtube Channel
Related Manuals for Skydroid S1-PRO


Summary of Contents for Skydroid S1-PRO
- Page 1 S1-PRO专业版用户手册 V1.0 四轴 ( ArduCopter ) 泉州云卓科技有限公司 建议: 在您阅读本用户手册时, 边阅读边操作。 您在阅读这些说明时, 如遇到困难请查阅本 用户手册或致电我们售后 ( 400-6996-520 ) 及云卓微信公众平台, 云卓官方群: 318480806 查 看相关问题问答。...
- Page 2 售后服务条款 1.本条款仅适用于泉州云卓科技有限公司所生产的产品, 云卓授权经销商销售的产品亦适用本 条款。 2.本公司产品自购买之日起, 一周内经我司核实为非人为造成的质量问题, 由云卓承担返修产 品的往返快递费, 购买云卓产品一周以上一年以内经我司核实为质量问题, 用户和云卓各自承 担寄出返修产品的快递费。 3.返修时需提供购买凭证和保修卡或网络平台交易记录。 4.云卓产品自购买之日起七天内, 在正常使用情况下出现非人为造成的质量问题, 外观无损坏, 凭保修卡及购机凭证在经销商处协商可以免费更换同型号产品; 经销商在收到更换产品时烦请 第一时间通知云卓公司予以备案更换。 5.云卓产品将由泉州云卓科技有限公司提供终身售后服务, 属于非人为造成的质量问题, 一年 内免费保修; 对于自购买之日起人为的损坏、 改装、 拆机及超过一年免费保修期的, 用户须支付 往返邮费及维修费用。 6.为确保您的权益受到保护, 并能及时有效的为您服务, 请在购买云卓产品时完整填写好保修 卡及索要购机凭证。 用户享受本售后服务条款必须提供保修卡及购机凭证。 7.返修产品将于云卓公司收到后的 15 个工作日内寄回给顾客, 并附上维修报告。 8.以上售后服务条款仅限于中国大陆销售的云卓产品。 港澳台及海外客户的售后问题发至邮箱 sales01@skydroid.xin, 具体售后细则视情况而定。...
-
Page 3: Table Of Contents
1.3、 使用建议 ............................2、 遥控器概览 ........................2.1、 遥控器 (美国手模式) ........................... 2.2、 遥控器功能概述 ..........................2.3、 遥控器充电 .......................... 2.4、 遥控器天线角度 ..........................3、 Skydroid Fly APP ....................3.1、 地面站调试软件Skydroid Fly安装 ..........................3.2、 APP主界面 ..........................4、 第一次接触准备 ..........................4.1、 机架类型选择 ............................. 4.2、 飞控监测 .......................... -
Page 4: 1、 S1-Pro概览
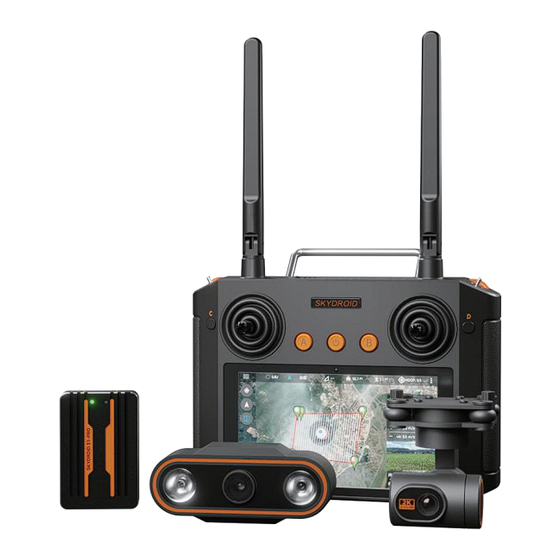
1、 S1-PRO概览 1.1、 部件 1.2、 端口和技术参数 状态灯 对频按钮 网口摄像头 供电口 PWM 1 2 3 4 5 6 7 8 9 10 11 12 UART Sbus输出... - Page 5 S1-PRO航电系统 S1-PRO航电系统 技术参数 技术参数 主处理器 主处理器 STM32F407 STM32F407 陀螺仪 陀螺仪 BMI088 BMI088 电子罗盘 电子罗盘 IST8310 IST8310 气压计 气压计 LPS22HB LPS22HB 接口 接口 GH1.25 GH1.25 鞭状天线 鞭状天线 默认30cm、 40cm、 50cm可选 默认30cm、 40cm、 50cm可选 PWM输出 PWM输出 12 OneShot/PWM输出 (可配置) 12 OneShot/PWM输出 (可配置)...
- Page 6 C10参数 产品名称 输入电源 7.2V~72V直流 工作电流 210mA 工作环境温度 -10℃~+60℃ 重量 外形尺寸 (长宽高) 51mm*43.3mm*61.7mm 俯仰角度 -90°~+10° 指向轴角度 -90°~+90° 横滚轴角度 45° 像素 有效像素: 400W 镜头规格 1/2.7 sensor EFL=2.4mm 输出方式 RTSP码流H265, 兼容H264 图传分辨率 1080P 视频录像存储分辨率 H264 视频存储格式 (可使用PotPlayer播放器或者其他支持H264格式的播放器播放) 照片存储分辨率 照片存储格式 JPEG 吊装模式 (出厂默认) 工作模式 倒装模式(可自行设置)...
-
Page 7: 2、 遥控器概览
1.3、 使用建议 对于初次使用 S1-PRO 飞控的用户来说, 建议分步骤完成飞控的入门使用: 1、 首先安装地面站控制软件, 熟悉地面站界面的各个菜单功能; 2、 组装飞机, 完成动力套的装配; 3、 遥控器连接飞控完成罗盘校准和电机校准; 4、 检查各类参数设定; 5、 第一次解锁起飞; 6、 飞控各类高阶应用, 辅助通道设置。 2、 遥控器概览 2.1、 遥控器 (美国手模式)... -
Page 8: 遥控器充电
序号 注解 注解 序号 2.4G 4dBm天线 右摇杆X2、 Y2 拨动三段开关/飞行模式 按键D (暂无功能) 波轮H (暂无功能) 波轮G (暂无功能) 按键C (暂无功能) 拨动三段开关 (暂无功能) 左摇杆X1、 Y1 防尘塞 显示屏 SIM卡接插口 喊话MIC Type-C充电口 按键A (暂无功能) 4pin网口 开关机按键 PPM输出/串口线接口 按键B (暂无功能) 2.2、 遥控器功能概述 序号 功能键 功能描述 - 控制杆向上推、 飞行器上升 油门/转向控制杆... - Page 9 2.4、 遥控器天线角度 (1)调整遥控器天线角度, 尽量正对飞行器飞行方向; (2)天线相互不要形成遮挡, 交叉。 正确操作 天线展开并垂直向上 错误操作 天线不能交叉 天线不能与遥控器平行...
-
Page 10: 3、 Skydroid Fly App
3、 Skydroid Fly APP 3.1、 需要下载Skydroid Fly APP, 请扫描二维码或登录www.skydroid.xin下载。 3.2、 APP主页面: 电量显示 飞行模式 信号强度 离家距离 飞行高度 GPS卫星个数 飞行时间 人的位置 飞机的位置 姿态 轨迹克隆 空速 空速 地速 隐藏侧边栏 爬升下降 速度 一键解锁 图像显示窗口 参数设置 拍照 录像 喊话 隐藏侧边栏... -
Page 11: 4、 第一次接触准备
4、 第一次接触准备 (1) 对频 ①S1Pro上电, 对频指示灯红灯常亮, 绿灯慢闪; ②上电后等待30s左右, 长按对频按钮直到绿灯快速闪烁; ③打开H12Pro助手, 点击对频, 等待显示对频成功; ④对频指示灯将会持续闪烁两分钟后绿灯常亮。 (2) 注册、 激活 遥控器插SIM卡或者连接WIFI, 打开Skydroid Fly APP 选择新用户注册 填入手机号, 密码, 获取验证码, 验证码区分大小写, 注册成功后登录... - Page 12 登陆后数传会自动连接上, 此时第一次使用将会弹出激活框, 请点击 “立即前往” , 去激活 界面激活 初级飞控调参密码999, 高级飞控调参密码999999。 首次使用初级调参密码即可。...
-
Page 13: 飞控监测
4.1、 机架类型选择 四轴, 六轴, 八轴, Y6轴, 3轴点击图案即可保存机架类型。 4.2、 飞控监测 通道查看: 遥控器通道输入舵量值。 输出查看: S1Pro的PWM通道输出舵量值... -
Page 14: Rtk天线设置
4.3、 RTK天线设置 使用RTK天线时勾选, 使用GPS天线时则不勾选。 ( 根据购买的是否为rtk套装勾选) 4.4、 水平校准 步骤1: 将飞行器放到水平的地面上; 步骤2: 确保机身水平且无震动; 步骤3: 点击 (校准) , 开始水平校准; 步骤4: 重新给机器上电。... - Page 15 4.5、 罗盘校准 对机器进行椭球校准和水平加垂直校准 (详细信息可点击右边 ? 查看) 注意: 使用定向套装时不需要校准罗盘 4.6、 电调校准 步骤 1: 连接飞行器, 从机器上移除螺旋桨; 步骤 2: 点击 【校准】 ; 步骤 3: 拔掉飞行器电池; 步骤 4: 重新插上电池; 步骤 5: 程序将会自动校准电调(大约15秒) ; 步骤 6: 拔下并再次插上电池, 即可正常使用。...
-
Page 16: 基础设置
4.7、 电机测试 步骤1: 输入油门值, 建议5%-10% (大飞机电机KV值低, 可以再设置大一些) ; 步骤2: 输入持续时间, 单位秒; 步骤3: 按图片转向, 电机序号测试电机旋转方向是否正确。 4.8、 基础设置 4.8.1、 姿态设置 调节感度与阻尼来改善飞行器的飞行姿态。 ( 详细信息可点击旁边 ? )... - Page 17 4.8.2、 导航设置 设置执行航线任务时或者是飞机处于自动模式下的一些参数。 ( 详细信息可点击旁边 ? ) 4.8.3、 速度设置 调节飞行器的飞行速度。 ( 详细信息可点击旁边 ? )...
- Page 18 4.8.4、 电量设置 低电压返航预警: 达到此电压值时, APP将发出返航报警提示。 强制返航电压: 达到此电压值时, 飞行器将强制返航。 强制降落电压预警: 达到此电压值时, APP将发出降落报警提示。 强制降落电压: 达到此电压值时, 飞行器将强制原地降落。 未解锁补偿电压: 飞机通电保持未解锁状态, 万用表测量电池当前电压, 再看数传显示的电压, 填入差值。 满载补偿电压: 飞机需要满载载荷, 悬停20秒, 记录当前电压。 然后立即降落, 等待20秒, 记录降 落电压, 填入差值。 注意: 具体电压设置可点击旁边 ? 进行参考...
-
Page 19: 其他设置
4.9、 其他设置 在其他设置页面里, 可设置外八电极上锁 (美国手) 是否开启以及外八多久上锁。 4.10、 辅助设置 1.先在H12助手 (设备助手) 里设置好自己需要控制舵机的通道, 并设置好失控保护值, 失控保 护值为0是保持当前状态。 对应遥控器上的按键 失控后输出的舵量值 2.遥控器对频连接飞控, 打开飞控APP: Skydroid Fly, 在飞控调参-999-辅助设置里修改自己需 要的通道。... -
Page 20: 飞行模式介绍
3.舵机的失控保护需要飞机解锁后才可以触发。 测试方法: 飞机不装桨叶, 解锁后, 遥控器关控, 测试舵机是否执行。 4.11、 飞行模式介绍 在GPS信号差或指南针受到干扰, 飞行器会进入定高模 式, 只支持手动飞行。 定高模式下, 飞行器定点异常, 请 定高模式 尽快降落。 飞行模式 (飞控判断 GPS信号, 使用GPS实现飞行器的精准悬停、 稳定飞行模式等。 GPS模式 切换相对 应的模式) 当飞行器拨到返航档位或失控, 飞行器将爬升到返航高 返航模式 度并自动返航。 *飞行模式由遥控器序号 的拨动三段开关设置。 最大速度 2m/s, 上升速度: 1.2m/s, 下降速度0.4m/s 低速 飞行速度 最大速度 12m/s, 上升速度: 4.2m/s, 下降速度2.0m/s 中速... -
Page 21: 5、 失控保护
4.12、 激光避障模块的使用 激光避障功能: 仅在飞机返航和自动模式下生效, 遇到障碍物时停止前进, 自动爬升, 避过障碍 物后, 继续前进。 5、 失控保护 飞行器返航方式分别为RTL返航、 智能低电量返航以及失控返航。 起飞时,GPS>12星,飞行器成 功记录到返航点。 如果是无GPS信号强制起飞, 则以最新GPS>12星 时的位置记录为返航点。 1.记录返航点 2.触发返航条件 3.调整机头方向 4.按APP设置的返航高度进行返航 (1) 不管飞行器目前高度, 如果飞行器在水平距离5米之内, 直接降 返航过程 落。 (2) 如果飞机距离5米之外、 20米之内则按当前高度返航, 最低返航高 度5米。 (3) 20米之外, 飞行器高于返航高度直接返航, 不足返航高度升高到 返航高度再执行返航。 APP一键返航/遥控器按键一键返航 一键返航 1.飞行器会根据强制返航电压自动执行低电压返航。... -
Page 22: 6、 硬件安装
6、 硬件安装 首先你要拥有一个飞行器, 这里我们以 X 型四轴为例, 在你拥有了一个完整安装好的多轴飞行 器后, 请按照以下步骤来安装你的 S1-PRO。 (1) 在飞行器上安装S1-PRO, 安装固定飞控在机架中心位置, 并确保安装位置水平, 天线在前为 机头方向。 (2) 遥控器对频, 连接 Skydroid Fly, 进行之前几步校准你的飞行器 。 (3) 遥杆内八进行解锁, 如解锁正常, 安装好桨后进行正常飞行; 如解锁不正常, 查找APP红色故 障提示, 进行解决 。 6.1、 在飞行器上安装S1-PRO 尽可能在靠近载具重心的位置, 使用提供的泡棉安装 S1-PRO。 确保飞控指向前方。 安装GPS, GPS 可不分方向, 校准罗盘即可。... -
Page 23: 将飞控与你的多轴连接起来 6.2.1、 电机顺序转向选择
6.2、 将飞控与你的多轴连接起来 6.2.1、 电机顺序转向选择 绿色 CW 顺时针转 蓝色 CCW 逆时针转 注意:因飞控无电压输出, 三轴机型接舵机需要外加BEC 模块插针给舵机供电。... -
Page 24: 配件连接
6.2.2、 顺时针和逆时针桨的识别 顺时针方向 (称为反桨) 和逆时针 (称为正桨) 。 推进器螺旋桨通常标有 P。 然而并非所有的螺旋 桨被标记和这两种类型通常可以在任一旋转方向。 因此, 按照如下桨的形状来判断是比较可靠 的。 你可以参考这些特征, 正确的识别桨的方向。 6.2.3、 配件连接 激光避障模块3P连接线插在最右侧排针位置, 黑线在上。 激光避障 PWM 1 2 3 4 5 6 7 8 9 10 11 12 Sbus输出... - Page 25 6.2.4、 网口摄像头的安装 POW+SBUS GND 7.2V-72V GND SBUS ➁ 网口线 ➀ 7.2V-72V ①电源 红色JST-2P公头, 供电电源:7.2V-72V (直流电源或者锂电池) RX-: 网络IP信号 ②网口线 RX+: 网络IP信号 网络IP信号 TX-: 网络IP信号 (信号传输) TX+: 网络IP信号 视频传输 网络IP高清视频输出 RTSP码流rtsp://192.168.144.108:554/stream=0 云台相机目前可支持最高容量为64 GB的金士顿Micro SD卡。 由于云 台相机要求快速读写1080P视频数据, 请使用标配的闪迪16G内存卡 存储卡 或者另购金士顿64G Class 10规格的Micro SD卡, 以保证视频正常录制。 注:...
- Page 26 6.3、 基础飞行 1.飞行前先把电池充满电。 2.把飞行器放置在平整开阔地面上, 用户面朝机尾 (电池尾插为机尾) 。 3.正确安装螺旋桨。 4.开启遥控器 (长按开机按键) , 把电池插头插入飞机供电口中。 5. 等待飞行器电机长滴一声后自检成功。 6.打开Skydroid Fly APP, 点击连接图标, 即可链接数传图传, 起飞模式建议为GPS模式, 搜星 >12颗才能解锁起飞。 7.内八拨动摇杆, 解锁飞机, 往上缓慢推油门杆, 让飞行器平稳起飞。 8.如大飞机晃动, 需要在app里进行感度调节 9.下拉油门杆使飞行器下降。 10.落地后, 将油门杆拉到最低位置并保持3秒以上直至电机停止。 11.停机后依次断开飞行器电源和遥控器电源。...
-
Page 27: 地理围栏
6.4、 地理围栏 默认关闭地理围栏, 如有需要在飞控调参-地理围栏里开启。 这是一种安全保护机制,保护飞机不飞出你设定的范围, 开启此机制会检测 GPS 是否定位, 当 没有定位无法解锁。 7、 日志下载与查看 Skydroid Flyapp里飞行记录查看。... -
Page 28: 8、 常见问题解答
8、 常见问题解答 1.遥控器无法连接。 ①查看APP类型是否选对 ②有无后台占用Skydroid Fly地面站 2.图像卡顿断连 ①调整天线角度对准飞机, 中间不要有阻挡 ②更换飞行场地, 请勿在高楼、 信号塔附近飞行 3.飞行器悬停不稳 ①更换飞行场地,请勿在高楼、 信号塔附近飞行 ②进行飞行器指南针校准和水平较准 ③判断是否风力过大影响飞行 ④微调感度 4.飞行器GPS精度不准或无法通过GPS精度测试 ①在室外空旷的地方捜索GPS达11颗及以上 5.拍摄不清晰 ①检查镜头部位是否有指纹、 污渍, 用酒精擦一下 ②在光线良好环境使用 6.镜头朦胧起雾 ①气候潮湿导致镜头起雾, 更换飞行器储存位置 ②存放时放置干燥剂 7.拍摄的图片或视频丢失 录制视频要执行结束录制操作,否则有可能导致视频损坏或者丢失。... - Page 29 免责免除 使用本产品时,因下列原因造成的直接或间接损害, 云卓不承担赔偿责任与法律责任。 1.用户在饮酒、 吸毒、 药物麻醉、 头晕、 乏力、 恶心等其他身体状况不佳或精神状况不佳的情况 下, 造成损害。 2 .用户的主观故意或判断失误造成的人身伤害、 财产损失与法律责任等。 3.因事故发生而引起的任何有关精神损害的赔偿。 4.因用户在自然保护区等法律法规禁止的飞行区域飞行造成的损害。 5.自行改装或更换非云卓生产的配件或零件, 致使飞行器运行不良而造成的其它损害。 6.飞行器自然磨损 (飞行时间达到100小时及以上) 、 腐朽、 线路老化等造成飞行器本身的运行不 良。 7.飞行器发出低电压报警,仍不降落, 导致飞行器坠落。 8.明知飞行器处于非正常状态 (如进水、 油、 土、 沙等其它不明物质以及组装未完成, 主要部件发 生明显故障,配件存在显而易见的缺损或缺失) ,仍然强制飞行而造成的损害。 9.飞行器处于磁场干扰区、 无线电干扰区 (如高压电线附近、 大型电力设备、 广播电视发射塔、 手 机基站等区域)...
- Page 30 建议 1.本产品与外界环境能够互相兼容, 满足FCC中对无线视频方面的限定要求。 本产品遵从FCC中第15部分规定,其包含两个方面: (1)产品工作不会对外产生有害干扰; (2)同时产品能够承受可能会导致产品异常工作的有害干扰。 注意: 对设备进行非法修改及变更所导致的任何无线及它的干扰, 制造商对此类事件不负有责 任。 因为这些修改及变更已经超出了用户的操作权限。 注意: 本产品已经通过测试, 并已证明符 合FCC中第15部分对B类数字 产品规定要求。 这些规定是为了确保产品在安装使用时,不会对居民环境造成有害影响。 本产品工作时会对外 辐射射频能量,若未按指令去安装使用本产品,可能造成对无线通信的干扰。 然而,在一些特定的 安装使用场合,这里并不保证干扰不会产生。 用户可以通过对产品的开关机,来确定一些干扰是 不是由于本产品所引起。 假如产品确实已经对无线及视频接收设备产生了干扰,鼓励用户对以 下一些纠正措施: √ 适当调整接收天线的方位。 √ 增加本产品与接收设备之间的距离。 √ 向经销商或有经验的无线/视频技术员寻求帮助。 2.当使用本产品时,确保产品天线离人的距离不小于20cm。 遥控器内部的USB接口, 以及飞机 的USB接口只能与USB2.0及以上通信接口相连。 禁止与USB电源接口相连。 请选用正确型号的 电池, 使用其它型号的电池,会有爆炸的危险。 同时, 请按照指令正确处理使用过的电池。 因此,...
- Page 31 请注意: (1)在某些情况下,出于私人目的拍摄或者摄录表演、 展会或其它商业建筑,也可能造成对他人知 识产权的侵害; (2)在某些地区和国家,小型航拍模型亦被禁止参与任何商业行为。 如果您在安装过程中遇到无法解决的问题, 请与云卓正式授权的代理商或云卓技术支持取得联 系。 本产品及手册的知识产权为泉州云卓科技有限公司所有,未经书面许可,任何机构和个人不 得以任何形式翻版、 复制和发布。 如引用、 刊发,需注明出处为泉州云卓科技有限公司, 且不得对 使用手册进行有悖原意的引用。...
- Page 32 温馨提示: 使用前请仔细阅读操作说明书! • 充电时要随时有人照看 • 充电完成后请立即拔掉充电线 • 螺旋桨部件可能导致伤害 • 此款产品不是玩具 • 不适合14岁以下的儿童 微信公众号 泉州云卓科技全国服务热线 400-6996-520 产品名称: S1-PRO 制造商: 泉州云卓科技有限公司 地址: 福建省泉州市高新产业园区海西育成基地A幢2楼 邮箱: sales01@skydroid.xin www.skydroid.xin...
- Page 33 S1-Pro User Manual V1.0 Skydroid Co.,Ltd Suggestion: When you read this user manual, operate it at the same time. When you read these instructions, if you encounter difficulties, please refer to this user manual or call our after-sales service (400-6996-520) or visit our WeChat public platform, also, you can visit our official QQ chat group: 318480806 to view related questions and answers.
- Page 34 Skydroid WeChat public platform After-sales service terms 1. These terms are only applicable to the products produced by Skydroid Co., Ltd., and the products sold by authorized Skydroid distributors are also applicable to this clause. 2. From the date of purchase, our company has verified that the quality problems are not caused by human beings within one week, and Skydroid will afford the round-trip express fee for the repaired products.
-
Page 35: Content
4.12、Use of laser obstacle avoidance module ......................5、Out of control protection ........................6、Hardware installation ....................6.1、Install S1-PRO on the drone ..............6.2、Connect flight control to your multi axis system ................6.2.1、Selection of motor steering sequence ........6.2.2、Identification of clockwise and counterclockwise propellers ...................... -
Page 36: 1、Overview Of S1-Pro
1、Overview of S1-PRO 1.1、Compunents 1.2、Ports and Technical Parameters Status light Binding button Webcam Power Port PWM 1 2 3 4 5 6 7 8 9 10 11 12 UART SBUS Output... - Page 37 S1-PRO ECS Technical Parameters Processor STM32F407 Gyro BMI088 Electronic compass IST8310 Barometer LPS22HB Interface GH1.25 Whip antenna 30cm/40cm/50cm Optional PWM Output 12 OneShot/PWM Output(configurable) Receiver Built-in R12 PRO Hardware Receiver Antenna Gain 4dBm Receiver Transmit Power 17.5dBm RC OUT SBUS...
- Page 38 Product name Input power 7.2V~72V DC Operating current 210mA Working temperature -10℃~+60℃ Weight Overall dimension (L, W, H) 51mm*43.3mm*61.7mm Pitch angle -90°~+10° Pointing axis angle -90°~+90° Rolling angle 45° Pixel Effective pixel:400W Lens specification 1/2.7 sensor EFL=2.4mm Output mode RTSP code stream H265,compatible with H264 Image transmission resolution 1080P Video recording storage resolution...
-
Page 39: Recommendations For Use
1.3、Recommendations for use For users who are using the S1-PRO flight controller for the first time, it is recommended to complete the introductory use of the flight controller in steps: 1. First install the ground station control app, and be familiar with the various menu functions of it;... -
Page 40: Overview Of The Remote Control Functions
Annotation Annotation 2.4G 4dBm antenna Right side Stick X2、Y2 Button D (No function) Toggle 3 positions switcher/ Flying mode Thumbwheel switch G (No function) Thumbwheel switch H (No function) Button C (No function) Toggle 3 positions switcher (No function) Left side Stick X1、Y1 Dust-free plug screen SIM card slot... -
Page 41: Remote Control Antenna Angle
2.4、Remote control antenna angle (1)Adjust the angle of the remote control antenna to face the drone’s flight direction as much as possible; (2)Antennas should not obstruct or cross with each other. Correct operation Unfold the antenna and vertically upwards Wrong operation Antennas cannot cross The antenna cannot be parallel to the remote control... -
Page 42: 3、Skydroid Fly App
3、 Skydroid Fly APP 3.1、Please use Skydroid Fly APP, you can download by scanning the QR code from the card in the package or from our official website: www.skydroid.xin 3.2、App main interface Signal strength Flying height Power display Flying mode... -
Page 43: 4、Preparation For The First Use
4、 Preparation for the first use Pairing and binding ①Power on the S1Pro, and the binding indicator light is constantly red and the green light flashing slowly; ②Wait for about 30 seconds after powering on, press and hold the frequency bind- ing button until the green light flashes quickly;... -
Page 44: Flight Control Monitoring
4.2、 Flight control monitoring Channel check: Input the rudder value into the remote control channel. Output check: PWM channel output rudder value of S1Pro. 4.3、 RTK antenna settings Choose when using the RTK antenna, and do not choose when using the GPS antenna. (Check the purchased item is a RTK version or not) -
Page 45: Horizontal Calibration
4.4、 Horizontal calibration Step 1: Place the drone on a flat level ground; Step 2: Ensure that the drone is in a flat level and free from vibration; Step 3: Click (Calibration) to start horizontal calibration; Step 4: Re-power on the drone. 4.5、... -
Page 46: Esc Calibration
4.6、 ESC calibration Step 1: Connect the drone and remove the propeller from the it; Step 2: Click [Calibration]; Step 3: Power off the drone; Step 4: Re-power on the battery; Step 5: The program will automatically calibrate the ESC (approximately 15 seconds); Step 6: Unplug and reinsert the battery to ensure normal use. -
Page 47: Basic Settings
4.8、 Basic Settings 4.8.1、 Attitude Setting Adjust sensitivity and damping to improve the flight attitude of the drone. (For detailed information, click to “?” to check) 4.8.2、 Navigation Settings Set some parameters when executing route tasks or when the drone is in automatic mode. -
Page 48: Speed Setting
4.8.3、 Speed Setting Adjust the flight speed of the drone. (For detailed information, click to “?” to check) 4.8.4、 Power setting Low voltage return warning: When this voltage value is reached, the APP will send out a return warning sound. Forced return voltage: When this voltage value is reached, the drone will forcibly return. -
Page 49: Other Settings
4.9、 Other Settings In other settings pages, you can set V mode to lock (Mode 2) and how long to be locked. 4.10、 Auxiliary settings 1. First set the channel you need to control the servo in the H12 Tool App (H12 assis- tant), and set the fail-safe protection value. -
Page 50: Introduction Of Airplane Modes
3.The loss of control protection of the servo can only be triggered after the drone is unlocked. Test way: Unequipped the propellers on the drone, and after unlocking, turn off the remote control to test whether the servo is running or not. 4.11、... -
Page 51: Use Of Laser Obstacle Avoidance Module
4.12、Use of laser obstacle avoidance module Laser obstacle avoidance function: only effective in drone return and automatic mode. When encountering obstacles, it stops moving forward, automatically climbs up, and after avoiding obstacles, it continues to move forward. 5、Out of control protection The return methods of the drone are RTL return, smart low battery return, and lost connection return. -
Page 52: 6、Hardware Installation
S1-PRO. (1) Install the S1-PRO on the drone, make sure it is installed in the center of the rack, and ensure that the installation position is horizontal, and the antenna is in the direction of the nose. -
Page 53: Connect Flight Control To Your Multi Axis System
6.2、Connect flight control to your multi axis system 6.2.1、Selection of motor steering sequence Green CW rotates clockwise Blue CCW rotates counterclockwise Note: Because the flight controller has no voltage output, the three-axis model drone needs to add BEC module pins to supply power to the servo. -
Page 54: Identification Of Clockwise And Counterclockwise Propellers
6.2.2、Identification of clockwise and counterclockwise propellers Clockwise (called reverse propeller) and counterclockwise (called forward propeller). Thruster propellers are usually marked with a “P”. However not all propellers are marked, so both types can usually rotate in either direction. Therefore, it is more reliable to judge the propellers according to its shape. -
Page 55: Installation Of Webcam
6.2.4、Installation of Webcam POW+SBUS GND 7.2V-72V GND SBUS ➁ Network port cable ➀ 7.2V-72V red JST-2P male plug, power supply: 7.2V~72V ①Power cable (DC power supply or lithium battery) RX -: network IP signal ②Network port cable (signal RX+:network IP signal Network IP signal transmission TX-:network IP signal... -
Page 56: Basic Flying
5. Wait for the drone motor to make a long beep before the self-check succeeds. 6. Open the Skydroid Ground Station APP and click on the connection icon to connect to the video/image transmission. The GPS mode is recommended for take-off. It will search for satellites automatically, when the numbers of satellites more than 12 pieces, it can unlock and take-off. -
Page 57: Geo-Fence
This is a security protection mechanism that protects the drone from flying out of the range you set. Enabling this mechanism will detect whether GPS is positioned, and it cannot be unlocked without positioning. 7、Log download and checking Check flight records in Skydroid Fly app. -
Page 58: 8、Faq
1.The remote control cannot be connected. ①Check whether the APP type is correct. ②Whether the background occupies the Skydroid Fly APP or not. 2.The image is stuck and disconnected ①Adjust the angle of the antenna to aim at the drone, and there should be no obstruc- tion in the middle. - Page 59 16.The user fails to comply with the use methods and various precautions mentioned in the user manual or user quick start guide of Skydroid official website and the loss and legal responsibility caused by various precautions.
- Page 60 Using other types of batteries may cause explosion. At the same time, please follow the instructions to properly dispose of the used battery. Therefore, we Skydroid promises that this product meets the basic requirements speci- fied in 19991/EC and some other related directive requirements.
- Page 61 Skydroid Co., Ltd. Without written permission, no organization or individual may reproduce, copy and publish in any form. If quoted or published, the source should be indicated as Skydroid Co., Ltd., and the manual should not be quoted contrary to the original intent.
- Page 62 • Propeller components may cause injury • This product is not a toy • Not suitable for children under 14 years WeChat public account Skydroid National Service Hotline 400-6996-520 Product name: S1-PRO Manufacturer: Skydroid Co., Ltd Address: 2nd Floor, Building A, Haixi Yucheng Base, High-tech Industrial Park, Quanzhou City, Fujian China.
Need help?
Do you have a question about the S1-PRO and is the answer not in the manual?
Questions and answers