Table of Contents
Advertisement
Quick Links
Advertisement
Table of Contents

Related Manuals for Beko EM 2192 O


Summary of Contents for Beko EM 2192 O
- Page 1 Fully Automatic Espresso Machine User Manual EM 2192 O 01M-8911411200-1222-13...
-
Page 2: Explanation Of Symbols
Please read this user manual first! Dear Customer, Thank you for prefering a Beko product. We hope that you get the best results from your product which has been manufactured with high quality and state- of-the-art technology. Therefore, please read this entire user manual and all other accompanying documents carefully before using the product and keep it as a reference for future use. -
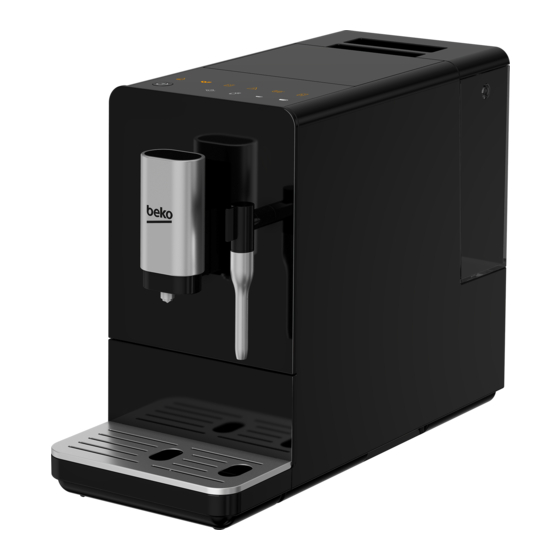
Page 3: Technical Data
Technical data 1. Coffee Beans Container Cover Power supply: 2. Coffee Bean Container 220-240 V~, 50-60 Hz 3. Control Panel Power: 1350 W 4. Adjustable coffee spout 5. Coffee Grounds Container Technical and design 6. Internal Drip Tray modifications reserved. 7. -
Page 4: Important Instructions For Safety And Environment
Important instructions for safety and environment This section includes the safety instructions that will help providing protection against personal injury and material loss risks. Failure to follow these instructions invalidates the granted warranty. 1.1 Danger of electric current Danger to life by electric current! Contact with live wires or components could lead to serious injury or even death! Observe the following safety precautions to avoid... -
Page 5: Danger Of Burning Or Scalding
Important instructions for safety and environment 1.2 Danger of burning or scalding Parts of the coffee machine can become very hot during operation! Dispensed drinks and escaping steam are very hot! Observe the following safety precautions to avoid burning/scalding yourself and/or others: Do not touch either of the metal sleeves on both •... - Page 6 Important instructions for safety and environment If the connecting cable is damaged, it should only • be replaced by a service agent recommended by the manufacturer in order to prevent any danger! Please contact the manufacturer or his customer service. Repairs to the coffee machine must only be carried •...
- Page 7 Important instructions for safety and environment This appliance can be used by children from the age • of 8 up as well as by persons with reduced physical, sensory or mental abilities or with lacking experience and/or knowledge, if these persons are supervised or have been instructed how to use the appliance in a safe way and have understood the hazards which could arise from using it.
- Page 8 Important instructions for safety and environment Never immerse the coffee machine itself, the • mains cable or the mains plug into water or other liquids. Do not clean the coffee machine or accessories in • a dish washer. Do not pour any other liquids apart from water or •...
- Page 9 Important instructions for safety and environment Unplug the appliance before each cleaning and • when the appliance is not in use. Place the appliance in a way so that the plug is • always accessible. Always use the appliance on a stable, flat, clean •...
-
Page 10: Intended Use
WARNING: Observe the proce- The fully automatic coffee ma- dures described in chine Beko is intended for use in this user manual. homes and similar applications, for No claims of any kind will be accepted instance in staff kitchens, shops,... -
Page 11: Compliance With The Weee Directive And Disposing Of The Waste Product
Important instructions for safety and environment The manufacturer assumes no li- Each household performs impor- ability for damage or injury result- tant role in recovering and recy- ing from failure to observe the user cling of old appliance. Appropriate manual, use for other than the disposal of used appliance helps intended purpose, unprofessional prevent potential negative conse-... -
Page 12: Control Panel
Display 2.1 Control Panel Flashing: Low water level/ Water tank missing Lack of bean Lights up stably: coffee grounds container is full Flashing: Internal Drip Tray/coffee grounds container is missing Lights up stably: Brewer is missing/ installed improperly Flashing: Service door is opened / installed improperly Lights up stably: Requires to do descaling Flashing: Descaling is under process Empty System Function is running... -
Page 13: Installation
Preparation 3.1 Installation Remove any protective films, stickers and any other packing material on the appliance. 150mm 150mm 150mm 150mm 150mm Choose a safe and stable sur- Insert the external drip tray. Unwind and straighten the face with an easily reachable Make sure it is inserted cor- power cord and insert the power supply and allow mini-... -
Page 14: Filing The Water Tank
Preparation 3.2 Filing the water tank About the protect program: If the water tank is not fully placed into the machine, a protection mode will be acti- vated in 15 seconds during brewing process. Hot water button will lights on control panel. 1. - Page 15 Preparation WARNING: Never fill the water tank with warm, hot, spar- kling water or any other liquid which might damage the water tank and the machine. Place the water tank back by Close the water tank by using using the lid as the handle. the lid.
-
Page 16: Operation
Operation 4.1 Grinding Adjustment You can adjust the grinder to suit the roast of your coffee by turning ad- juster knob in the bean container: When the grinder is grinding the coffee bean when it is making the coffee, you can turn the adjust knob to do the adjustment. - Page 17 Operation 4.2 Filing the bean container When is flashing, the appliance needs to be filled with cof- fee bean. Remove the bean contai- Slowly pour in the coffee be- Place the container lid back. ner lid. ans. WARNING: Fill the coffee bean container only with coffee beans.
- Page 18 Operation 4.3 Making Your Coffee Switch on the appliance by Place a cup under the coffee The espresso button being pressing the power on/off spout and adjust the height pressed will light on and the button. The appliance is then of the spout the fit the cup.
-
Page 19: Hot Water
Operation 4.4 Adjustiing The Volume Of Your Coffee/ Hot Water You can memorize your desired volume of coffee for both strong espres- so and mild espresso and also the hot water from 25ml to 250ml. bipp! When making your cof- When the volume of coffee fee (either strong espres- meets your desired volume,... -
Page 20: Mode Selection
Operation 4.6 Mode Selection The machine has two different setting: default setting, ECO mode and speed mode. In ECO mode, the appliance helps to save more energy. In speed mode, the user can make their coffee faster than in default setting. ECO Mode Speed Mode Default Setting... - Page 21 Operation 3. Press the hot water button for ECO mode, strong espresso button for speed mode and mild espresso button for default setting. Two Beep sound will be heard indicates that the mode is being selected. (Note: If you are pressing the relative lights on button for each mode, the machine will not response).
-
Page 22: Cleaning Of The Appliance
Cleaning 5.1 Cleaning of the appliance 1. Disconnect the power cord from the mains supply outlet. 2. Pour away all the water in the internal and external drip tray 3. Use a damped cloth or non-scratching cleaner to clean the water stains on the appliance. -
Page 23: Self-Cleaning
Cleaning Pull down the service door Squeeze the brewer unit. Re- Clean the coffee outlet line and remove it. move the brewer. Wash the with brush. brewer with fresh water. Dry the brewer afterwards. When lights up stably, it indicates that the brewer is missing / installed improperly. - Page 24 Cleaning 4. Place a sufficient large container under the coffee spout. 5. In standby condition, press and hold and strong espresso button for 5 seconds. A beep sound will be heard with and strong espresso button will be flashing. 6. Press strong espresso button to confirm undergoing the self-cleaning process.
-
Page 25: Manual Rinsing
Cleaning 4. When the empty system function is completed, the appliance will switch off automatically. WARNING: After perform EMPTY SYSYEM FUNCTION; press the hot water button until water can come out from spout when the coffee maker is reused again. 5.4 Manual Rinsing You can perform a manual rinsing cycle to clean the coffee nozzle after use. - Page 26 Cleaning Cancelling the auto-clean mode Your appliance cleans itself automatically before and after each brewing operation. You may follow the steps below to cancel the auto-clean mode. • Turn on the appliance by pressing the On-Off switch and wait until it engages the Stand-by position.
-
Page 27: Troubleshooting
Troubleshooting Problem Cause Solution The appliance does not work. The appliance is not connected Plug in and press the switch. to the mains. Check the cable and the Plug No or delayed response in Appliance under Unplug the appliance. Restart several trials of pressing on electromagnetic interference after few minutes... - Page 28 Troubleshooting Problem Cause Solution Lack of bean indicator flashes Internal coffee powder outlet To follow the steps of section but there is still a lot of coffee is blocked. cleaning coffee powder outlet. bean inside the container. The appliance no longer Improper handling when...
Need help?
Do you have a question about the EM 2192 O and is the answer not in the manual?
Questions and answers