Table of Contents
Advertisement
Available languages
Available languages
¿Preguntas, problemas, piezas faltantes? Antes de volver a la tienda,
llame al servicio de atención al cliente de Glacier Bay
8 a.m. - 7 p.m., EST, de lunes a viernes, 9 a.m. - 6 p.m., EST, sábados
1-855-HD-GLACIER
HOMEDEPOT.COM/GLACIERBAY
Conserve este manual para futuras consultas.
INSTALLATION AND CARE GUIDE
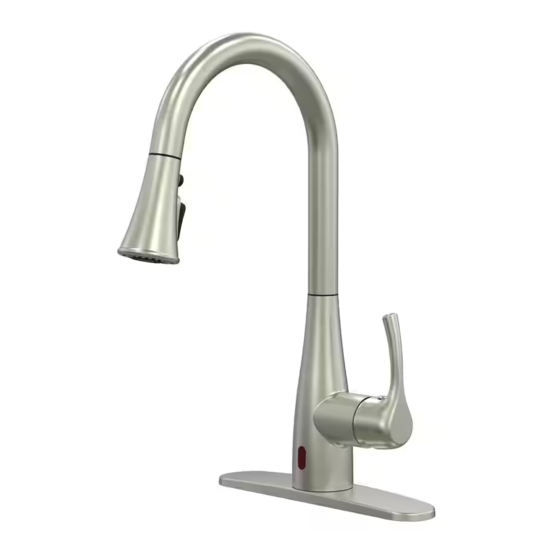
MARCIE SINGLE-HANDLE INTEGRATED PULL-DOWN
TOUCHLESS KITCHEN FAUCET
Questions, problems, missing parts? Before returning to the store,
call Glacier Bay Customer Service
8 a.m. - 7 p.m., EST, Monday - Friday, 9 a.m. - 6 p.m., EST, Saturday
1-855-HD-GLACIER
HOMEDEPOT.COM/GLACIERBAY
We appreciate the trust and con dence you have placed in Glacier Bay through the purchase of this Kitchen faucet. We strive to
continually create quality products designed to enhance your home. Visit us online to see our full line of products available for your home
improvement needs. Thank you for choosing Glacier Bay !
Model #
SKU #
RF412034
1009029257
RF415034
1009029258
RF416034
1009029259
THANK YOU
Advertisement
Chapters
Table of Contents

Subscribe to Our Youtube Channel
Related Manuals for Glacier bay MARCIE RF412034


Summary of Contents for Glacier bay MARCIE RF412034
- Page 1 THANK YOU We appreciate the trust and con dence you have placed in Glacier Bay through the purchase of this Kitchen faucet. We strive to continually create quality products designed to enhance your home. Visit us online to see our full line of products available for your home...
-
Page 2: Table Of Contents
Glacier Bay products are manufactured with superior quality standards and workmanship and are backed by our limited lifetime warranty. Glacier Bay products are warranted to the original consumer purchaser to be free of defects in materials or workmanship. We will replace FREE OF CHARGE any product or parts that proves defective. -
Page 3: Installation
Installation Installation (continued) Installing the faucet assembly Installing the faucet assembly Attaching the fast mounting nut Attaching the quick connector in single hole sink in three hole sink □ □ Push the fast mounting nut (C) over the faucet assembly Push the pull-down hose (1) rmly upward and attach it (A) shank and twist to tighten. - Page 4 Installation (continued) Installation (continued) Installing the quick counterweight Installing the batteries Connecting the battery box Connecting the battery box □ CAUTION: □ Install the quick counterweight (G) on the pull-down hose Connect the battery box (D) cable with sensor cable. CAUTION: Please use 4 AA batteries and install them correctly at the marked position.
-
Page 5: Operation
Operation Operation (continued) Flushing and checking for leaks Attaching and securing the spray head Removing the quick connector Using the faucet □ □ □ Pull the spray hose out of the spout of the faucet If it is necessary to remove the quick connector (1), The water will be turned off automatically after 180±15 IMPORTANT: assembly (A). -
Page 6: Care And Cleaning
Care and Cleaning Troubleshooting □ When the faucet is dirty, use a neutral detergent to wipe, and then rinse with ambient water. Dry the faucet with a soft cloth. Problem Possible cause Possible causes Solution □ Don't use cleaning powder, polishing powder, detergents containing coarse particles or nylon scrub. Also, do not use acid detergent. Handle isn't opened. -
Page 7: Troubleshooting
Troubleshooting (continued) Service Parts Problem Possible cause Possible causes Solution NOTE: Many replacement cartridges, aerators, and drain Low power supply. Replace the batteries. assemblies can be purchased at your local The Water pressure is too low Water pressure is lower than Home Depot store or online at HOMEDEPOT.COM Pressurize the water supply pipeline. - Page 8 Retain this manual for future use. ¡GRACIAS! Agradecemos la con anza que ha depositado en Glacier Bay al comprar este grifo de cocina. Nos esforzamos por crear continuamente productos de calidad diseñados para mejorar su hogar. Visítenos en línea para ver nuestra línea completa de...
-
Page 9: Información Importante
GARANTÍA DE POR VIDA Los productos Glacier Bay se fabrican con estándares de calidad y mano de obra superiores y están respaldados por nuestra garantía limitada de por vida. Los productos Glacier Bay están garantizados contra defectos de materiales o mano de obra para el comprador original. Sustituiremos GRATUITAMENTE cualquier producto o pieza que resulte defectuoso. -
Page 10: Instalación
Instalación Instalación (continuación) Instalación del grifo en un Instalación del grifo en un Fijación de la tuerca de montaje Fijación del conector rápido fregadero de un solo ori cio fregadero de tres ori cios □ □ Empuje la tuerca de montaje rápido (C) sobre el vástago Empuje la manguera desplegable (1) rmemente hacia del grifo (A) y gírela para apretarla. - Page 11 Instalación (continuación) Instalación (continuación) Instalación del contrapeso rápido Instalación de las baterías Conexión de la caja de la batería Conexión de la caja de la batería □ PRECAUCIÓN: □ Instale el contrapeso rápido (G) en la manguera extensi- Conecte el cable de la caja de la batería (D) con el cable PRECAUCIÓN: Utilice 4 baterías AA e instálelas correctamente según el ble en la posición marcada.
-
Page 12: Funcionamiento
Funcionamiento Funcionamiento (continuación) Colocación y jación del cabezal Descarga y comprobación de fugas Extracción del conector rápido Utilización del grifo rociador □ □ Si es necesario retirar el conector rápido (1), apriete El agua se cerrará automáticamente después de □ Extraiga la manguera rociadora del caño del grifo (A). -
Page 13: Cuidado Y Limpieza
Cuidado y limpieza Solución de problemas □ Cuando el grifo esté sucio, utilice un detergente neutro para limpiarlo y enjuague con agua a temperatura ambiente. Seque el grifo Problema Posible causa Posibles causas Solución con un paño suave. El asa no está abierta. Abra el asa y active el sensor. -
Page 14: Solución De Problemas
Solución de problemas(continuación) Piezas de repuesto Problema Posible causa Posibles causas Solución NOTA: Poca alimentación. Sustituya las baterías. Puede adquirir muchos cartuchos de repuesto, aireadores y drenaje en su tienda The Home La presión del agua es La presión del agua es inferior Depot local o en línea en HOMEDEPOT.COM demasiado baja (por debajo Presurice la tubería de suministro de agua.
Need help?
Do you have a question about the MARCIE RF412034 and is the answer not in the manual?
Questions and answers
The water has stopped flowing completely all of a sudden. I changed the batteries and still nothing. Any ideas how to bypass the sensor completely?
How can we bypass the touchless feature on our faucet? We don't want it.
The touchless feature on the Glacier Bay Marcie RF412034 faucet can be bypassed by turning off the handle manually if the faucet will not be used for a long time. Additionally, natural sunlight can interfere with the sensor signal, so avoiding direct sunlight may help disable unintended activations.
This answer is automatically generated
Hello is there a way to turn off the sensor and just use it like a regular sink on the RF412034 model?
how do I turn off the touchless feature on RF412034