
Related Manuals for Thule 101018 Series


Summary of Contents for Thule 101018 Series
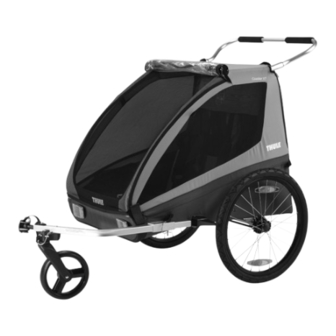
- Page 1 Thule Coaster XT Instructions 101018XX IMPORTANT - Keep these instructions for future reference. 51100985...
-
Page 2: Table Of Contents
CONTENTS INTRODUCTION USE & FEATURES Manual Intended Use Setting the Parking Brake Carrier Intended Use Adjusting the Padded Shoulder Harness 1.3 Specifications Using the Two-in One Cover Using the Sunscreen PARTS DESCRIPTION Storage Included ADDITIONAL INFORMATION SAFETY Accessories Symbols and Instructions Service and Care General Safety Instructions Storage... -
Page 3: Introduction
Thank you for choosing a Thule Coaster XT. Your new carrier offers quality, safety features and comfort. PLEASE NOTE: Thule Child Transport Systems Ltd. retains all rights to this Owner’s Manual. No text, details, or illustrations from this manual may be reproduced, distributed, or become the subject of unauthorized use for commercial purposes, nor may they be made available to others. -
Page 4: Manual Intended Use
If the Thule child carrier is used in conditions of MANUAL INTENDED USE poor visibility, at dusk or in the hours of darkness, it is highly recommended to be fitted with a safety Who is this manual intended for? approved working light set. This manual is intended for the purchaser and user... -
Page 5: Parts Description
PARTS DESCRIPTION INCLUDED Thule Coaster XT chassis Bicycle trailer kit Strolling kit Handlebar Two 20 inch wheels 51100985 - F EN-5... -
Page 6: Safety
Warnings provide instructions critical child carrier. to the safe use and operation of this • Do not carry extra children or bags on this Thule child carrier. Thule child carrier. Failure to follow • This Thule child carrier will become unstable if the these instructions could result in an manufacturer’s recommended load is exceeded. - Page 7 • Only replacement parts supplied or recommended by following check while the carrier is standing on a flat the manufacturer/distributor shall be used. surface: • Do not use this Thule child carrier around or near an • Tip the Thule child carrier backwards by about open fire or exposed flame. 15cm/6in. The Thule child carrier should return • A reflector that complies with CPSC regulations shall...
-
Page 8: Getting Started
GETTING STARTED 4.1 INCLUDED COMPONENTS Verify that your carrier was packaged with the following items: • Thule Coaster XT chassis • Bicycle trailer kit • Strolling kit • Handlebar • Two 20 inch wheels • Owner's manual NOTICE Store your carrier and its components... -
Page 9: Unfolding The Carrier
With one hand on the upper frame and the other hand on the carrier axle, push the two halves together. WARNING Care must be taken when folding and unfolding this Thule child carrier to prevent finger entrapment. To avoid injury ensure that your child is kept away when unfolding and folding this product. -
Page 10: Installing The Wheels
4.4 INSTALLING THE WHEELS Disengage the parking brake. Press and hold the wheel release button on a wheel. 4.6 INSTALLING THE WHEEL DEFLECTORS Insert the wheel axle into an axle socket. (See image 1) Release the wheel release button. Press the wheel fully into the axle socket. Verify that the wheel is securely attached to the carrier by giving it a sharp pull. -
Page 11: Installing The Handlebar
WARNING Insert the flagpole into the metal or plastic collar on the safety flag. Any load attached to the handle affects the stability of the Thule child carrier. Insert the flagpole through the sleeve on the left hand side of the body. (See image 3) 51100985 - F EN-11... -
Page 12: Installing The Ezhitch Tm With A Quick-Release
4.8.2 INSTALLING THE EZHITCH WITH A QUICK-RELEASE Verify that the quick release skewer is compatible with your bicycle. Completely unscrew and remove the quick-release knob from the quick release skewer. Remove one of the springs from the quick-release skewer. Insert the quick-release skewer through the ezHitch™. (See image 1) Insert the quick-release skewer into the bicycle axle from the left side pointing right. -
Page 13: Installing The Ezhitch Tm On A Solid Axle
Inspect the hitch arm for any signs of damage or wear that could compromise the safe use of the hitch arm. Position the hitch arm in front of the Thule child carrier with the hitch ball pointing forwards and to the right. -
Page 14: Attaching The Carrier To Your Bicycle
(See image 3) Failure to install the hitch’s back up safety strap may lead to the Thule child carrier Loop the back-up safety strap around the bicycle frame becoming separated from the bicycle. -
Page 15: Removing The Carrier From Your Bicycle
D-clip. (See image 3) Verify that the hitch arm is securely attached to the Thule child carrier by giving it a sharp pull away from the Thule child carrier. 51100985 - F EN-15... -
Page 16: Inserting The Stroller Wheel
4.9.2 INSERTING THE STROLLER WHEEL 4.9.3 STORING THE STROLLER WHEEL WHILE CYCLING Insert the stroller wheel to the hitch arm from the bottom. (See image1) Remove the stroller wheel by unclipping the D-clip, Insert the pin through stroller wheel attachment and pulling out the pin and removing the wheel. -
Page 17: Use & Features
After engaging the brake always verify that the parking Never leave your child unattended in brake is working - the carrier should not roll forwards or this Thule child carrier. backwards. The parking brake should always Grasp the red handle on the brake lever and push it be engaged during the loading and upwards to release the parking brake. -
Page 18: Adjusting The Padded Shoulder Harness
WARNING This seat unit is not suitable for children under 6 months. For children under 6 months an approved Thule baby accessory must be used. NOTICE When seating a single child in the carrier always seat the child on the right side. -
Page 19: Using The Two-In One Cover
To close the cover; pull down the front of the cover and attach each corner using the velcro. (See image 2) WARNING The user of this Thule child carrier must be aware of exposure hazards such as wind chill and heat exhaustion, either by prolonged... -
Page 20: Using The Sunscreen
To shade inside the child compartment; roll the back flap down the front of the carrier. Use the velcro at the bottom of the sunscreen to keep it closed. (See image 1) To completely open up the front and back of the Thule child carrier, roll the back flap up. Use the elastic rings at the top of the back flap to keep it up. Your carrier is equipped with the following storage compartments: One large cavity in the back. -
Page 21: Additional Information
• Thule Infant Sling Metal Components • Thule Baby Supporter Check for any dents or cracks. Do not use the Thule child • Thule Footmuff Sport carrier if any metal components are cracked or damaged. • Thule Axle Mount ezHitch Fasteners •... -
Page 22: Storage
Extreme use of this carrier can lead to premature wear. The way this Thule child carrier is used and cared for will greatly affect how quickly it wears. Thule Sweden AB, Borggatan 5 info@thule.com...
Need help?
Do you have a question about the 101018 Series and is the answer not in the manual?
Questions and answers