Table of Contents
Advertisement
Quick Links
Owner's Manual
Thank you, and congratulations on your choice of the BOSS
JS-5 JamStation.
Before using this unit, carefully read the sections entitled:
• USING THE UNIT SAFELY (page 2–3)
• IMPORTANT NOTES (page 10–11)
These sections provide important information concerning
the proper operation of the unit.
Additionally, in order to feel assured that you have gained a
good grasp of every feature provided by your new unit,
Owner's manual should be read in its entirety. The manual
should be saved and kept on hand as a convenient reference.
Copyright © 2000 BOSS CORPORATION
All rights reserved. No part of this publication may be reproduced in any form
without the written permission of BOSS CORPORATION.
Advertisement
Table of Contents

Related Manuals for Boss JamStation JS-5


Summary of Contents for Boss JamStation JS-5
- Page 1 Owner’s Manual Thank you, and congratulations on your choice of the BOSS JS-5 JamStation. Before using this unit, carefully read the sections entitled: • USING THE UNIT SAFELY (page 2–3) • IMPORTANT NOTES (page 10–11) These sections provide important information concerning the proper operation of the unit.
- Page 2 • Do not attempt to repair the unit, or replace parts within it (except when this manual provides specific instructions directing you to do so). Refer all servicing to your retailer, the nearest Roland Service Center, or an authorized Roland distributor, as listed on the "Information" page.
- Page 3 • Before using the unit in a foreign country, consult with your retailer, the nearest Roland Service Center, or an authorized Roland distributor, as listed on the "Information" page.
-
Page 4: Table Of Contents
Let’s Try Playing Some Sounds ...20 Let’s Create a Song...33 Changing How a Song Plays...44 Let’s Record Guitar Play ...49 --------------------------------------------------------------------------- Chapter 1 Overview of the JS-5 ...55 About Songs ... 55 About Styles ... 55 About Parts... 55 About Tracks ... 55 About Forms... - Page 5 Chapter 2 Playing a Song ...59 To save the modified settings ... 59 Playing a Song... 59 Changing the Tempo ... 60 Changing the Key... 60 Adding a Count-in... 60 Displaying the Chord Progression... 61 Playing with a Different Chord Progression ... 61 Playing with a Different Style ...
- Page 6 Contents Chapter 5 Editing Songs ...75 Erasing Forms... 75 Erasing Chords... 75 Erasing Forms Together with Chords... 76 Copying Forms... 77 Copying Chord Progression ... 78 Copying Forms Together with Chords... 79 Deleting Measures ... 80 Inserting Measures... 80 Deleting an Entire Song/Deleting the Data on a Specified Track ... 81 Copying an Entire Song ...
- Page 7 Initializing the Memory Card ... 125 Saving All the JS-5’s Settings to the Card ... 126 Returning Backup Files Saved on a Card to the JS-5... 127 Deleting Data on a Card... 127 Chapter 13 Changing the Usage Environment ...128 Adjusting the Contrast of the Display ...
- Page 8 Contents Copying Groups of User Songs and Styles Between the JS-5 and Memory Cards ... 129 Deleting Data in a Batch ... 129 Returning to the Factory-default Settings ... 130 Displaying Remaining Memory... 130 Chapter 14 Controlling the JS-5 with MIDI...131 What Is MIDI?...
-
Page 9: Main Features
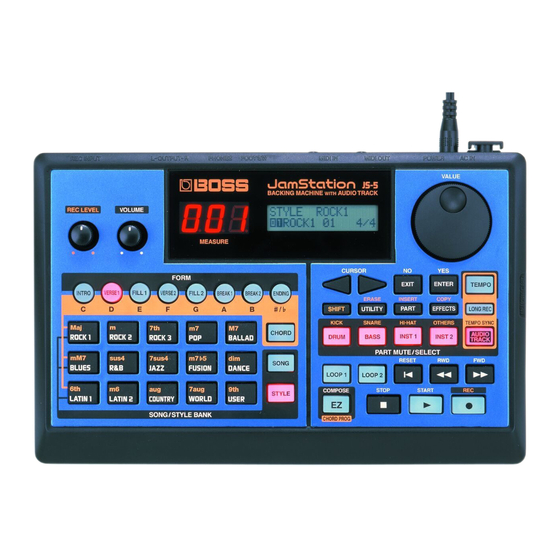
Main Features The JS-5 is a backing machine equipped with a backing generator offering new features that make it easy to create four-part backing data (accompaniment data), even for people with no knowledge of sequencers or music. It’s also equipped with a digital recorder feature, so you can record guitar solos and vocals. -
Page 10: Important Notes
(including padding) that it came in, if possible. Otherwise, you will need to use equivalent packaging materials. • Use a cable from Roland to make the connection. If using some other make of connection cable, please note the following precautions. -
Page 11: Before Using Memory Cards
• Do not use this unit for purposes that could infringe on a copyright held by a third party. BOSS/Roland assumes no responsibility whatsoever with regard to any infringe- ments of third-party copyrights arising through your use of this unit. -
Page 12: Part Names And Functions
This adjusts the input sound of a device connected to the REC INPUT jack. 2. VOLUME Knob This adjusts the overall volume level of the JS-5. 3. Display Left side: This displays the measure and count-in. Right side: This displays a variety of information according to the state of the operation. - Page 13 This is used in combination with other buttons. 15.UTILITY Button Use this when making settings related to the usage environment for the JS-5. ERASE Button: Holding down the SHIFT button and pressing the UTILITY button makes this function as the ERASE button, allowing you to erase or delete data.
-
Page 14: Rear Panel
This is for inserting a memory card (smart media). Purchase smartmedia at your local computer dealer or digital camera vendor. The JS-5 can use 8 to 64 MB SmartMedia with a power- source voltage of 3.3 V. Inserting SmartMedia other than those described here may result in corruption of data in the JS-5. -
Page 15: Some Conventions This Manual Uses
37.MicroSaver Security Slot ( MicroSaver and Kensington are registered trademarks of Kensington Microware Limited. © 1997 Kensington Microware Limited Kensington Microware Limited 2855 Campus Drive San Mateo, CA 94403 U.S.A. Web:www.kensington.com Some Conventions This Manual Uses This manual uses the typographical conventions shown below in order to explain methods of operation in a concise way. Text enclosed in “[ ]”... -
Page 16: Getting Ready To Play
Getting Ready to Play Making the Connections The JS-5 does not have a built-in amp or speakers. To play sounds, you need to have on hand an amp or audio set, or some stereo headphones. * Audio cables, MIDI cables, stereo headphones, and foot switch are not included. - Page 17 Connect the amp or audio set as shown in the figure. If necessary, connect stereo headphones. * To get the best performance out of the JS-5, we recommend stereo use. For monaural use, make the connection to the OUTPUT L (MONO) jack.
-
Page 18: Switching On The Power
Is the volume level of the unit and the connected amp or other device turned down all the way? Turn on the POWER switch on the rear panel of the JS-5. fig.QS01-02 * This unit is equipped with a protection circuit. A brief interval (a few seconds) after power up is required before the unit will operate normally. -
Page 19: Switching Off The Power
Is the volume level of the unit and the connected amp or other device turned down all the way? Switch off the power to the amp or other device. Switch off the power to the JS-5. Getting Ready to Play... -
Page 20: Let's Try Playing Some Sounds
Let’s Try Playing Some Sounds Listening to the Preset Songs The JS-5 has 200 Preset (onboard) songs. Try choosing and playing a variety of songs. The 200 Preset Songs are classified by category, such as rock or jazz. fig.QS02-02 Press [SONG], getting the button to light. - Page 21 FUSION ... Fusion DANCE... . Hip hop, techno, etc. LATIN ... . . Salsa, bossa nova and samba, etc. COUNTRY .
- Page 22 Let’s Try Playing Some Sounds Changing the Tempo of a Performance Next, try changing the tempo of the song being played. fig.QS02-05 Press [TEMPO], getting the button to light. The present tempo appears on the display. fig.QS02-06 Turn [VALUE] to adjust the tempo. Settings values: 40–250 Once you’ve decided on the tempo, press [TEMPO], extinguishing the button’s light.
-
Page 23: Displaying The Chord Progression
Displaying the Chord Progression You can switch to a screen (Chord screen) where the chord progression is displayed, and check the chord progression. fig.QS02-07 Press [CHORD], getting the button to light. The Chord screen appears. fig.QS02-08 Category Chord root Song number Press [START] to start playing the song. - Page 24 Let’s Try Playing Some Sounds Listening with a Different Chord Progression The Preset Songs feature one additional Chord Progression. Let’s try playing a Preset Song after switching to this Chord Progression. fig.QS02-12 While play is stopped, hold down [SHIFT] and press [EZ], getting the button to light.
- Page 25 Changing the Style of a Preset Song You may want to try changing the Style of a Preset Song. The JS-5 has 200 types of Preset (built-in) Style. Let’s try choosing and play a variety of Styles. The 200 Preset Styles are classified by category, such as rock or jazz.
- Page 26 Let’s Try Playing Some Sounds ROCK 1 ... . Hard rock, Heavy metal ROCK 2 ... . Typical Rock of the sixties through nineties ROCK 3 .
- Page 27 2 when the performance ends. Let’s Try Playing Some Sounds What is a Form? Forms are the performance patterns from which a song is put together. The JS-5 has eight types of Forms available for selection for each Style. INTRO: Intro VERSE 1, 2: The main performance patterns.
- Page 28 Let’s Try Playing Some Sounds In the case of ENDING, you will return to the beginning of the song when playback ends. * When playback reaches the number of measures specified for the song, playback will stop and you will return to the beginning of the song. Entering a Chord Let’s try playing a Preset Song with chords you enter yourself.
- Page 29 fig.QS02-18 Category Chord root Song number When [START] is pressed, the performance begins with the input chord. Input the chords as needed. You can input chord types unavailable with [Maj]–[9th]. “Playing with Chords You Enter Yourself” (p. 62) Let’s Try Playing Some Sounds On-Bass chord Chord type...
- Page 30 Using As a Rhythm Machine A song’s performance pattern is played using these four parts: “Inst (instrument) 1,” “Inst (instrument) 2,” “Drum,” and “Bass.” By playing just the drum part of a song, you can use the JS-5 as a rhythm machine. fig.QS02-19 Press the [PART MUTE] [BASS], [INST 1], and [INST 2] buttons to make the button lights go dark.
- Page 31 Playing Along with a Song on Guitar Let’s try connecting an electric guitar to the JS-5 and play along with a song on the guitar. fig.QS02-20 1,4 2,3 Turn [REC LEVEL] counterclockwise all the way. fig.QS02-21 Connect the electric guitar to the REC INPUT jack.
- Page 32 Let’s Try Playing Some Sounds Set the REC INPUT selector switch appropriately. GUITAR: When an electric guitar (or bass) is connected, or when an electric guitar (or bass) and an effects processor are connected (The Guitar Amp Simulator is working.) LINE: When an electric acoustic guitar is connected, or when a keyboard is connected...
-
Page 33: Let's Create A Song
Let’s Create a Song With the JS-5, you can create maximum 100 original songs (User Songs). Let’s try creating an actual song. Before we create a song, let’s take a quick look at how a song is put together. fig.QS03-01... - Page 34 Let’s Create a Song Composing Your Own Original Song (EZ Compose) Using EZ Compose makes it easy to create your own original songs. fig.QS03-02 Select a User Song to be recorded. Press [SONG], getting the button to light. Press [USER]. Turn [VALUE] to select a song.
- Page 35 Press [SONG/STYLE BANK] and select a category. Turn [VALUE] to select a Style. * When you press [START], the Style is played using the Forms selected at that time.(A chord progression will not be added.) Once you’ve decided on the Style, press [ENTER]. The Chord template Selection screen appears.
- Page 36 Let’s Create a Song Turn [VALUE] to specify the key (root) of the song. You can specify a key from C to B, in semitone steps. Once you’ve decided on the key of the song, press [ENTER]. A screen asking you to confirm that you want to proceed with EZ Compose appears.
- Page 37 Creating a Song from a Score You can compose a song by choosing a Style and recording the Forms and Chord Progression. This section uses examples to describe the steps for composing a song like the one below. This records a song that combines a Rock Style with a Blues Chord Progression.
-
Page 38: Select A Style
Let’s Create a Song fig.QS03-10 (1) Select the destination for recording. Select the destination for recording the User Song. Press [SONG], getting the button to light. Press [USER]. Turn [VALUE] to select a song. A User Song where no data is recorded will have an “*” next to the song number. - Page 39 (3) Select a recording track. Press [REC], getting the button to light. [SONG], [CHORD], and [AUDIO TRACK] flash, and the Recording Track Selection screen appears. fig.QS03-30 * To cancel, press [EXIT]. First, record the Form. Press [SONG] to select the Form Track. The Recording Standby screen for the Form appears.
-
Page 40: Press [Start]
When the intro finishes playing, the JS-5 automatically changes to playback of Verse 1. In this case, the JS-5 changes to Verse 1 in the second measure, and [VERSE 1] lights up. Continue by playing Verse 1 in measures 5 through 15. - Page 41 (5) Record the chords. Record the chord progression on the Chord Track. In this example, let’s try using Step recording. fig.QS03-20 20, 22 Press [REC], getting the button to light. [SONG], [STYLE], [CHORD], and [AUDIO TRACK] flash, and the Recording Track Selection screen appears. fig.QS03-32 * To cancel, press [EXIT].
- Page 42 Let’s Create a Song Press [REC] to display “STEP.” Step recording is now selected. Press [CURSOR] to make the Quantize display flash, then turn [VALUE] to make the setting for quantizing. In this example, set this to “ ” (whole note). Press [START].
- Page 43 fig.QS03-18 Repeat steps 21–22 to record all the chords in the score on p. 37. * If the same chord continues, you can record the first chord and then omit the remainder of the recording for that chord. Move to the timing at which you wish to record a different chord.
-
Page 44: Changing How A Song Plays
Changing How a Song Plays Changing the Key You can use Key Transpose to change (transpose) the key of a song. * Although the keys of chords that are actually played are transposed when Key Transpose is set, the keys shown in the screen during performances or when recording do not change. - Page 45 * If you modify the settings of a preset song, these settings cannot be stored. If you wish to store the settings, copy them to a user song. (p. 82) When you’ve finished making the settings, press [EXIT]. The display returns to the original screen. Adjusting the Volume of Each Part You can adjust the volume level of each of the parts that make up a Style: Inst 1, Inst 2, Drum, and Bass.
- Page 46 Changing How a Song Plays fig.QS04-04 Drum Bass Volume level of each Part Press [PART MUTE/SELECT] and select the part whose volume level you want to change. * When a User Song to which audio data is recorded is selected, the following screen appears when [AUDIO TRACK] is pressed.
-
Page 47: Using Effects
Using Effects The JS-5 is provided effects such as Reverb and Chorus. In this example, let’s change the settings for Reverb to check out what the effect does. * It is not possible to use effects on the sound input from REC INPUT. - Page 48 Changing How a Song Plays Turn [VALUE] to select the type. Try changing to a variety of types and check out the different effects. * If you modify the settings of a preset song, these settings cannot be stored. If you wish to store the settings, copy them to a user song.
-
Page 49: Let's Record Guitar Play
You can record your own performances to a song’s (Preset/User) Audio track. Here, select a Preset that appeals to you, copy it to the JS-5’s User Songs, then record the performance of the guitar (or vocal, or other instrument) along with this song. - Page 50 Let’s Record Guitar Play Select the User Song to be used as the copy destination. Here, select one of the JS-5’s User Songs. Press [CURSOR], and the Category indication will begin blinking. Then, turn [VALUE] to select “USER” (the JS-5).
- Page 51 Recording fig.QS05-01 Select the User Song to record. Use the procedure previously described to select the copied song. Press [SONG], getting the button to light. Press [USER]. Turn [VALUE] to select a song number. Press [REC], getting the button to light. [SONG], [CHORD], and [AUDIO TRACK] flash, and the Recording Track Selection screen appears.
-
Page 52: Adjust The Recording Level
Let’s Record Guitar Play Press [LONG REC] and select the recording quality. Hi-Fi: Select this when you want to perform high-quality recording. LONG: Select this when you want to make the recording time longer. When you select “LONG,” [LONG REC] lights up. Adjust the recording level. -
Page 53: Deleting Recorded Data
Deleting Recorded Data To delete all audio data for the presently selected User Song, follow the steps below. fig.QS05-06 At the Song screen, press [ERASE] ([SHIFT] + [UTILITY]). The Delete screen for Song appears. fig.QS05-07 Turn [VALUE] to select “AUDIO.” fig.QS05-40 Press [ENTER]. - Page 54 Let’s Record Guitar Play To delete the data, press [ENTER]. The audio data is deleted. The following screen appears. fig.QS05-41 When the delete is completed, the Song screen reappears. fig.QS05-42 Would you like to know more about recording on the Audio Track? “Chapter 9 Recording Your Own Performance”...
-
Page 55: Chapter 1 Overview Of The Js-5
Chapter 1 Overview of the JS-5 About Songs A single song on the JS-5 is called a Song. The JS-5’s 200 internal Songs are referred to as Preset Songs, whereas Songs created by the user are called User Songs. The JS-5 can hold maximum 100 User Songs, and you can store up to maximum 100 songs on optional memory cards (SmartMedia). -
Page 56: About Styles And Chord Conversions
Chapter 1 Overview of the JS-5 About Styles and Chord Conversions With the JS-5, Style performance data is converted according to the “Chord Name” recorded on the Chord Track. Preset Style performance data is created based on the conversion of the chords, and the data is converted and performed just by designating the chords. -
Page 57: About Memory
Memory Data in the Preset Memory is lost when a different operation is carried out, or when the power to the JS-5 is turned off. When you want to save data, you must first copy the data to the User Memory or a memory card. -
Page 58: About Procedures For Changing Settings
Chapter 1 Overview of the JS-5 About Procedures for Changing Settings This section explains those of the JS-5’s operations that are shared by the different functions. Switching Pages When a page appears in the display, a “ the right of the page. -
Page 59: Chapter 2 Playing A Song
When the settings have been saved, you will return to the previous screen. Never turn off the power to the JS-5 or remove the memory card from the JS-5 while the “ ” still appears at the left of... -
Page 60: Changing The Tempo
Chapter 2 Playing a Song Changing the Tempo Now we’ll change the tempo for playing the song. 1. Press [TEMPO], getting the button to light. The present tempo appears on the left-hand display. fig.RE02-02 2. Turn [VALUE] to adjust the tempo. 3. -
Page 61: Displaying The Chord Progression
Displaying the Chord Progression TThis changes the Song screen to a screen displaying the chord progression (Chord screen). 1. Press [CHORD], getting the button to light. The Chord screen appears. fig.RE02-05 Category Chord root Song number Chord type * You can switch to the Chord screen even while a song is playing. -
Page 62: Playing With Forms You Select Yourself
Chapter 2 Playing a Song * When switching to User Styles (USER or CARD) that use a lot of memory, the message “No More Memory!” may be displayed, and in some cases, the data may not be played, even though it is recorded in the Form. In such situations, you can either switch to a Preset Song or a User Song that uses less memory, or you can enable play of all Forms by reducing Song or Style data. -
Page 63: Muting Out The Sound Of A Specific Part
When the Performance is in Progress 1. Press [CHORD], getting the button to light. 2. Use the following buttons to enter a chord. Use [C] through [B] and [#/b] to specify the root of the chord. Pressing [#/b] repeatedly cycles through the selections of “#,”... -
Page 64: Playing More Than One Song Continuously (Song Chain)
Chapter 2 Playing a Song Playing More Than One Song Continuously (Song Chain) You can have up to ten songs played back to back in a performance. This function is called Song Chain. * You can combine User Songs in the unit and on a memory card for continuous play. -
Page 65: Chapter 3 Composing Songs Using Ez Compose
Chapter 3 Composing Songs Using EZ Compose Using EZ Compose makes it easy to create your own original songs. 1. Select a User Song to be recorded (p. 59). * If no card is inserted, you can’t select a User Song on a card. 2. -
Page 66: Chapter 4 Creating User Songs
Chapter 4 Creating User Songs Never turn off the power to the JS-5 or remove the memory card from the JS-5 while the “ ” still appears at the left of the display (when data is being written), as this can prevent the data from being written properly, and may adversely affect later operations. -
Page 67: Recording Forms
3. Turn [VALUE] to select a Style. * While you are taking these procedures, you cannot play the Style you select. 4. Press [SONG] or [CHORD] to return to Recording Standby screen. Recording Forms Record Forms to the Form Track. There are two methods for this, Realtime Recording and Step Recording. -
Page 68: Step Recording
Chapter 4 Creating User Songs Step Recording Form is recorded in units of one measure. 1. Display the Form’s Recording Standby screen (p. 66). [REC] and [SONG] lights up. 2. Press [REC] to display “STEP.” Step Recording is selected. fig.RE04-09 3. -
Page 69: Adding Fill-Ins And Breaks
For measures earlier than this measure, a “ displayed in the upper right of the screen. 8. Once you have finished recording, press [STOP]. [REC] goes dark, and the Song screen reappears. Adding Fill-ins and Breaks Use the following procedure to add fill-ins and breaks after recording. -
Page 70: Recording The Chord Progression
Chapter 4 Creating User Songs 5. Press [ENTER]. The copy-destination designation screen appears. fig.RE04-15 Beginning measure * To cancel, press [EXIT]. The Form’s Step Recording screen reappears. 6. Specify the measure for the copy destination. Turn [VALUE] to specify the starting measure. The final measure is determined automatically by the number of measures in the copy source. -
Page 71: Step Recording
Use [Maj] through [9th] to specify the chord type. * You cannot select a chord type other than [Maj] through [9th]. To specify an On-Bass chord, hold down [SHIFT] and use [C] through [B] and [#/b] to specify the bass tone. If you press [CURSOR ] to select “1 COUNT IN,”... - Page 72 Chapter 4 Creating User Songs Use [Maj] through [9th] to specify the chord type. When selecting a Chord Type other than [Maj] through [9th], press [CURSOR], making the display flash, then turn [VALUE] to select the chord type. fig.RE02-30 (N.C) 7(13) add9 m7b5...
-
Page 73: Erasing Chords
Erasing Chords You can erase the recorded Chord in the current screen. After the Chord is erased, the previous Chord is carried forward. 1. Display the Chord’s Step Recording screen (p. 66). fig.RE04-24 2. Use [FWD] or [RWD] to show the Chord you want to erase. -
Page 74: Using A Preset Song As A Base For Creating A New Song
Chapter 4 Creating User Songs Using a Preset Song as a Base for Creating a New Song When creating a User Song by editing a Preset Song, since you cannot edit the Preset Song itself, copy the Preset Song to the User Songs. -
Page 75: Chapter 5 Editing Songs
Chapter 5 Editing Songs Never turn off the power to the JS-5 or remove the memory card from the JS-5 while the “ ” still appears at the left of the display (when data is being written), as this can prevent the data from being written properly, and may adversely affect later operations. -
Page 76: Erasing Forms Together With Chords
Chapter 5 Editing Songs fig.RE05-44 Relevant Track 4. Turn [VALUE] to select “CHORD.” 5. Press [ENTER]. The Chord erase screen appears. fig.RE05-06 starting measure Range of measures to be erased 6. Specify the range of measures to be erased. Use [CURSOR] and [VALUE] to specify the starting measure and final measure. -
Page 77: Copying Forms
6. Specify the range of measures to be erased. Use [CURSOR] and [VALUE] to specify the starting measure and final measure. * The specified final measure cannot come before the starting measure. 7. Once you’ve decided on the measures to be erased, press [ENTER]. -
Page 78: Copying Chord Progression
Chapter 5 Editing Songs * When attempting to copy many measures at one time, the message “No More Memory!” may be displayed, and you may not be able to copy the data. In this case, you can copy the data by dividing the measures to be copied into smaller sections, and repeating the copy procedure as many times as is needed. -
Page 79: Copying Forms Together With Chords
fig.RE04-16 * To cancel, press [EXIT]. The copy-destination designation screen reappears. 10. Press [ENTER] to execute the copy. The copy will be executed, and when it is finished the display will indicate “Completed!” Copying Forms Together with Chords This copies the both the Forms along with the Chords in a specified range of measures and copies them to other measures on the same track. -
Page 80: Deleting Measures
Chapter 5 Editing Songs Deleting Measures This deletes the actual measures themselves, along with the Forms and Chords they contain, for a specified range of measures. After the Measures are removed, subsequent measures are brought forward to close the gap created. * Even if you delete a measure of the Song where Audio data is recorded, there will be no change caused in the Audio data. -
Page 81: Deleting An Entire Song/Deleting The Data On A Specified Track
4. Once you’ve decided on the insertion point, press [ENTER]. The Measure insert designation screen appears. fig.RE05-21 Number of measures to be inserted 5. Turn [VALUE] to specify the number of measures to be inserted. 6. Once you’ve decided on the number of measures, press [ENTER]. -
Page 82: Copying An Entire Song
Chapter 5 Editing Songs Copying an Entire Song This copies an entire Preset Song or User Song to the User Songs. If copying a User Song, the audio data can also be copied along with the rest of the data. 1. -
Page 83: Chapter 6 Adjusting The Balance Between Parts
When the settings have been saved, you will return to the previous screen. Never turn off the power to the JS-5 or remove the memory card from the JS-5 while the “ ” still appears at the left of... -
Page 84: Changing The Pan For Each Part
Chapter 6 Adjusting the Balance Between Parts Changing the Pan for Each Part You can adjust the Pan (placement of the sonic image) for each of the Parts, “INST 1,” “INST 2,” “DRUM,” and “BASS.” * The Audio track Pan is fixed at center. 1. - Page 85 * For Parts in which Insert Effects (p. 88) are used, Direct Level adjusts the level of the sound after the Insert Effects are added. In this case, the following appears in the screen. fig.RE06-07 * If you press [START], you can making the settings while listening to the performance.
-
Page 86: Chapter 7 Changing Effect Settings
When the settings have been saved, you will return to the previous screen. Never turn off the power to the JS-5 or remove the memory card from the JS-5 while the “ ” still appears at the left of... -
Page 87: Changing The Chorus Settings
Functions of Each Parameter 1 REVERB TYPE This selects the type of reverb effect. ROOM1: Dense, short reverb ROOM2: Thin, short reverb STAGE1: Reverb with many later reflections STAGE2: Reverb with strong first reflections Bright, clear reverb HALL1: Rich reverb HALL2: Basic, general delay DELAY:... -
Page 88: Using The Insert Effects
Chapter 7 Changing Effect Settings Functions of Each Parameter 6 CHORUS RATE This sets the rate of the wavering chorus sound. 7 CHORUS DEPTH This sets the depth of the chorus’s undulating effect. 8 CHORUS PRE DELAY This sets the elapsed time after the source sound is played before the chorus sound is produced. -
Page 89: Changing The Settings For Each Type
* Refer to the Reference pages for more on the effects of each type. STEREO-EQ OVERDRIVE DISTORTION PHASER SPECTRUM ENHANCER AUTO-WAH ROTARY COMPRESSOR LIMITER HEX-CHORUS TREMOLO-CHO SPACE-D STEREO-CHO STEREO-FL STEP-FL STEREO-DLY MOD-DELAY 3-TAP-DLY 4-TAP-DLY TIMECTL-DLY 2-P.SHIFT FB-P.SFT REVERB GATE-REVERB OD CHO OD FL OD DLY DS CHO... - Page 90 Chapter 7 Changing Effect Settings STEREO-EQ (Stereo Equalizer) This is a stereo equalizer which allows you to adjust the tone quality using a low range, two mid-range, and a high range control. fig.RE07-101 L in 4-Band EQ R in 4-Band EQ LOW FREQ (Low Frequency) 200/400 Hz Select the frequency at which the low frequency range will be adjusted.
- Page 91 DISTORTION Distortion produces a more intense distortion than the Overdrive effect. fig.RE07-103 L in 2-Band Distortion Simulator R in DRIVE 0–127 Adjust the amount of distortion. The volume will change together with the amount of distortion. LEVEL (Output Level) 0–127 Specify the output volume.
- Page 92 Chapter 7 Changing Effect Settings BAND 4 (Band 4 Level) -15–+15 dB Specify the gain (amount of boost or cut) at 1250 Hz. BAND 5 (Band 5 Level) -15–+15 dB Specify the gain (amount of boost or cut) at 2000 Hz. BAND 6 (Band 6 Level) -15–+15 dB Specify the gain (amount of boost or cut) at 3150 Hz.
- Page 93 LOW SLOW (Low Frequency Slow Rate) 0.05–10.0 Hz Specify the low-speed (SLOW) rotational speed of the low- range rotor. LOW FAST (Low Frequency Fast Rate) 0.05–10.0 Hz Specify the high-speed (FAST) rotational speed of the low- range rotor. LOW ACCL (Low Frequency Acceleration) 0–15 Specify the time required for the rotational speed of the low- range rotor to change from the low speed to the high speed (or from the high speed to the low speed).
- Page 94 Chapter 7 Changing Effect Settings POST GAIN 0/+6/+12/+18 Specify the level of the output sound. LOW GAIN -15–+15 dB Specify the gain (amount of boost or cut) for the low frequency range. Positive (+) settings will emphasize (boost) the low frequency range. HI GAIN (High Gain) -15–+15 dB Specify the gain (amount of boost or cut) for the high frequency range.
- Page 95 You can use the Tremolo Chorus as an Auto Pan by using the following settings for the Tremolo Chorus. PRE DELAY: 0 ms CHO DEPTH: 0 TREM PHASE: 180 TREM DEPTH: 127 BALANCE: D0:100E SPACE-D Space-D is a multiple chorus that applies two-stage modulation in stereo.
- Page 96 Chapter 7 Changing Effect Settings BALANCE (Effect Balance) D100:0E–D0:100E Specify the volume balance between the original sound and the chorus sound. With a setting of D100:0E only the original sound will be output, and with a setting of D0:100E only the chorus sound will be output.
- Page 97 MIDI clock of the JS-5 or an external device. Use Clock Source (p. 133), a system parameter, to select whether the MIDI clock of the JS-5 or the external device is to be used for synchronization. * When a numerical setting is made, the MIDI clock is ignored.
- Page 98 Chapter 7 Changing Effect Settings PHASE L (Phase Left) NORMAL/INVERT Specify the phase of the left delay sound. NORMAL: The phase will not change. INVERT: The phase will be inverted. PHASE R (Phase Right) NORMAL/INVERT Specify the phase of the right delay sound. The phase will not change.
- Page 99 MIDI clock of the JS-5 or an external device. Use Clock Source (p. 133), a system parameter, to select whether the MIDI clock of the JS-5 or the external device is to be used for synchronization. * When a note value has been selected as the setting, and the...
- Page 100 Chapter 7 Changing Effect Settings LEVEL L (Left Level) 0–127 Specify the volume of the left delay sound. LEVEL R (Right Level) 0–127 Specify the volume of the right delay sound. HF DAMP (High-Frequency Damp) 200–8000 Hz, BYPASS Specify the frequency at which the high frequency range of the delayed sound returned to the input will be cut.
- Page 101 BALANCE (Effect Balance) D100:0E–D0:100E Specify the volume balance between the original sound and the delay sound. With a setting of D100:0E only the original sound will be output, and with a setting of D0:100E only the delay sound will be output. LEVEL (Output Level) 0–127 Specify the output volume.
- Page 102 Chapter 7 Changing Effect Settings MODE (Pitch Shift Mode) 1–5 Higher settings will cause the response to be slower, but the pitch will be steadier. LVL BAL (Level Balance) A100:0B–A0:100B Adjust the volume balance between the pitch shift A and pitch shift B sounds.
-
Page 103: Gate-Reverb
LOW GAIN -15–+15 dB Specify the gain (amount of boost or cut) of the low frequency range. Positive (+) settings will emphasize (boost) the low frequency range. HI GAIN (High Gain) -15–+15 dB Specify the gain (amount of boost or cut) of the high frequency range. - Page 104 Chapter 7 Changing Effect Settings FL (Overdrive Flanger) This effect connects an overdrive and a flanger in series. fig.RE07-127 Balance D L in Feedback Overdrive Flanger R in Balance D OD DRIVE 0–127 Specify the amount of distortion for the overdrive. The volume will change together with the amount of distortion.
- Page 105 CHO (Distortion Chorus) This effect connects distortion and chorus in series. fig.RE07-129 L in Balance D Distortion Chorus R in Balance D The parameters are essentially the same as “OD with the exception of the following two. DS DRIVE (Distortion Drive) 0–127 Specify the amount of distortion for the overdrive.
- Page 106 Chapter 7 Changing Effect Settings CHO BAL (Chorus Balance) D100:0E–D0:100E Specify the volume balance between the enhancer sound that does not pass through the chorus and the enhancer sound that does pass through the chorus. A setting of D100:0E will output only the enhancer sound, and a setting of D0:100E will output only the enhancer sound that is passed through the chorus.
- Page 107 DLY (Chorus Delay) This effect connects a chorus and a delay in series. fig.RE07-135 Balance D L in Balance D Balance E Chorus Delay Balance E Feedback R in Balance D Balance D CHO PREDLY (Chorus Pre delay) 0.0–100 ms Specify the time delay from the original sound until the chorus sound is heard.
- Page 108 Chapter 7 Changing Effect Settings LEVEL (Output Level) 0–127 Specify the output volume. FL (Chorus Flanger) This effect connects a chorus and flanger in series. fig.RE07-137 Balance D L in Feedback Balance E Chorus Balance E R in Balance D CHO PREDLY (Chorus Pre delay) 0.0–100 ms Specify the time delay from the original sound until the chorus sound is heard.
-
Page 109: Chapter 8 Changing Performance Instruments
When the settings have been saved, you will return to the previous screen. Never turn off the power to the JS-5 or remove the memory card from the JS-5 while the “ ” still appears at the left of... -
Page 110: Changing Bass Part Instruments
Chapter 8 Changing Performance Instruments Changing Bass Part Instruments Change the Instrument used for the Bass Part with a different Instrument. * Some of the instruments are played monophonically. “Instrument List” (p. 143) 1. Select a Song. 2. Press [PART]. 3. -
Page 111: Chapter 9 Recording Your Own Performances
If you have set Sync mode (p. 133) so that the JS-5 will playback in synchronization under control from an external MIDI device, it is not possible to record on the audio track. -
Page 112: Selecting Between Audio Quality
Chapter 9 Recording Your Own Performances Selecting Between Audio Quality When recording, select whether to give priority to audio quality or recording length in the Recording Quality Selection screen. Hi-Fi: Select this to record with high sound quality. LONG: Select this when you want to increase the amount of time for recording. -
Page 113: Playback
If you press [CURSOR ] several times to select “1 QUALITY,” you can check the available recording time.(p. 112) If you press [CURSOR ] several times to select “2 COUNT IN,” you can make count-in settings. (p. 112) 7. Adjust the recording level. Play your guitar, and turn [REC LEVEL] to adjust the recording level of the sound that is input to REC INPUT so that the “... -
Page 114: Deleting The Recorded Data
Chapter 9 Recording Your Own Performances fig.RE09-10 Starting measure 4. Use [CURSOR] and [VALUE] to set the starting and final measures of the range to be rerecorded. * You cannot set the starting measure for rerecording at an earlier point than the starting measure of the performance (the measure indicated in the left display). -
Page 115: Using The Js-5 As A Phrase Trainer
Trainer By recording sounds from CDs, MDs, or other sources to the Audio track, you can then use the JS-5 as a convenient “phrase trainer” for copying and repeated practice of difficult passages. Adjusting the tempo also allows you to play back rapid phrases at slower tempos. -
Page 116: Chapter 10 Various Performance Techniques
* If you record a User Style before saving the Loop settings, these settings are then deleted. Never turn off the power to the JS-5 or remove the memory card from the JS-5 while the “ ” still appears at the left of... -
Page 117: Using The Foot Switch To Start/Stop Playback
Start/Stop Playback With a foot switch (such as the optional FS-5U) connected to the FOOT SW jack on the JS-5’s rear panel, you can use your foot to start and stop performances. Additionally, by using a special cable (the optional PCS-31), you can then connect two foot switches. - Page 118 Chapter 10 Various Performance Techniques MUTE DRUM–AUDIO TRACK: Each time you press the foot switch,, the specified part will switch between “mute (silent)” and “un-muted (sounding).” The button will be dark when muted, and lit when sounding. 4. Once you have finished making the settings, press [UTILITY] once more, or press [EXIT].
-
Page 119: Chapter 11 Creating User Styles
(the velocity) is recorded in eight levels. Only note information (p. 131) is recorded to the User Style. Never turn off the power to the JS-5 or remove the memory card from the JS-5 while the “ ” still appears at the left of... -
Page 120: Preparing To Record
Furthermore, the sound of the Metronome may change if the Drum Kit is switched. Preparing to Record First connect the JS-5 to a MIDI keyboard and set the MIDI channels (p. 131) to the part you want record. fig.RE11-01 MIDI keyboard * Only connect the MIDI OUT of the external MIDI device to the JS-5’s MIDI IN. - Page 121 fig.RE11-03 Selected Part Instrument 8. Turn [VALUE] to select the Instrument (Drum Kit). 9. Once you have finished making the settings, press [PART] once more, or press [EXIT]. 10. Use [CURSOR] and [VALUE] to set Quantize. The Quantize here corrects discrepancies in the timing during recording of fill-ins and breaks, with the timing set to the selected note length.
-
Page 122: Deleting A User Style/Deleting Data Of The Specified Form
Chapter 11 Creating User Styles For more on the correspondence between Note Numbers and Rhythm Instruments, refer to “Drum Kit List” (p. 144). Erasing a performance If you wish to erase a recorded performance, press [ERASE] ([SHIFT] + [UTILITY]) to access the following screen. -
Page 123: Copying Forms
Copying Forms This copies the content of the currently selected Form and copies it to another Form in the same Style. 1. Display the User Style’s Record Standby screen. (p. 120) 2. Press [COPY] ([SHIFT] + [EFFECTS]). The Form’s copy screen appears. fig.RE11-13 3. -
Page 124: Copying Styles
Chapter 11 Creating User Styles Copying Styles This copies a Style (Preset or User) to the User Styles. 1. While play is stopped, press [COPY] ([SHIFT] + [EFFECTS]). 2. Press [CURSOR ] to select “COPY STYLE?” The Style’s copy screen appears. fig.RE11-19 Destination Style category / number... -
Page 125: Chapter 12 Using Memory Cards
Handling Memory Cards Purchase SmartMedia at your local computer dealer or digital-camera vendor. * The JS-5 can use 8 MB to 64 MB smart media with a power-source voltage of 3.3 V. * Roland S2M-5/S4M-5 SmartMedia cannot be used. Insert memory cards in the MEMORY CARD slot only when the performance of a Song is stopped. -
Page 126: Saving All The Js-5'S Settings To The Card
The Backup File confirmation screen appears. fig.RE12-11 * To cancel, press [EXIT]. 10. Press [ENTER]. The backup begins. fig.RE12-13 Never turn off the power to the JS-5 or remove the memory card during a backup. When the backup is finished, the display will indicate “Completed!”... -
Page 127: Returning Backup Files Saved On A Card To The Js-5
7. Press [ENTER]. The load begins. fig.RE12-18 Never turn off the power to the JS-5 or remove the memory card while the load is in progress. Chapter 12 Using Memory Cards When the Load is finished, the display will indicate “Completed!”... -
Page 128: Chapter 13 Changing The Usage Environment
4. To finish making the setting, press [UTILITY] again, or press [EXIT]. Tuning the JS-5’s sound generator This tunes the sound generator of the JS-5. 1. Press [UTILITY]. 2. Press [CURSOR] and select “2 SETUP M.TUNE.” fig.RE13-02 3. Turn [VALUE] to perform tuning. -
Page 129: Copying Groups Of User Songs And Styles Between The Js-5 And Memory Cards
Between the JS-5 and Memory Cards You can copy blocks of Song and Style data (backing data) from the JS-5 (User Memory) to a memory card, as well as from a memory card to the JS-5 (User Memory). 1. Press [UTILITY]. -
Page 130: Returning To The Factory-Default Settings
Chapter 13 Changing the Usage Environment Returning to the Factory- default Settings This returns all settings on the JS-5 to the values they had when the unit shipped from the factory. This is called Factory Reset. When you perform a Factory Reset, all sequence data is erased and other settings are reset to their standard default values. -
Page 131: Chapter 14 Controlling The Js-5 With Midi
B. fig.RE14-03 MIDI Transmit Channel: 1 MIDI Channels on the JS-5 On the JS-5, channels are set for each part (Drum, Bass, Inst 1, and Inst 2). Drum: Bass: Inst 1: Inst 2:... -
Page 132: About The Midi Implementation Chart
System Exclusive These messages are used when storing data such as User Songs created with the JS-5 or settings for User Styles on another connected JS-5 or external sequencer. Common This category includes Song Select, which gives information... -
Page 133: Synchronizing A Performance
MIDI sequencer. To synchronize a performance with an external MIDI device, it is necessary to decide whether the JS-5 or the external MIDI instrument will control starting and stopping, and which tempo, the JS-5’s or that of the external MIDI device, should be followed (Sync mode). -
Page 134: Saving Data To An External Midi Instrument (Bulk Dump)
* For information about setting the device ID number on the external MIDI instrument, refer to the documentation for the equipment. * The device ID number of the JS-5 is set to “17” when shipped from the factory. Connections fig.RE14-09... -
Page 135: Returning Data From An External Midi Instrument (Bulk Load)
Returning Data from an External MIDI Instrument (Bulk Load) This is used to return data sent to a MIDI sequencer to the unit, or to receive data sent from another JS-5. This is called “bulk load.” Connections fig.RE14-15 MIDI OUT... -
Page 136: Troubleshooting
Troubleshooting If the JS-5 does not function as you except, please check the following pints. If this does not resolve the problem, contact a nearby Roland service center or your dealer. No Sound Is the power to the JS-5 and any connected instrument turned on? Check the connections and then turn on the power. - Page 137 Are you connecting with a high-Z instrument cable or other cable that introduces resistance? Use cables (such as Roland’s PCS Series cables) that do not add resistance. Did you change the setting of the REC INPUT selector...
- Page 138 Troubleshooting The Metronome does not sound during recording of the User Style Is the Drum part muted? Release the mute on the Drum part (p. 63). The key of the chord shown in the screen differs from that of the sound currently being played Have you set the Key Transpose? When you have set the Key Transpose (p.
-
Page 139: Error Messages
Unsupported Media! Cause: The memory card inserted is not compatible with the JS-5. Solution: Use a memory card compatible with the JS-5 (8 to 64 MB SmartMedia with a power-source voltage of 3.3 V). Read Error! Cause: Memory card data cannot be loaded correctly. - Page 140 MIDI Buffer Full! Cause: Too many MIDI messages are being received at one time for the JS-5 to process them. Solution: Press [EXIT], then Reduce the number of MIDI messages received by the JS-5. Checksum Error! An exclusive message could not be correctly.
-
Page 141: Preset Song List
Preset Song List Name Name ROCK 1 ROCK 3 JS-5HardRock AcousticRck1 BritHardRck1 AcousticRck2 BritHardRck2 Gtr Arpeggio 80'sHardRock CntmpraryRck Fast Boogie 8bt Rock 1 Heavy & Loud 8bt Rock 2 Slow Rock 1 8bt Rock 3 Slow Rock 2 16bt Rock Slow &... -
Page 142: Preset Style List
Preset Style List No. Name No. Name ROCK 1 ROCK 3 01 JS-5HardRock ** 01 AcousticRck1 02 BritHardRck1 ** 02 AcousticRck2 03 BritHardRck2 03 Gtr Arpeggio 04 80'sHardRock ** 04 CntmpraryRck * 05 Fast Boogie 05 8bt Rock 1 06 Heavy & Loud ** 06 8bt Rock 2 07 Slow Rock 1 07 8bt Rock 3... -
Page 143: Instrument List
Instrument List Name Fingered Bs1 Fingered Bs2 Fingered Bs3 Fingered Bs4 MonoFingerBs Pick Bass 1 Pick Bass 2 MonoPickBass Hip Bass PickBs forOD Slap Bass 1 Slap Bass 2 Slap Bass 3 MonoSlapBass Finger&Slap Acoustic Bs1 Acoustic Bs2 Acoustic Bs3 Acoustic Bs4 Fretless Bs1 Fretless Bs2... -
Page 144: Drum Kit List
Drum Kit List PowerKit1 FunkKit1 Note No. Verb Kick Old Kick Deep Kick 3 Sol Kick Dry Stick Dry Stick Piccolo SN RoomSnr Hand Claps Hand Claps RoomSnr Natural SN2 Verb Tom Lo Dry Tom Lo Cl HiHat 2 Cl HiHat 2 Verb Tom Lo Dry Tom Lo Pedal HiHat... - Page 145 CountryKit OrchestraKit Note No. Lite Kick Old Kick Old Kick Old Kick Dry Stick Dry Stick Ballad SN Loose Snr Hand Claps Hand Claps Brush Slap SN Roll Dry Tom Lo Timpani Cl HiHat 2 Timpani Dry Tom Lo Timpani Pedal HiHat Timpani Dry Tom Lo...
-
Page 146: Chord Type Chart
Chord Type Chart Chord types that enable chord conversion (26 types and N.C.) consist of the following notes. The following shows chord types with the root C. fig.RE15_71.Chord Type – – (N.C) 7(13) add9 madd9 m7 5 sus4 7sus4 aug7... -
Page 147: Midi Implemantation
00H-7FH (0-127) F7H : EOX (End Of Exclusive) * With the JS-5, the System Exclusive Messages can be used to transmit Bulk Dump of Song/Pattern data and system data. For details refer to p. 134. System Common Message If the Sync mode is set at "MIDI", this message is never transmitted. - Page 148 00H-7FH (0-127) F7H : EOX (End Of Exclusive) * With the JS-5, the System Exclusive Messages can be used to transmit Bulk Dump of Song/Style data and System data. For details refer to p. 134. System Common Message Recognized only when the JS-5 is in stop and MIDI Sync mode is set at MIDI.
- Page 149 2nd byte ss=Song number : 00H-63H (0-99) * If a Preset Song is selected on the JS-5, this message switches Preset Songs. If a User Song is selected, it switches User Songs. This message cannot switch between Preset and User Songs.
- Page 150 1. System setup parameters Data included in this area is all MIDI/utility data. If you want to send Data Request to the JS-5 in this area, set the address and the size as follows. Address : 00 00 00 00...
- Page 151 Examples of exclusive messages and calculating the checksum Roland exclusive messages (RQ1, DT1) are transmitted with a checksum at the end of the data (before F7) to check that the data was received correctly. The value of the checksum is determined by the address and data (or size) of the exclusive message.
-
Page 152: Midi Implementation Chart
MIDI Implementation Chart MIDI Implementation Chart JamStation Model JS-5 Function... Basic Default Channel Changed Default Mode Messages Altered Note Number : True Voice Note On Velocity Note Off After Key's Touch Channel's Pitch Bend 6, 38 Control Change 100, 101... -
Page 153: Specifications
*2 When a memory card is used, audio recording is possible for a maximum of 100 songs. When the JS-5 is used by itself, audio recording is possible for a maximum of 6 songs. In the interest of product improvement, the specifications and/or appearance of this unit are subject to change without prior notice. -
Page 154: Index
Index Adjust the Volume ...83 Arrange Mode ...119 Audio Track ...33, 55 AUTO ...133 Backup File ...126–127 Bass Part ...110 BREAK ...27, 55 Category ...20, 25, 55 Chord ...23, 28, 62 Chord Progression ...61 Chord Template ...35, 65 Chord Track ...33, 55 Chorus ...87 Chorus Send Level ...84 Contrast ...128... - Page 155 Index Recording Input ...111 Recording Level ...52 Recording Time ...111 Recording Track ...66 Remaining Memory ...130 REMOTE ...133 Rerecording ...113 Reverb ...86 Reverb Send Level ...84 Rhythm Machine ...30 Root ...23 Save ...59, 83, 86, 109 Sequence Track ...55 SmartMedia ...57, 125 Song ...55 Song Chain ...64 Song Name ...74...
- Page 156 MEMO...
- Page 157 MEMO...
- Page 158 MEMO...
- Page 159 IMPORTANT: THE WIRES IN THIS MAINS LEAD ARE COLOURED IN ACCORDANCE WITH THE FOLLOWING CODE. BLUE: NEUTRAL BROWN: LIVE As the colours of the wires in the mains lead of this apparatus may not correspond with the coloured markings identifying the terminals in your plug, proceed as follows: The wire which is coloured BLUE must be connected to the terminal which is marked with the letter N or coloured BLACK.
- Page 160 02126623 ‘01-02- AE2-31K...
Need help?
Do you have a question about the JamStation JS-5 and is the answer not in the manual?
Questions and answers
BOSS JamStation JS-5 Backing
The BOSS JamStation JS-5 provides high-quality accompaniments through its unique Backing Generator. It can create full four-part accompaniments, making it ideal for guitar and bass players to jam along with a rhythm section. Additionally, it includes a built-in Timestretch feature that automatically syncs audio recordings to internal patterns.
This answer is automatically generated