BUDDEE BD903205-BK - Dual Alarm Digital Clock Radio Manual
- User manual (2 pages)
Advertisement
For optimum performance and safety, read these instructions carefully before connecting, operating or adjusting this product. Refer to this manual for future reference.
INTRODUCTION
Never be late again with the Buddee Dual Alarm Digital Clock Radio. Set alarms for multiple times of the day or night to ensure you wake up on time ready for your important appointments.
Dual alarms and AM/FM radio allow you to wake up how and when you like while the compact size fits easily on your bedside table.
FEATURES
- Dual alarms
- AM/FM radio
- Sleep and snooze functions
- 20 radio presets
- Radio or buzzer alarms
PACKAGE CONTENTS
Before attempting to use this unit, please check the packaging and make sure the following items are contained in the shipping carton:
- Main unit (Dual alarm digital clock radio)
- Power cable
- User manual
TECHNICAL SPECIFICATIONS
Power source: AC 220V-240V 50Hz
Power consumption: 5W
Radio frequency: FM 87.5-108MHz
AM 522-1620kHz
Speaker: 50mm 8 (ohm), 0.5W
Battery backup: 1.5V (AAA battery) x2 (not included)
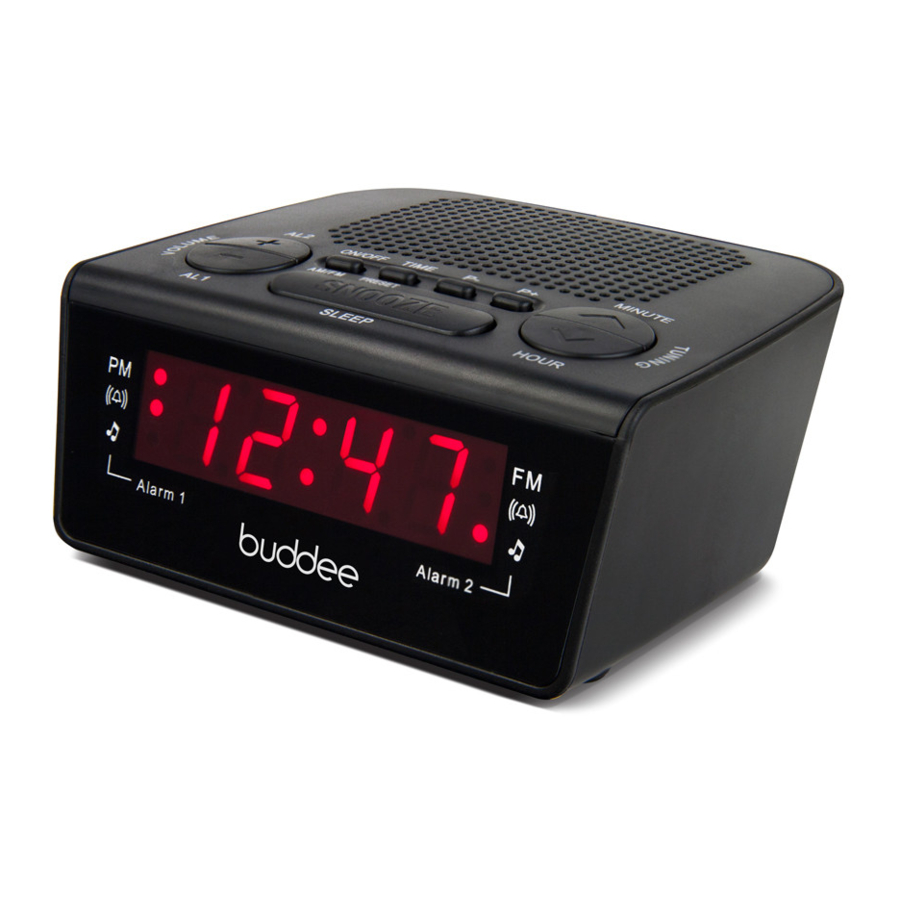
DEVICE FUNCTIONS

- Set alarm 1 / Increase volume
- Set alarm 2 / Decrease volume
- Radio ON/OFF / Select AM/FM
- Set time / Set radio presets
- Previous radio preset
- Next radio preset
- Set minutes / Increase radio frequency
- Set hour/ Decrease radio frequency
- Set sleep timer / Snooze alarm
- PM indicator
- Alarm 1 Buzzer indicator
- Alarm 1 Radio indicator
- FM indicator
- Alarm 1 Buzzer indicator
- Alarm 2 Radio indicator
POWER SOURCE
Please check carefully that the voltage indicated on the rating label corresponds to the voltage of your area. Plug the AC cord into a standard wall socket.
BATTERY BACKUP
This unit has a backup battery which provides power in the event of a power outage.
- Remove battery door.
- Insert 2 new AAA batteries (not included).
- Replace the battery door.
If there is a power failure, the time setting, alarm setting and memory settings will not be affected. The LED display will not be illuminated while backup battery is in use. After AC power is restored, the unit will function normally with the settings from before the power outage.
Note: If the unit will not be used for an extended period of time, disconnect from AC power and remove the batteries.
OPERATING THE RADIO
- Press the ON/OFF button once to turn the radio on. The radio will begin playing on the FM band.
- Press the AM/FM button to switch between AM and FM.
- Adjust the volume with the VOLUME buttons. Volume range: 00 (mute) to 16 (max).
- Use the TUNING buttons to tune to your desired station. Manual Tuning: Press either of the TUNING buttons repeatedly to reach the desired frequency. In AM mode, each press will adjust the frequency up or down by 9KHz. In FM mode, each press will adjust up or down by 0.1MHz.
Automatic Scanning: Press and hold either of the TUNING buttons to auto scan. Scanning will stop automatically when a clear signal is found. Repeat until the desired station is reached. *To stop auto scanning, press any button once.
Note: In areas where the radio signal is not strong, auto scanning may fail to find a strong enough signal. In this case, please use manual tuning. - To turn off the radio, hold the ON/OFF button until the radio is turned off and the LED displays the time.
Note: The current station and volume will be memorised when the radio is turned off, and will be played the next time the radio is turned on.
For the best FM reception, extend the FM antenna wire to its full length and move around to find the direction which captures the strongest signal. Do not connect the FM wire to an outdoor antenna.
For AM reception, extend the inbuilt antenna and turn the unit to find the optimal direction.
PRESETTING RADIO STATIONS
You can preset up to 10 stations for each AM and FM, these are stored as P01, P02, etc.
- Tune the radio to the station you wish to preset.
- Hold the preset button until the last memorised preset number appears and flashes.
- Select the desired preset number using the P+ and P- buttons.
- Once the desired preset number is displayed on screen, press the PRESET button once to save.
Note: If the PRESET button is not pressed within 5 seconds of reaching the desired preset number, preset mode will be exited and the preset will not be saved.
If the chosen preset number is already saved, the existing preset will be overwritten.
TUNING IN TO A PRESET STATION
- When the radio is on, press either the PRESET, or P+ button once to tune into the next preset.
- Continually press the P+ or P- button to reach the desired preset.
![]()

TIME SETTING
- When the unit is first plugged in to the power outlet, 12:00 will appear and flash on the display.
- Press the HOUR button to set the hour.
- Press the MINUTE button to set the minutes.
- Once the correct time is set, either press the TIME button or leave for 5 seconds to save.
- To adjust the current time, first switch off the radio. Hold the TIME button until the display flashes, then set the time following steps 2 - 4.
DUAL ALARM FUNCTION
This product allows the user to set dual alarms. These can be set independently, waking up to either the radio or a buzzer. When an alarm is set to radio, the user must select the desired band, station and volume level before turning off the radio.
ALARM SETTING
- To set the alarm time, the radio must be turned off.
- Press the ALARM 1 button once, the alarm time and either the Alarm 1 Buzzer or Radio indicator will flash.
- Set the desired time using the HOUR and MINUTE buttons.
- Once the desired time is set, either press the ALARM 1 button or leave for 5 seconds to save.
- Press the ALARM 1 button repeatedly to set the alarm function. The corresponding indicator be illuminated.
- To set alarm 2, repeat steps 1 - 5 using the ALARM 2 button.
Note: Alarms 1 and 2 have unique buzzer sounds, allowing the user to easily distinguish between the two alarms.
If the same time is set for both alarms, alarm 2 will take priority.
TURNING OFF THE ALARM
When the alarm sounds, press the ON/OFF or ALARM 1 button to turn off alarm 1. Repeat with the ALARM 2 button to turn off alarm 2. If a button isn't pressed after the alarm sounds, it will continue to sound and will turn off after 1 hour.
The alarm will sound again the same time the next day.
To disable the alarm, press the ALARM 1 or 2 button repeatedly until no alarm indicators are illuminated.
SNOOZE SETTING
When the alarm sounds, press the SNOOZE button to turn off the alarm. The alarm will sound again after 9 minutes. To switch off the alarm while snoozing, press the ON/OFF button. The alarm indicator will stop flashing and the alarm will sound again the next day.
SETTING THE SLEEP TIMER
The sleep function allows the radio to play for 10, 20, 30, 40, 50, 60, 70, 80 or 90 minutes before turning off automatically.
- Turn on the radio.
- Press the SLEEP button repeatedly to select the desired sleep time.
- During sleep mode, press the SLEEP button to display the remaining time. The sleep time can be set again following step 2.
- To turn off sleep mode, press the SLEEP button repeatedly until the LED displays OFF. The radio will continue to play until turned off manually.

Made in China
© Buddee Gear 2016. All rights reserved. All trademarks are registered trademarks of respective manufacturers listed.

Documents / ResourcesDownload manual
Here you can download full pdf version of manual, it may contain additional safety instructions, warranty information, FCC rules, etc.
Download BUDDEE BD903205-BK - Dual Alarm Digital Clock Radio Manual
Advertisement


Need help?
Do you have a question about the BD903205-BK and is the answer not in the manual?
Questions and answers