Table of Contents
Advertisement
Advertisement
Table of Contents

Related Manuals for ATV ATVM120


Summary of Contents for ATV ATVM120
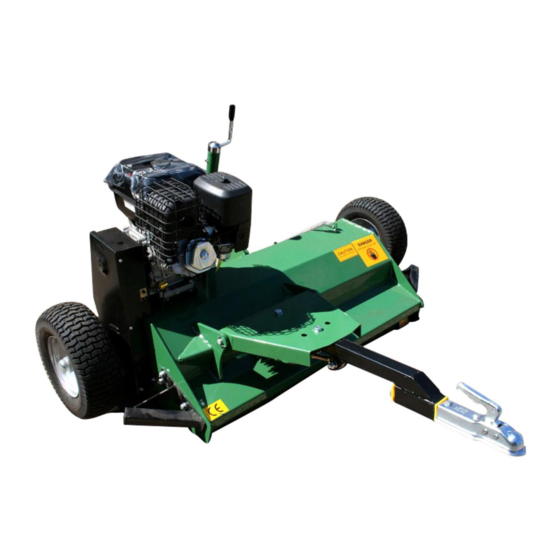
- Page 1 ATV Flail Mower ATVM120 - Operator’s Manual...
- Page 2 Important - Read These Instructions Fully. Important - Forward Speed & Cutting Height The ammount of grass or weedsto be cut dictates the forward speed and cutting height and should be adjusted accordingly. A slow forward speed will give the best results and prolong the use of the drive clutch and belts.
- Page 3 Fitted with an easy to start engine it has been designed to cope with a wi range of conditions. The ATV - Flail mower incorporates easy height adjustment, range of engine options and a full width anti-scalping roller to avoid damage to machine and sward.
- Page 4 1) Some weight is transferred from the trailer onto the ATV draw-bar; 2) The draw-bar has a swivel hitch and the ATV a ball hitch having a large head to neck ratio. This makes it easier for the draw-bar hitch to swivel and cope with undulating ground;...
- Page 5 ATVs using mounted equipment are safer if the equipment has: 1) A low centre of gravity. This improves stability. 2) A gross weight within the limits approved by ATV manufacturer. 3) No dangerous projections to injure the operator or bystanders;...
- Page 6 Be aware that increased speed greatly increases the risk of instability and risk of and overturn; Training Train everyone who has to use an ATV whether with mounted or trailed equipment or as a solo machine. The training should emphasise the factors affecting stability, the need for care and...
- Page 7 In The Interest Of Safety - Do Not 1) DO NOT - Operate the mower without all the correct guards fitted. 2) DO NOT - Alter engine settings unless stated by Engine manufacturer. 3) DO NOT -Touch any moving or rotating parts, during working conditions. 4) DO NOT - Stop the engine immediately after heavy use, (See section 5.6).
-
Page 8: In The Interest Of Safety - Do
5) DO - Reduce speeds when working on hillsides or rough terrain 6) DO - Be aware components can be hot after operation 7) DO - Follow any towing guidelines stated by ATV manufacturer. 8) DO - Show some caution when filling the tank with petrol, especially if engine components are hot. - Page 9 Instruction / Warning Decals Keep wheel nuts tight, check daily refer to the operations manual for correct tyre inflation pressure observe towings vehicle max towing limits or trailer max weights Attention Your responsibilities before operating this machine are: Read Understand and Follow the safety procedures manual. Train operators before using &...
- Page 10 5) DO - Reduce speeds when working on hillsides or rough terrain 6) DO - Be aware components can be hot after operation 7) DO - Follow any towing guidelines stated by ATV manufacturer. 8) DO - Show some caution when filling the tank with petrol, especially if engine components are hot.
-
Page 11: Initial Check
In The Interest Of Safety - Do The decals on the previous page should be located on your AT – Flail Mower. If any of the above decals are not located on your AT or are damaged in damaged in any way contact for some replacement decals before use. - Page 12 To Adjust 1) Unlock the locking nut (A) 2) Lengthen the link to lower the front of the deck or shorten to raise the deck 3) Once the deck is level, re-tighten locking nut (A) Quick Offset Drawbar - Unlock the nut and screw slide the drawbar to the desired position and release the screw into the securing hole then lock the nut, as shown.
-
Page 13: Mower Cutting Height
Mower Cutting Height The main cutting height adjustment is achieved by using the screw jack, to raise or lower the cutting deck as necessary. Cutting Height Adjustment Turn the handle to raise or lower as necessary Start The Engine Observe all safety precautions; keep hands and feet away from rotor and other moving parts. - Page 14 Push button electric start engine options can be supplied if required. Simply hitch up the mower, connect the electrical supply plug to the ATV socket and turn the ignition key to start the mover. Observing all the precautions mentioned above in Starting.
-
Page 15: Stopping The Mower
Start The Engine FAILURE TO DO THIS WILL RESULT IN CLUTCH SLIP AND ULTIMATELY SEVERE DAMAGE TO THE CLUTCH AND DRIVE When moving from normal working conditions to heavier cutting, it may be evident that the engine dies down and loses revs. SLOW DOWN IMMEDIATELY to allow the engine revs to build up again to normal working speed. - Page 16 Anti-Scalping Rolling / Side Skids The main purpose of the anti-scalping roller is to prevent damage. If a wheel drops into a hole, or there is uneven ground between the wheels, the roller takes the weight of the mower, avoiding the flails scalping the ground; combined with the side skids the mower provides good protection to the rotor.
-
Page 17: Maintenance Schedule
Maintenance Schedule... - Page 18 Maintenance Schedule Engine Refer to engine manufacturer’s manual, for servicing and maintenance of the engine.
-
Page 19: Visual Check
Excess Crop Build Up Remove all crop deposits from the deck, and engine area. Build-up of crop deposits could result in heat build and fires Disconnect the spark plug lead. Remove any crop that is wrapped around the end of the rotor (A) or on the underside of the deck. Raise the deck to its max height to assist access to the rotor shaft. -
Page 20: Wheel Bearing Inspection
Rotor Bearing Inspection Rotate rotor shaft by hand and feel for any roughness in the bearings. Also try to pull the shaft from side to side to see if any movement is found. If symptoms persist strip down the rotor-housing unit and inspect bearings. Wheel Bearing Inspection Jack one side of the mower body up, so the wheel is just off the ground. -
Page 21: General Inspection
General Inspection Check the mower to ensure all fasteners are tight and all safety guards / chains are intact and fitted securely. Check all safety-warning decals, Replace any defective guards or damaged decals. Rotor Flail Maintenance However, when breaking or losing a knife, it is important to replace it immediately. Failure to do this can cause serious unbalancing problems. - Page 22 ATV Flail Mower Part List...
- Page 23 ATV Flail Mower Assembly Number Part Number Name & Specifications Quantity Remark GB5783-86 BlotM12x30 GB93-87 Spring Washer 12 GB97.1-85 Plain Washer 12 MFP120.00.1 Fixing Sleeve Circlip 35 GB894.1-85 Circlip 62 GB893.1-86 Bearing 6007Z GB278-89 Driving MFP120.00.1 Belt Wheel Clutch Key 6.3x7x50 MFP120.00.0...
- Page 24 ATV Flail Mower Part List...
- Page 25 ATV Flail Mower Assembly Number Part Number Name & Specifications Quantity Remark Blot M8x16 GB97.1-85 Plain Washer 8 GB6184-86 Tensioner GB5783-86 Bearing 180105 GB96-85 Sleeve MFP120.00.15 Circlip 47 3 GB279-88 Cover MFP120.00.15 Blot M8x25 4 GB893.1-86 Plain Washer 8 MFP120.00.10 Locking Nut M20 MFP120.00.1...
- Page 26 Wheel Partment Assembly...
- Page 27 ATV Flail Mower Assembly Number Part Number Name & Specifications Quantity Remark GB1152-89 Oil cup M6 GB6170-86 Mut N12 GB97.1-85 Plain Washer 12 MFP120.00.03 Protection Casing Weldment GB5783-86 Bolt M12x35 MFP120.00.03 Handle 9 GB276-94 Bearing 61904 TR200.00.123 Bearing Seat GB301-95...
- Page 28 Wheel Partment Assembly...
- Page 29 Wheel Partment Assembly Number Part Number Name & Specifications Quantity Remark GB1152-89 Oil cup M6 GB6170-86 Mut N12 GB97.1-85 Plain Washer 12 MFP120.00.03 Protection Casing Weldment GB5783-86 Bolt M12x35 MFP120.00.03 Handle 9 GB276-94 Bearing 61904 TR200.00.123 Bearing Seat GB301-95 Bearing 51104 GB70-85 Screw M8x30 TR200.00.120...
- Page 30 Traction Assembly...
- Page 31 Traction Assembly Number Part Number Name & Specifications Quantity Remark ATV120.013 Soleplate Weldment GB5782-86 Blot M16x80 GB97.1-85 Plain Washer GB184-86 Locking Nut M16 GB5782-86 Blot M20x90 GB97.1-85 Plain Washer 20 GB93-87 Spring Washer 20 GB6170-86 Nut M20 ATV120.00.01 Bracket For Traction 5 GB5782-86 Blot M12x80 GB97.1-85...
Need help?
Do you have a question about the ATVM120 and is the answer not in the manual?
Questions and answers
How to replace the belts