
Related Manuals for LD CURV 500 I AMP


Summary of Contents for LD CURV 500 I AMP
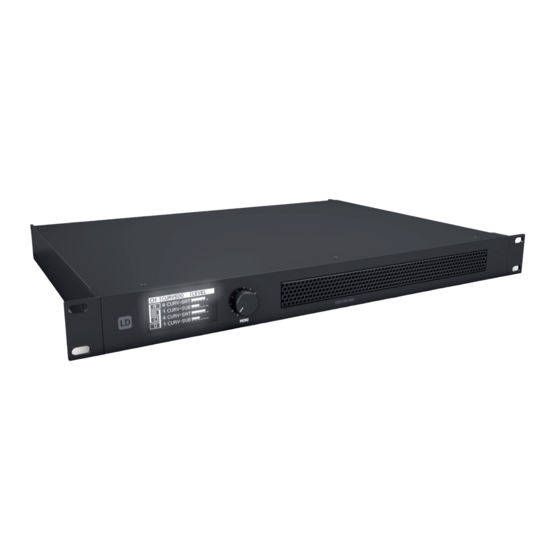
- Page 1 USER´S MANUAL BEDIENUNGSANLEITUNG MANUEL D`UTILISATION MANUAL DE USUARIO INSTRUKCJA OBSŁUGI MANUALE D‘ USO 操作说明书 操作說明書 CURV 500 I AMP ® 4 CHANNEL CLASS D INSTALLATION AMPLIFIER LDCURV500IAMP...
- Page 2 CONTENTS / INHALTSVERZEICHNIS / CONTENU / CONTENIDO / TREŚĆ / CONTENUTO / 目录 / 目錄 ENGLISH POLSKI PREVENTIVE MEASURES ŚRODKI OSTROŻNOŚCI 48-49 INTRODUCTION WPROWADZENIE CONNECTIONS, OPERATING AND DISPLAY ELEMENTS GNIAZDA, PANEL OBSŁUGI I WSKAŹNIKI OPERATION 6-10 OBSŁUGA 51-55 BRIDGE MODE / 70 V OPERATION 10-11 TRYB MOSTU/ ZASILANIA 70 V 55-56...
- Page 3 YOU‘VE MADE THE RIGHT CHOICE! We have designed this product to operate reliably over many years. LD Systems stands for this with its name and many years of experience as a manufacturer of high-quality audio products. Please read this User‘s Manual carefully, so that you can begin making optimum use of your LD Systems product quickly.
- Page 4 XLR sockets and terminal block connections. The I AMP can power up to six CURV-500 satellites or one CURV500ISUB subwoofer per channel via its Speakon-compatible output jacks or terminal block connections. Presets for speakers from the CURV500 series are pre-installed. PC software for management of the I AMP is available to download from the product page at WWW.LD-SYSTEMS.COM.
- Page 5 USB interface (Type B) for updating device firmware and loudspeaker presets, managing global presets and resetting the lock PIN. The corresponding Windows PC programme and current update files can be found along with a manual in the download area of the product at WWW.LD-SYSTEMS.COM HOUSING FAN...
- Page 6 OPERATION DISPLAY MAIN DISPLAY After switching on the power amplifier, the greeting ”Welcome” is displayed briefly. The main display then appears with the following information: amplifier name (editable), amplifier channel (CH A - D) with links, speaker preset, audio level with peak indicator and channel mute. Following about 10 minutes of no input, sections of the display fade out and only amplifier channel with links, audio level meter with peak display and channel mute are displayed.
- Page 7 DELAY Menu item for the configuring the channel delay (delay line). Press the rotary MENUdial to access the selection menu for device settings and turn the dial to select the menu item DELAY (bright background). Now press the dial, and then turn it to select the channel on which you want to adjust the delay.
- Page 8 PRESET Menu item for selecting loudspeaker presets for speakers from the LD CURV series. For example, select the preset 6 CURV-SATon the Smart Link® adapter for the appropriate channel if you wish to connect 6 x CURV 500 array satellites; select the preset 1 CURV SUB if you want to connect the CURV 500 installation-subwoofer (note: select the preset that corresponds with the number of satellites per SmartLink adapter).
- Page 9 Rotate MENU to select 0 -9 for second digit -> Press MENU etc. In the event of the PIN becoming lost, it can be reset to the factory setting (1234) by using the PC software and USB interface (downloadable from the product page at WWW. LD-SYSTEMS.COM). DELAY UNIT...
- Page 10 BRIDGE MODE / 70 V OPERATION To set up a 70 V installation with the CURV 500 I AMP and CURV 500 satellites you require the LD Systems SmartLink adapter for 70 V applications LDCURV500SLAT (available in black and white, please note the instructions in the user manual for the LDCURV500SLAT); if you wish to use the speakON-compatible speaker output of the CURV 500 I AMP you require speaker cables with specially configured speakON-compatible plugs, since two amplifier channels can be connected simultaneously in bridge mode in conjunction with the relevant speaker preset.
- Page 11 3 x LDCURV500SAT 3 CURV 500 satellites per SmartLink adapter 70 V = maximum of 8 SmartLink adapters (8 x 60 W = 480 W max.) Speaker preset 3xC500-70V LDCURV500SLAT 4 x LDCURV500SAT 4 CURV 500 satellites per SmartLink adapter 70 V = maximum of 6 SmartLink adapters (6 x 80 W = 480 W max.) Speaker preset 4xC500-70V LDCURV500SLAT...
- Page 12 TECHNICAL DATA Model number: LDCURV500IAMP Product type: DSP controlled amplifier Type: 4-Channel Rated output power (1 kHz @ 2,7 Ohm): 4 x 240 W (depending on preset) Rated output power (1 kHz @ 4 Ohm): 4 x 240 W (depending on preset) Rated output power (1 kHz @ 8 Ohm): 4 x 120 W (depending on preset) Rated output power (1 kHz @ 16 Ohm):...
- Page 13 MANUFACTURER´S DECLARATIONS MANUFACTURER‘S WARRANTY & LIMITATIONS OF LIABILITY You can find our current warranty conditions and limitations of liability at: https://cdn-shop.adamhall.com/media/pdf/MANUFACTURERS- DECLARATIONS_LD_SYSTEMS.pdf .To request warranty service for a product, please contact Adam Hall GmbH, Adam-Hall-Str. 1, 61267 Neu Anspach / Email: Info@adamhall.com / +49 (0)6081 / 9419-0. CORRECT DISPOSAL OF THIS PRODUCT (valid in the European Union and other European countries with a differentiated waste collection system) This symbol on the product, or on its documents indicates that the device may not be treated as household waste.
- Page 14 Dieses Gerät wurde unter hohen Qualitätsanforderungen entwickelt und gefertigt, um viele Jahre einen reibungslosen Betrieb zu gewährleisten. Dafür steht LD Systems mit seinem Namen und der langjährigen Erfahrung als Hersteller hochwertiger Audioprodukte. Bitte lesen Sie diese Bedie- nungsanleitung sorgfältig, damit Sie Ihr neues Produkt von LD Systems schnell optimal einsetzen können.
- Page 15 Die symmetrische Eingänge sind als XLR-Buchsen und Schraub-Steckverbindungen ausgeführt. Der I AMP kann pro Kanal bis zu sechs CURV-500- Satelliten oder einen CURV500ISUB Subwoofer über speakON-kompatible Ausgangsbuchsen oder Schraub-Steckverbindungen ansteuern. Presets für die Lautsprecher der CURV500 Serie sind vorinstalliert. Eine PC Software für die Verwaltung des I AMP ist auf der Produktseite auf WWW.LD-SYSTEMS.COM als Download erhältlich.
- Page 16 USB-Schnittstelle (Typ B) zum Updaten der Geräte-Firmware und der Lautsprecher-Presets, zum Verwalten der Global Presets und zum Zurücksetzen der Sperr-PIN. Das entsprechende Windows PC-Programm und aktuelle Update-Files finden Sie mit einer Anleitung im Download-Bereich des Produkts auf WWW.LD-SYSTEMS.COM GEHÄUSELÜFTER Um Überhitzung des Geräts zu vermeiden, achten Sie darauf, dass die Lüfter nicht abgedeckt werden und Luft ungehindert zirkulieren kann.
- Page 17 BEDIENUNG DISPLAY HAUPTANZEIGE Nach dem Einschalten des Verstärkers wird als Begrüßungstext für kurz Zeit „WELCOME“ angezeigt, danach erscheint die Hauptanzeige mit folgenden Informationen: Verstärkername (editierbar), Verstärkerkanal (CH A - D) mit Verlinkung, Lautsprecher-Preset, Audiopegel mit Peak-Anzeige und Kanal-Stummschaltung (Mute). Erfolgt für circa 10 Minuten keine Eingabe, werden Teile der Anzeige ausgeblendet und nur Verstärkerkanal mit Verlinkung, Audiopegel mit Peak-Anzeige und Kanal-Stummschaltung werden angezeigt.
- Page 18 MASTER VOLUME Die Einstellung der Gesamtlautstärke kann direkt aus der Hauptanzeige erfolgen, sofern diese Option im entsprechenden Menüpunkt aktiviert wurde, selbst dann, wenn die Sperrung der Bedienelemente aktiviert wurde. Drücken Sie auf den Drück-Dreh-Geber MENU, um ins Auswahlmenü für die Geräteeinstellungen zu gelangen und wählen durch Drehen des Gebers den Menüpunkt MASTER VOLUME aus (hell hinterlegt). Drücken Sie nun 2-mal auf den Geber, wählen durch Drehen des Gebers nach links „ON“...
- Page 19 EQUALIZER Menüpunkt zum Einstellen des 10-Band parametrischen Equalizers in den Kanälen A bis D. Drücken Sie auf den Drück-Dreh-Geber MENU, um ins Aus- wahlmenü für die Geräteeinstellungen zu gelangen und wählen durch Drehen des Gebers den Menüpunkt EQUALIZER aus (hell hinterlegt). Drücken Sie nun auf den Geber und wählen durch Drehen des Gebers den Kanal aus, den Sie bearbeiten möchten (Kanal A - D).
- Page 20 PRESET Menüpunkt für die Auswahl der Lautsprecher-Presets für die Lautsprecher der LD CURV Serie. Wählen Sie beispielsweise das Preset 6 CURV-SAT, wenn Sie am entsprechenden Kanal 6 Stück CURV 500 Array Satelliten am SmartLink® Adapter, das Preset 1 CURV-SUB, wenn Sie den CURV 500 Installations-Subwoofer anschließen möchten (Hinweis: Wählen Sie das der Anzahl der Satelliten pro SmartLink...
- Page 21 9 für die erste Stelle -> MENU drücken -> MENU drehen für die Auswahl einer Zahl von 0 bis 9 für die zweite Stelle -> Menu drücken usw.. Geht die PIN verloren, kann diese mit Hilfe der PC-Software über die USB-Schnittstelle auf Werkseinstellung (1234) zurückgesetzt werden (Download von der Produktseite auf WWW.LD-SYSTEMS.COM). DELAY UNIT Einstellen der Längenmaßeinheit der Kanalverzögerung METERS / FEET:...
- Page 22 BRIDGE-MODUS / 70 V-BETRIEB Zum Einrichten einer 70V Installation mit dem CURV 500 I AMP und CURV 500 Satelliten benötigen Sie den LD-Systems SmartLink Adapter für 70V Anwendungen LDCURV500SLAT (in schwarz und weiß erhältlich, beachten Sie die Hinweise in der Bedienungsanleitung für LDCURV500SLAT) und falls Sie den speakON-kompatiblen Lautsprecherausgang des CURV 500 I AMP verwenden möchten, Lautsprecherkabel, mit speziell belegten...
- Page 23 3 x LDCURV500SAT 3 x CURV 500 Satellit pro SmartLink Adapter 70V = Menge maximal 8 SmartLink Adapter (8 x 60W = 480W max.) Lautsprecher-Preset 3xC500-70V LDCURV500SLAT 4 x LDCURV500SAT 4 x CURV 500 Satellit pro SmartLink Adapter 70V = Menge maximal 6 SmartLink Adapter (6 x 80W = 480W max.) Lautsprecher-Preset 4xC500-70V LDCURV500SLAT...
- Page 24 TECHNISCHE DATEN Modellnummer: LDCURV500IAMP Produkttyp: DSP-gesteuerter Verstärker Typ: 4-Kanal Nennausgangsleistung (1 kHz an 2,7 Ohm): 4 x 240 W (je nach Voreinstellung) Nennausgangsleistung (1 kHz an 4 Ohm): 4 x 240 W (je nach Voreinstellung) Nennausgangsleistung (1 kHz an 8 Ohm): 4 x 120 W (je nach Voreinstellung) Nennausgangsleistung (1 kHz an 16 Ohm): 4 x 60 W (je nach Voreinstellung)
- Page 25 HERSTELLERERKLÄRUNGEN HERSTELLERGARANTIE & HAFTUNGSBESCHRÄNKUNG Unsere aktuellen Garantiebedingungen und Haftungsbeschränkung finden Sie unter: https://cdn-shop.adamhall.com/media/pdf/MANUFACTURERS- DECLARATIONS_LD_SYSTEMS.pdf. Im Service Fall wenden Sie sich bitte an Adam Hall GmbH, Adam-Hall-Str. 1, 61267 Neu Anspach / E-Mail Info@adamhall.com / +49 (0)6081 / 9419-0. KORREKTE ENTSORGUNG DIESES PRODUKTS (Gültig in der Europäischen Union und anderen europäischen Ländern mit Mülltrennung) Dieses Symbol auf dem Produkt oder dazugehörigen Dokumenten weist darauf hin, dass das Gerät am Ende der Produktlebenszeit nicht zusammen mit dem normalen Hausmüll entsorgt werden darf, um Umwelt- oder Personenschäden durch unkontrollierte Abfallentsorgung zu vermeiden.
- Page 26 Cet appareil a été développé et fabriqué en appliquant des exigences de qualité très élevées : il garantit des années de fonctionnement sans problème. Grâce à de nombreuses années d‘expérience, LD Systems est un nom connu dans le domaine des produits audio haut de gamme. Veuillez lire attentivement ce Manuel Utilisateur : vous apprendrez rapidement à...
- Page 27 SpeakON ou les borniers à vis. Les haut-parleurs de la série CURV500 sont préconfigurés. Un logiciel pour PC destiné à la gestion de l’I AMP peut par ailleurs être téléchargé sur la page du produit du site WWW.LD-SYSTEMS.COM.
- Page 28 Presets) et la réinitialisation du code PIN de verrouillage. Le logiciel pour PC adapté fonctionnant sous Windows et les derniers fichiers de mise à jour peuvent être téléchargés sur la page dédiée au produit du site WWW.LD-SYSTEMS.COM. VENTILATEUR DE L’APPAREIL...
- Page 29 MODE D’EMPLOI ÉCRAN PRINCIPAL À la mise sous tension de l’amplificateur, un message de bienvenue s’affiche brièvement (WELCOME). L’écran principal met ensuite à disposition les informations suivantes : désignation de l’amplificateur (modifiable), canal d’ampli (CH A - D) avec liaison correspondante, haut-parleurs préconfigu- rés, niveau audio avec valeur-crête et canal mis en sourdine (Mute).
- Page 30 DELAY Option de menu permettant de régler le délai de temporisation du canal (Delay Line, par ex.). Appuyer sur le bouton de réglage MENU pour accéder au menu de sélection des paramètres de l’appareil et le tourner pour sélectionner l’option DELAY (mise en surbrillance). Appuyer sur le bouton de réglage et le tourner pour sélectionner le canal pour lequel le délai de temporisation (Delay) doit être réglé.
- Page 31 Pour revenir à l’écran principal, tourner le bouton de réglage et sélectionner l’option EXIT (mise en surbrillance), puis confirmer en appuyant sur le bouton de réglage. Au bout d’environ 10 secondes d’inactivité, l’écran principal s’affiche. PRESET Option de menu permettant de sélectionner les haut-parleurs préconfigurés de la série LD CURV (presets). Sélectionner, par exemple, le preset...
- Page 32 En cas de perte du code PIN, ce dernier peut être réinitialisé via le logiciel pour PC et l’interface USB (rétablisse- ment du réglage usine : 1234) (logiciel téléchargeable sur la page dédiée au produit du site WWW.LD-SYSTEMS.COM). DELAY UNIT Réglage de l’unité...
- Page 33 DELAY TEMP Réglage du calcul de la distance sur la température ambiante (La vitesse de propagation du son dépend, entre autres, de la température ambiante) : Appuyer deux fois sur le bouton MENU -> Tourner le bouton MENU pour régler une température comprise entre 0° C et 40° C ->...
- Page 34 70 V LDCURV500SLAT de LD-Systems (disponible en noir et blanc, tenez compte des indications figurant dans le mode d'emploi du LDCURV500SLAT). Si vous souhaitez utiliser la sortie de haut-parleur compatible speakON du CURV 500 I AMP, il vous faut aussi des câbles de haut-parleurs avec des connecteurs compatibles speakON à...
- Page 35 4 x LDCURV500SAT 4 satellites CURV 500 par adaptateur SmartLink 70 V = quantité maximale 6 adaptateurs SmartLink (6 x 80 W = 480 W max.) Preset de haut-parleur 4xC500-70V LDCURV500SLAT AFFECTATION DES SORTIES DE HAUT-PARLEUR Les contacts des connecteurs compatibles speakON et des connecteurs à vis sont raccordés en parallèle. En mode Bridge (BTL = Bridge Tied Load) / Fonctionnement 70 V, les connecteurs compatibles speakON B et D NE doivent PAS être affectés, de même que les pôles négatifs des connexions à...
- Page 36 Réglages : Bouton-poussoir rotatif Indicateurs : Écran OLED Fréquence d'échantillonnage du convertis- 48 kHz seur A/N-N/A : Résolution du convertisseur A/N-N/A : 24 bits Plage dynamique : 114 dB Délai maximum / Canal : 59 m / 166 ms Égaliseur : 10 x Paramétrique / Canal Entrées : Connecteurs d'entrée ligne : XLR (symétrique), bornes à visser Sorties haut-parleur : Connecteurs de sortie enceintes : Bornes à...
- Page 37 Este equipo está diseñado y fabricado con los estándares de calidad más exigentes, para garantizar un correcto funcionamiento durante muchos años. Los productos de LD-Systems se caracterizan por su gran calidad, avalada por el prestigio de la marca y una dilatada experiencia como fabri- cante.
- Page 38 CURV 500 o un subwoofer CURV500ISUB a través de las salidas compatibles speakON o los bloques de terminales enroscables/ enchufables. Los ajustes predeterminados para los altavoces de la serie CURV500 vienen preinstalados. Hay un software para PC que permite gestio- nar el I AMP, y que se puede descargar en la página del producto en WWW.LD-SYSTEMS.COM.
- Page 39 Puerto USB (tipo B) para actualizar el firmware del equipo y los ajustes predeterminados de los altavoces, así como para administrar los ajustes predeterminados globales y restablecer el PIN de bloqueo. El correspondiente programa de Windows para PC y los últimos archivos de actualiza- ción, junto con sus instrucciones, están disponibles en la zona de descarga del producto en WWW.LD-SYSTEMS.COM...
- Page 40 VENTILADORES DE LA CARCASA Para evitar el sobrecalentamiento del equipo, compruebe que estos ventiladores no están cubiertos y que el aire puede circular libremente. FUNCIONAMIENTO PANTALLA PRINCIPAL DEL DISPLAY Tras encender el amplificador, como texto de saludo se muestra brevemente "WELCOME"; después aparece la pantalla principal con la siguiente información: nombre del amplificador (editable), canal del amplificador (CH A - D) con vinculación, ajuste predeterminado del altavoz, nivel de audio con indicador de pico y silenciado del canal (Mute).
- Page 41 MASTER VOLUME La configuración del volumen general se puede realizar directamente en la pantalla principal siempre que esta opción se haya activado en el punto pertinente del menú, incluso si se activó el bloqueo de los elementos de manejo. Presione MENU en el pulsador giratorio para acceder a los ajustes del equipo en el menú...
- Page 42 ECUALIZADOR Punto del menú para configurar el ecualizador paramétrico de 10 bandas en los canales A a D. Presione MENU en el pulsador giratorio para acceder a los ajustes del equipo en el menú de selección y elija el punto del menú EQUALIZER (resaltado con color claro) girando el pulsador. Ahora presione el pulsador y, girándolo, seleccione el canal que desea editar (canal A - D).
- Page 43 PRESET Punto del menú para seleccionar los ajustes predeterminados de los altavoces de la serie LD CURV. Por ejemplo, escoja el ajuste predeterminado 6 CURV-SAT si desea conectar 6 satélites de array del CURV 500 con el adaptador SmartLink en el canal pertinente, y el ajuste predeterminado 1 CURV-SUB ®...
- Page 44 MODO BRIDGE / FUNCIONAMIENTO A 70 V Para configurar una instalación de 70 V con el CURV 500 I AMP y satélites CURV 500, hace falta el adaptador SmartLink de LD Systems para aplicaci- ones de 70 V (LDCURV500SLAT) (disponible en negro y blanco, tenga en cuenta las indicaciones del manual de instrucciones del LDCURV500SLAT) y además, si desea utilizar la salida de altavoz compatible con speakON del CURV 500 I AMP, necesitará...
- Page 45 2 x LDCURV500SAT 2 satélites CURV 500 por adaptador SmartLink a 70 V = Cantidad máxima de 12 adaptadores SmartLink (12 x 40 W = 480 W máx.) Ajuste predeterminado del altavoz 2xC500-70V LDCURV500SLAT 3 x LDCURV500SAT 3 satélites CURV 500 por adaptador SmartLink a 70 V = Cantidad máxima de 8 adaptadores SmartLink (8 x 60 W = 480 W máx.) Ajuste predeterminado del altavoz 3xC500-70V LDCURV500SLAT...
- Page 46 ASIGNACIÓN DE SALIDAS DE ALTAVOZ Los contactos de los conectores hembra compatibles con speakON y de los conectores macho de rosca están cableados en paralelo. En el modo Bridge (BTL = Bridge Tied Load) / funcionamiento a 70 V NO se deben utilizar los conectores hembra B y D compatibles con speakON, así como tam- poco los polos negativos de los conectores macho de rosca.
- Page 47 Conexiones de salida de altavoz: Compatible con Speakon, terminales enroscables/enchufables Desconexión de toma de tierra: Sí, integrada en la interfaz gráfica Refrigeración: ventilador de bajo ruido controlado por temperatura, silencioso en modo reposo Voltaje de funcionamiento: 100 V – 240 V CA / 50-60 Hz Fusible: 110 –...
- Page 48 Firma LD Systems gwarantuje to swoją marką i wieloletnim doświadczeniem w wytwarzaniu wysokiej jakości produktów audio. Proszę starannie przeczytać niniejszą instrukcję obsługi, aby móc jak najszybciej zacząć użytkować ten produkt marki LD Systems. Dalsze informacje na temat firmy LD SYSTEMS dostępne są na naszej stronie internetowej WWW.LD-SYSTEMS.COM ŚRODKI OSTROŻNOŚCI...
- Page 49 śrubowych wzmacniacza I AMP można podłączyć maks. sześć satelitów CURV-500 lub jeden subwoofer CURV500ISUB. Presety dla głośników serii CURV500 zostały zainstalowane fabrycznie. Oprogramowanie PC do sterowania wzmacniaczem I AMP dostępne jest do pobrania na stronie produktu WWW.LD-SYSTEMS.COM.
- Page 50 Interfejs USB (typu B) służący do aktualizowania oprogramowania sprzętowego oraz presetów głośnika, zarządzania globalnymi presetami oraz resetowania kodu PIN blokady. Odpowiedni program Windows PC oraz aktualne pliki aktualizacyjne wraz z instrukcjami dostępne są do pobrania na stronie produktu WWW.LD-SYSTEMS.COM. WENTYLATOR OBUDOWY...
- Page 51 OBSŁUGA GŁÓWNE WSKAŹNIKI WYŚWIETLACZA Po włączeniu wzmacniacza wyświetli się krótki tekst powitalny „WELCOME”, a następnie pojawi się ekran główny z następującymi informacjami: nazwa wzmacniacza (edytowalna), kanał wzmacniacza (CH A – D) z połączeniem, preset głośnika, poziom sygnału audio ze wskaźnikiem szczytowym oraz wskaźnik wyciszenia kanału (Mute). Po około 10 minutach bezczynności elementy wyświetlacza zgasną i wy- świetlać...
- Page 52 DELAY Ta opcja menu służy do ustawiania opóźnienia kanału (np. Delay-Line). Nacisnąć pokrętło MENU, aby wejść w menu ustawień urządzenia, i obracać nim, aby wybrać opcję DELAY (opcja ta zostanie podświetlona). Nacisnąć pokrętło i obracać nim, aby wybrać kanał, który ma zostać opóźniony (De- lay).
- Page 53 PRESET Opcja menu, która służy do wybierania presetów dla głośników z serii LD CURV. Wybrać, przykładowo, preset 6 CURV-SAT, jeśli za pomocą adaptera SmartLink® do odpowiedniego kanału podłączonych ma zostać 6 satelitów CURV 500 Array lub preset 1 CURV-SUB, jeśli podłączony ma zostać subwo- ofer przeznaczony do instalacji w systemach CURV 500 (wskazówka: wybrać...
- Page 54 0 do 9 -> nacisnąć pokrętło MENU itd. W razie utracenia kodu PIN można go przywrócić do wartości fabrycznej (1234) za pomocą komputera PC z oprogramowaniem. Urządzenie można podłączyć, korzystając z gniazda USB. Oprogramowanie można znaleźć na stronie produktu WWW.LD-SYSTEMS.COM). DELAY UNIT Opcja ta służy do ustawiania jednostek długości opóźnienia kanału na METERS / FEET (metry lub stopy):...
- Page 55 TRYB MOSTU/ ZASILANIA 70 V Aby skonfigurować instalację 70 V z satelitami CURV 500 I AMP oraz CURV 500, potrzebny jest adapter SmartLink systemów LD przeznaczony do zastosowań 70 V LDCURV500SLAT (adaptery dostępne są w kolorze czarnym i białym; należy przestrzegać wskazówek zawartych w instrukcji obsługi LDCURV500SLAT).
- Page 56 2 x LDCURV500SAT 2 satelity CURV 500 na adapter SmartLink 70 V = maksymalna liczba adapterów SmartLink to 12 (12 x 40 W = 480 W maks.) Preset głośnika 2xC500-70V LDCURV500SLAT 3 x LDCURV500SAT 3 satelity CURV 500 na adapter SmartLink 70 V = maksymalna liczba adapterów SmartLink to 8 (8 x 60 W = 480 W maks.) Preset głośnika 3xC500-70V LDCURV500SLAT...
- Page 57 ZAJMOWANIE WYJŚĆ GŁOŚNIKOWYCH Styki gniazd kompatybilnych ze złączami speakON oraz złącza śrubowe połączone są równolegle. W trybie mostu (BTL = Bridge Tied Load) / zasilania 70 V NIE wolno zajmować gniazd B i D kompatybilnych ze złączami speakON ani bieguna ujemnego złącza śrubowego. Należy zwrócić uwagę na dowolnie konfigurowalny routing wejść...
- Page 58 Chłodzenie: cichy wentylator sterowany temperaturą, bezszelestny w trybie bezczynności Napięcie pracy: zasilacz impulsowy, 115 V AC / 230 V AC, 50/60 Hz (automatyczna konwersja) Bezpiecznik: 110–120 V AC: T10AL / 250 V 220–240 V AC: T5AL / 250 V Pobór mocy przy pełnym obciążeniu: 1100 W Temperatura otoczenia (podczas pracy): 0°C–35°C...
- Page 59 Quest‘apparecchio è stato sviluppato e prodotto secondo elevati standard qualitativi che garantiscono un funzionamento regolare per molti anni. Per questo motivo LD Systems, con il suo nome e la pluriennale esperienza, rappresenta un‘azienda produttrice di prodotti audio di qualità. Leggete attentamente questo manuale d‘uso per utilizzare al meglio il vostro nuovo prodotto LD Systems.
- Page 60 AMP può comandare fino a sei satelliti CURV-500 o un subwoofer CURV500ISUB tramite prese d'uscita speakON compatibili o raccordi a vite/ connettori a spina. I preset per gli altoparlanti della serie CURV500 sono preinstallati. Sul sito del prodotto WWW.LD-SYSTEMS.COM è inoltre disponibile per il download un software per PC per la gestione dell'I AMP.
- Page 61 Interfaccia USB (di tipo B) per l’aggiornamento del firmware del dispositivo e dei preset degli altoparlanti, per la gestione dei preset globali e per la reimpostazione del PIN di blocco. Il programma per Windows corrispondente e i file di aggiornamento correnti sono disponibili nell’area download del sito del prodotto WWW.LD-SYSTEMS.COM VENTOLE DELL’ALLOGGIAMENTO...
- Page 62 COMANDO SCHERMATA PRINCIPALE DEL DISPLAY In seguito all'accensione dell'amplificatore, verrà visualizzato brevemente il saluto "WELCOME" e, successivamente, comparirà la schermata principale con le seguenti informazioni: nome amplificatore (modificabile), canale amplificatore (CH A - D) con collegamento, preset degli altoparlanti, livello audio con visualizzazione del picco e muting del canale.
- Page 63 Voce di menu per l’impostazione del ritardo dei canali (ad es. delay line). Premere sul trasduttore di pressione/rotazione MENU per accedere al menu di selezione delle impostazioni del dispositivo e, ruotando il trasduttore, selezionare la voce di menu DELAY (evidenziata). Premere il trasduttore e, ruotandolo, selezionare il canale per cui si desidera impostare il ritardo (delay).
- Page 64 PRESET Voce di menu per la selezione dei preset degli altoparlanti della serie LD CURV. Selezionare, ad esempio, il preset 6 CURV-SAT, se si desidera collegare allo stesso canale 6 satelliti array CURV 500 dell’adattatore SmartLink®, il preset 1 CURV-SUB, se si desidera collegare il subwoofer CURV 500 (nota: selezionare il preset corrispondente al numero di satelliti per adattatore SmartLink ®...
- Page 65 9 per la prima posizione -> Premere MENU -> Ruotare MENU per selezionare un numero da 0 a 9 per la seconda posizione -> Premere MENU, ecc. Se si perde il PIN, tramite il software per PC (scaricabile dal sito del prodotto WWW. LD-SYSTEMS.COM) e l'interfaccia USB può essere reimpostato all'impostazione di fabbrica (1234). DELAY UNIT Impostazione dell'unità...
- Page 66 BRIDGE MODE/70V Per l’allestimento di un impianto da 70V con satelliti CURV 500 I AMP e CURV 500 è necessario l’adattatore SmartLink di LD-Systems per applicazioni LDCURV500SLAT da 70V (disponibile nei colori bianco e nero; seguire le istruzioni riportate nel manuale d’uso per LDCURV500SLAT) e qualora si desi- deri utilizzare l’uscita dell’altoparlante del CURV 500 I AMP compatibile con speakON, i cavi per altoparlanti, con appositi connettori compatibili con...
- Page 67 2 x LDCURV500SAT 2 satelliti CURV 500 per ciascun adattatore SmartLink da 70V = numero massimo 12 adattatori SmartLink (12 x 40W = 480W max.) Preset altoparlanti 2xC500-70V LDCURV500SLAT 3 x LDCURV500SAT 3 satelliti CURV 500 per ciascun adattatore SmartLink da 70V = numero massimo 8 adattatori SmartLink (8 x 60W = 480W max.) Preset altoparlanti 3xC500-70V LDCURV500SLAT...
- Page 68 DISPOSIZIONE USCITE ALTOPARLANTE I contatti delle prese compatibili con speakON e dei connettori per morsettiera sono cablati in parallelo. In Bridge Mode (BTL = Bridge Tied Load) / 70V NON è consentito utilizzare le prese B e D compatibili con speakON, altrettanto dicasi per i poli negativi dei connettori per morsettiera. All’attivazione del segnale osservare il routing in ingresso liberamente configurabile (punto ROUTING).
- Page 69 Raffreddamento: ventola di termoregolazione a basso rumore, silenziosa quando è inattiva Tensione operativa: 100V-240V AC / 50-60Hz Fusibile: 110 - 120 V CA: T10AL / 250 V 220 - 240V CA: T5AL / 250V Consumo elettrico a pieno carico: 1100 W Temperatura ambiente (in funzione): 0°C - 35°C Umidità...
- Page 70 简体中文 购买我们的产品是您正确的选择! 本产品在极高的质量要求下研发制造, 可确保长年平稳运作。 LD Systems享誉全球、 经验丰富, 是一家高品质音频设备制 造商。 请仔细阅读这本使用说明书, 以便您能尽快以最佳方式使用LD Systems的产品。 关于LD SYSTEMS的更多信息请访问我们的网站WWW.LD-SYSTEMS.COM 安全须知 1.请仔细通读这本使用说明书。 2.请将所有信息和说明妥善保存。 3.请按照说明中的指示进行操作。 4.请注意所有的警告提示。 请勿移除设备上的安全提示或其它信息。 5.请按照说明中规定的方法使用本设备。 6.请将设备放置在稳固、 合适的三脚架或固定装置上 (固定安装方式) 。 确保墙面支架安装正确, 安全牢固。 确保本设备安 装牢固, 不会滑落。 7.进行安装时请注意本国适用的安全规定。 8.请勿在暖气、 储热器、 锅炉及其它热源附近安装和运行本设备。 确保本设备安装后能够充分散热冷却。 9.请勿将任何火源 (如燃烧的蜡烛) 放置在本设备上。 10.请勿堵塞通风口。 11. 务请与设备周围和上方至少保持 20 厘米的距离。 12.请勿靠近水源运行本设备。 设备不得接触可燃性物质、 液体和气体。 避免阳光直射!...
- Page 71 本设备适用于专业用途。 本设备商用时, 应遵守本国适用的事故预防性规定和准则。 作为制造商, Adam Hall公司在法律 上有义务明确提醒您可能存在的健康风险。 过高的音量和长时间强音负荷会导致听力受损: 使用本产品时可能产生很高 的声压级 (SPL) , 会造成音乐人、 工作人员和听众受到不可逆转的听力损伤。 请避免长时间 受到音量高于90dB的负荷。 引言 I AMP是一款安装在19英寸机架中的四通道放大器, 专门为安装CURV-500系统而研发。 设备外观扁平, 带有D类拓扑结 构和DSP控制单元, 具有高效的开关电源, 频响范围为10Hz – 22kHz。 每个信道都有参数化音质调节和延迟功能, 4欧姆 负载提供240瓦RMS, 谐波失真率小于0.01%。 I AMP使用具有编码功能的旋按式调节器和对比度高、 清晰易读的OLED显示屏, 操作简单、 直观。 设备配有软启动功能以 及低噪音温控风扇, 带有直流、 过流、 过热和短路保护功能。 对称输入有XLR插口和螺旋插塞接口两种方式。 I AMP的每个 信道都能控制多达6个CURV-500卫星音箱, 或者通过speakON兼容输出插口或螺旋插塞接口控制一个CURV500ISUB 重低音音箱。 设备已预装了CURV500系列扬声器的预设。 用于管理I AMP的电脑软件可在WWW.LD-SYSTEMS.COM 的产品页面上下载。...
- Page 72 信道A到D的螺旋插塞式扬声器输出端 (供货范围包括螺旋插塞连接器) 。 为了避免设备受损, 请注意每个信道上连接的扬 声器的总阻抗最小为2.7欧姆。 相应信道的speakON兼容插口和螺旋插塞接口的触点是平行布线的。 信道1 - 4输入 (3针XLR插口) 信道1到4的对称线路输入, 3针XLR插口。 相应信道的XLR插口和螺旋插塞接口的触点是平行布线的。 信道1 - 4输入 (螺旋插塞接口) 信道1到4的对称线路输入, 螺旋插塞接口 (供货范围包括螺旋插塞连接器) 。 相应信道的XLR插口和螺旋插塞接口的触点 是平行布线的。 数据USB USB接口 (B型) , 用于更新设备固件和扬声器预设, 管理全局预设, 重置锁定识别码 (PIN码) 。 相应的Windows软件和最 新的更新文件以及操作说明可在WWW.LD-SYSTEMS.COM的 产品下载区域获取。 外壳风扇 为防止设备过热, 请注意切勿用物品覆盖风扇, 以便空气流通顺畅。...
- Page 73 操作 显示屏主屏幕 开启功放后, 显示屏上会短暂显示 “欢迎” 字样, 然后出现主屏幕, 其中内容包括: 功放名称 (可编辑) 、 带有相连信道的功放信道 (信道A到D) 、 扬声器预设以及包括峰值显示和信道静音 (Mute) 的音频电平。 如果10分钟左右没有任何输入操作, 一部分内容就会隐藏, 只显示带有相连信道的功放信道、 包括 峰值显示和信道静音的音频电平。 功放名称 功放信道 功放信道 及相连信道 及相连信道 扬声器预设 音频电平, 包括峰值显示 (PK) 音频电平, 包括峰值显示 (PK) 和信道静音 (Mute) 和信道静音 (Mute) 信道音量 该菜单项用于调节信道音量。 按下旋按式编码器 “菜单” , 进入设备设置选项菜单, 旋转编码器选择菜单项 “信道音量” ( 背 景亮起)...
- Page 74 延迟 该菜单项用于设置信道延迟 (例如延迟线) 。 按下旋按编码器 “菜单” , 进入设备设置选项菜单, 旋转编码器选择菜单项 “延 迟” ( 背景亮起) 。 现在按下编码器, 然后旋转编码器选择您想设置延迟的信道。 再次按下编码器, 然后旋转编码器设置数值 ( 向左旋转表示延迟最大, 向右旋转可从0ms开始进行微调) 。 延迟以毫秒 (ms) 、 米 (m) 和英尺 (ft) 为单位显示 (参见 “设置” -> “延迟单位” ) 。 按下编码器, 确认输入的设置。 现在请以同样的方式设置其它信道的延迟。 要返回选项菜单时, 旋转编码器选 择菜单项...
- Page 75 道。 再次按下编码器, 旋转编码器选择要连接的信道 (UNLINK表示取消连接) 。 按下编码器, 确认选择的信道。 信道之间的 连接在显示屏上显示为相应字母之间的 “连接条” 图形。 要返回主屏幕时, 旋转编码器选择菜单项 “退出信道连接” , 然后再 次按下编码器确认。 要返回主屏幕时, 旋转编码器选择 “退出” ( 背景亮起) , 然后按下编码器确认。 10秒钟左右没有任何输 入操作时, 显示屏自动显示主屏幕。 预设 该菜单项用于选择LD CURV系列扬声器的扬声器预设。 例如, 如果您想在相应的信道上将6个CURV 500线阵卫星音箱连 接在SmartLink®适配器上, 请选择预设6 CURV-SAT; 如果您想连接CURV 500安装式重低音音箱, 请选择预设1 CURV- SUB (提示: 请选择与每个SmartLink 适配器上连接的卫星音箱数量相对应的预设) 。 按下旋按编码器 “菜单” , 进入设备 ®...
- Page 76 -> 将 “菜单” 旋转到 “PIN” -> 按两次 “菜单” -> 将 “菜单” 旋转到 “关” -> 按下 “菜单” -> 将 “菜单” 旋转到箭头符号离开该页 -> 按下 “菜单” 设置个人PIN码: 按两次 “菜单” -> 将 “菜单” 旋转到 “编辑” -> 按下 “菜单” -> 旋转 “菜单” 选择第一位数字0到9 -> 按下 “菜单” -> 旋转 “菜单” 选择第二位数字0到9 -> 按下 “菜单” , 依此类推。 如果PIN码丢失, 可 以通过USB接口在电脑软件中重置出厂设置 (1234) ( WWW.LD-SYSTEMS.COM产品页面的 下载区域) 。 延迟单位 设置信道延迟的长度单位米/英尺: 米/英尺...
- Page 77 退出 要退出选项菜单并返回主屏幕时, 旋转编码器选择菜单项 “退出” ( 背景亮起) , 然后按下编码器确认。 橋接模式 / 70 V 設備 若使用 CURV 500 I AMP 和 CURV 500 衛星音箱裝配 70V 的安裝 , 需要 LD 系統 SmartLink 適配器用於 70V 應用 LDCURV500SLAT (有黑色和白色可用 , 請參閱 LDCURV500SLAT 使用手冊中的說明) , 若要使用 speakON 相容的 CURV 500 I AMP 揚聲器輸出 , 要使用 500 I AMP , 音箱電纜應分別帶有 SpeakON 相容的專用插頭 , 因為在使用相對 應的揚聲器預設時 , 放大器的兩個聲道以橋接模式相互連接 。 作為 speakON 相容式插頭的一種替代方式 , 可以使用螺絲 插頭連接器 (包括在供貨範圍內 , 請參見揚聲器輸出配置圖示或放大器上的說明 , 建議使用 2 x 1.5mm² 音箱電纜) 。 依照...
- Page 78 3 x LDCURV500SAT 每個 SmartLink 適配器 70V 三個 CURV 500 衛星音箱 = 最多 8 個 SmartLink 適配器 (8 x 60W = 480W 最大) 揚聲器預設 3xC500-70V LDCUR- V500SLAT 4 x LDCURV500SAT 每個 SmartLink 適配器 70V 四個 CURV 500 衛星音箱 = 最多 6 個 SmartLink 適配器 (6 x 80W = 480W 最大) 揚聲器預設 4xC500-70V LDCURV500SLAT 揚聲器輸出配置 SpeakON 相容插孔的接點以及相對應聲道的螺絲插頭連接器採用並列接線 。 在橋接模式 (BTL = 橋接式負載) /70V 設 備所允許的 speakON 相容插孔 B 和 D 不能被佔用 , 例如螺絲插頭連接器的負極 。 請注意 , 用於訊號控制的輸入路由可 自由配置 (參閱路由一節) 。 2 個橋接放大器聲道 (橋接模式) 用於控制 70V SmartLink 適配器的組合 , 例如 , 可以在正常 模式下控制兩個 CURV500 ISUB 揚聲器 (例如 , 聲道 A/B 為橋接模式 —— 聲道 C 和 D 為正常模式) 。 請選擇相對應的揚 聲器預設...
- Page 79 技术参数 型号编号: LDCURV500IAMP 产品类型: DSP控制功放 类型: 4信道 标称输出功率 (2.7欧姆负载提供 4 x 240 W (根据预设值的不同有所变化) 1 kHz) : 标称输出功率 (4欧姆负载提供1 4 x 240 W (根据预设值的不同有所变化) kHz) : 标称输出功率 (8欧姆负载提供1 4 x 120 W (根据预设值的不同有所变化) kHz) : 标称输出功率 (16欧姆负载提供 4 x 60 W (根据预设值的不同有所变化) 1kHz) : BTL / 70 V 設備額定輸出 2 x 480 W (取決於具體預設) (橋接式負載, 1 kHz @ 4 Ohm) : 输出电路: D类 频响范围 +/- 1 dB: 10 Hz - 22000 Hz ( 根据预设值的不同有所变化) 谐波失真率:...
- Page 80 制造商声明 制造商质保与责任范围 我们当前适用的质保条件和责任范围请参见: http://www.adamhall.com/media/shop/downloads/documents/ manufacturersdeclarations.pdf。 有关售后服务事宜请联系: Adam Hall GmbH, Adam-Hall-Str. 1, 61267 Neu Anspach / E-mail Info@adamhall.com / +49 (0)6081 / 9419-0. 废弃处理本产品的正确方法 (适用于欧盟国家以及其他采取垃圾分类的欧洲国家) 产品或其附属文件上的这一符号表示, 该设备在使用期结束 后不得与普通的生活垃圾一同丢弃, 避免在不受控制的废弃物处理过程中造成环境或人身损害。 请将本产品与其它 废弃物分开处理, 使其得到回收, 促进可持续性经济循环。 作为个人, 您可通过出售该产品的经销商或通过相应的当地政 府机构获取环保处理废弃物的相关信息。 作为商业用户, 请联系您的供货商, 必要时请查看协议中规定的设备废弃处理条 件。 本产品不得与其它商用垃圾一同丢弃。 CE符合性声明 Adam Hall GmbH公司在此声明, 本产品符合以下指令 (如适用) : 无线设备指令R&TTE (1999/5/EG) , 2017年6月起由RED (2014/53/EU) 取代 低电压指令 (2014/35/EU) 电磁兼容指令 (2014/30/EU) RoHS (...
- Page 81 繁體中文 首先祝賀您做出正確的選擇 ! 本設備依照最高品質標準開發製造 , 確保長期工作而無故障 。 LD 系統充分體現出我們作為高品質音頻產品製造商所具備 之聲譽和長期的經驗 。 請仔細閱讀本操作說明書 , 讓您儘快掌控您新的 LD 系統之使用 。 有關 LD 系統之更多資訊 , 請存取我們網站 : WWW.LD-SYSTEMS.COM 安全注意事項 1.請仔細閱讀本手冊 。 2.請將所有資訊和說明書妥善存放在安全之處 。 3.請依照按照說明進行操作 。 4.請注意所有警告事項 。 請勿從設備中去除任何安全說明或其他資料 。 5.僅應依照設計用途使用本產品 。 6.僅使用穩固 、 合適之三腳架 (固定式安裝時) 。 確保牆壁式支架正確安裝並固定 。 確認設備牢固安裝 , 不會掉落 。...
- Page 82 DSP 控制 , 配備有高效開關電源 , 頻率回應範圍為 10 Hz – 22 kHz 。 每個聲道均配備參數式均衡器和延遲 , 在總諧波失真 小於 0.01% 時可以 4 歐姆提供 240 瓦特 RMS 。 I AMP 採用按壓式編碼器和高對比度 、 易於讀取的 OLED 顯示器 , 能夠輕鬆 、 直觀進行操作 。 還配備有一個軟啟動 、 低 噪聲 、 溫度控制的風扇 , 可以保護防止直流電流 、 過電流 、 過熱和短路 。 平衡式輸入設計為 XLR 插孔和螺紋連接器 。 經 由 speakON 相容的輸出插孔或螺紋連接器 , I AMP 每聲道可控制多達六個 CURV-500 衛星音箱或一個超低音揚聲器 CURV500ISUB 。 安裝有適合 CURV500 系列音箱的預設 。 在 WWW.LD-SYSTEMS.COM 產品頁面上 , 有一款用於管理 I AMP 的電腦軟體可供下載 。...
- Page 83 IN 1 - 4 輸入 (3 針腳 XLR) 1 至 4 聲道對稱式線路輸入採用 3 針腳 XLR 連接器 。 XLR 插孔的接點以及相對應聲道的螺紋連接器採用並列接線 。 IN 1 - 4 輸入 (螺紋連接器) 1 至 4 聲道對稱式線路輸入採用螺紋連接 (隨附螺紋連接器) 。 XLR 插孔的接點以及相對應聲道的螺紋連接器採用並列 接線 。 資料 USB 埠 USB 介面 (類型 B) 用以更新裝置韌體和揚聲器預設 、 管理全局預設和重設鎖定 PIN 碼 。 相應的 Windows PC 程式和最 新的更新檔案 , 可在 WWW.LD-SYSTEMS.COM 上產品下載區內的指南中找到 。 殼體通風 為避免裝置過熱 , 確保通風口未被遮蓋 , 空氣可自由流通動 。...
- Page 84 操作 主顯示 接通放大器電源之後 , 在短時間內顯示有 「WELCOME」 歡迎訊息 , 隨後主顯示器顯示以下資訊 : 放大器名稱 (可編輯) 、 放 大器聲道 (CH A - D) 及連結 、 揚聲器預設 、 音頻電平及峰值指示和聲道靜音 (Mute) 。 若持續大約 10 分鐘沒有輸入 , 會隱 藏部分顯示 , 僅顯示放大器聲道及連結 、 音頻電平及峰值指示和聲道靜音 。 放大器名稱 放大器聲道 放大器聲道 及連結 及連結 揚聲器預設 音頻電平及峰值指示 (PK) 音頻電平及峰值指示...
- Page 85 延遲 (DELAY) 此選單項用於設定聲道的延遲 (例如 , 延遲線路) 。 按下按壓式旋鈕上的 MENU (功能表) , 進入裝置設定功能表 , 轉動旋 鈕 , 選擇選單項 DELAY (延遲) ( 背景燈光亮起) 。 現在 , 按下旋鈕 , 並透過轉動旋鈕來選擇要設定其延遲的聲道 。 再次按下 旋鈕 , 並透過轉動旋鈕來設定所需要的值 (向左旋轉 = 最大延遲 , 向右旋轉 = 從 0 毫秒開始微調) 。 延遲顯示單位為毫秒 (ms) , 以及公尺 (m) 或英呎 (ft) ( 參見 SETUP -> DELAY UNIT (設定 - > 延遲單位) ) 。 按下旋鈕 , 確認輸入 。 現在以同樣方式 , 將 其他聲道設定至所需要的延遲...
- Page 86 顯示螢幕上 , 透過兩個相對應字母之間的 「連接條」 , 以圖形方式表示連結 。 若要返回到主畫面 , 可以轉動旋鈕 , 選擇選單項 LINK EXIT (退出連結) , 然後按下旋鈕再次確認 。 若要返回到主畫面 , 轉動旋鈕 , 選擇 EXIT (退出) ( 背景燈光亮起) , 然後 按下旋鈕加以確認 。 如果 10 秒鐘內沒有輸入 , 則自動顯示主畫面 。 預設 (PRESET) 此選單項用於選擇 LD CURV 系列揚聲器的揚聲器預設 。 例如 , 在 SmartLink 適配器上有 6 個 CURV 500 陣列衛星 ® 音箱時 , 選擇預設 6 CURV-SAT ; 若要連接 CURV 500 設備超低音揚聲器 , 則選擇預設...
- Page 87 關閉) - > 按壓 MENU - > 若要退出 , 轉動 MENU 至箭頭圖示 - > 按壓 MENU 設置單獨的 PIN 碼 : 按下 MENU 兩次 - > 轉動 MENU 至 EDIT (編輯) - > 按壓 MENU - > 轉動 MENU , 從 0 到 9 的數字中選擇作為第一個數字 - > 按壓 MENU - > 轉動 MENU , 從 0 到 9 的數字中選擇作為 第二個數字 , 其餘數字以此類推 。 如果 PIN 碼丟失 , 可以透過 USB 埠 , 藉助 PC 軟體恢復到出 廠設定 (1234) ( 從網站 WWW.LD-SYSTEMS.COM 的產品頁面下載) 。 延遲單位 (DELAY 設定聲道延遲的長度單位 , 公尺/英呎 (METERS / FEET) : UNIT) 按壓 MENU - > 旋轉 MENU 選擇 METERS ( 公尺) 或者 FEET (英呎) - > 按壓 MENU - > 若...
- Page 88 SETUP) 退出 (EXIT) 若要退出選擇選單並顯示主畫面 , 轉動旋鈕 , 選定選單項 EXIT (退出) ( 背景燈光亮起) , 按壓旋鈕進行確認 。 桥接模式/70V运行模式 要将CURV 500 I AMP和CURV 500卫星音箱连接为70V安装模式 , 需要使用70V应用版本的LD Systems SmartLink 适配器LDCURV500SLAT (有黑白两色可选 , 请注意LDCURV500SLAT使用说明书中的提示) , 如果要使用CURV 500 I AMP的speakON兼容扬声器输出端 , 还需要专门配有speakON兼容插头的扬声器电缆 , 因为在相应的扬声器预设条 件下功放的两条信道以桥接模式相连 。 如果不用speakON兼容插头 , 也可使用螺旋插塞接头 (包括在供货范围内 , 分配 方式参见 “扬声器输出分配” 图或功放上压印的信息 , 建议扬声器电缆2 x 1.5mm²) 。 按照 “预设” 部分的说明 , 选择与每个...
- Page 89 2个LDCURV500SAT 每个70V SmartLink适配器有2个CURV 500卫星音 箱 = 数量 最多12个SmartLink适配器 (12 x 40W = 最大480W) 扬声器预设2xC500-70V LDCURV500SLAT 3个LDCURV500SAT 每个70V SmartLink适配器有3个CURV 500卫星音箱 = 数量 最多8个SmartLink适配器 (8 x 60W = 最大480W) 扬声器预设3xC500-70V LDCURV500SLAT 4个LDCURV500SAT 每个70V SmartLink适配器有4个CURV 500卫星音箱 = 数量 最多6个SmartLink适配器 (6 x 80W = 最大480W) 扬声器预设4xC500-70V LDCURV500SLAT...
- Page 90 扬声器输出分配 speakON兼容插口和螺旋插塞接口的触点是平行布线的 。 在桥接模式 (Bridge Tied Load) /70V运行模式中 , 不得使用 speakON兼容插口B和D以及螺旋插塞接口的负极 。 进行信号控制时 , 请注意可自由配置的输入端选路 ( “选路” 部分) 。 可 以将控制70V SmartLink适配器的2个桥接功放信道 (桥接模式) 和以普通模式控制两个CURV 500 ISUB扬声器的方式 相组合 (例如信道A/B为桥接模式 , 信道C和D为普通模式) 。 请选择相应的扬声器预设 。 技術規格 型號 : LDCURV500IAMP 產品型號 : DSP 控制放大器 類型 : 4 聲道 額定輸出功率 (1 kHz @ 2.7 歐姆) : 4 x 240 W (取決於具體預設) 額定輸出功率...
- Page 91 相對濕度 (工作時) : < 80 % (無冷凝) 寬 : 482 mm 高 : 44 mm 深 : 420 mm 重量 : 6.8 kg 特性 : 4 聲道 , 配有 DSP控制 ; 專門用於 CURV 500 系統 ; 19” 實用殼體/1 個單元 。 每個 聲道可控制多達六個 CURV-500 衛星音箱或 CURV500ISUB 超低音揚聲器 。 經 由按壓式編碼器進行操控 。 高對比度 OLED 顯示螢幕 。 溫度控制式低噪聲風扇 。 可 靠的開關電源 (PFC) 。 製造商聲明...
- Page 94 LD-SYSTEMS.COM Adam Hall GmbH | Adam-Hall-Str. 1 | 61267 Neu-Anspach | Germany Phone: +49 6081 9419-0 | adamhall.com REV: 04...
Need help?
Do you have a question about the CURV 500 I AMP and is the answer not in the manual?
Questions and answers