Table of Contents
Advertisement
Available languages
Available languages
THIS INSTRUCTION BOOKLET CONTAINS
IMPORTANT SAFETY INFORMATION. PLEASE
READ AND KEEP FOR FUTURE REFERENCE.
WARNING:
To reduce the risk of
injury, the user must read and understand the
operator's manual before using this product.
CE LIVRET D'INSTRUCTIONS CONTIENT DES
CONSIGNES DE SÉCURITÉ IMPORTANTES.
VEUILLEZ LE LIRE ET LE CONSERVER POUR
TOUTE RÉFÉRENCE FUTURE.
AVERTISSEMENT :
réduire les risques de blessures, l'utilisateur
doit lire et veiller à bien comprendre le manuel
d'utilisation avant d'employer ce produit.
HLPM02/HLPM02VNM 40V
Lawn Mower
Tondeuse
Podadora
OPERATOR'S MANUAL
MANUEL D'UTILISATION
concernant la sécurité
Commande de pièces et dépannage
MANUAL DEL OPERADOR
Pedidos de piezas y servicio
ESTE FOLLETO DE INSTRUCCIONES CONTIENE
INFORMACIÓN DE SEGURIDAD IMPORTANTE.
LÉALO Y CONSÉRVELO PARA REFERENCIA
FUTURA.
ADVERTENCIA:
Pour
el riesgo de lesiones, el usuario debe leer y
comprender el manual del operador antes de
usar este producto.
2-3
4-5
5
Assembly 6-7
Operation 7-9
Maintenance 9-10
Parts/Service
Back page
2-3
4-5
5
Assemblage 6-7
Utilisation 7-9
Entretien 10-11
Dépannage 12
Page arrière
2-3
importantes
4-5
Características 5-6
Armado 6-7
Funcionamiento 7-9
Mantenimiento 10-11
Pág. posterior
Para reducir
Advertisement
Table of Contents

Related Manuals for HART HLPM02VNM


Summary of Contents for HART HLPM02VNM
-
Page 1: Table Of Contents
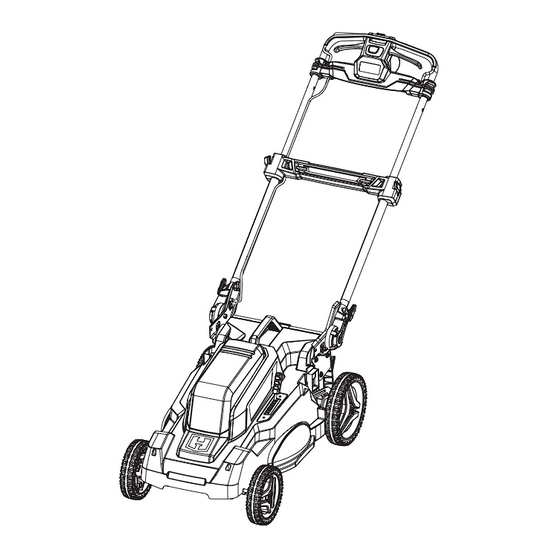
HLPM02/HLPM02VNM 40V Lawn Mower Tondeuse Podadora OPERATOR’S MANUAL Important Safety Instructions Symbols Features Assembly 6-7 Operation 7-9 Maintenance 9-10 Troubleshooting 11 Parts/Service Back page MANUEL D’UTILISATION Instructions importantes concernant la sécurité Symboles Caractéristiques Assemblage 6-7 Utilisation 7-9 Entretien 10-11 Dépannage 12 Commande de pièces et dépannage... - Page 2 See this fold-out section for all of the figures referenced in the operator’s manual. Consulter l’encart à volets afin d’examiner toutes les figures mentionnées dans le manuel d’utilisation. Consulte esta sección desplegable para ver todas las figuras a las que se hace referencia en el manual del operador. FIG.
- Page 3 FIG. 2 FIG. 4 A - Rear discharge door (couvercle d’éjection arrière, puerta de descarga posterior) B - Rear discharge opening (ouverture d’éjection arrière, abertura de descarga posterio) C - Mulching plug (insert broyeur, tapón para trituración) FIG. 5 A - Handle adjustment knob (bouton de réglage de la poignée, perilla de ajuste del mango) B - Lower handle (poignée inférieure, mango inferior) C - To unlock (pour déverrouiller, para desbloquear)
- Page 4 FIG. 7 FIG. 11 A - Grass catcher handle (poignée de collecteur d’herbe, mango del receptor de hierba) B - Slots (fentes, ranuras) C - Rear discharge door (couvercle d’éjection arrière, puerta de descarga posterior) D - Rear discharge opening (ouverture d’éjection latérale, abertura de descarga lateral) E - Hook (crochet, gancho) FIG.
- Page 5 FIG. 13 FIG. 17 FIG. 16 TO STORE THE MACHINE IN THE HORIZONTAL POSITION POUR REMISER L’ÉQUIPEMENT EN POSITION HORIZONTALE PARA GUARDAR LA MÁQUINA EN POSICIÓN HORIZONTAL 15° MAXIMUM 15° MAXIMAL 15° MÁXIMA FIG. 14 FIG. 18 TO STORE THE MACHINE A - Blade post (round) [tiges pour lame IN THE VERTICAL POSITION (ronde), montantes de cuchilla (Redondo)]...
-
Page 6: Important Safety Instructions
IMPORTANT SAFETY INSTRUCTIONS drugs, alcohol, or medication. A moment of inattention WARNING!: while operating the lawn mower may result in serious READ AND UNDERSTAND ALL INSTRUCTIONS. personal injury. Failure to follow all instructions listed below and on the Maintain lawn mower with care – Keep machine in good machine may result in electric shock, fire, and/or serious working condition. Keep blades sharp and guards in personal injury. - Page 7 IMPORTANT SAFETY INSTRUCTIONS Clear the work area before each use. Remove all objects Service on the product must be performed by qualified such as rocks, tree nuts, sticks, metal, wire, bones, toys, repair personnel only. Service or maintenance performed or other objects which can be thrown by the blade.Stay by unqualified personnel could result in injury to the user behind the handle when the motor is running. or damage to the product. Avoid holes, ruts, bumps, rocks, property stakes, or other The grass catcher assembly is subject to deterioration hidden objects. Uneven terrain could cause a slip and and wear and should be checked each time the mower is fall accident.
-
Page 8: Symbols
SYMBOLS The following signal words and meanings are intended to explain the levels of risk associated with this product. SYMBOL SIGNAL MEANING DANGER: Indicates a hazardous situation, which, if not avoided, will result in death or serious injury. WARNING: Indicates a hazardous situation, which, if not avoided, could result in death or serious injury. Indicates a hazardous situation, which, if not avoided, may result in minor or moderate CAUTION: injury. (Without Safety Alert Symbol) Indicates information considered important, but not related NOTICE: to a potential injury (e.g. messages relating to property damage). Some of the following symbols may be used on this product. Please study them and learn their meaning. Proper interpretation of these symbols will allow you to operate the product better and safer. -
Page 9: Features
SYMBOLS Some of the following symbols may be used on this product. Please study them and learn their meaning. Proper interpretation of these symbols will allow you to operate the product better and safer. SYMBOL NAME DESIGNATION/EXPLANATION Amperes Current Hertz Frequency (cycles per second) Watt Power... -
Page 10: Assembly
ASSEMBLY UNPACKING WARNING: This product requires assembly. To prevent accidental starting, do not make any ad- Carefully remove the product and any accessories from justments or installations with the start key or battery the box. Make sure that all items listed in the Packing pack inserted. Accidental starting of the mower during List are included. assembly could result in serious personal injury. WARNING: WARNING: Do not use this product if any parts on the Packing List Never operate the mower without the proper safety de- are already assembled to your product when you unpack vices in place and working. Never operate the mower... -
Page 11: Operation
ASSEMBLY Using the same method, attach the remaining clips on Lift and hold the rear discharge door. each side of the bag to the frame rail to secure. Grasp the mulching plug by its handle and insert it at a slight angle, as shown. INSTALLING THE GRASS CATCHER (FOR REAR Push the mulching plug securely into place. BAGGING OPERATION) Lower the rear discharge door. See Figures 6 - 7. - Page 12 Raise the battery cover. levers to move the mower without engaging the blade. Press and hold the battery latch button at the bottom of CRUISE CONTROL the battery pack. See Figure 12 Remove battery pack from the mower. WARNING: For complete charging instructions, refer to the Operator’s Manuals for your HART battery pack and charger models. Always adjust the cruise control before you engage the blade. Adjusting the cruise control while mowing may WARNING: cause you to lose control and could result in serious To avoid accidental starting that could result in serious injury while the blade is operating. personal injury, always remove the start key when moving WARNING: or transporting the mower.
-
Page 13: Maintenance
OPERATION Watch for holes, ruts, rocks, hidden objects, or bumps When cutting heavy grass, reduce walking speed to allow which can cause you to slip or trip. Tall grass can hide for more effective cutting and a proper discharge of the obstacles. Remove all objects such as rocks, tree limbs, clippings. etc., which could be tripped over or thrown by the blade. Do not cut wet grass. It will stick to the underside of the deck and prevent proper bagging or mulching of grass Always be sure of your footing. A slip and fall can cause clippings. serious personal injury. If you feel you are losing your balance, release the upper blade control lever immedi- New or thick grass may require a narrower cut or a higher ately. cutting height. Do not mow near drop-offs, ditches, or embankments; Clean the underside of the mower deck after each use you could lose your footing or balance. - Page 14 MAINTENANCE GENERAL MAINTENANCE Replace the blade insulator and spacer, then thread the blade nut on the shaft and finger tighten. Avoid using solvents when cleaning plastic parts. Most NOTE: Make certain all parts are replaced in the exact plastics are susceptible to damage from various types of order in which they were removed. commercial solvents and may be damaged by their use. Use clean cloths to remove dirt, dust, oil, grease, etc. Torque the blade nut down clockwise using a torque wrench (not provided) to ensure the bolt is properly WARNING: tightened. The recommended torque for the blade nut is 310 – 360 in.lbs.
-
Page 15: Troubleshooting
TROUBLESHOOTING IF THESE SOLUTIONS DO NOT SOLVE THE PROBLEM CONTACT YOUR AUTHORIZED SERVICE DEALER. PROBLEM POSSIBLE CAUSE SOLUTION Handle not in position. Handle adjustment knobs and/or handle Make sure handle adjustment knobs lock clips are not secured. are fully seated and handle lock clips are fully closed. Mower not starting. Battery is low in charge. Charge the battery. Start key not installed. Install start key. Handle assembly is not in operating Raise lower and upper handle. - Page 16 NOTES 12 – English...
-
Page 17: Instructions Importantes
INSTRUCTIONS IMPORTANTES CONCERNANT LA SÉCURITÉ Ne pas charger l’outil sous la pluie ou dans un endroit mouillé. AVERTISSEMENT ! : Restez vigilant - Regardez ce que vous faites et utilisez LISEZ ET VEILLEZ À COMPRENDRE TOUTES LES votre meilleur jugement lorsque vous utilisez la tondeuse. INSTRUCTIONS. - Page 18 INSTRUCTIONS IMPORTANTES CONCERNANT LA SÉCURITÉ Manipuler les batteries avec soin pour éviter des courts- Si la tondeuse commence à vibrer de façon anormale, arrêtez circuits avec des objets conducteurs comme des anneaux, le moteur, retirer la clé de démarrage et vérifiez immédiatement des bracelets et des clés.
-
Page 19: Symboles
SYMBOLES Les termes de mise en garde suivants et leur signification ont pour but d’expliquer le degré de risques associé à l’utilisation de ce produit. SYMBOLE SIGNAL MEANING Indique une situation dangereuse qui, si elle n’est pas évitée, aura pour conséquences des DANGER : blessures graves ou mortelles. -
Page 20: Caractéristiques
SYMBOLES Certains des symboles ci-dessous peuvent être utilisés sur produit. Veiller à les étudier et à apprendre leur signification. Une interprétation correcte de ces symboles permettra d’utiliser produit plus efficacement et de réduire les risques. SYMBOLE DÉSIGNATION / EXPLICATION Ampères Intensité... -
Page 21: Assemblage
ASSEMBLAGE DÉBALLAGE AVERTISSEMENT : Ce produit nécessite l’assemblage. N’utilisez jamais la tondeuse sans les dispositifs de Retirez prudemment l’outil et les accessoires de la boîte. sécurité appropriés en place et en état de marche. Assurez-vous que tous les articles énumérés dans la Liste N’utilisez jamais la tondeuse si les dispositifs de sécurité... -
Page 22: Utilisation
ASSEMBLAGE INSTALLATION DU COLLECTEUR D’HERBE Pousser solidement le déflecteur pour déchiquetage en (POUR ARRIÈRE UTILISATION D’ENSACHAGE) place. Relâchez le couvercle de la décharge arrière. Voir les figures 6 et 7. Réinstaller la clé de démarrage et le bloc-piles dès le NOTE : En utilisant le collecteur d’herbe, ne pas installer moment de la tonte. - Page 23 à la charge, consulter les manuels d’utilisation des Ajustez toujours le régulateur de vitesse avant d’activer batteries de HART et des modèles de chargeur connexes la lame. Si vous ajustez le régulateur de vitesse pendant que vous tondez la pelouse, vous pourriez perdre le AVERTISSEMENT : contrôle et causer des blessures graves pendant que la...
- Page 24 UTILISATION CONSEILS DE TONDAISON UTILISATION SUR LES PENTES Voir la figure 13. AVERTISSEMENT : AVERTISSEMENT : Ne tondez pas du gazon mouillé; vous pourriez glisser et tomber, et vous causer ainsi de graves blessures. Les pentes sont un facteur majeur relié aux glissements et des chutes accidentelles qui peuvent résulter en des Assurez-vous que la pelouse est libre des pierres, noix blessures graves.
-
Page 25: Entretien
ENTRETIEN AVERTISSEMENT : AVERTISSEMENT : Avant d’effectuer de l’entretien ou de nettoyer la Ne permettez jamais à ce que les liquides pour freins, tondeuse, s’assurer que les lames de la tondeuse sont la gazoline, les produits à base de pétrole, les huiles complètement immobiles et que les piles et la clé... - Page 26 ENTRETIEN Remettez l’isolant de lame et l’écarteur, vissez l’écrou de Essuyez la tondeuse avec un chiffon sec. lame sur l’arbre et serrez à main. Vérifiez si les écrous, les boulons, les boutons, les vis, NOTE : Assurez-vous que toutes les pièces soient les attaches, etc sont serrés.
-
Page 27: Dépannage
DÉPANNAGE SI LES PRÉSENTES SOLUTIONS NE RÉSOLVENT PAS LE PROBLÈME, CONTACTER LE CENTRE DE RÉPARATIONS AGRÉÉ. PROBLÈME CAUSE POSSIBLE SOLUTION Poignée en mauvaise position. Les boutons de réglage de la poignée S’assurer que les boutons de réglage de et/ou les pinces de blocage de la la poignée sont complètement assis et poignée ne sont pas fixés correctement. -
Page 28: Instrucciones De Seguridad
INSTRUCCIONES DE SEGURIDAD IMPORTANTES utilice la podadora cuando está cansado, molesto o bajo la ¡ADVERTENCIA! influencia de drogas, alcohol o medicamentos. Un momento LEA Y COMPRENDA TODAS LAS INSTRUCCIONES. El de descuido al utilizar la podadora de pasto puede causar incumplimiento de las instrucciones señaladas abajo y en lesiones serias. - Page 29 INSTRUCCIONES DE SEGURIDAD IMPORTANTES Despeje el área de trabajo cada vez antes de utilizar esta Sólo personal de reparación calificado debe dar servicio herramienta. Retire todos los objetos como piedras, nueces al producto.Todo servicio o mantenimiento efectuado por de arbol, palos, frutos secos, metal, alambre, huesos, juguetes personal no calificado puede significar un riesgo de lesiones u otros objetos que puedan ser lanzados por la cuchilla.
-
Page 30: Símbolos
SÍMBOLOS Las siguientes palabras de señalización y sus significados tienen el objeto de explicar los niveles de riesgo relacionados con este producto. SÍMBOLO SEÑAL SIGNIFICADO PELIGRO: Indica una situación peligrosa, la cual, si no se evita, causará la muerte o lesiones serias. Indica una situación peligrosa, la cual, si no se evita, podría causar la muerte o lesiones ADVERTENCIA: serias. -
Page 31: Características
SÍMBOLOS Es posible que se empleen en este producto algunos de los siguientes símbolos. Le suplicamos estudiarlos y aprender su significado. Una correcta interpretación de estos símbolos le permitirá utilizar mejor y de manera más segura el producto. SÍMBOLO NOMBRE DENOMINACIÓN/EXPLICACIÓN Corriente continua Tipo o característica de corriente... -
Page 32: Armado
CARACTERÍSTICAS BOTÓN DE ARRANQUE Y ASA LLAVE DEL ARRANQUE El botón de arranque y la asa están ubicados en el mango La llave del arranque debe introducirse antes de arrancar superior de la podadora. Presione el botón de arranque y luego la podadora. -
Page 33: Funcionamiento
ARMADO Para levantar el mango superior: Vuelva a instalar la llave del arranque y el paquete de baterías cuando esté listo para podar el pasto. Abra las trabas del mango. INSTALACIÓN DEL TAPÓN PARA TRITURACIÓN Abra el mango superior en toda su extensión. (PARA LA OPERACIÓN DE TRITURACIÓN) ... - Page 34 FUNCIONAMIENTO Para ver las instrucciones de carga completas, consulte los ADVERTENCIA: manuales del operador del paquete de baterías HART y los Siempre retire el paquete de baterías y la llave de modelos de cargador. arranque de la herramienta cuando esté ensamblando ADVERTENCIA: partes, realizando ajustes, limpiando o cuando ésta...
- Page 35 FUNCIONAMIENTO CONTROL DE CRUCERO Limpie la parte inferior del piso de la podadora después de cada uso para eliminar recortes de hierba, hojas, Vea la figura 12. suciedad y otros desechos acumulados. ADVERTENCIA: NOTA: Siempre detenga la podadora, permita que las hojas se detengan completamente, retire la llave de Siempre ajuste el control de crucero antes de activar arranque y extraiga el paquete de baterías del puerto...
-
Page 36: Mantenimiento
MANTENIMIENTO ADVERTENCIA: ADVERTENCIA: Antes de realizar tareas de mantenimiento o limpiar la No permita en ningún momento que fluidos para podadora, asegúrese de que las hojas de la podadora frenos, gasolina, productos a base de petróleo, aceites se detengan por completo y de quitar las baterías y la penetrantes, etc., lleguen a tocar las piezas de plástico. - Page 37 MANTENIMIENTO Vuelva a colocar el aislante de cuchilla y el separador; Gire la podadora sobre su costado y limpie los recortes luego, enrosque la tuerca de la cuchilla en el eje y apriétela de hierba que se acumularon en la parte inferior del piso con los dedos.
-
Page 38: Corrección De Problemas
CORRECCIÓN DE PROBLEMAS SI CON ESTAS SOLUCIONES NO SE RESUELVE EL PROBLEMA, COMUNÍQUESE CON EL CONCESIONARIO DE SERVICIO AUTORIZADO DE SU PREFERENCIA. PROBLEMA CAUSA POSIBLE SOLUCIÓN El mango no está en posición. Las perillas de ajuste del mango y/o las Asegúrese de que las perillas de ajuste trabas del mango no están trabadas. - Page 39 NOTAS 13 - Español...
- Page 40 Los detalles de la garantía están disponibles en www.HARTtools.com Para validar la garantía limitada de 3 años, se solicitará una prueba de compra. 995000849 HART, el logo de HART y el logo H son marcas 8-15-19 (REV:02) de Techtronic Cordless GP.
Need help?
Do you have a question about the HLPM02VNM and is the answer not in the manual?
Questions and answers
I ordered a replacement blade 40V 20 inch and it’s too long
I ordered a replacement blade for 40 V 20 inch and it’s too long
The correct blade length for the HART HLPM02VNM 40V 20 inch model is 20 inches.
This answer is automatically generated
My mower won’t start
The HART HLPM02VNM mower may not start due to the following reasons:
1. The battery is low in charge – charge the battery.
2. The start key is not installed – install the start key.
3. The handle assembly is not in the operating position – raise both the lower and upper handle.
This answer is automatically generated