Advertisement
BATTERY INSTALLATION
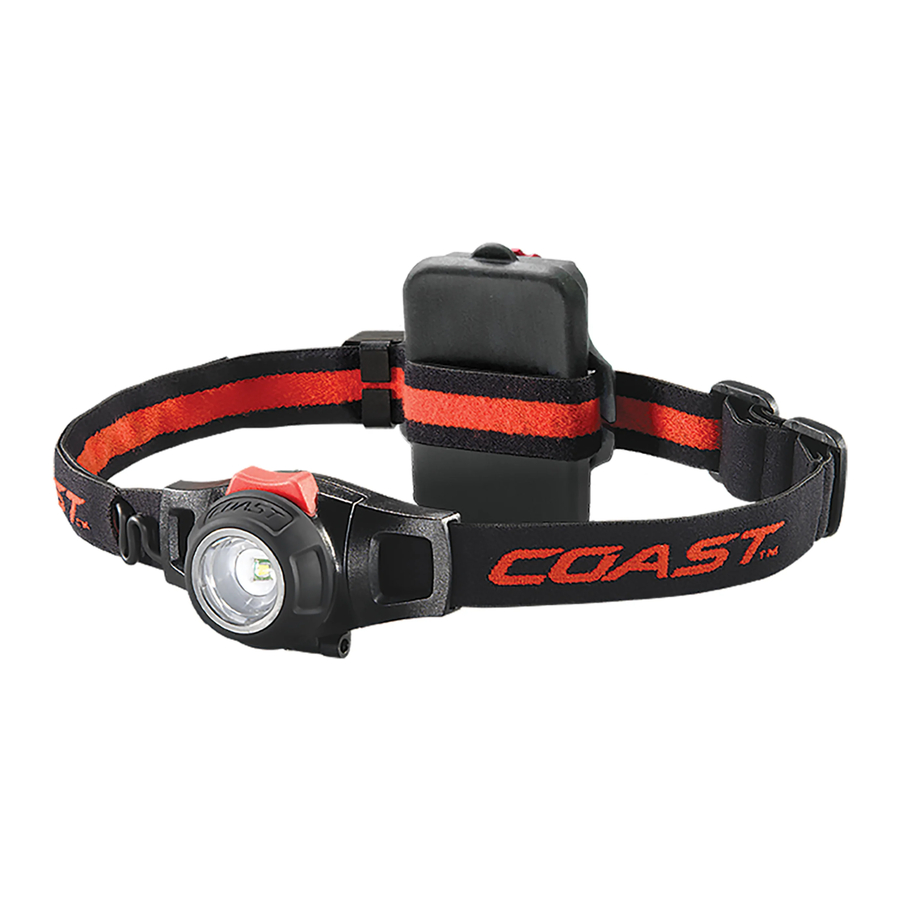
- The HL7R uses three AAA NiHM rechargeable 1.2 volt batteries.
- Do not use rechargeable batteries other than those supplied with the headlamp.
- You can use AAA alkaline batteries in this headlamp.
- The batteries are housed in the rear of the headlamp.
- To access the battery compartment, pull the elastic headband slightly away from the battery pack.
- Remove the rubber battery case cover by grasping the tab at the top of cover and pulling it away from the battery pack.
- Insert the batteries in the direction indicated inside the battery pack.
- Replace rubber battery case cover, making sure that the cover is placed evenly over the rim of the case.
CHARGING INSTRUCTIONS
Prior to first use, charge the HL7R at least eight hours.
The headlamp can be charged via USB or a standard AC power outlet.
To charge via USB, insert the charging cord into the small box near the battery pack that is marked "DC IN 5V." Insert the USB end of the cord into a USB port on a computer. The computer must be turned on to charge the headlamp.
To charge via AC wall outlet, plug the USB end of the cord into the supplied AC adaptor. Plug the AC adapter into the AC power outlet.
When the light is charging, a green light will be visible flashing in the lens of the light. When the headlamp is fully charged, the light will stop blinking and stay on green.
HEAD STRAP ADJUSTMENT
To adjust the HL7R to fit your head, slide the buckle on left side of the head strap. It may be necessary to slide the head of the light and battery pack on the head strap to center the light once the head band is adjusted to the proper size.
LIGHT OPERATION
To turn on the light, depress the red switch on top of the light.
To turn off the light, depress the red switch on top of the light.
To adjust the brightness, slide the VLT (Variable Light Technology) Dimmer on top of the battery pack. Move to the right to increase the brightness. Move the switch to the left to decrease the brightness.
BEAM POSITION AND FOCUS ADJUSTMENT
This headlamp is equipped with COAST's Pure Beam Focusing Optic which allows the user to choose between a broad flood beam and a focused Bulls-Eye Spot beam for long distance illumination.
To adjust the beam into the broad, flood light mode, when the light is on your head, turn the Focus Ring around the lens of the light to your right (counter clockwise when looking at the front of the light.) In the flood mode, the COAST logo on the Focus Ring around the lens will be at the top, lined up with the red on/off switch.
To adjust the beam into the Bulls-Eye Spot mode, when wearing the light, turn the Focus Ring around the lens of the light to your left (clockwise when looking at the front of the light.)
The beam can be used in any position, from full flood beam to spot beam.
The hinged beam adjustment allows you to tilt the beam of light down into position to illuminate objects directly in front of you or in your hands. To adjust, grasp the head of the light at the top and bottom between your thumb and index finger. Pull the red button away from your head and down.
HARD HAT SAFETY HELMET CLIP USE
The HL7R includes helmet clips for use with hard hat style safety helmets. To use the helmet clips, loosen the side headbands to fit the helmet and attach the clips to the side strap of the headlamp, evenly spaced with two on each side. Note: One of the clips has a wider loop in order to fit over the area on the side headband where the Z cord is located. Put the headlamp on the safety helmet and attach the clips to the rim of the helmet. Some adjustment of the clip positions and head straps will be necessary for proper fit on safety helmets. Note: Clips are designed for use ONLY with HARD HAT style safety helmets. They are not acceptable for use on most sporting safety helmets.
MAINTENANCE
Wipe the external body with a damp cloth. Do not submerge.

Documents / ResourcesDownload manual
Here you can download full pdf version of manual, it may contain additional safety instructions, warranty information, FCC rules, etc.
Advertisement


Need help?
Do you have a question about the HL7R and is the answer not in the manual?
Questions and answers