Table of Contents
Advertisement
Quick Links
Operating instructions
Cleanox 5.0 EP-01-015
Electrochemical cleaning, polishing and signing
13.10.2021
Rev.0
www.oreuter.de
Operating instructions Cleanox 5.0
REUTER GmbH & Co. KG
Schimmelbuschstrasse 9e
D-40699 Erkrath, Germany
Phone: +49(0)211-73060-430
fax: +49(0)211-73060-477
mail@oreuter.de
Side
from 48
1
Advertisement
Table of Contents

Related Manuals for REUTER Cleanox 5.0 EP-01-015

Summary of Contents for REUTER Cleanox 5.0 EP-01-015
- Page 1 Operating instructions Cleanox 5.0 Operating instructions Cleanox 5.0 EP-01-015 Electrochemical cleaning, polishing and signing REUTER GmbH & Co. KG Schimmelbuschstrasse 9e D-40699 Erkrath, Germany Phone: +49(0)211-73060-430 fax: +49(0)211-73060-477 mail@oreuter.de 13.10.2021 Rev.0 www.oreuter.de Side from 48...
-
Page 2: Table Of Contents
Operating instructions Cleanox 5.0 Content Preface ........... Fehler! Textmarke nicht definiert. Validity of these instructions ............... 4 Target group of this manual ................. 4 Intended use ....................4 Observance of the operating instructions ........... 4 EC and VDE directives .................. 5 Accident prevention (UVV) ................ - Page 3 Operating instructions Cleanox 5.0 14.3 Groundpliers with cable and plug .............. 25 14.4 Performance Brush XL and Performance Brush AutoFeed XL ....26 14.5 Mounting Carbon Fiber Brush XL / Handle ..........27 14.5.1 Mount Performance Brush to normal Handle ........... 27 14.5.2 Performance Brush Mount AutoFeed XL to the AutoFeed handle ....
-
Page 4: Preface
We wish you a lot of fun and successful work with our devices. 1.1 Validity of these instructions These instructions refer to the following devices: ➢ Cleanox 5.0 EP-01-015 1.2 Target group of this manual These operating instructions are intended for the operator and the operating personnel of the cleaning device. -
Page 5: Ec And Vde Directives
Operating instructions Cleanox 5.0 1.5 EC and VDE directives The electrochemical processing equipment complies with the CE certificate of conformity: ➢ 2014/35/EU Low Voltage Directive ➢ 2014/30/EU EMC Directive ➢ 2011/65/EU RoHS Directive 1.6 Accident prevention (UVV) ⚫ Hazards can occur due to: ➢... - Page 6 Operating instructions Cleanox 5.0 Hint From 01.05.2014 all UVV regulations and regulations have been renumbered and named. Examples such as: BGV/GUV-V, BGR/GUV-R, BGI/GUV-I/BGG/GUV-G or GUV-SI will no longer exist. The fonts are consistently divided into four categories. ➢ DGUV regulations ➢...
-
Page 7: For Your Safety
Operating instructions Cleanox 5.0 For your safety Read this instruction manual carefully. The following chapter explains the pictograms used in this manual. Convention 2.1.1 Pictograms The pictograms used in these instructions shall have the following meanings: Warning sign ➢ Information on possible dangers when handling the device and accessories. -
Page 8: Warning Signs
Operating instructions Cleanox 5.0 2.1.3 Warning sign Electromagnetic field warning Hot surface warning Warning of explosive substances Warning against harmful substances Warning of dangerous electrical voltage Warning of danger to life and limb "Warning" warning about corrosive chemicals 2.1.4 Prohibition signs Ban on people with pacemakers 2.1.5 Mandatory sign... -
Page 9: Safety Measures In The Event Of A Malfunction
Operating instructions Cleanox 5.0 Safety measures in the event of a malfunction Turn off the device immediately and unplug it. Secure and mark the device against turning it back on. ➢ Restore the device to full functionality after each repair. ➢... -
Page 10: Possible Sources Of Danger And Protective Measures
Operating instructions Cleanox 5.0 Possible sources of danger and protective measures 2.3.1 Possible sources of danger Improper handling of the device and its components. ➢ The handle lies on the workpiece or work surface in such a way that the carbon fiber brush comes into contact with the metal surface. -
Page 11: Protective Measures
Operating instructions Cleanox 5.0 2.3.2 Protective measures Repairs to electrical parts of the equipment or to power lines may only be carried out by qualified electricians. ➢ Have the device checked immediately by a qualified electrician after a short circuit or malfunction. ➢... -
Page 12: Check Before Each Start Of Work
⚫ The connection of foreign components that are not released may ➢ the destruction of the device. ➢ ta danger to persons. ⚫ The use of chemicals that are not approved Reuter GmbH & Co. KG may: ➢ lead to damage to health, ➢ worsen the work result ➢... -
Page 13: Requirements For Staff And Operators
Turn the device on and off. ➢ Correction of slight disturbances after instruction. This knowledge is imparted either by this operating manual, Reuter GmbH & Co. KG or other authorized persons or institutions. Operator ⚫ The operator must regularly instruct the personnel in accordance with the legal requirements. -
Page 14: Material Defects
Reuter GmbH & Co. KG. Unless it is clearly proven that the damage was clearly caused by negligent design or production by Reuter GmbH & Co. KG and was foreseeable at the time of construction. -
Page 15: Delivery, Internal Transport, Unpacking
Operating instructions Cleanox 5.0 Delivery, internal transport, unpacking The complete device set is delivered in a sturdy Euro plastic box. This box is closed with two plastic cable ties and a metal cable tie before shipment in our factory. The lid can only be opened by destroying and removing the cable ties. Security In principle, all activities required for delivery, transport, unpacking and storage must be carried out with the utmost care and all rules and... -
Page 16: Delivery Listcleaning Set "Cleanox 5.0
Operating instructions Cleanox 5.0 7.1 Delivery listcleaning set "Cleanox 5.0" Description Contain Quantity Order no. Illustration Cleaning EP-01-015 Cleanox 5.0 Single parts cleaning Contain Quantity Order no. Illustration Cleanox 5.0 EP-01-115 AutoFeedHandle with long 10 mm² cable, EP-07-951 brush and Teflon sleeve Performance AutoFeed EP-02-960... - Page 17 Operating instructions Cleanox 5.0 Spray bottle for water EP-07-002 500 ml ✓ Wrench SW 10 AB-02-932 ✓ Mounting pins 5x100 EP-07-223 Euro plastic box EP-07-019 Teflon handle with EP-07-600 4m cable 10mm² Performance-Brush Carbon Brush L EP-02-939 Set of 5 Performance-Brush Carbon Brush XL EP-02-929...
-
Page 18: Storage
Operating instructions Cleanox 5.0 Storage For safe and gentle storage of the "Cleanox" and accessories, observe the following measures: ➢ Leave the device set in the closed transport box. ➢ Protection against moisture and dust. ➢ Ambient temperature 5°C to 40°C. ➢... -
Page 19: Equipment Technology
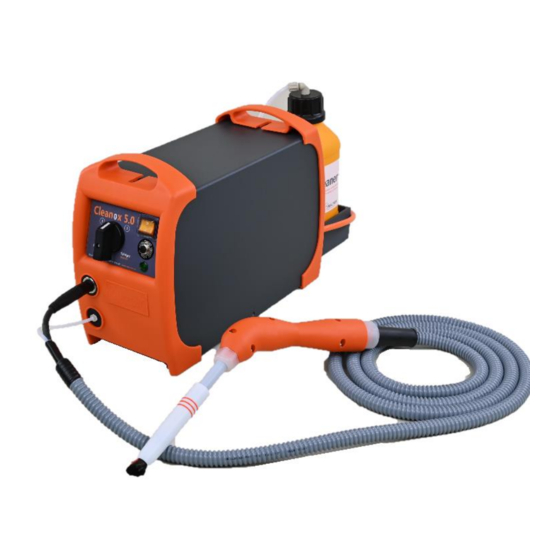
12.1 Cleanox 5.0 The Cleanox 5.0 is the only electrochemical cleaning and polishing device with integrated, automatic electrolyte supply from Reuter GmbH & Co. KG. This device offers the possibility to clean and polish welds with fully automatic electrolyte supply. In both processes, the passive layer of the stainless steel is rebuilt. -
Page 20: Application
Operating instructions Cleanox 5.0 12.2 Application Cleaning with Polishing with Polishing with Cleaning with carbon fiber carbon fiber AutoFeed Sign AutoFeed brush brush M, XL AutoFeed XL AutoFeed XL M, XL dark bright Tools ⚫ ⚫ ⚫ ⚫ ⚫ ⚫ Cleanox 5.0 Power: 1250VA ⚫... -
Page 21: Front Panel Controls And Controls
Operating instructions Cleanox 5.0 13 Front panel controls and controls Cleanox 5.0 1 Device main switch ON/OFF 2 Indicator lamp (green device ready for operation)→ 3 Overload Fuse 4 Red high-current socket for ground cable 5 Black high current socket 6 IQS connector for automatic electrolyte delivery 7 Selector switch polishing, cleaning 13.1 Circuit breaker (Overload FUSE) -
Page 22: High-Current Sockets
Operating instructions Cleanox 5.0 13.2 High-current sockets The device is equipped with combination Measure sockets for the safe transmission of the cleaning current. ⚫ High-current socket " red" ➢ Always for connecting the high current plug with cable 10mm " red". -
Page 23: Elements On The Back
Operating instructions Cleanox 5.0 13.4 Elements on the back Cleanox 5.0 1 mains cable with safety plug 240V/50Hz 2 Red high-current socket for the ground cable 3 warning lamp for electrolyte level 4 Electrolyte supply on/off (switch) 5 Endurance Run Electrolyte Pump (Pushbutton) 6 Electrolyte pump 7 1 l electrolyte bottle holder with integrated level sensor 14 Accessories... -
Page 24: Autofeed Handle For Cleanox 5.0
Operating instructions Cleanox 5.0 14.2 AutoFeed handle for Cleanox 5.0 The AutoFeed Handle can only be used on Connect Cleanox 5.0, unless you are using a Reuter MagicBox. ⚫ AutoFeed Handle (1) ⚫ Cable + Teflon Hose (2) ➢ To work, plug the high-current... -
Page 25: Groundpliers With Cable And Plug
Operating instructions Cleanox 5.0 14.3 Groundpliers with cable and plug The crowdpliers is always connected to the red high-current socket of the device. With the Cleanox 5.0, the red high-current beech is located on the back above the mains cable. ⚫... -
Page 26: Performance Brush Xl And Performance Brush Autofeed Xl
Operating instructions Cleanox 5.0 14.4 Performance Brush XL and Performance Brush AutoFeed XL Use the included carbon fiber brushes type Performance XL for cleaning Welds. ⚫ 10 mm For manual operation, use the Performance Brush XL ⚫ For automatic operation, use the Performance AutoFeed Brush XL The Performance Brushes consists of the following components:... -
Page 27: Mounting Carbon Fiber Brush Xl / Handle
Operating instructions Cleanox 5.0 14.5 Mounting Carbon Fiber Brush XL / Handle Before you start working, you need to mount a brush on your cleaning handle. 14.5.1 Mount Performance Brush to normal Handle To mount a brush correctly on the handle, follow these steps: ⚫... -
Page 28: Performance Brush Mount Autofeed Xl To The Autofeed Handle
Operating instructions Cleanox 5.0 14.5.2 Performance Brush Mount AutoFeed XL to the AutoFeed handle Perform the following steps to mount a AutoFeed Brush correctly on AutoFeed Handle to mount: ⚫ Connect the AutoFeed Adapter to the AutoFeed Handle ➢ Use a spanner SW10 ➢... -
Page 29: Electrolyte
Observe all safety data sheets and general safety regulations. If you have any questions about the use of our electrolytes, please contact Reuter GmbH und Co. KG or one of our sales partners directly. We will be happy to advise you. -
Page 30: Placing The Electrolyte Bottle For Automatic Operation
Operating instructions Cleanox 5.0 14.6.2 Placing the electrolyte bottle for automatic operation If you use the automatic operation of the Cleanox 5.0, you must place the 1 l electrolyte bottle in the permanently installed holder of the Cleanox 5.0. ⚫ Place the bottle in the receptacle ⚫... -
Page 31: Commissioning
Operating instructions Cleanox 5.0 15 Commissioning Security Power switch The Cleanox must be switched off when connecting the cables and changing the handles, brushes, carbon electrodes or felts. ➢ Rotary switch to 0 ➢ Power switch. The Cleanox is equipped for one-phasic connection to 230V/50Hz schuko socket and equipped with a commercially available schuko plug. -
Page 32: Connection Ground Terminal
Operating instructions Cleanox 5.0 16.4 Connection ground terminal ⚫ The ground terminal (3) provides the electrical contact between the workpiece and the electrochemical cleaning device here. ⚫ Ensure good electrical contact between ground terminal (3) and workpiece. Workpiece ⚫ If necessary, clean the contact point. ⚫... -
Page 33: Unlocking The High-Current Plug
Operating instructions Cleanox 5.0 16.4.2 Unlocking the high-current plug ⚫ To unlock, lightly push the high-current plug into the High current Socket until you feel resistance (light Click clicking). ➢ The latch is released. ➢ Now unplug the high- current plug from the high-current socket. -
Page 34: Carbon Fiber Brush Cleaning Workflow
Operating instructions Cleanox 5.0 17.2 Carbon Fiber Brush Cleaning Workflow Workflow - Cleaning - Remark ⚫ Turn on the device. ➢ The power button is lit. ➢ The green indicator light only lights up when the selector switch is no longer set to "0". Security ➢... - Page 35 Operating instructions Cleanox 5.0 ⚫ Place the brush vertically. ⚫ Now lightly stroke the weld seam with the brush. ➢ Move the carbon fiber brush as you would when painting with a normal brush. ⚫ Never push the carbon fiber brush too hard ➢...
-
Page 36: Polishing With Carbon Fiber Brush By Hand
Operating instructions Cleanox 5.0 18 Polishing with carbon fiber brush by hand You can previously clean welds: ⚫ High gloss polishing or adjust the gloss burr to the surrounding surface as desired. ➢ Oxides, silicates, and scaling that could not be completely removed during cleaning can be removed almost completely with polishing. -
Page 37: Procedure After Work
Operating instructions Cleanox 5.0 ⚫ Set the selector switch to power level "I" ➢ normal polishing ➢ LED lights up ⚫ Use our polisher electrolyte to polish. ⚫ The polishing workflow is the same as the cleaning process Hint If necessary, you can still seal the surface with our Neutralyt (see catalogue). -
Page 38: Cleaning With The Carbon Fiber Brush In Automatic Mode
Operating instructions Cleanox 5.0 19 Cleaning with the carbon fiber brush in automatic mode 19.1 Preparation ⚫ AutoFeed handle with Performance Brush AutoFeed XL ⚫ Earth terminal ⚫ Cleaning electrolyte ⚫ Protective clothing Security Are all components installed and connected correctly? Do you wear your personal protective equipment? 19.2 Carbon Fiber Brush Cleaning Workflow Workflow - Cleaning -... - Page 39 Operating instructions Cleanox 5.0 ⚫ Set the selector switch to level "I" Clean ➢ LED lights up ⚫ Press the button on the back of the Cleanox 5.0 until electrolyte escapes from the brush ➢ Hold the brush over a vessel so that you do not drip electrolyte onto other parts ⚫...
- Page 40 Operating instructions Cleanox 5.0 ⚫ Spray the surface with plenty of water immediately after cleaning. ➢ Use the supplied spray bottle ➢ Use distilled or demineralized water. ➢ This way you avoid unsightly white limescale edges. ➢ The water hardness must be less than 10° dH . ➢...
-
Page 41: Polishing With Carbon Fiber Brush In Automatic Mode
Operating instructions Cleanox 5.0 20 Polishing with carbon fiber brush in automatic mode You can previously clean welds: ⚫ High gloss polishing or adjust the gloss burr to the surrounding surface as desired. ➢ Oxides, silicates, and scaling that could not be completely removed during cleaning can be removed almost completely with polishing. -
Page 42: Procedure After Work
Operating instructions Cleanox 5.0 ⚫ Set the selector switch to power level "I" ➢ normal polishing ➢ LED lights up ⚫ For polishing, use our Polisher electrolyte. ⚫ The polishing workflow is the same as the cleaning process Hint If necessary, you can still seal the surface with our Neutralyt (see catalogue). - Page 43 Operating instructions Cleanox 5.0 Tipps to improve the cleaning result ⚫ Long-lasting cleaning without rewetting the carbon fiber brush with electrolyte leads to strong heating of the electrode and the workpiece. ➢ This increases the wear of the carbon fiber brush and reduces the service life and cleaning effect! ➢...
-
Page 44: Possible Errors And Their Remedy
Operating instructions Cleanox 5.0 21 Possible errors and their remedy Fault / error message Possible cause(s) Remedy - Tap clamp not connected No cleaning effects - Workpiece/electrolyte temperature - Turn on your device although the green control LED is too low - Connecting mass pliers - Thread M10 on the cleaning handle - Cleaning with wire brush... -
Page 45: Specifications
Operating instructions Cleanox 5.0 22 Specifications Product no.: EP-01-115 Power [VA] 1250 Weight [kg] Set weight incl. accessories [kg] Dimensions [mm] 250x150x500 Line voltage 230V / 50Hz / 6A 9.5 – 12.5 V AC/DC Secondary voltage Protection IP 21 Table 9 Technical data 23 Clean containers, handles and workstations ⚫... -
Page 46: Maintain
Operating instructions Cleanox 5.0 24 Maintain Hint The following maintenance operations may be carried out by the operator of the equipment himself: ⚫ All cleaning work on the device housing. ⚫ All cleaning work on accessories. ⚫ Replacement of wear parts ➢... -
Page 47: Disposal
Tip for ordering spare and wear parts Our complete product range including all spare and wear parts can be found in our general catalogue at: http://www.reuter.works You are also welcomed to contact us or one of our sales partners directly. Side... -
Page 48: Ec - Declaration Of Conformity
Operating instructions Cleanox 5.0 26 EC – Declaration of conformity Original declaration of conformity Manufacturer Reuter GmbH & Co. KG Schimmelbuschstrasse 9e D-40699 Erkrath, Germany Germany Plenipotentiary for the compilation Olaf Reuter of the technical documentation The general responsibility for drawing up this declaration of conformity lies with the manufacturer.
Need help?
Do you have a question about the Cleanox 5.0 EP-01-015 and is the answer not in the manual?
Questions and answers