Table of Contents
Advertisement
Quick Links
Zhejiang Lancable Tech., Co., Ltd
Add.: 19th. Floor, Xingtu Building, No.451
Wulianwang Street, Binjiang Zone, Hangzhou
City, 310051 Zhejiang Pro., CHN.
www.poersmart.com
Tel.: +86-571-87117288
Fax: +86-571-28190666
E-mail: support@poersmart.com
smart controls
User Manual
Wireless Programmable
Room Thermostat
Model No. : PTC10/PTR16
Scan for App
Power to control your heating
Anytime, Anywhere
Advertisement
Table of Contents

Summary of Contents for POER PTR16
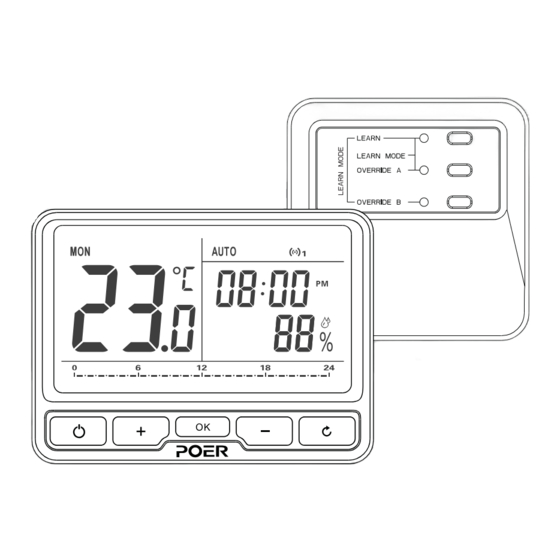
- Page 1 User Manual Wireless Programmable Room Thermostat Model No. : PTC10/PTR16 Zhejiang Lancable Tech., Co., Ltd Add.: 19th. Floor, Xingtu Building, No.451 Tel.: +86-571-87117288 Wulianwang Street, Binjiang Zone, Hangzhou Fax: +86-571-28190666 City, 310051 Zhejiang Pro., CHN. E-mail: support@poersmart.com Power to control your heating www.poersmart.com...
-
Page 2: Table Of Contents
2.1 Install and Wiring Receiver It contains a wireless programmable room thermostat PTC10 and a wireless receiver PTR16, the two units are linked by Radio Frequency. (If your kit is Wi-Fi thermostat, 2.1.1 Install Receiver there is a gateway PTG10 accessing your thermostat to internet?) 2.1.2 Receiver’s wiring... -
Page 3: System Installation
3 The Receiver should be mounted in a location where it will not come into contact with water, moisture or condensation. Note: 4 Before wiring the terminals, please check the wiring drawings carefully. 2.1 1 Install Receiver Follow the installation diagrams to install and connect the receiver PTR16 correctly. -
Page 4: Receiver's Wiring
2. System Installation 2. System Installation 2.1 2 Receiver’s wiring Electric heater Contacts: β 3380 230VAC 50Hz<16A °C= 10KΩ 230V 50Hz Imax 230V 50Hz Imax Thermal actuator Thermostat kit do not contains external temperature sensor NTC terminals. BL BR Wiring with AC230V power supply in NTC sensor terminals will destroy the receiver! Wiring Figure: 230V... -
Page 5: Activate Batteries And Install Thermostat
2.2.1 Activate Batteries 2.3.1 RF Signal Pairing The room thermostat has already been pre-bound with receiver in kit PTC10/PTR16 when delivery. You may directly move to RF communication test, please refer to 2.3.2. A. RF signal pairing between room thermostat and receiver... - Page 6 2. System Installation 2. System Installation (3-2)When is flashing on the screen’s left side, press to send the pairing B. RF signal pairing between room thermostat and gateway this is only for Wi-Fi thermostat) command with receiver; Pairing success if flashing on screen’s right side, pairing failed if E01 or E02 is Automatically pairing thermostat with gateway by App on mobile phone flashing on screen’s right side, in this case, you need to send the paring command with...
- Page 7 2. System Installation 2. System Installation (1-2)Add thermostat by scanning it's QR code or typing MAC ID manually. (1-3)Pairing process between thermostat and gateway might take about 1 minute. Once thermostat is paired with gateway successfully, will show up on the top right corner of thermostat’s screen;...
- Page 8 2. System Installation 2. System Installation (2-3-1)Long press to enter Menu Selection, when are flashing, (2-4)Gateway is still under paring mode even one thermostat's paring succeed, if you had more thermostats need to be paired, you may continue to pair them with gateway press to enter RF pairing interface.
-
Page 9: Rf Communication Test
2. System Installation 2. System Installation 2.3.2 RF communication test RF communication test between thermostat and gateway Enter RF Communication Test by long pressing , when show up on screen’s To make sure RF communication between thermostat and receiver, thermostat and gateway before using them regularly, you should take a RF communication test. -
Page 10: Operation Thermostat
3. Operation Thermostat 3. Operation Thermostat When appeared on Temperature Area, press to select current 3.1 Clock Setting month and press to set. Clock setting should be done if thermostat was used for the first time or after batteries changed; automatically clocking setting will be done if thermostat was connected with Internet via Gateway. -
Page 11: Program Setting
3. Operation Thermostat 3. Operation Thermostat Enter 5+2 days/7 days/1 day program when Days flashing, select by 3.2 Program Setting press to confirm. 3.2.1 Pre-set Program 5+2 Days Program This thermostat comes with the following default settings pre-programed for your convenience: Working days’... -
Page 12: Override Mode
3. Operation Thermostat 3. Operation Thermostat Time flashing in Time Area, press to adjust the 1st time as required, 3.3 Override Mode-to change temperature for a press to confirm. short period under AUTO mode Under AUTO mode, enter Override mode by pressing appeared on upper right. -
Page 13: Manual Mode
3. Operation Thermostat 3. Operation Thermostat 3.4 Manual Mode-to set a constant room temperature manually 3.5 Holiday Mode Switch between AUTO and Manual Mode by pressing Make a holiday plan, it will keep your room at the pre-set temperature until your return time is coming. -
Page 14: Eco Mode
3. Operation Thermostat 3. Operation Thermostat ★ Holiday start time: adjust by pressing 3.7 OFF Mode (Frost Protection) as following figure, confirm by pressing Under OFF Mode, your room’s Frost Protection will be automatically turned on unless you exit the mode; The default temperature is 7℃, you can change this default value in User Options. -
Page 15: User Options Table
4. User Option 5. User Options Table 1. You may change user operation after entered User Operation by Pressing Option Content Min. Max. Default when is flashing under Menu Selection. Change 12h or 24h clock Change to another pre-set program Switch on/off summer/winter time Change temperature offset °C... -
Page 16: Product Specification
PID control, in the worst case it may damage the heat source. Wireless Receiver Wireless Programmable Thermostat Operating Temperature 0 to 50°C Operating Temperature 0 to 50°C 868 MHz(433 MHz-PTR16-433) Transmitting frequency Bidirectional Heating system Control mode Communication Range Display LCD with backlight...


Need help?
Do you have a question about the PTR16 and is the answer not in the manual?
Questions and answers