Table of Contents

Related Manuals for Vela Treatment Chair


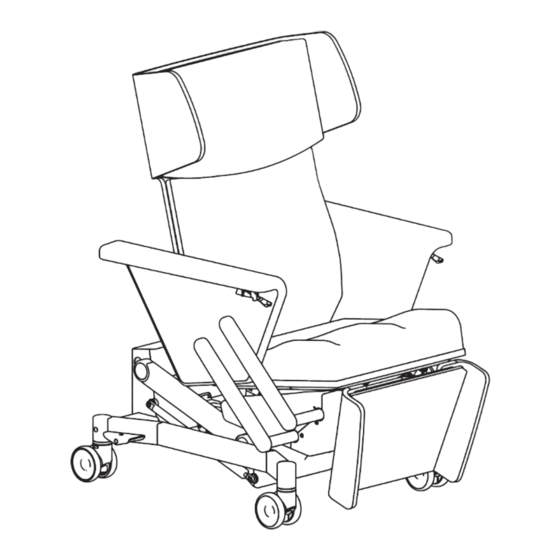
Summary of Contents for Vela Treatment Chair
- Page 1 I N S T R U C T I O N F O R U S E VELA Medical Manual. nr. 105634 Item no.: Model 87211 VELA Rumba 87212 VELA Neonatal chair 87213 VELA Treatment Chair ISO 9001 ISO 14001 *The chair’s design varies depending on the model...
-
Page 2: Table Of Contents
TABLE OF CONTENTS 1.0. INTRODUCTION 1.1. WARNINGS 1.2. ELECTROMAGNETIC EMISSION 1.3. LABELS USED ON THE CHAIR 1.4. SAFETY 1.4.1. Intended use 1.4.2. Transport 1.5. WARRANTY 1.6. UNWRAPPING THE CHAIR 1.7. MAINTENANCE 1.7.1. Wheels 1.7.2. Frame & wooden surfaces 1.7.3. Upholstery 1.8. -
Page 3: Introduction
1.0. INTRODUCTION DEAR CUSTOMER Congratulations on your new VELA Medical chair. This user guide contains helpful information about adjustments, operation, and maintenance. Important To help you get the most benefit from your chair, please read this user guide carefully and keep it handy for future reference. -
Page 4: Warnings
1.1. WARNINGS The chair is intended for indoor use in hospital settings. The chair is not suitable for use outside hospital settings. The chair does not have electrical accessories. The chair is only intended for use by adults. The chair must not be used for operations or in contagious wards, as the chair cannot be run through a washer. -
Page 5: Electromagnetic Emission
1.2. ELECTROMAGNETIC EMISSION RF emission CISPR 11, Group 1, Class A Harmonic Emissions IEC 61000-3-2, Class A Voltage changes/fluctuations and flickers IEC 61000-3-3 Immunity Test Test Level Professional Healthcare Electrostatic discharge (ESD) IEC 61000-4-2 ± 8 kV contact disharge ± 2,4,6,8,15 kV air discharge Radiated RF field IEC 61000-4-3 3 V/m 80 MHz –... -
Page 6: Labels Used On The Chair
The chair must not be used outside This chair has CE certification and approval a hospital setting. for the model name “VELA Rumba” and :: The chair is not designed to be stood adheres to EU regulations. The chair is manufactured by: upon. -
Page 7: Warranty
VELA Medical. hair, and dirt. VELA Medical is not liable for damages to the product or the user arising from: 1.7.2. FRAME & WOODEN SURFACES Frame and all wooden surfaces are :: Transport surface treated with resistant varnish. -
Page 8: Upholstery
1.7.3. UPHOLSTERY regular household items. Magic Premium by Cotting Group: Correct disposal and recycling Abrasion resistance: About 500,000 reduce the negative impact on the Martindale, ISO 5470-2 environment and human beings. Biocompatibility: ISO 10993-10:2014 Lightfastness: Light ≥ 6; perspiration Note: Electrical and electronic (ISO 11641): Class 4 equipment as well as batteries Surface resistance: Blood/urine (EN... -
Page 9: Placing/Removing Pillows
1.9. PLACING/REMOVING PILLOWS 1.9.1. FOOTREST 1. Push the pillow against the footrest so the holes (1a) are pressed into the rubber brackets (1b). 2. Push the pillow firmly in place so that it cannot be moved up or down. 3. Click the cover (3a) onto the seat pillow (3b) to mount correctly. Note: there are buttons on both sides of the cover. -
Page 10: Quickguide - Remote Control
2.0. QUICKGUIDE – REMOTE CONTROL Before Use: The supplied blue ”key” must be used at the back of the hand control to turn from locked to open ”padlock”. This in order to use the chair’s electrical functions. Remote Control Can be placed on the hanger or behind the chair. Note: if the remote control is to be moved to the other side of the chair, this must always be done by bringing it behind the chair in order to avoid pinching hazards. -
Page 11: Settings
2.1. SETTINGS Modifications and repairs to the chair must only be carried out by a VELA Medical technician or a person with the required training. 2.1.1. USING THE BRAKES Press down on the brake pedal on the right or left side of the chair to apply the brake to the back wheels. -
Page 12: Using The Front Brakes
2.1.5. USING THE FRONT BRAKES* Double wheels with button-activated brakes. Press the buttons on the right and left side of the chair to engage brakes completely. Note: the button-activated brakes only engage two front wheels and should always be used with the pedal (Section 2.1.1.). 2.1.6. -
Page 13: Electrical Features
2.2. ELECTRICAL FEATURES Figure 1 Neutral/Lift down Lift up 2.2.1. LIFT (UP OR DOWN) The button on the left lowers the seat. The button on the right raises the seat (Figure 1). Warning! Beware of trapping hands or limbs underneath the chair when using the lift. Figure 2 Alighting assistance Neutral... -
Page 14: Backrest Angle
Figure 3 Neutral Maximum back angling 2.2.3. BACKREST ANGLE The button on the left angles the backrest forwards. The but- ton on the right angles the backrest backwards (Figure 3). Note: the backrest can only be serviced when the seat is in a horizontal position (Sections 2.0.2./2.0.4.). -
Page 15: Trendelenburg
Figure 5 Maximum back angling/footrest engaged Trendelenburg 2.2.5. TRENDELENBURG* The (red) button on the right angles the seating unit to Trende- lenburg (backrest horizontal, footrest up) (Figure 5). Note: not all chairs are equipped with the Trendelenburg feature! Figure 6 Trendelenburg Neutral 2.2.6. -
Page 16: Technical Data And Documentation
The electrical cable (on the back of the chair) must be rolled up during transportation. Note: the chair must not be sat upon during transportation. VELA Medical :: Gøteborgvej 8-12 :: 9200 Aalborg SV :: Denmark :: Tel: +45 96 34 76 00 :: mail@vela-medical.com vela-medical.com...
Need help?
Do you have a question about the Treatment Chair and is the answer not in the manual?
Questions and answers