Table of Contents
Advertisement
Quick Links
Advertisement
Table of Contents

Subscribe to Our Youtube Channel
Related Manuals for Microtek PlateLyzer


Summary of Contents for Microtek PlateLyzer
- Page 1 Scanner User's Manual www.microtek.com...
-
Page 2: Preface
The contents of this manual have been checked carefully for accuracy, and every effort has been made to ensure that there are no errors. However, Microtek makes no guarantee as to the accuracy of the contents of this document and reserves the right to make changes to the contents without prior warning. -
Page 3: Fcc Compliance Statement
• Consult the dealer or an experienced technician for help. Any changes or modifications not expressly approved by the party responsible for compliance could void the user’s authority to operate the equipment. PlateLyzer Scanner User's Manual... -
Page 4: Safety Precautions
When you need a repair service, unplug the scanner from the power outlet and consult qualified service personnel. • When replacement parts are required, use replacement parts that are specified by the manufacturer or have the same characteristics as the original parts. PlateLyzer Scanner User's Manual... -
Page 5: Table Of Contents
Scanning and Measuring Scenarios ...........19 Using MiBio-Probe Software ............. 19 Scanning Samples ..............20 Creating a Spot Frame Template ..........23 Measuring and Exporting Data ............ 25 Periodic Scanning ..............28 Appendix ...................29 Troubleshooting ................29 Specifications ................. 30 PlateLyzer Scanner User's Manual... - Page 6 PlateLyzer Scanner User's Manual...
-
Page 7: Knowing About Your Scanner
• Microtek-patented E.D.I.T.™ technology: This is a patented “glassless” scanning system, built into the lower bay of Microtek’s dual media scanners, which can avoid the adverse effects by glass, such as Newton rings and image distortion. This technology ensures clear and distortion-free images during the scanning process. -
Page 8: System Requirements
Color display with 24-bit color output capability • 1GB RAM or more (2GB is recommended) • Intel Core i3 processor PC or higher with a built-in USB port • Microsoft Windows 10/11 (compatible with Windows 7/8) PlateLyzer Scanner User's Manual... -
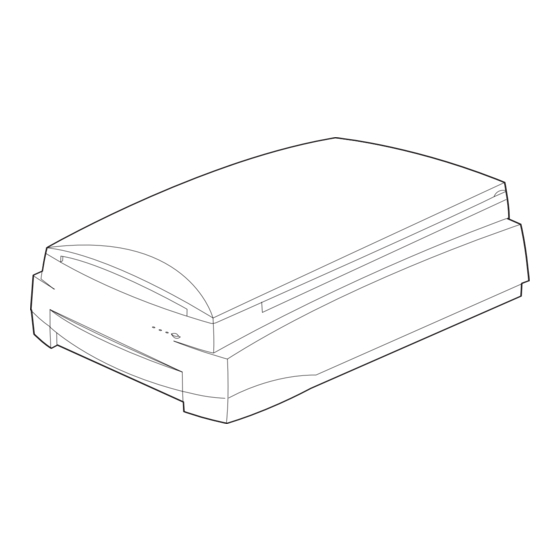
Page 9: Taking A Closer Look
Scanning bed (Drawer) Used to place the holder with loaded microplate or glass slide. USB 2.0 port Used to connect the scanner to a computer. Power connector Used to connect the scanner to a power source. PlateLyzer Scanner User's Manual... -
Page 10: Initial Setup
After unpacking your scanner package, please check for the major components listed below. Take note that the sample holder you received depends on the configuration of the scanner you purchased. Sample holder Standard Holder Scanner Power cord Dual-Scan Holder Hi-Speed USB cable Slide Tray Power adapter PlateLyzer Scanner User's Manual... -
Page 11: Step 2: Installing The Software
Please follow the steps below to load and install the required software for the scanner: 1. Please visit the Microtek website at https://www.microtek.com. 2. Search for the keyword “PlateLyzer“ and locate the ”Download” page for the product. 3. Download the necessary drivers and software marked as “Yes” in the download list based on your operating system. -
Page 12: Step 3: Unlocking The Scanner
Locked When the screw has been tightened, this indicates that your scanner is locked. 4. Turn off your scanner. The scanner is now ready for transport. PlateLyzer Scanner User's Manual... -
Page 13: Step 4: Connecting The Scanner
1. Connect the power adapter to the back of the scanner. 2. Plug one end of the power cord into the power adapter, and plug the other end of the power cord into a wall outlet or other power source.. PlateLyzer Scanner User's Manual... -
Page 14: To The Usb 2.0 Cable
4. Connect the other end of the USB cable to the scanner’s USB port. 5. Press the Power button ( ) at the front panel of the scanner, and wait Power button for the lights to stop blinking and stay on steady. The system will detect your scanner automatically. PlateLyzer Scanner User's Manual... -
Page 15: Positioning Samples
To scan microplates or glass slides with samples, please use the sample holder provided in the scanner package. Microtek offers two types of microplate holders and one slide tray for you to choose from. You can select and purchase the appropriate holder based on the type of vessel with loaded samples. -
Page 16: Standard Holder
1. Place the microplate into the frame of the Standard Holder. 2. Insert the holder with loaded microplate all the way into the scanning bed (drawer) of the scanner. Keep Calibration strip clear and free of any obstruction at all times PlateLyzer Scanner User's Manual... -
Page 17: Dual-Scan Holder
2. Insert the holder with loaded microplate all the way into the scanning bed (drawer) of the scanner. Keep Calibration strip clear and free of any obstruction at all times PlateLyzer Scanner User's Manual... -
Page 18: Slide Tray
Hold up to four glass slides at a time 2. Insert the holder with loaded glass slides all the way into the scanning bed (drawer) of the scanner. Keep Calibration strip clear and free of any obstruction at all times PlateLyzer Scanner User's Manual... -
Page 19: Scanning And Measuring Scenarios
Scanning and Measuring Scenarios Using MiBio-Probe Software Microtek MiBio-Probe is a program to acquire and measure images of biochips with a variety of scanning, viewing and measurement functions. The software Microtek MiBio-Probe allows users to quickly and accurately acquire image information from the reaction of biochips with samples and reagents, and generate simple reports for export to other software for analysis. -
Page 20: Scanning Samples
(drawer). NOTE: Make sure that nothing is on the scanner's glass surface. 2. Double-click on the Microtek MiBio-Probe icon on the desktop to launch it. 3. Click on the Scan Settings button( ) to open the Settings window. Then set the desired scanning parameters according to your needs. - Page 21 ) to specify the file name, format, and storage path of exported images. 7. Finally, click on the Export button to save the selected scanned images to the specified storage path with the file properties defined in the export settings. PlateLyzer Scanner User's Manual...
- Page 22 Scan Settings window Navigation area Scanned image System default folder Image thumbnail Thumbnail area Main interface - Viewer panel Red grid PlateLyzer Scanner User's Manual...
-
Page 23: Creating A Spot Frame Template
6. If necessary, repeat steps 2 to 5 above to create multiple templates that can be loaded when needed. PlateLyzer Scanner User's Manual... - Page 24 Selected well Well image Well Plate diagram Select the image to use for creating templates 3.c, 3.d Main interface - Template Editor panel Unadjusted spot frames (green) Adjusted spot frames (green) PlateLyzer Scanner User's Manual...
-
Page 25: Measuring And Exporting Data
Click on the Clean All button to clear the spot frame template for all wells. 5. If necessary, use the Adjustment tool at the top right of the panel to adjust the spacing and size of the spot frames for accurate positioning of the analyte. PlateLyzer Scanner User's Manual... - Page 26 Click on the Measure-Export button, specify a file name and storage path, and then export the file. The exported data file is saved in CSV format and stored in the location specified along with the selected well image. PlateLyzer Scanner User's Manual...
- Page 27 The well with the applied template Selected and template-applied well Select the image to measure Main interface - Measure panel The well with the applied template “tplt” - The image with measurement settings saved Measurement results Selected well for exporting data PlateLyzer Scanner User's Manual...
-
Page 28: Periodic Scanning
The scanned images will be individually named in chronological order and stored in the default or a custom folder. Set the interval between periodic scans Set the number of periodic scans to perform PlateLyzer Scanner User's Manual... - Page 29 Periodic scan mode is enabled PlateLyzer Scanner User's Manual...
-
Page 30: Appendix
Make sure that the “Scan Mode” is set to “Transparent” when scanning a transparent microplate or glass slide with samples, and set it to “Reflective” when scanning an opaque microplate with samples. Uninstall and reinstall the MiBio-Probe software. PlateLyzer Scanner User's Manual... -
Page 31: Specifications
DC 24V, 2.5A (Output) Power Consumption 60 W Max. Power Supply Voltage Manufacturer Model No. (AC/DC adapter) AC 100V to 240V DELTA DPS-60AB-6 Environment Operating temperature: 41° to 104°F (5° to 40°C) Relative humidity: 20% to 85% PlateLyzer Scanner User's Manual...
Need help?
Do you have a question about the PlateLyzer and is the answer not in the manual?
Questions and answers