Table of Contents
Advertisement
Available languages
Available languages
Quick Links
Termo Eléctrico
Storage Electric Water Heater
GTS 10
GTS 15
INSTRUCCIONES DE INSTALACIÓN Y USO
INSTALLATION AND OPERATING INSTRUCTIONS
Lea estas instrucciones atentamente antes de instalar o utilizar el aparato por primera vez.
Please read these instructions before installing or using this appliance for the first time.
Advertisement
Table of Contents

Related Manuals for Gabarron GTS 10

Summary of Contents for Gabarron GTS 10
- Page 1 Termo Eléctrico Storage Electric Water Heater GTS 10 GTS 15 INSTRUCCIONES DE INSTALACIÓN Y USO INSTALLATION AND OPERATING INSTRUCTIONS Lea estas instrucciones atentamente antes de instalar o utilizar el aparato por primera vez. Please read these instructions before installing or using this appliance for the first time.
-
Page 2: Informacion Importante
1.- INFORMACION IMPORTANTE • Lea con detalle estas instrucciones antes de instalar o utilizar este aparato por primera vez. La garantía no cubrirá los daños causados por la no observancia de estas instrucciones. • Las instrucciones deben conservarse para futuras referencias. Este manual debe ser conservado y dado a cualquier nuevo usuario. -
Page 3: Instalación
2.- INSTALACIÓN El termo debe instalarse lo más cerca posible del punto de utilización resguardado de posibles heladas. Para elegir el emplazamiento se debe tener en cuenta que los conductos de entrada y salida de agua sean fácilmente accesibles evitando en lo posible el uso de codos, para que pueda ser desmontado sin problemas o se pueda sustituir cualquier componente del mismo. - Page 4 Entrada de agua fría Salida de agua caliente Manguito dieléctrico Manguito dieléctrico Válvula de Seguridad Unidireccional Desagüe Válvula Presión El desagüe o flujo de agua que resulta de la sobrepresión nunca debe ser obstruido. El conducto de desagüe debe tener una pendiente continua y suficiente con una sección en ningún caso inferior a la del orificio de salida del grupo de seguridad.
-
Page 5: Mantenimiento
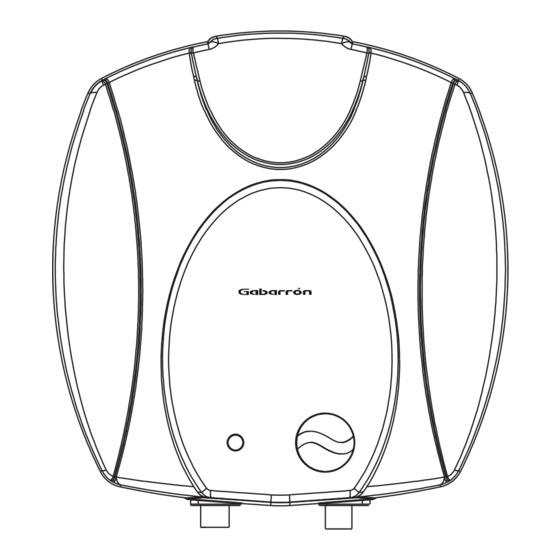
3.- FUNCIONAMIENTO Carcasa Plástico Indicator de calentamiento Mando Control Termostato Entrada Agua Fría Salida Agua Caliente Enchufar a la red. El indicador de calentamiento permanecerá encendido siempre que la resistencia esté calentando el agua. Es posible regular la temperatura del agua caliente mediante el mando de control del termostato hasta los 75ºC como máximo. -
Page 6: Datos Técnicos
Este termo ha sido fabricado dentro de un sistema de calidad asegurada y conforme a procesos respetuosos con el medio ambiente. Una vez finalizada la vida útil del aparato, llévelo a un punto limpio para que sus materiales puedan ser reciclados de forma adecuada 5.- DATOS TÉCNICOS Modelo GTS10... - Page 7 1.- IMPORTANT INFORMATION • Read these instructions carefully before installing or using this heater for the first time. The guarantee will not cover damage caused by not following these instructions. • The instructions should be retained for future reference. This guide must be kept and given to any new owner.
-
Page 8: Installation
2.- INSTALLATION When possible the water heater should be sited to minimize the pipe distance to hot water outlets. It should be protected from moisture and frost. Please note that the inlet and outlet are easily accessible. Avoid if possible the use of many fittings, so that it can be disassembled without problems or any spare part may be easily replaced. - Page 9 Cold Water Inlet Pipe Hot Water Outlet Pipe Dielectric Hose Dielectric Hose Mono-directional Security Valve Pressure leakage hole The Pressure Relief Valve may discharge water and it should be piped to a safe but visible drain point. A tundish should be incorporated close to the appliance where any discharge will be visible nut not hazardous.
-
Page 10: Operating The Water Heater
3.- OPERATING THE WATER HEATER Plastic Cover Heating Indicator Temperature Controlling Knob Cold Water Inlet Hot Water Outlet Connect the water heater to the electrical socket. The heating indicator will be lit as long as the heating element is energized. The light will go out when the desired temperature is reached. The setting of the water temperature can be modified by turning the Temperature Controlling Knob up to 75ºC max. -
Page 11: Specifications
In case of malfunction or doubt, do not try to repair the heater yourself; it may result in a fire hazard or electric shock. This thermal radiator has been manufactured under an assured quality system using environment friendly processes. Please take the heaters to a clean point once their useful life is finished, in order to recycle their materials in the right way. - Page 12 El símbolo en e l producto o en su e mbalaje indica que e este producto no se puede tratar com mo desperdicio norm males del hogar. Este e producto se debe entregar al punt to de recolección de e equipos eléctricos y y electrónicos para reciclaje.