Brother HL-5270DN Quick Setup Manual
Hide thumbs
Also See for HL-5270DN:
- User manual (152 pages) ,
- Network user's manual (112 pages) ,
- Technical reference manual (517 pages)
Table of Contents
Advertisement
Quick Links
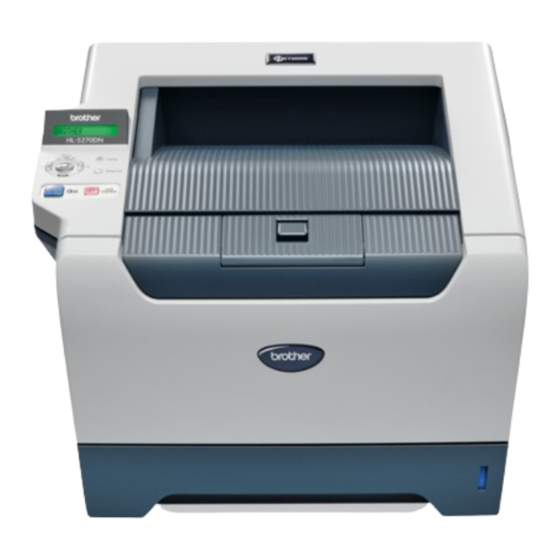
HL-5270DN
Before you can use the printer, you must set up the hardware and install the driver. Please
read this 'Quick Setup Guide' for proper set up and installation instructions.
How to use the printer, see the User's Guide in the CD-ROM.
Keep this 'Quick Setup Guide' and the supplied CD-ROM in a convenient place for quick and
easy reference at all times.
STEP1
Setting Up the Machine
STEP2
Installing the Printer Driver
Setup is Complete!
Advertisement
Chapters
Table of Contents

Related Manuals for Brother HL-5270DN


Summary of Contents for Brother HL-5270DN
- Page 1 HL-5270DN Before you can use the printer, you must set up the hardware and install the driver. Please read this ‘Quick Setup Guide’ for proper set up and installation instructions. STEP1 Setting Up the Machine STEP2 Installing the Printer Driver Setup is Complete! How to use the printer, see the User’s Guide in the CD-ROM.
- Page 2 Symbols used in this guide Caution Hot Surface Warning Electrical Hazard Warnings tell you what to do Electrical Hazard icons alert Hot Surface icons warn you Cautions specify procedures to prevent possible personal you to a possible electrical not to touch machine parts you must follow or avoid to injury.
-
Page 3: Table Of Contents
For USB interface cable users (Windows 98/Me/2000/XP only)............. 14 For parallel interface cable users ......................16 For network interface cable users ......................17 For Brother Peer-to-Peer network printer users (LPR/NetBIOS) ............17 For shared network printer users ......................19 ® Macintosh For USB interface cable users ........................ -
Page 4: Safety Precautions
Safety Precautions To Use the Printer Safely Warning There are high voltage electrodes inside the printer. Before you clean the inside of the printer, make sure that you have turned off the power switch and unplugged the printer from the AC power outlet. DO NOT handle the plug with wet hands. - Page 5 A shielded interface cable should be used in order to ensure compliance with the limits for a Class B digital device. Changes or modifications not expressly approved by Brother Industries, Ltd. could void the user's authority to operate the equipment. Industry Canada Compliance Statement (For Canada This Class B digital apparatus complies with Canadian ICES-003.
- Page 6 Incorrectly wired extension cords may MANUFACTURED: cause personal injury and equipment damage. Brother Corporation (Asia) Ltd. Brother Buji Nan Ling The fact that the equipment operates satisfactorily Factory Gold Garden Ind., Nan Ling Village, Buji, Rong does not imply that the power is grounded and that Gang, Shenzhen, CHINA the installation is completely safe.
- Page 7 Safety Precautions Disconnect device You must install this printer near a power outlet that is easily accessible. In case of an emergency, you must disconnect the power cord from the power outlet to shut off the power completely. Caution for LAN connection Connect this product to a LAN connection that is not subjected to over voltages.
-
Page 8: Getting Started
Getting Started What is in the box? Carton components may vary from one country to another. Save all packing materials and the printer carton in case for any reason you must ship your printer. 1 Front Cover Release Button 5 Paper tray 2 Control panel 6 Power switch 3 Face-down output tray support flap (Support flap) -
Page 9: Control Panel
Getting Started Control panel 1 Menu buttons Move forward through menus. Move backward through menus. Choose the control panel menu. Select the chosen menus and settings. Back Go back one level in the menu structure. 2 Go button Exit from the control panel menu and reprint setting. Clear error messages. -
Page 10: Supplied Cd-Rom
Documentation View the Printer User’s Guide and Network User's Guide in PDF format (Viewer included). You can also view the User’s Guide in HTML format by accessing the Brother Solutions Center. ® The User’s Guide in PDF format will be installed automatically when you install the driver. (For Windows... -
Page 11: Step1 Setting Up The Machine
STEP1 Setting Up the Machine Put the CD-ROM into the CD-ROM drive ® ® For Windows users For Macintosh users Improper Setup Improper Setup DO NOT connect the interface cable. DO NOT connect the interface cable. Connecting the interface cable is done when Connecting the interface cable is done when installing the driver. -
Page 12: Install The Drum Unit And Toner Cartridge Assembly
STEP1 Setting Up the Machine Put the drum unit and toner cartridge assembly Install the drum unit and into the printer. toner cartridge assembly Improper Setup DO NOT connect the interface cable yet. Close the front cover of the printer. Press the front cover release button and open the front cover (1). -
Page 13: Load Paper In The Paper Tray
Setting Up the Machine Fan the stack of paper well to avoid paper jams Load paper in the paper tray and misfeeds. Pull the paper tray completely out of the printer. Put paper in the paper tray. Make sure that the paper is flat in the tray and below the maximum paper mark (1). -
Page 14: Print A Test Page
STEP1 Setting Up the Machine Press Go. The printer prints a test page. Check Print a test page that the test page has printed correctly. Improper Setup DO NOT connect the interface cable yet. Make sure that the printer power switch is off. Connect the AC power cord to the printer. -
Page 15: Step2- Installing The Printer Driver
Follow the instructions on this page for your operating system and interface cable. For the latest driver and to find the best solution for your problem or question, access the Brother Solutions Center directly from the CD-ROM / Driver or visit http://solutions.brother.com. -
Page 16: Windows
STEP2 Installing the Printer Driver ® Windows ® For USB interface cable users (Windows 98/Me/2000/XP only) When the License Agreement window Note appears, click Yes if you agree to the License If the Found New Hardware Wizard appears on Agreement. your PC, click Cancel. - Page 17 98/Me users, the setup is now complete. Now go to ® For Windows 2000/XP users, go to ‘Setting Your Printer as the Default Printer’. Choose the Brother Printer icon. Click File, and then Set as Default printer. The setup is now complete.
-
Page 18: For Parallel Interface Cable Users
STEP2 Installing the Printer Driver ® Windows For parallel interface cable users Click Finish. Note If the Found New Hardware Wizard appears on your PC, click Cancel. Note If you want to register your product on-line, check On-Line Registration. Connecting the printer to your PC and installing the driver Turn off the printer power switch. -
Page 19: For Network Interface Cable Users
Installing the Printer Driver ® Windows For network interface cable users For Brother Peer-to-Peer network printer users (LPR/NetBIOS) Connect the network interface cable to the Note printer, and then connect it to a free port on • If you are going to connect the printer to your your hub. - Page 20 STEP2 Installing the Printer Driver ® Windows For LPR Users: Click Finish. Choose Search the network for devices and choose from a list of discovered devices (Recommended). Or enter your printer's IP address or its node name. Click Next. For NetBIOS Users: Choose Search the network for devices and choose from a list of discovered devices (Recommended).
-
Page 21: For Shared Network Printer Users
Installing the Printer Driver ® Windows For shared network printer users Choose Network Shared Printer, and then Note click Next. If you are going to connect to a shared printer on your network, we recommend that you ask your system administrator about the queue or share name printer prior to installation. -
Page 22: Macintosh
STEP2 Installing the Printer Driver ® Macintosh For USB interface cable users ® For Mac OS X 10.2.4 or greater users Click Go, then Applications. ® Connecting the printer to your Macintosh installing the driver Click Install Printer Driver on the menu screen. - Page 23 Installing the Printer Driver ® Macintosh Choose USB. Click Printer Setup Utility, then Quit Printer Setup Utility. Choose the proper printer, and then click Add. ® For Mac OS 10.2 users: The setup is now complete. ® For Mac OS 10.3 users: ®...
-
Page 24: 9.1 To 9.2 Users
From the Apple menu, click Chooser. Double-click your language folder. Click the Brother Laser icon. On the right side of the Chooser, choose the printer to which you want to print. Close the Chooser. Double-click the Printer Driver Installer icon to install the printer driver. -
Page 25: For Network Interface Cable Users
Installing the Printer Driver ® Macintosh For network interface cable users ® For Mac OS X 10.2.4 or greater users Click Go, then Applications. ® Connecting the printer to your Macintosh installing the driver Click Install Printer Driver on the menu screen. - Page 26 ® Macintosh Make the following selection. Click Printer Setup Utility, then Quit Printer Setup Utility. Choose Brother HL-5270DN series, and then click Add. Go to Step 13. The setup is now complete. Choose Brother HL-5270DN series, and then click Add.
-
Page 27: 9.1 To 9.2 Users
Connect the network interface cable to the printer, and then connect it to a free port on your hub. Click the Brother Laser (IP) icon, and then choose BRN_xxxxxx (where xxxxxx are the last six digits of the Ethernet address). Click Turn on the printer power switch. -
Page 28: For Network Users
BRAdmin Professional configuration utility (For Windows users) ® The BRAdmin Professional utility for Windows is designed to manage your Brother network connected devices in a Local Area Network (LAN) environment. For more information on BRAdmin Professional, visit us at http://solutions.brother.com. Installing the BRAdmin Professional... -
Page 29: Bradmin Light Configuration Utility (For Mac Os ® X Users)
X users) ® The Brother BRAdmin Light software is a Java™ application that is designed for the Apple Mac OS environment. It supports some of the features of the Windows BRAdmin Professional software. For example, using the BRAdmin Light software, you can change some network settings and update firmware on Brother’s network ready printers and multifunction devices. -
Page 30: Web Browser
Web browser Print the Printer Settings Page The Brother print server is equipped with a web server that allows you to monitor its status or change some The Printer Settings Page lists all the current printer of its configuration settings, using HTTP (Hyper Text settings, including network settings. -
Page 31: Consumables And Options
When the time comes to replace consumable items, the following messages will appear on the LCD. TONER LOW TONER LIFE END DRUM NEAR END For more information about the consumables for your printer, visit us at http://solutions.brother.com or contact your local Brother re-seller. See Chapter 6 of the User's Guide. Toner Cartridge... -
Page 32: Repacking Information
Repacking Information Repack the printer. Shipment of the printer If for any reason you must ship your printer, carefully package the printer to avoid any damage during transit. We recommend that you save and use the original packaging. The printer should also be adequately insured with the carrier. - Page 33 The contents of this manual and the specifications of this product are subject to change without notice. Brother reserves the right to make changes without notice in the specifications and materials contained herein and shall not be responsible for any damages (including consequential) caused by reliance on the materials presented, including but not limited to typographical and other errors relating to the publication.
- Page 34 LM56680011 Printed in China © 2005 Brother Industries, Ltd. © 1998-2005 TROY Group, Inc. © 1983-2005 PACIFIC SOFTWORKS INC. This product includes the "KASAGO TCP/IP" software developed by Elmic Systems, Inc. ALL RIGHTS RESERVED.
Need help?
Do you have a question about the HL-5270DN and is the answer not in the manual?
Questions and answers