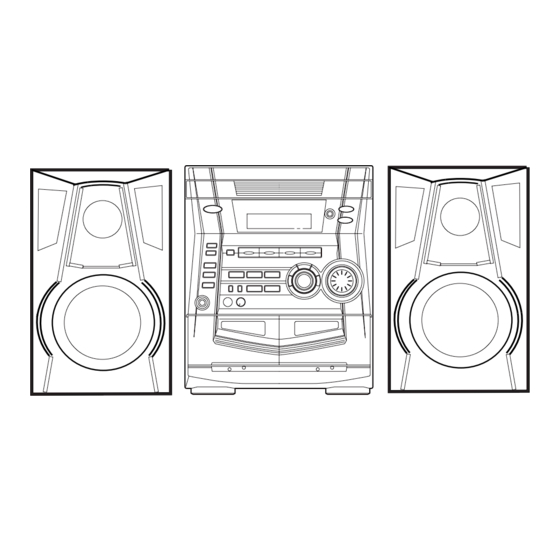
Aiwa NSX-AJ305 U Service Manual
Compact disc stereo system
Hide thumbs
Also See for NSX-AJ305 U:
- Operating instructions manual (23 pages) ,
- Service manual (40 pages) ,
- Service manual (126 pages)
Table of Contents
Advertisement
SERVICE MANUAL
COMPACT DISC
STEREO SYSTEM
SYSTEM
NSX-AJ300<U>
NSX-AJ305<U>
NSX-SZ300
<LH,EZ>
NSX-SZ305<EZ>
• If requiring information about the CD mechanism, see Service Manual of BZG-5,
(S/M Code No. 09-00C-353-3N2).
NSX-AJ300
NSX-AJ305
NSX-SZ300
NSX-SZ305
BASIC TAPE MECHANISM : ZZM-3 PR1NM
BASIC CD MECHANISM : BZG-5 ZD3NM
CD
CASSEIVER
CX-NAJ300
CX-NAJ305
CX-NSZ300
CX-NSZ305
S/M Code No. 09-012-440-5R1
REMOTE
SPEAKER
CONTROLLER
SX-NAJ302
SX-NAJ302
RC-ZAS02
SX-R145
SX-NSZ302
U
U
LH,EZ
EZ
Advertisement
Table of Contents

Related Manuals for Aiwa NSX-AJ305 U


Summary of Contents for Aiwa NSX-AJ305 U
- Page 1 NSX-AJ300 NSX-AJ305 NSX-SZ300 LH,EZ NSX-SZ305 SERVICE MANUAL COMPACT DISC BASIC TAPE MECHANISM : ZZM-3 PR1NM STEREO SYSTEM BASIC CD MECHANISM : BZG-5 ZD3NM REMOTE SYSTEM SPEAKER CASSEIVER CONTROLLER NSX-AJ300<U> CX-NAJ300 SX-NAJ302 SX-NAJ302 NSX-AJ305<U> CX-NAJ305 RC-ZAS02 SX-R145 NSX-SZ300 CX-NSZ300 <LH,EZ> SX-NSZ302 NSX-SZ305<EZ>...
-
Page 2: Specifications
SPECIFICATIONS Main unit CX-NAJ300/CX-NSZ300/CX-NAJ305/CX-NSZ305 <General> Power requirements U: 120 V AC, 60 Hz <FM tuner section> LH: 120 V/220-230 V/240 V AC Tuning range 87.5 MHz to 108 MHz (switchable), 50/60 Hz Usable sensitivity (IHF) U,LH: 13.2 dBf EZ: 230 V AC, 50 Hz EZ: 16.8 dBf Power consumption 300U: 70 W... - Page 3 PROTECTION OF EYES FROM LASER BEAM DURING SERVICING This set employs laser. Therefore, be sure to follow carefully CAUTION the instructions below when servicing. Use of controls or adjustments or performance of proce- dures other than those specified herin may result in WARNING!! hazardous radiation exposure.
-
Page 4: Note On Before Starting Repair
NOTE ON BEFORE STARTING REPAIR 1. Forced discharge of electrolytic capacitor of power supply block When repair is going to be attempted in the set that uses relay circuit in the power supply block, electric potential is kept charged across the electrolytic capacitors (C101, 102) even though AC power cord is removed. - Page 5 In such a case, check also if the POWER AMPLIFIER circuit or power supply circuit has any abnormalities or not. 2-2. Regarding reset There are cases that the machine does not work correctly because the MICROCOMPUTER is not reset even though the AC power cord is re-inserted, or the software reset (pressing the STOP key + POWER key) is performed.
-
Page 6: Electrical Main Parts List
ELECTRICAL MAIN PARTS LIST REF. NO. PART NO. KANRI DESCRIPTION REF. NO. PART NO. KANRI DESCRIPTION 87-A12-036-000 CAP, E 2200-63 M SMG<U,LH> 87-A12-776-090 CAP, E 2200-50 M 85 SKR<EZ> 87-A21-419-040 C-IC,NJM14558MD-TE2 87-A12-036-000 CAP, E 2200-63 M SMG<U,LH> 87-A21-893-040 C-IC,NJM14558V-TE2 87-A12-776-090 CAP, E 2200-50 M 85 SKR<EZ>... - Page 7 REF. NO. PART NO. KANRI DESCRIPTION REF. NO. PART NO. KANRI DESCRIPTION C304 87-012-275-080 C-CAP,U 1200P-50 K B GRM C784 87-012-286-080 CAP, U 0.01-25 C307 87-A12-062-080 CAP,E 100-10 SMG C785 87-012-286-080 CAP, U 0.01-25 C308 87-A12-062-080 CAP,E 100-10 SMG C786 87-012-286-080 CAP, U 0.01-25 C309...
- Page 8 REF. NO. PART NO. KANRI DESCRIPTION REF. NO. PART NO. KANRI DESCRIPTION C918 87-A10-039-080 C-CAP,U 470P-50 J CH<U,LH> L906 88-ZA1-603-010 COIL,FM-OSC-U 2G<U,LH> C921 87-012-195-080 C-CAP,U 100P-50CH<U,LH> L941 87-A50-020-010 COIL,ANT LW (COI) 252KHZ<EZ> C922 87-012-174-080 C-CAP,U 12P-50 J CH CHJ<U,LH> L942 87-A50-019-010 COIL,OSC LW (COI) 856KHZ<EZ>...
- Page 9 REF. NO. PART NO. KANRI DESCRIPTION REF. NO. PART NO. KANRI DESCRIPTION C901 87-012-195-080 C-CAP,U 100P-50 CH S345 87-A90-095-080 SW,TACT EVQ11G04M<U,LH,300EZ> C902 87-012-195-080 C-CAP,U 100P-50 CH S345 87-A90-164-080 SW,TACT SKQNAB(N)<305EZ> C903 87-012-195-080 C-CAP,U 100P-50 CH S346 87-A90-095-080 SW,TACT EVQ11G04M<U,LH,300EZ> C904 87-012-195-080 C-CAP,U 100P-50 CH S346...
-
Page 10: Chip Resistor Part Code
CHIP RESISTOR PART CODE Chip Resistor Part Coding Figure Resistor Code Value of resistor Chip resistor Dimensions (mm) Symbol Wattage Type Tolerance Resistor Code Form 1/16W 1005 0.35 1/16W 1608 0.45 1/10W 2125 1.25 0.45 1/8W 3216 0.55 TRANSISTOR ILLUSTRATION E C B E C B E C B... - Page 11 FL (BJ814GNK) GRID ASSIGNMENT AND ANODE CONNECTION GRID ASSIGNMENT – 11 –...
- Page 12 ANODE CONNECTION – 12 –...
- Page 13 WIRING – 1 (MAIN) <U, LH> (VT) – 13 –...
- Page 14 SCHEMATIC DIAGRAM – 1 (MAIN 1 / 2 : AMP) <U,LH> – 14 –...
- Page 15 SCHEMATIC DIAGRAM – 2 (MAIN 2 / 2 : TUNER) <U,LH> – 15 –...
- Page 16 WIRING – 2 (MAIN) <EZ> – 16 –...
- Page 17 SCHEMATIC DIAGRAM – 3 (MAIN 1 / 2 : AMP) <EZ> – 17 –...
- Page 18 SCHEMATIC DIAGRAM – 4 (MAIN 2 / 2 : TUNER) <EZ> – 18 –...
- Page 19 WIRING – 3 (FRONT) – 19 –...
-
Page 20: Schematic Diagram - 5 (Front)
SCHEMATIC DIAGRAM – 5 (FRONT) – 20 –... - Page 21 WIRING – 4 (PT) <U, EZ> – 21 –...
-
Page 22: Schematic Diagram - 6 (Pt)
SCHEMATIC DIAGRAM – 6 (PT) <U,EZ> – 22 –... - Page 23 WIRING – 5 (PT) <LH> – 23 –...
-
Page 24: Schematic Diagram - 7 (Pt)
SCHEMATIC DIAGRAM – 7 (PT) <LH> – 24 –... - Page 25 WIRING – 6 (DECK) TO FRONT C.B CN104 D DECK C.B (FC104) 1 3 5 7 9 11 2 4 6 8 10 (CAM1) (CAM2) (REA) (CST2) (CST1) SOL2 SOL1 SFR1 DECK MOTOR – 25 –...
-
Page 26: Ic Block Diagram
IC BLOCK DIAGRAM – 26 –... - Page 27 – 27 –...
- Page 28 IC DESCRIPTION µ µ PD780226GF-021-3BA<U,LH,300EZ>, IC, PD780228GF-078-3BA<305EZ> Pin Name Description Pin No. O-MOTOR DECK MOTOR ON/OFF output. O-SOL1 DECK1 solenoid ON/OFF output. O-SOL2 DECK2 solenoid ON/OFF output. O-STBY STANDBY LED (Echo mode) output (ON/OFF). – Not connected. O-PB1 DECK1 playback switch output (ON/OFF). –...
- Page 29 Pin Name Description Pin No. I-SPEANA_1 A/D input for spectrum analyser level display. I-SPEANA_2 A/D input for spectrum analyser level display. I-KEY1 Key A/D input 1. I-KEY2 Key A/D input 2. I-SPEANA_3 A/D input for spectrum analyser level display. I-TU_SIG Tuner signal input <305EZ only>.
- Page 30 ADJUSTMENT <TUNER / FRONT / DECK> < TUNER SECTION > 1. Clock Frequency Check 8. FM Tracking Adjustment <U,LH> Settings : • Test point : TP2 (CLK) Settings : • Test point : TP8(Lch), TP9(Rch) Method : Set to AM 1710kHz(U,LH), MW 1602kHz(EZ) and •...
- Page 31 < DECK SECTION > 17. REC/PB Frequency Response Adjustment (DECK 2) 13. Tape Speed Adjustment (DECK 2) Settings : • Test tape : TTA–602 Settings : • Test tape : TTA–100 • Test point : TP8(Lch), TP9(Rch) • Test point : TP8(Lch), TP9(Rch) •...
-
Page 32: Cd Test Mode
CD TEST MODE 1. How to Start the CD Test Mode While pressing the FUNCTION button, insert the AC plug to the power outlet. When the test mode is started, the message [CD TEST] is displayed. 2. How to Exit the CD Test Mode Press the POWER button or disconnect the AC plug. -
Page 33: Mechanical Exploded View
MECHANICAL EXPLODED VIEW 1 / 1 BZG-5 ZD3NM 305 U WIRE,BINDER HT-SINK S FL901 HT-SINK 60S 300 EZ CHAS,MAIN ZZM-3 PR1NM PLATE,EARTH MECH – 33 –... -
Page 34: Mechanical Parts List
10 8B-NF9-001-010 CABI,FR U<U> 35 8B-NF9-211-010 HLDR,TR S 11 8Z-NF6-210-010 DMPR,150 N 36 8A-NF9-211-010 HLDR,PWB PT HI 12 87-CE3-023-010 BADGE,AIWA 30N SILV 37 87-NF4-221-010 HLDR,CABLE 13 8B-NF9-035-010 WINDOW,DISP H<LH,EZ> 38 87-A80-092-010 AC CORD ASSY,E BLK SUN FAI<LH,EZ> 13 8B-NF9-010-010 WINDOW,DISP U<300U>... -
Page 35: Tape Mechanism Exploded View
TAPE MECHANISM EXPLODED VIEW 1 / 1 TERMINAL, TERMINAL,LB1 IC, EW732 IC, EW732 – 35 –... -
Page 36: Tape Mechanism Parts List
TAPE MECHANISM PARTS LIST 1 / 1 REF. NO. PART NO. KANRI DESCRIPTION REF. NO. PART NO. KANRI DESCRIPTION 8Z-ZM3-227-010 BELT,MAIN M3 8Z-ZM3-233-010 SPR-T,BRG M3 8Z-ZM3-235-010 BELT,MAIN L 84-ZM2-227-310 SPR-C,AZIMUTH 8Z-ZM1-235-010 PULLEY,MOT 87-A90-403-110 HEAD,RPH MS15R 87-045-347-010 MOT,SHU2L 70 87-A90-404-010 HEAD,EH LE15B 8Z-ZM1-232-010 GEAR,IDL FF/REW 8Z-ZM3-239-010... -
Page 37: General Speaker Disassembly Instructions (For Reference)
GENERAL SPEAKER DISASSEMBLY INSTRUCTIONS (FOR REFERENCE) Type.1 Type.4 Insert a flat-bladed screwdriver into the position indicated by the TOOLS arrows and remove the panel. Remove the screws of each speaker 1 Plastic head hammer unit and then remove the speaker units. 2 (() flat head screwdriver 3 Cut chisel How to Remove the PANEL, FR... -
Page 38: Accessories / Package List
SPEAKER PARTS LIST SX-NAJ302(YUSC,YUSL,YUSN,YUS1N,YUSC9) SX-NSZ302 (YSC,YSL,YLSC,YLSL,YSC9,YLSC9) REF. NO. PART NO. KANRI DESCRIPTION 1 8B-NSK-001-010 PANEL,FR R 2 8B-NSK-002-010 PANEL,FR L 3 8B-NSK-005-010 PROTECTOR, ASSY 4 8B-NSK-602-010 SPKR,W 160<EXCEPT YLSC,YLSL,YLSC9> 4 8B-NSK-608-010 SPKR,W 160 H<YLSC,YLSL,YLSC9> 5 8B-NSK-604-010 SPKR,T 60<EXCEPT YSC,YSL,YSC9> 5 8B-NSK-610-010 SPKR,T 60<YSC,YSL,YSC9>... - Page 39 2–11, IKENOHATA 1–CHOME, TAITO-KU, TOKYO 110, JAPAN TEL:03 (3827) 3111 9820543 0251431 Printed in Singapore...
- Page 40 BZG-5 English SERVICE MANUAL BASIC CD MECHANISM : 3ZG-2E3NM CD MECHANISM 3ZG-2E7NF TYPE BASIC CD MECHANISM YZD3NCM 3ZG-2E3NM YZD3N1CM 3ZG-2E3NM ZD7NFD 3ZG-2E7NF ZD3GNDM 3ZG-2E3NM S/M Code No. 09-00C-353-3N4...
-
Page 41: Protection Of Eyes From Laser Beam During Servicing
PROTECTION OF EYES FROM LASER BEAM DURING SERVICING This set employs laser. Therefore, be sure to follow carefully the CAUTION instructions below when servicing. Use of controls or adjustments or performance of procedures other than those specified herein may result in hazardous WARNING! radiation exposure. - Page 42 Precaution to replace Optical block (KSS-213F, 5ZL-3) PICK-UP ASSY PWB Body or clothes electrostatic potential could ruin (KSS-213F: 87-A90-836-010) MODEL laser diode in the optical block. Be sure ground body and workbench, and use care the clothes do not touch the diode. 1) After the connection, remove solder shown in the right figure.
- Page 43 How to Adjust the Rotating Phase of the Gear, Main Cam 1) Push down the hooking catch of the CHAS. MECH, and remove the TRAY. 2) Align the arrow mark of the Gear, Main Cam with the black round mark of the CHAS, MECHA as shown below. 3) Confirm that the Slide, Mech Cam is located in the right position, then insert the TRAY gently.
- Page 44 ELECTRICAL MAIN PARTS LIST-1/2 REF. NO PART NO. KANRI DESCRIPTION REF. NO PART NO. KANRI DESCRIPTION C128 87-A10-504-080 C-CAP,U 0.047-16 K B<EXCEPT ZD3GNDM> C129 87-010-403-080 CAP, ELECT 3.3-50V 87-A21-821-030 C-IC,LC78645E<EXCEPT ZD3GNDM> C130 87-010-759-020 C-CAP,U 0.1-25 Z F<ZD3GNDM> 87-A21-821-130 C-IC,LC78645NE<ZD3GNDM> C130 87-010-759-080 C-CAP,U, 0.1-25F<EXCEPT ZD3GNDM>...
- Page 45 ELECTRICAL MAIN PARTS LIST-2/2 REF. NO PART NO. KANRI DESCRIPTION REF. NO PART NO. KANRI DESCRIPTION PS401 87-A90-156-010 SNSR,SG-240<EXCEPT ZD7NFD> MOTOR C.B(ZD7NFD) 87-045-356-010 MOT,RF-310TA 30<ZD7NFD> DRIVE C.B(EXCEPT ZD7NFD) 87-045-358-010 MOT,RF-310TA 43<ZD7NFD> PIN3 87-A60-670-010 CONN,6P H 2MM JMT<ZD7NFD> 87-045-363-010 MOT,MDN4RA3ETA1<EXCEPT ZD7NFD> 87-A90-042-010 SW,LEAF MSW-17310MVP0<ZD7NFD>...
- Page 46 TRANSISTOR ILLUSTRATION-1/1 E C B 2SC3052 KTA1266 2SA1235 KTC3198 2SA19790...
- Page 47 BLOCK DIAGRAM-1/1 EXCEPT ZD7:3ZG2E3NM ZD7:3ZG2E7NF (EXCEPT ZD3GNDM) (ZD3GNDM) KSS213F(EXCEPT ZD7NFD) 5ZL-3 YR3(ZD7NFD) CN203 ZD3GNDM MODEL DRIVE C.B(EXCEPT ZD7NFD) MOTOR C.B(ZD7NFD)
- Page 48 WIRING-1/2 (3CD) 5ZL-3...
- Page 49 SCHEMATIC DIAGRAM-1/1 (ZD7FD) (ZD3GNDM) (ZD7NFD) (ZD3GNDM,YZD3NCH,YZD3N1CM) Q301 Q307 2SC3052F 2SA1235 Q301 Q307 R316 ZD3GNDM MODEL R315 100 R317 180 1/4W MTZJ 6.8B ZD3GNDM MODEL (ZD3GNDM,YZD3NCM, YZD3N1CM) (ZD3GNDM,YZD3NCM,YZD3N1CM) (EXCEPT ZD3GNDM) (ZD3GNDM) (ZD7NFD) R316 (ZD7NFD) 180 1/4W CD MOUNT SW TRAY SW OPEN DOWN CLOSE...
- Page 50 WIRING-2/2 (T-T, DRIVE, MOTOR) (CONDUCTOR SIDE) CN202 DRIVE C.B EXCEPT ZD7 MODEL (CONDUCTOR SIDE) MOTOR C.B ZD7 MODEL MOTOR C. B (CONDECTOR SIDE) -11-...
- Page 51 WAVE FORM-1/1 IC201 1 (Vo3-) VOLT/DIV: 500mV IC101 (RES) VOLT/DIV: 1V TIME/DIV: 200mS TIME/DIV: 10mS IC201 2 (Vo3+) IC101 (VDD5) IC101 ? (XOUT) (TRAY (CLOSE)) 1.6Vp-p 5.2Vp-p 1.6Vp-p 6Vp-p Between CN202 1 and 2 VOLT/DIV: 1V 1.2Vp-p (2 Pin: 0 Level) TIME/DIV: 200mS IC101 (RES)
- Page 52 IC BLOCK DIAGRAM-1/1 IC, LA6568 -13-...
- Page 53 IC DESCRIPTION-1/1 (LC78645)-1/2 Pin No. Pin Name Description SLCO Control output. SLCIST Slice level control SLCO output current adjustment resistor connection pin. EFMIN RF signal input pin. RF monitor pin. RFVDD — RF power supply pin. RFVSS — RF ground pin. FIN1 A+C signal input pin.
- Page 54 IC DESCRIPTION-1/1 (LC78645)-2/2 Pin No. Pin Name Description LVSS — L channel D/A converter L channel ground pin. RVSS — R channel ground pin. RCHO R channel D/A converter R channel output pin. RVDD — R channel power supply pin. XVDD —...
- Page 55 ELECTRICAL MESUREMENT • Perform the adjustments after the machine enters the test mode. • Place the CD mechanism horizontally level. • Equipment and tools required Measuring equipment: Oscilloscope (Use the probe of 10:1) Digital Multimeter (Use it in the DC Volt range.) Jitter meter (Kikusui 6235 or equivalent) Test disc: TCD-782...
- Page 56 MECHANICAL EXPLODED VIEW-1/1 *27 YZD3N1CM model is not supplied. LED 901 CUSH, CD A CUSH,CD A (BZA-1) CUSH,CD A 3ZG2 -17-...
- Page 57 MECHANICAL PARTS LIST-1/1 REF. NO PART NO. KANRI DESCRIPTION REF. NO PART NO. KANRI DESCRIPTION 1 84-ZG1-672-010 F-CABLE,5P 1.25 210MM WHITE N 19 84-ZG1-274-010 GEAR,RELAY 8 2 84-ZG1-225-010 BELT,SQ1.0-63.3 20 81-ZG1-291-110 GEAR,TRAY RELAY NO3 3 84-ZG1-267-010 PULLEY,LOAD MO 8 21 84-ZG1-205-210 GEAR,TRAY (*) 4 87-045-364-010 MOTOR(BCH3B14)
- Page 58 COLOR NAME TABLE Basic color symbol Color Basic color symbol Color Basic color symbol Color Black Cream Orange Green Gray Blue Transparent Blue Gold Pink Silver Titan Silver Brown Violet White Transparent White Yellow Transparent Yellow Metallic Blue Light Blue Transparent Green Dark Blue Transparent Orange...
- Page 59 MECHANISM EXPLODED VIEW 1/2 (3ZG-2) -20-...
- Page 60 CD MECHANISM PARTS LIST-1/2 (3ZG-2) REF. NO PART NO. KANRI DESCRIPTION 1 83-ZG2-262-010 CHAS ASSY,E3 2 83-ZG2-235-010 0E GEAR,A3 3 83-ZG2-205-210 0E GEAR,B 4 83-ZG2-236-010 0E GEAR,MOTOR 3 5 83-ZG2-253-110 0E SHAFT,SLIDE 5 6 M8-5ZL-395-000 2Y 5ZL-3 YR3<E7NF > 6 87-A90-836-010 2Y PICKUP,KSS-213F<E3NM > 7 83-ZG2-245-510 1A LEVER,SHUTTER(*)<E3NM >...
- Page 61 2–11, IKENOHATA 1–CHOME, TAITO-KU, TOKYO 110-8710, JAPAN TEL:03 (3827) 3111 Printed in Singapore 921338...
Need help?
Do you have a question about the NSX-AJ305 U and is the answer not in the manual?
Questions and answers