
Related Manuals for Hathorn H7


Summary of Contents for Hathorn H7
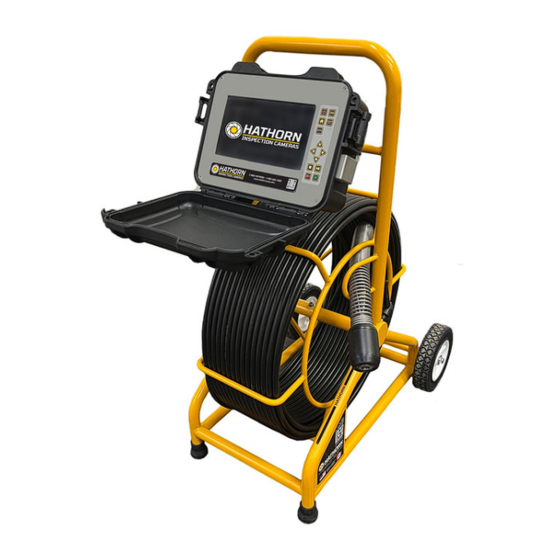
- Page 1 OPERATOR’S MANUAL FOR H7 CONTROLLER For Safe and Effective Operation: Before operation of your system, it is advised that this manual be read carefully.
-
Page 3: Table Of Contents
CONTENTS PAGE 4 LIMITED WARRANTY PAGE 5 LIMITATION OF WARRANTY/ SERVICE/ FREIGHT PAGE 6 PRODUCT SPECIFICATIONS PAGE 7-8 FEATURE IDENTIFICATION PAGE 9-10 KEYPAD & MENU ICONS PAGE 11 USER INSTRUCTIONS PAGE 12 RECORDING VIDEO / SCREENSHOTS PAGE 13 PLAYING / DELETING FILES PAGE 14 INSPECTION PROCEDURE PAGE 15... -
Page 4: Limited Warranty
Hathorn® products. Hathorn® assumes no responsibility for other’s use or misuse of its products. Hathorn® Corporation assumes no... - Page 5 By purchasing a Hathorn® Corporation product, you accept the terms of this limited warranty. You also agree that Hathorn® Corporation shall have no liability to you or any end user for any damages resulting from delay or loss of use of the product due to failure of the product within the warranty period, or otherwise, or in service or repair.
-
Page 6: Product Specifications
PRODUCT SPECIFICATIONS Weight 45lbs Length x Width x Depth 33" X 19" X 16" Power AC/DC Adapter 12V - 4.1A Battery Only Milwaukee® M18 18V or equivalent Battery Life ~5hrs using 3.0Ah (not recording & sonde off) Battery Extender Yes with on-screen battery display Display Type Impact-resistant LCD... -
Page 7: Feature Identification
FEATURE IDENTIFICATION Battery Mount on Back USB Port 18V Battery Cradle and AC/ DC Adapter Power Input... - Page 8 FEATURE IDENTIFICATION Keypad Serial # Battery Footage 7” LCD Power Counter Screen LED Lights Sapphire Camera Window Plastic Skid/Sleeve...
-
Page 9: Keypad & Menu Icons
KEYPAD ICONS Power On/Off Sonde On/Off Menu & Exit Footage Counter Reset Enter / Confirm Selection Navigation Buttons Pause Recording & Stop Recording & Playback Playback Take Screen shot Record Video MAIN MENU OPTIONS... - Page 10 INFORMATION BAR ICONS Sonde On/Off & Frequency Battery Monitor Footage (ft. or m) Recording Media Date & Time SETTING UP YOUR SYSTEM FOR FIRST USE Your system comes from the factory set up for use using factory default settings. Should you wish to change any functions or options, press the MENU key, then select Controller Settings.
-
Page 11: User Instructions
Turning Your Monitor On Press the POWER button to turn on the controller. At this point you should see the Hathorn logo on the screen while the system boots up. Boot up takes ~12 seconds. Note: It is good practice to remove batteries from electronic equipment after use. -
Page 12: Recording Video / Screenshots
RECORDING VIDEO Select the media location you wish to record to in the Controller Menu. You can choose USB, HDD or both USB & HDD. Insert the USB stick into the USB port if you wish to record to USB. All videos are stored in MPEG4 format. - Page 13 PLAYING MEDIA FILES Press the MENU key, then enter the FILE STORAGE OPTIONS menu. Select the date on which files were recorded, then highlight the file you wish to play and press the RIGHT ARROW or ENTER key on the keypad or enter key on the keyboard. Your selected file will now be playing (video) or be shown (screen shot).
-
Page 14: Inspection Procedure
INSPECTION PROCEDURE Skids or sleeves should ALWAYS be used to protect the camera head. Depending on the size of the pipe you are inspecting, you may need to use a skid, so the camera is centered or off the floor of the line. Care should be taken so the skids do not snag in the line. -
Page 15: Locating The Sonde
LOCATING THE SONDE SIGNAL (512HZ) Insert the sonde into the drain and locate it while it is still just in view at the drain or duct entrance. Hold the locator vertically - directly over the sonde with the antenna in line with the sonde. Adjust the locator sensitivity so the bar graph reads between 60% and 80%. -
Page 16: Maintenance
MAINTENANCE Inspection Camera - After every use, the camera should be cleaned and checked for possible damage. External scuffing of the camera case is normal and should be of no concern. The camera view port is made of sapphire and should be cleaned with a soft, damp cloth. Grease, dirt or scratches will affect the quality of the video and if the lens is badly scratched it should be replaced. - Page 17 REPAIR FACILITIES - USA Repairs, warranty or otherwise, returned to must be submitted with a “Return Maintenance Authorization.” For “RMAs” please contact: Hathorn USA Address: 739 North Wilson Road, Columbus, OH, 43204 Phone: 1-855-863-9226 FAX: 1-905-604-3400 Email: usaservice@hathorncorp.com Website: www.hathorncorp.com Kaiser Premier USA –...
- Page 18 Repairs, warranty or otherwise, returned to must be submitted with a “Return Maintenance Authorization.” For “RMAs” please contact: Hathorn Canada - Ontario, Manitoba & Eastern Canada Address: 255 Shields Court, Unit C, Markham, ON L3R 8V2 Phone: 1-905-604-7040 FAX: 1-905-604-3400 Email: service@hathorncorp.com...
- Page 20 Hathorn Canada 255 Shields Court, Unit C Markham, Ontario, Canada L3R 8V2 +1 (866) HATHORN Hathorn USA 739 North Wilson Road Columbus, Ohio, USA...
Need help?
Do you have a question about the H7 and is the answer not in the manual?
Questions and answers