
Related Manuals for Peak Scientific MS Table 1B

Summary of Contents for Peak Scientific MS Table 1B
- Page 1 Mass Spectrometer Table User Manual Model Peak PN AB Sciex PN MS Table 1B 10-9900 5032309 2014 © Peak Scientific - Rev 17 – 07/08/14...
-
Page 2: Table Of Contents
Technical Specification 2B/2N Environment Inlet Conditions Generator Outlets Electrical Requirements General Unpacking Installation Generator Environment General Dimensions Unit Controls Rear Connections Drain Connection – MS Table–1N/1N Hi- Flow/2N only Page 2 2014 © Peak Scientific - Rev. 17 - 07/08/14... - Page 3 Safe Operation of Pump Tray Connecting to the Application Tubing Lengths IMPORT ANT DOCUMENTS Normal Operation Relocation of MS Table Service Requirements Service Schedule Service Plans Cleaning Trouble Shooting Page 3 2014 © Peak Scientific - Rev. 17 - 07/08/14...
-
Page 4: Change History
Please review each of the following sections carefully. Thank you for selecting Peak Scientific to meet your Gas Generation needs, and should you require any further assistance or support please do not hesitate to contact Peak Scientific or Peak Partner from which you purchased your Generator. -
Page 5: Introduction
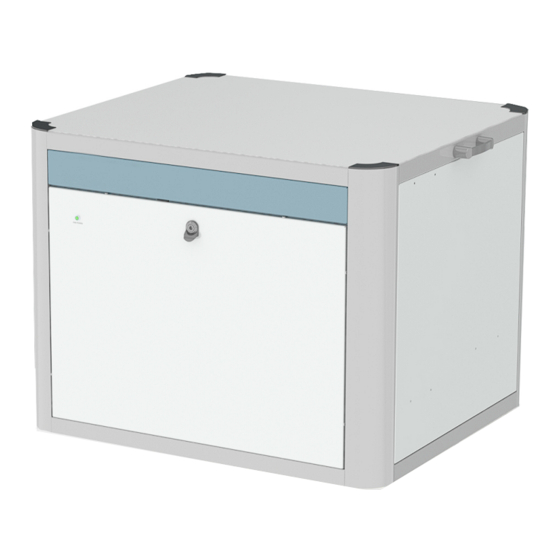
MS Table User Manual Introduction The MS Table 1B/2B and 1N/1N Hi-Flow/2N (with integrated Nitrogen Generator) is a transportable table designed specifically to locate a Mass Spectrometer. On the inside of the table is a sliding tray to support and house the Mass Spectrometer Vacuum Pumps. -
Page 6: Warranties And Liabilities
(other than pursuant to clause 6 above) that may be suffered by the Customer or any third party. Page 6 2014 © Peak Scientific - Rev. 17 - 07/08/14... -
Page 7: Safety Notices
These instructions must be read thoroughly and understood before installation and operation of your Peak MS Table Generator. Use of the Generator in a manner not specified by Peak Scientific MAY impair the SAFETY provided by the equipment. When handling, operating or carrying out any maintenance,... -
Page 8: Declaration Of Conformity
Segenworth North, Fareham Ontario Hampshire Canada England K1V 1H2 PO15 5RL Signed By: Name: Chris Pugh Position: Engineering Director Done at: Peak Scientific Instruments Ltd, Inchinnan, Scotland. Date: of July 2014 Page 8 2014 © Peak Scientific - Rev. 17 - 07/08/14... -
Page 9: Environmental Declaration
Where a specific certificate of compliance is required, this can be requested, on a product serial number basis, directly from Peak Scientific Instruments Ltd, by contacting us through our website on www.peakscientific.com... -
Page 10: Technical Specification 1B/1N/1N Hi-Flow
Pressure Gauges Start-Up Time For Purity 30 minutes Electrical Requirements Voltage 110-240 VAC Frequency 50/60 Hz Current 1 Amp Input Connection Fuse T1.6A Power Cord Type Pollution Degree Installation Category Page 10 2014 © Peak Scientific - Rev. 17 - 07/08/14... -
Page 11: General
Purity ≥95 Particles <0.01µm Phthalates NONE Suspended liquids NONE Gas outlets 3 x ¼” BSPP Drain outlet 1 x ¼” BSPP Pressure gauges Start-Up Time For Purity 30 minutes Page 11 2014 © Peak Scientific - Rev. 17 - 07/08/14... -
Page 12: Electrical Requirements
100 x 83 x 80.4 (39.4 x 32.6 x 31.6) Weight 105 kg 108.5 kg Shipping Weight 137.5 kg 140 kg Noise Level 54 dBA @1m Heat Output 820 BTU / Hr Page 12 2014 © Peak Scientific - Rev. 17 - 07/08/14... -
Page 13: Unpacking
MS Table User Manual Unpacking Although Peak Scientific takes every precaution with safe transit and packaging, it is advisable to fully inspect the unit for any sign of transit damage. Check ‘SHOCKWATCH’ label for signs of rough handling prior to un-packing –... -
Page 14: Installation
Maximum Ambient Conditions: 30°C (dry bulb) 70%RH (Max) Non-Condensing General Dimensions Figure 1: General dimensions The Generator must always be placed on a level surface. Failure to do so will affect the performance of the Generator. Page 14 2014 © Peak Scientific - Rev. 17 - 07/08/14... -
Page 15: Unit Controls
MS Table User Manual Unit Controls Curtain Pressure Source Pressure Exhaust Pressure Gauge Gauge Gauge Fan Power Left Hand Side Right Hand Side Figure 2: Unit controls Page 15 2014 © Peak Scientific - Rev. 17 - 07/08/14... -
Page 16: Rear Connections
If a container is used it should be emptied at regular intervals. The container must NOT have an air tight seal as water and air are expelled at pressure. Page 16 2014 © Peak Scientific - Rev. 17 - 07/08/14... -
Page 17: Water Bottle Mount Installation
Zero Grade air. The MS Table-1B/2B does not have an integrated Nitrogen Generator, but does have the facility to bolt-on to the side of the table a Peak Scientific Instruments Wall Mounted Infinity 1031 Nitrogen Generator. -
Page 18: Levelling Feet
The support feet must be used in conjunction to ensure the MS Table doesn’t move in operation. The castors have been tested and proven to support a maximum weight of 250KG Page 18 2014 © Peak Scientific - Rev. 17 - 07/08/14... -
Page 19: Electrical Connection
Any doubts as to the suitability of your compressed air supply should be referred to Peak Scientific or any of their authorised partners. The Compressed Air supply should be connected to the inlet located at the rear of the unit as shown in the Rear Connections section of this manual. -
Page 20: Fan Power Led - 2B/2N Only
This is indication that the fans attached to the front panel are being supplied with power, and are running correctly. The front panel should be connected to the power supply as shown below. Figure 10: Fan Power Connection Page 20 2014 © Peak Scientific - Rev. 17 - 07/08/14... -
Page 21: Safe Operation Of Pump Tray
Depress both yellow tabs simultaneously and pull tray outwards until it clicks into position. Once pumps have been installed, ensure correct reconnection of earth straps and fan power lead. Page 21 2014 © Peak Scientific - Rev. 17 - 07/08/14... -
Page 22: Connecting To The Application
Generator use 10/8 and the final 10 meters to the application use 6/4 tubing). Keep the connections and bends to a minimum. The imperial equivalents are: 6/4 = 1/4” O/D, 3/16” I/D. 10/8 = 3/8” O/D, 5/16” I/D. Page 22 2014 © Peak Scientific - Rev. 17 - 07/08/14... -
Page 23: Important Documents
MODEL TYPE: INSTALLATION DATE (DD/MM/YYYY): TELEPHONE: Important Please Note: You have 1 month to register your Peak Scientific product from the date of shipment. If you wish to defer installation of your generator you must notify Peak Scientific within month shipment date. -
Page 24: Normal Operation
4. Disengage the leveling feet. Once the MS Table has been safely moved to its new location, the MS Table can then be installed as per the Installation Guide. Page 24 2014 © Peak Scientific - Rev. 17 - 07/08/14... -
Page 25: Service Requirements
08-4631 Table 2: Annual Service Kit Service Plans Peak Scientific offer two service plans. The Complete Service Plan, specifically designed for Generators operated in critical environments, also includes full breakdown cover, guaranteed response times and Generator upgrades if available. Our Standard Service Plan, covering the basic needs of our Generators, features special deals on spare parts and breakdowns. -
Page 26: Trouble Shooting
Disconnect power cord from the rear of the the LED is not lit. Generator. Replace the fuse at the rear of the unit, if necessary. Reconnect power cord. • Contact your service provider. Page 26 2014 © Peak Scientific - Rev. 17 - 07/08/14... - Page 27 São Paulo SP Brasil 107-0061 Singapore, 118223 Tel: +886 2 8226 2383 Tel: +1 866 647 1649 Tel: +81 3-6864-0468 Tel: +65-6777 1966 Fax: +886 2 8226 9499 Fax: +65-6777 1978 2014 © Peak Scientific - Rev 17 – 07/08/14...
Need help?
Do you have a question about the MS Table 1B and is the answer not in the manual?
Questions and answers