
Related Manuals for Clover CDR1660


Summary of Contents for Clover CDR1660
- Page 1 H.264 16/8/4CH Pentaplex Digital Video Recorder V2.6 MODEL: CDR1660 / CDR0860 / CDR0460 Copyright © 2009 Clover Electronics U.S.A. All Rights Reserved...
- Page 2 MODEL: CDR1660 / CDR0860 / CDR0460 H.264 STAND-ALONE DVR USER MANUAL V 2.6...
-
Page 3: Table Of Contents
MODEL: CDR1660 / CDR0860 / CDR0460 H.264 STAND-ALONE DVR USER MANUAL V 2.6 Table of Contents ABOUT THIS MANUAL .................... 7 1. UNPACKING ...................... 8 1.1. H.264 STAND-ALONE DIGITAL VIDEO RECORDER ....................9 2. FEATURES ....................... 10 3. WHAT TO DO AT THE TIME OF INSTALLATION ............11 4. - Page 4 MODEL: CDR1660 / CDR0860 / CDR0460 H.264 STAND-ALONE DVR USER MANUAL V 2.6 7.7.1.4. SLOW ............................ 38 7.7.1.5. LOOP PLAYBACK ......................... 39 7.7.1.6. PLAYBACK BUTTONS ......................40 7.7.1.7. AUDIO PLAYBACK ....................... 41 7.7.2. ADVANCED PLAYBACK ....................... 41 7.7.2.1. CALENDAR SEARCH ......................41 7.7.2.2.
- Page 5 MODEL: CDR1660 / CDR0860 / CDR0460 H.264 STAND-ALONE DVR USER MANUAL V 2.6 8.3.2.2.1. INTERNET TIME ADJUST ....................70 8.3.2.2.2. SELECT TIME ZONE ......................70 8.3.2.2.3. DAYLIGHT SAVING TIME ....................71 8.3.2.3. TIME TRIMMING ........................71 8.3.3. BUZZER ..........................72 8.3.4.
- Page 6 MODEL: CDR1660 / CDR0860 / CDR0460 H.264 STAND-ALONE DVR USER MANUAL V 2.6...
-
Page 7: About This Manual
H.264 STAND-ALONE DVR USER MANUAL V 2.6 ABOUT THIS MANUAL This is the Instruction Manual for H.264 Stand-Alone Digital Video Recorder, Model CDR1660, CDR0860 and CDR0460. The middle digit(s) of the model numbers (e.g.: 4, 8 and 16) represent the number of cameras of the DVR. -
Page 8: Unpacking
MODEL: CDR1660 / CDR0860 / CDR0460 H.264 STAND-ALONE DVR USER MANUAL V 2.6 1. UNPACKING Care should be taken when unpacking to avoid damaging the system. Please ensure that the following items are included. Note: Contact your dealer immediately if any components are missing. -
Page 9: Stand-Alone Digital Video Recorder
Hard disk drive, which can be replayed and searched easily any time. The CDR1660/CDR0860/CDR0460 supports easy backup (copy) via USB port, external Hard Disk Drive/CD RW/DVD RW and networking in both static and dynamic IP modes. -
Page 10: Features
MODEL: CDR1660 / CDR0860 / CDR0460 H.264 STAND-ALONE DVR USER MANUAL V 2.6 2. FEATURES H.264 Compression Algorithm The most advanced compression available today. Multi Functional Record Powerful, multiple record modes available: Normal (Continuous, Manual), Alarm, Motion Detection and Schedule Recording. -
Page 11: What To Do At The Time Of Installation
MODEL: CDR1660 / CDR0860 / CDR0460 H.264 STAND-ALONE DVR USER MANUAL V 2.6 3. WHAT TO DO AT THE TIME OF INSTALLATION The system should be installed in the following order; 1. Make sure all the required hardware is available. -
Page 12: Specifications
MODEL: CDR1660 / CDR0860 / CDR0460 H.264 STAND-ALONE DVR USER MANUAL V 2.6 4. SPECIFICATIONS Video Video Input 16/8/4 CH (BNC) Input Level 1.0Vp-p±10% Composite, 75Ω Balanced Video Standard AUTO Main Monitor Output 1.0 Vp-p Composite, 75Ω Balanced Analog Spot Monitor Output 1.0 Vp-p Composite, 75Ω... - Page 13 MODEL: CDR1660 / CDR0860 / CDR0460 H.264 STAND-ALONE DVR USER MANUAL V 2.6 Searching and Playback Searching Method Time/Date, Calendar, Event Playback(Reverse) 1, 2, 4, 8,16, 32, 64, 128 velocity 1/2, 1/4,1/8,1/16, 1/32, 1/64, 1/128 Copy Device Internal CD/DVD RW...
- Page 14 MODEL: CDR1660 / CDR0860 / CDR0460 H.264 STAND-ALONE DVR USER MANUAL V 2.6 Environmental Operating Temp 0℃ ~ + 40℃ Storage Temperature -10℃ ~ + 60℃ Humidity 30 ~ 90%RH (non-condensing) Physical Construction Shape Consumer Style Construction Material Plastics Front Steel Case...
-
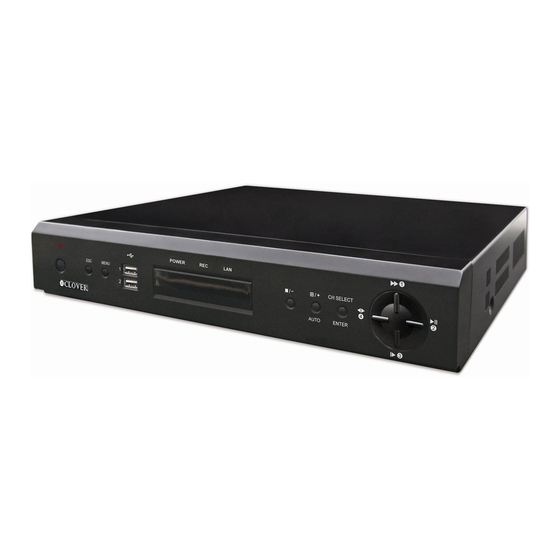
Page 15: Overview And Controls
9. MULTI/ AUTO a) Press this key to display multiple screens. * CDR1660/CDR0860: In case of 8CH and 16CH, this key is used to toggle between multiple Displays Modes: 4CH, 8CH and 16CH split screen display modes. b) If you press this button for 2~3 seconds long will be activates the automatic channel... - Page 16 MODEL: CDR1660 / CDR0860 / CDR0460 H.264 STAND-ALONE DVR USER MANUAL V 2.6 10. CH SELECT/ ENTER Key a) Press this key to select the desired channel in full screen. This key is used to toggle between single channels. b) Press this key to execute the selected function in the menu screen or enter the selected submenu.
-
Page 17: Rear Panel
MODEL: CDR1660 / CDR0860 / CDR0460 H.264 STAND-ALONE DVR USER MANUAL V 2.6 5.2. REAR PANEL... - Page 18 Fan used for cooling the components internally. Alarm input 1 through 4 on CDR0460, 1 through 8 on ⑨ ALARM(SENSOR) INPUT CDR0860 and 1 through 16 on CDR1660 ⑩ RS-485 TERMINAL BLOCK Terminal blocks for RS-485 Terminal blocks for relay out ⑪...
-
Page 19: Ir Remote Controller
MODEL: CDR1660 / CDR0860 / CDR0460 H.264 STAND-ALONE DVR USER MANUAL V 2.6 5.3. IR REMOTE CONTROLLER Button Name Description Iris close and open of PTZ / 1. (IRIS-/+) Frame by Frame(field by field) playback 2. (ZOOM-/+) Zoom in and out of PTZ Enter the spot mode / Return to the 3. -
Page 20: Mouse Control And Operations
MODEL: CDR1660 / CDR0860 / CDR0460 H.264 STAND-ALONE DVR USER MANUAL V 2.6 5.4. MOUSE CONTROL AND OPERATIONS Insert the USB Mouse to the USB port which is on the front panel of the DVR as shown in the below figure. - Page 21 MODEL: CDR1660 / CDR0860 / CDR0460 H.264 STAND-ALONE DVR USER MANUAL V 2.6 a) RECORD Button Click the left button of the mouse on REC icon of the Menu bar to start to record. To stop recording, click the left button of the mouse on REC icon once again.
- Page 22 MODEL: CDR1660 / CDR0860 / CDR0460 H.264 STAND-ALONE DVR USER MANUAL V 2.6 Click the (EXIT) button to return to the LIVE mode. For detail information of copy menu, refer to chapter 7.8. COPY on page 45. d) SETUP Button.
- Page 23 MODEL: CDR1660 / CDR0860 / CDR0460 H.264 STAND-ALONE DVR USER MANUAL V 2.6 Click the (EXIT) button of the PTZ control bar to return to the LIVE mode. For detail information of PTZ control, refer to chapter 7.5.9. PAN / TILT on page 33.
-
Page 24: Installation And Connections
MODEL: CDR1660 / CDR0860 / CDR0460 H.264 STAND-ALONE DVR USER MANUAL V 2.6 6. INSTALLATION AND CONNECTIONS 6.1. NOTE FOR INSTALLATION Install the system according to the instructions described in this manual. Avoid any area with high humidity or dust which can shorten lifetime of the system. -
Page 25: Connection Of Monitor
MODEL: CDR1660 / CDR0860 / CDR0460 H.264 STAND-ALONE DVR USER MANUAL V 2.6 6.3.2. CONNECTION OF MONITOR Connect the composite Video Output (VIDEO OUT) of the DVR to the Video IN of Monitor as shown in the below diagram. 6.4. SENSOR CONNECTION If you want, you can install sensors on your DVR system. -
Page 26: Alarm (Relay) Connection
MODEL: CDR1660 / CDR0860 / CDR0460 H.264 STAND-ALONE DVR USER MANUAL V 2.6 6.5. ALARM (RELAY) CONNECTION If you want, you can install alarm on your DVR system. There is one alarm power switch, which is controlled by the DVR. -
Page 27: Connection To An Ethernet Network
MODEL: CDR1660 / CDR0860 / CDR0460 H.264 STAND-ALONE DVR USER MANUAL V 2.6 6.7. CONNECTION TO AN ETHERNET NETWORK Our Ethernet connector is a RJ45 type. The maximum cable length is 300 ft. When you want to use a longer cable, we suggest using repeater. -
Page 28: How To Operate
MODEL: CDR1660 / CDR0860 / CDR0460 H.264 STAND-ALONE DVR USER MANUAL V 2.6 7. HOW TO OPERATE 7.1. GENERAL INFORMATION You can operate all functions of the system by use of buttons located on the front panel, remote controller and a mouse. Additionally, you can control this unit with an external keyboard controller via RS-485 or can remotely control via the Ethernet port located on the back of the unit. -
Page 29: Live
When the channel is in event recording mode, it will display the appropriate event recording mode: ALARM and MOTION. NOTE: CDR0860 /CDR1660: It can be seen in information of the 8channel or 16channel 7.5. LIVE 7.5.1. FULL SCREEN A Full screen is available in the live mode or the record mode. -
Page 30: Live Audio
MODEL: CDR1660 / CDR0860 / CDR0460 H.264 STAND-ALONE DVR USER MANUAL V 2.6 AUTO SEQ notification is displayed on the upper left hand corner of the screen while the system is in the AUTO SEQUENCE mode. 7.5.4. LIVE AUDIO This unit can support 1 channel audio (line audio only). -
Page 31: Picture-In-Picture (Pip)
MODEL: CDR1660 / CDR0860 / CDR0460 H.264 STAND-ALONE DVR USER MANUAL V 2.6 ① Use the directional buttons to move the zoom window to the desired location. ② Toggle x2, x4 and normal screens by clicking button. ③ Click the... -
Page 32: Spot Monitor
MODEL: CDR1660 / CDR0860 / CDR0460 H.264 STAND-ALONE DVR USER MANUAL V 2.6 ① Clicking the numeric buttons on the PIP control bar or pressing the numeric buttons of the remote controller will change the PIP window to change the channel to the desired channel. -
Page 33: Osd On / Off
MODEL: CDR1660 / CDR0860 / CDR0460 H.264 STAND-ALONE DVR USER MANUAL V 2.6 The spot monitor will display the channel accordingly. Press the SPOT button of the remote controller to exit from Spot monitor mode. 7.5.8. OSD ON / OFF OSD ON/OFF is possible in the live mode or record mode. -
Page 34: Record
MODEL: CDR1660 / CDR0860 / CDR0460 H.264 STAND-ALONE DVR USER MANUAL V 2.6 Click the PTZ button on the MENU bar or press the PTZ button of the remote controller in the live mode to access the PAN/TILT cameras. ① ZOOM: Zoom in and out by clicking on the - or + buttons. -
Page 35: Motion Recording
MODEL: CDR1660 / CDR0860 / CDR0460 H.264 STAND-ALONE DVR USER MANUAL V 2.6 7.6.2. MOTION RECORDING Motion recording is yet another effective form of event recording that is triggered when a channel detects motion in its field of view as the H.264 compression algorithm allows for accurate and error-free motion detection. -
Page 36: Schedule (Time) Recording
MODEL: CDR1660 / CDR0860 / CDR0460 H.264 STAND-ALONE DVR USER MANUAL V 2.6 Select the ALARM RECORDING ON or OFF and set the other items to the desired values. The channels on which the alarm is triggered will display the “ALARM” message and you can hear the beep sound by 5 seconds interval for 30 seconds. -
Page 37: Fast Forward / Rewind
MODEL: CDR1660 / CDR0860 / CDR0460 H.264 STAND-ALONE DVR USER MANUAL V 2.6 Click the button on the playback control bar or press the DIR (Direction) button of the remote controller or the front panel to change the playback direction. -
Page 38: Picture-By-Picture
MODEL: CDR1660 / CDR0860 / CDR0460 H.264 STAND-ALONE DVR USER MANUAL V 2.6 Clicking the button on the playback control bar or pressing the DIR button will change the direction of fast forward to rewind while maintaining the same speed. -
Page 39: Loop Playback
MODEL: CDR1660 / CDR0860 / CDR0460 H.264 STAND-ALONE DVR USER MANUAL V 2.6 Clicking the button on the playback control bar or pressing the DIR button of the remote controller or the front panel will change the direction of slow playback to the opposite direction while maintaining the same speed. -
Page 40: Playback Buttons
MODEL: CDR1660 / CDR0860 / CDR0460 H.264 STAND-ALONE DVR USER MANUAL V 2.6 When the end of the loop is reached, the playback returns to POSITION A and the loop playback is repeated. Press the PIP button of the remote controller to exit from the loop playback mode. -
Page 41: Audio Playback
MODEL: CDR1660 / CDR0860 / CDR0460 H.264 STAND-ALONE DVR USER MANUAL V 2.6 7.7.1.7. AUDIO PLAYBACK The audio is always recorded in real time regardless of the recording speed. Press the AUDIO SEL button to turn the AUDIO ON or OFF while pressing FUNCTION button. - Page 42 MODEL: CDR1660 / CDR0860 / CDR0460 H.264 STAND-ALONE DVR USER MANUAL V 2.6 To change the month, click the MONTH button and then click the desired month or highlight the MONTH button using ▲,▼, buttons and press the ENTER ◀, ▶...
-
Page 43: Time / Date Search
MODEL: CDR1660 / CDR0860 / CDR0460 H.264 STAND-ALONE DVR USER MANUAL V 2.6 7.7.2.2. TIME / DATE SEARCH Time search provides an overview of the recorded data from the earliest available recording to the latest available recording. At the SEARCH menu,... - Page 44 MODEL: CDR1660 / CDR0860 / CDR0460 H.264 STAND-ALONE DVR USER MANUAL V 2.6 If any of the channels need to be viewed in full screen mode, select the desired channel by clicking the left button of the mouse. Or in case of using the remote controller of the front panel buttons, highlight CHANNEL using the ▲,▼...
-
Page 45: Copy
MODEL: CDR1660 / CDR0860 / CDR0460 H.264 STAND-ALONE DVR USER MANUAL V 2.6 To start the playback, double-click the desired event or highlight the desired event using the ▲,▼ buttons and then press the ENTER ,◀, ▶ button of the remote controller or the front panel. - Page 46 MODEL: CDR1660 / CDR0860 / CDR0460 H.264 STAND-ALONE DVR USER MANUAL V 2.6 And the COPY menu will be displayed like the left picture. CD-RW, DVD±RW and DVD RAM media must be formatted prior to backup. Double-click the MEDIA FORMAT or move the cursor to MEDIA FORMAT using the ▲,▼...
- Page 47 MODEL: CDR1660 / CDR0860 / CDR0460 H.264 STAND-ALONE DVR USER MANUAL V 2.6 Click YES to begin formatting and double-click NO to cancel. Or move the cursor using the ▲,▼ buttons of the remote controller or the front panel and then press the ENTER button to select YES or NO.
- Page 48 MODEL: CDR1660 / CDR0860 / CDR0460 H.264 STAND-ALONE DVR USER MANUAL V 2.6 CDR0460 (4channel) a. Select the MEDIA type (USB 1 or USB 2: DVR USB port number to be connected) by clicking the left button of the mouse or moving the cursor using ▲,▼...
-
Page 49: Cd-R
MODEL: CDR1660 / CDR0860 / CDR0460 H.264 STAND-ALONE DVR USER MANUAL V 2.6 7.8.2. CD-R The process is same as above, chapter 7.8.1. CD-RW / DVD-RW / DVD+RW / DVD RAM on page 45. After clicking COPY to start the backup and before displaying the copying progress, The DVR will start creating a buffer for the selected data to be backed up. - Page 50 MODEL: CDR1660 / CDR0860 / CDR0460 H.264 STAND-ALONE DVR USER MANUAL V 2.6 And you can see the playback image of the selected file like the left picture. RECOMMENDED USB BRANDS The USB 2.0 flash memory comes in various sizes, up to 8 Gigabytes of storage per flash memory.
-
Page 51: External Hard Disk Drive
MODEL: CDR1660 / CDR0860 / CDR0460 H.264 STAND-ALONE DVR USER MANUAL V 2.6 As the compatibility is continuously being tested, please check with the seller before using non-listed manufacturers’ models. <Figure1: Other USB A-Type> <Figure 2: Standard USB A-Type> NOTE: User should format a media before using. -
Page 52: Full Media Capacity During Copying
MODEL: CDR1660 / CDR0860 / CDR0460 H.264 STAND-ALONE DVR USER MANUAL V 2.6 Double-click YES to stop the backup process. Or in case of using the remote controller or the front panel buttons, highlight YES using the ▲,▼ buttons ,◀, ▶... -
Page 53: Setup
MODEL: CDR1660 / CDR0860 / CDR0460 H.264 STAND-ALONE DVR USER MANUAL V 2.6 Double-click YES to continue copying. Or in case of using the remote controller or the front panel buttons, highlight YES using the ▲,▼ buttons and then ,◀, ▶... -
Page 54: Auto Sequence
MODEL: CDR1660 / CDR0860 / CDR0460 H.264 STAND-ALONE DVR USER MANUAL V 2.6 8.1.1. AUTO SEQUENCE CDR0460 (4channel) At the SCREEN menu, Double-click AUTO SEQUENCE or highlight AUTO SEQUENCE and then press the ENTER button and the AUTO SEQUENCE menu will be displayed like the left picture. -
Page 55: Hdd Free Space Mode
MODEL: CDR1660 / CDR0860 / CDR0460 H.264 STAND-ALONE DVR USER MANUAL V 2.6 8.1.2.2. HDD FREE SPACE MODE Select the display mode for the remaining free space on the hard disk drive. The default is in percentage. Click the left button of the mouse on the value. Or in case of using the remote controller or the ▲,▼... -
Page 56: Camera
Click the X button or press the ESC button to exit from this screen. NOTE: CDR0860 / CDR1660: It can be seen in information of the 8channel or 16channel CDR0860 (8channel) CDR1660 (16channel) a) TITLE (CAMERA NAME) User can change the CHANNEL TITLE. - Page 57 MODEL: CDR1660 / CDR0860 / CDR0460 H.264 STAND-ALONE DVR USER MANUAL V 2.6 b) COVERT (CAMERA ON/OFF) Each camera can be convert by setting ON or OFF in the CAMERA menu. The covert function is available in the live mode.
- Page 58 MODEL: CDR1660 / CDR0860 / CDR0460 H.264 STAND-ALONE DVR USER MANUAL V 2.6 Click the PTZ button of the channel where the PTZ camera is connected and select the appropriate protocol type. Or in case of using the remote controller...
-
Page 59: Spot
MODEL: CDR1660 / CDR0860 / CDR0460 H.264 STAND-ALONE DVR USER MANUAL V 2.6 8.1.4. SPOT At the SCREEN menu, Double-click SPOT or highlight SPOT and then press the ENTER button and the SPOT menu will be displayed like the left picture. -
Page 60: Video Enhancement
MODEL: CDR1660 / CDR0860 / CDR0460 H.264 STAND-ALONE DVR USER MANUAL V 2.6 8.1.5. VIDEO ENHANCEMENT At the SCREEN menu, Double-click VIDEO ENHANCEMENT or highlight VIDEO ENHANCEMENT and then press the ENTER button and the VIDEO ENHANCEMENT menu will be displayed like the left picture. -
Page 61: Contrast
MODEL: CDR1660 / CDR0860 / CDR0460 H.264 STAND-ALONE DVR USER MANUAL V 2.6 8.1.5.3. CONTRAST At the VIDEO ENHANCEMENT menu, Double-click CONTRAST or highlight CONTRAST and then press the ENTER button and the CONTRAST menu will be displayed like the left picture. -
Page 62: Event Screen Mode
MODEL: CDR1660 / CDR0860 / CDR0460 H.264 STAND-ALONE DVR USER MANUAL V 2.6 8.1.6. EVENT SCREEN MODE Define how the main video output reacts when an event occurs. Click the left button of the mouse on the value and select the desired value. Or in case of using the remote controller or the front panel buttons, highlight EVENT SCREEN MODE using the ▲,▼... -
Page 63: Recording Setup
MODEL: CDR1660 / CDR0860 / CDR0460 H.264 STAND-ALONE DVR USER MANUAL V 2.6 8.2.1. RECORDING SETUP Each channel can be individually scheduled and adjusted. Scheduling allows the DVR to record at specific times even when the REC button is not on. -
Page 64: Recording Speed (Frames Per Second)
MODEL: CDR1660 / CDR0860 / CDR0460 H.264 STAND-ALONE DVR USER MANUAL V 2.6 8.2.1.2. RECORDING SPEED (FRAMES PER SECOND) This allows the user to configure the recording speed (FPS) for each channel. Click the F/S button of the desired channel in the... -
Page 65: Schedule Recording
MODEL: CDR1660 / CDR0860 / CDR0460 H.264 STAND-ALONE DVR USER MANUAL V 2.6 8.2.1.4. SCHEDULE RECORDING User can set the SCHEDULE recording of each Channel. Click the SCHEDULE ( ) button of the desired channel in the RECORDING SETUP menu and you can see the SCHEDULE menu like the left picture. -
Page 66: Pre Recording Time
MODEL: CDR1660 / CDR0860 / CDR0460 H.264 STAND-ALONE DVR USER MANUAL V 2.6 8.2.1.5.2. PRE RECORDING TIME Select the desired time for PRE RECORDING TIME by clicking the left button of the mouse on the value. Or in case of using the remote controller or the front panel buttons, highlight PRE... -
Page 67: Alarm Recording
MODEL: CDR1660 / CDR0860 / CDR0460 H.264 STAND-ALONE DVR USER MANUAL V 2.6 8.2.1.6. ALARM RECORDING User can set the ALARM RECORDING of each Channel. Click the ALARM ( ) button of the desired channel in the RECORDING SETUP menu and you can see the SENSOR menu like the left picture. -
Page 68: System
MODEL: CDR1660 / CDR0860 / CDR0460 H.264 STAND-ALONE DVR USER MANUAL V 2.6 NOTE: This unit cannot use the Common Microphones. Instead, the User has to connect the audio out of a Camera or a Microphone with a Line Out facility. -
Page 69: Hdd Information
MODEL: CDR1660 / CDR0860 / CDR0460 H.264 STAND-ALONE DVR USER MANUAL V 2.6 8.3.1.2. HDD INFORMATION User can see the details information for the installed HDDs. At the HDD menu, Double-click HDD INFORMATION or highlight HDD INFORMATION and then press the ENTER button and the HDD INFORMATION screen will be displayed like the left picture. -
Page 70: Time & Date
MODEL: CDR1660 / CDR0860 / CDR0460 H.264 STAND-ALONE DVR USER MANUAL V 2.6 8.3.2.1. TIME & DATE At the CLOCK Menu, Double-click TIME & DATE or highlight TIME & DATE and then press the ENTER button and the TIME &... -
Page 71: Daylight Saving Time
ENTER button to select. 8.3.2.3. TIME TRIMMING Normally, Clover is using the time trimming setting if the time is incorrect over 2 sec per day. When booting, you can see the TIME TRIMMING setup screen. <How to set up>... -
Page 72: Buzzer
MODEL: CDR1660 / CDR0860 / CDR0460 H.264 STAND-ALONE DVR USER MANUAL V 2.6 8.3.3. BUZZER You can hear the beep sound when event occurs or key operation if the BUZZER setup is ON. At the SYSTEM menu, Click the left button of the mouse on the value. Or in... -
Page 73: Set Password
MODEL: CDR1660 / CDR0860 / CDR0460 H.264 STAND-ALONE DVR USER MANUAL V 2.6 Copy button Live Audio selection Main Menu button PTZ control button NOTE: In case of the PASSWORD CHECK is ON, only ADMIN can set the NEW PASSWORD. -
Page 74: Factory Default Setting
MODEL: CDR1660 / CDR0860 / CDR0460 H.264 STAND-ALONE DVR USER MANUAL V 2.6 8.3.5. FACTORY DEFAULT SETTING At the SYSTEM menu, Double-click FACTORY DEFAULT SETTING or highlight FACTORY DEFAULT SETTING and then press the ENTER button and the FACTORY DEFAULT window will be displayed like the left picture. -
Page 75: System Iformation
MODEL: CDR1660 / CDR0860 / CDR0460 H.264 STAND-ALONE DVR USER MANUAL V 2.6 8.3.7. SYSTEM IFORMATION System Information provides the information about the Software version (Firmware version) of the DVR and Hardware version of the FPGA chip. CDR0460 (4channel) At the SYSTEM menu,... -
Page 76: Network
MODEL: CDR1660 / CDR0860 / CDR0460 H.264 STAND-ALONE DVR USER MANUAL V 2.6 8.4.1. NETWORK At the LINK menu, Double-click NETWORK or highlight NETWORK and then press the ENTER button and you can see the NETWORK menu like the left picture. -
Page 77: Ip Address
MODEL: CDR1660 / CDR0860 / CDR0460 H.264 STAND-ALONE DVR USER MANUAL V 2.6 8.4.1.2.1. IP ADDRESS Define the IP address if the DHCP is set to off. The DVR should be provided with its own static IP address. Click the left button of the mouse on the value and the pop-up window will be displayed. Click the buttons and then click the ENTER ( ) button to enter the IP address. -
Page 78: Server 1
MODEL: CDR1660 / CDR0860 / CDR0460 H.264 STAND-ALONE DVR USER MANUAL V 2.6 8.4.1.4.1. SERVER 1 At the DDNS SERVER menu, Double-click SERVER 1 or highlight SERVER 1 and then press the ENTER button and you can see the IP address input screen like the left picture. -
Page 79: Rs485
MODEL: CDR1660 / CDR0860 / CDR0460 H.264 STAND-ALONE DVR USER MANUAL V 2.6 8.4.2. RS485 At the LINK menu, Double-click RS-485 or highlight RS-485 and then press the ENTER button and you can see the RS-485 menu like the left picture. -
Page 80: Send E-Mail
MODEL: CDR1660 / CDR0860 / CDR0460 H.264 STAND-ALONE DVR USER MANUAL V 2.6 At the LINK menu, Double-click E-MAIL or highlight E-MAIL and then press the ENTER button and you can see the E-MAIL menu like the left picture. Click the X button or press the ESC button to exit from this screen. -
Page 81: Search
MODEL: CDR1660 / CDR0860 / CDR0460 H.264 STAND-ALONE DVR USER MANUAL V 2.6 8.5. SEARCH At the MAIN MENU, Double-click SEARCH or highlight SEARCH and then press the ENTER button and you can see the SEARCH menu like the left picture. -
Page 82: Client Program: Dvr Viewer
MODEL: CDR1660 / CDR0860 / CDR0460 H.264 STAND-ALONE DVR USER MANUAL V 2.6 9. CLIENT PROGRAM: DVR VIEWER The DVR Viewer is a dedicated client program that connects to, monitors and manages up to 16 DVRs simultaneously. 9.1. SYSTEM REQUIREMENT The DVR Viewer receives, decodes and displays data for up to 16 DVRs or up to 256 cameras simultaneously requiring a powerful personal computer to take full advantage of the program. - Page 83 MODEL: CDR1660 / CDR0860 / CDR0460 H.264 STAND-ALONE DVR USER MANUAL V 2.6 The DVR viewer will be installed in its default folder of C:\Program Files\DVR\DVR-Viewer. If the folder needs to be changed, click on ‘BROWSE…’ button and then select a different folder.
-
Page 84: Codec Installation
MODEL: CDR1660 / CDR0860 / CDR0460 H.264 STAND-ALONE DVR USER MANUAL V 2.6 NOTE: In case of the Windows XP OS, user has to download the UDF drivers prior to the installation of the DVR Viewer Program because the DVR is using the UDF file system while copying and playing the data. - Page 85 MODEL: CDR1660 / CDR0860 / CDR0460 H.264 STAND-ALONE DVR USER MANUAL V 2.6 Click on ‘INSTALL’ for installing the program. Click on ‘OK’ to finish the Installation process.
-
Page 86: Viewer - Layout
MODEL: CDR1660 / CDR0860 / CDR0460 H.264 STAND-ALONE DVR USER MANUAL V 2.6 9.2. VIEWER - LAYOUT Locate the DVR Viewer icon on the desktop and double-click on it to run the client software. The program can also be located in START- Programs – DVR-Viewer. -
Page 87: Config
Display the current version of the DVR Viewer program. CDR0860 (8channel) CDR (16channel) NOTE: CDR0860 /CDR1660: It can be seen in information of the 8channel or 16channel ② COPY Copy and the Live + Copy. ▫ Quick Copy Click on the Quick Copy for faster copying the recorded data from the DVR to the Host Program (DVR VIEWER) without live images. - Page 88 MODEL: CDR1660 / CDR0860 / CDR0460 H.264 STAND-ALONE DVR USER MANUAL V 2.6 ③ Video Enhance User can adjust the Brightness of screen by clicking on the bar or dragging the slider on the bar. User can adjust the Contrast of screen by clicking on the bar or dragging the slider on the bar.
-
Page 89: Connection
MODEL: CDR1660 / CDR0860 / CDR0460 H.264 STAND-ALONE DVR USER MANUAL V 2.6 9.4. CONNECTION Click on the CONNECT button of the DVR VIEWER. By clicking the Connect button, the below window pops up. Click on the New button, the below screen appears. -
Page 90: Capture
MODEL: CDR1660 / CDR0860 / CDR0460 H.264 STAND-ALONE DVR USER MANUAL V 2.6 DVR. Once the User enters the above details, he can save the data by clicking on the SAVE button. 9.5. CAPTURE User can take a snapshot in the Live mode by clicking on the CAPTURE icon as shown in the below screen. -
Page 91: Status
MODEL: CDR1660 / CDR0860 / CDR0460 H.264 STAND-ALONE DVR USER MANUAL V 2.6 a) Save to file. The picture can be saved as a JPEG or Bitmap format. b) Print Send the picture to the printer. c) Printer Setup User can print the .jpeg image by clicking on the Printer Setup. -
Page 92: Player
MODEL: CDR1660 / CDR0860 / CDR0460 H.264 STAND-ALONE DVR USER MANUAL V 2.6 9.7.1. PLAYER User has to this screen to playback the recorded video. By clicking the PLAYER icon on the DVR VIEWER, the below window pops up. - Page 93 MODEL: CDR1660 / CDR0860 / CDR0460 H.264 STAND-ALONE DVR USER MANUAL V 2.6 1) MULTI SCREEN User can split the screen into 4, 9 and 16 by clicking the Multi Screen icon. 2) STATUS DISPLAY User can see the status of the playback data along with time and date by pressing the below said icons.
- Page 94 MODEL: CDR1660 / CDR0860 / CDR0460 H.264 STAND-ALONE DVR USER MANUAL V 2.6 5) CONVERT AVI a) User can click on the CONVERT AVI button to convert the file into AVI format. At first, click the CONVERT AVI button b) Next, select the folder for AVI file will be saved. And click OK button.
- Page 95 MODEL: CDR1660 / CDR0860 / CDR0460 H.264 STAND-ALONE DVR USER MANUAL V 2.6 c) AVI Converting the Message. d) Converting Complete.
- Page 96 MODEL: CDR1660 / CDR0860 / CDR0460 H.264 STAND-ALONE DVR USER MANUAL V 2.6 6) PRINT In live or playback mode, select any of the channels and then click on PRINT to bring up the screen print window. e) Save to file.
- Page 97 MODEL: CDR1660 / CDR0860 / CDR0460 H.264 STAND-ALONE DVR USER MANUAL V 2.6 8) BRIGHTNESS/CONTRAST/SATURATION User can adjust the Brightness of screen by clicking on the bar or dragging the slider on the bar User can adjust the Contrast of screen by clicking on the bar or dragging the...
-
Page 98: Copy
MODEL: CDR1660 / CDR0860 / CDR0460 H.264 STAND-ALONE DVR USER MANUAL V 2.6 9.8. COPY It is possible to copy the recorded data from the DVR system to a client PC by using the Copy button in the Multi mode only. -
Page 99: Pan / Tilt And Preset Buttons
MODEL: CDR1660 / CDR0860 / CDR0460 H.264 STAND-ALONE DVR USER MANUAL V 2.6 9.10. Pan / Tilt and Preset Buttons User can control the PTZ camera through DVR Viewer. Please refer to the below diagram for more detailed explanation on PTZ functions. - Page 100 MODEL: CDR1660 / CDR0860 / CDR0460 H.264 STAND-ALONE DVR USER MANUAL V 2.6 5) PRESET Functions User can set a maximum of 255 preset positions. By clicking on the Move button, User can move the camera to the desired location.
-
Page 101: Internet Explorer (Web Browser)
MODEL: CDR1660 / CDR0860 / CDR0460 H.264 STAND-ALONE DVR USER MANUAL V 2.6 10. INTERNET EXPLORER (WEB BROWSER) The system requirement is same as network client viewer. Enter the address on internet window www.cloverddns.com Check the “firewall” or “security wall” in Internet option. - Page 102 MODEL: CDR1660 / CDR0860 / CDR0460 H.264 STAND-ALONE DVR USER MANUAL V 2.6 Click “Trusted site” and Enter “SITE” box. Add the address – https://www.cloverddns.com in blank and click the “ADD” button. Then, you can see the site (https://www.cloverddns.com) is added.
- Page 103 MODEL: CDR1660 / CDR0860 / CDR0460 H.264 STAND-ALONE DVR USER MANUAL V 2.6 If you still see this page, please allow the “Active control” and install it. And you can see the left Security window. Please Click “INSTALL” button. Use the following process.
- Page 104 MODEL: CDR1660 / CDR0860 / CDR0460 H.264 STAND-ALONE DVR USER MANUAL V 2.6 You can execute “Web browser” now. Enter the IP address or Mac address to connect the DVR. Refer to chapter 9. CLIENT PROGRAM: DVR VIEWER on page 82 for operating the web browser.
-
Page 105: Hard Disk Drive (Hdd) Installation
MODEL: CDR1660 / CDR0860 / CDR0460 H.264 STAND-ALONE DVR USER MANUAL V 2.6 11. Hard Disk Drive (HDD) Installation Remove the top cover of your DVR and connect both the power and Signal (SATA) cables to the HDD as shown below. -
Page 106: Appendix
MODEL: CDR1660 / CDR0860 / CDR0460 H.264 STAND-ALONE DVR USER MANUAL V 2.6 12. APPENDIX CONTENTS 12.1. TIME ZONE LISTING 12.2. RECORDING TIME TABLE 12.3. FACTORY DEFAULT SETTINGS 12.4. Warranty & Factory Service 12.1. TIME ZONE LISTING GMT-12:00 International Date Line West... - Page 107 MODEL: CDR1660 / CDR0860 / CDR0460 H.264 STAND-ALONE DVR USER MANUAL V 2.6 GMT+02:00 Jerusalem GMT+03:00 Baghdad GMT+03:00 Kuwait, Riyadh GMT+03:00 Moscow, St. Petersburg, Volgograd GMT+03:00 Nairobi GMT+03:30 Tehran GMT+04:00 Abu Dhabi, Muscat GMT+04:00 Baku, Tbilisi, Yeveran GMT+04:30 Kabul GMT+05:00...
-
Page 108: Recording Time Table
MODEL: CDR1660 / CDR0860 / CDR0460 H.264 STAND-ALONE DVR USER MANUAL V 2.6 12.2. RECORDING TIME TABLE HDD : 500GB Based on 4 cameras RECORD IMAGE IMAGE Use HDD Cap POSSIBILITY SIZE QUALITY Record Size acity (MB)hr DAY/500 GB 720 X480... -
Page 109: Factory Default Values
MODEL: CDR1660 / CDR0860 / CDR0460 H.264 STAND-ALONE DVR USER MANUAL V 2.6 12.3. FACTORY DEFAULT VALUES SCREEN CDR1660(16CH) CDR0860(8CH) CDR0460(4CH) QUAD-A QUAD-B QUAD-A QUAD-C QUAD-A SEQUENCE TYPE QUAD-B QUAD-D EIGHT-A EIGHT-A EIGHT-B AUTO SEQUENCE ADD AUTO SINGLE CDR1660(16CH) each channel... - Page 110 MODEL: CDR1660 / CDR0860 / CDR0460 H.264 STAND-ALONE DVR USER MANUAL V 2.6 CDR1660 HALF D1 NORMAL (4,8,12,16CH) CDR0860 HALF D1 NORMAL (1~8CH) CDR0460 HALF D1 NORMAL (1~4CH) SCHEDULE RECORDING WEEKDAY NONE SELECTED SCHEDULE SATURDAY NONE SELECTED SUNDAY NONE SELECTED...
- Page 111 MODEL: CDR1660 / CDR0860 / CDR0460 H.264 STAND-ALONE DVR USER MANUAL V 2.6 SYSTEM LOG SYSTEM INFORMATION LINK DHCP IP ADDRESS 192.168.0.2 SUBNET MASK 255.255.255.0 STATIC IP GATEWAY 192.168.0.1 0.0.0.0 PORT 5400 NETWORK SERVER 1 211.174.251.155 DDNS SERVER SERVER 2 211.174.251.160...
-
Page 112: Warranty & Factory Service
MODEL: CDR1660 / CDR0860 / CDR0460 H.264 STAND-ALONE DVR USER MANUAL V 2.6 12.4. Warranty & Factory Service Limited 2Year Warranty This warranty gives the original purchaser specific legal rights and you may also have other rights, which may vary from state to state. If our products do not function because of any defect in material or workmanship, we will repair it for free for 2 years on parts and labor from the date of original purchase.
Need help?
Do you have a question about the CDR1660 and is the answer not in the manual?
Questions and answers