Advertisement
Quick Links
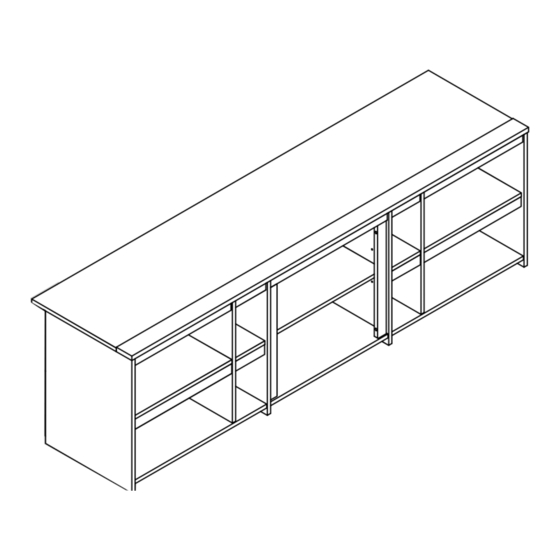
7121335COM 70" TV Stand
2073335COM 70" Fireplace TV Stand
Date of Purchase ___ / ___ / ___
Lot Number:
Do Not Return This Product!
Contact our customer service team for help first.
Call: 1-800-489-3351 (toll free)
Monday-Friday 9am - 5pm CST
Visit: www.ameriwoodhome.com
WARNING
Easy
Assembly Difficulty Meter
Tough
Advertisement

Subscribe to Our Youtube Channel
Related Manuals for Ameriwood HOME 7121335COM


Summary of Contents for Ameriwood HOME 7121335COM
- Page 1 7121335COM 70" TV Stand 2073335COM 70" Fireplace TV Stand Date of Purchase ___ / ___ / ___ Lot Number: Do Not Return This Product! Contact our customer service team for help first. Call: 1-800-489-3351 (toll free) Monday-Friday 9am - 5pm CST...
-
Page 2: Helpful Hints
Contact Us! Helpful Hints PEOPLE NEEDED FOR ASSEMBLY: 1-2 ESTIMATED ASSEMBLY TIME: 1 HOUR ameriwoodhome.com... -
Page 3: Before You Start
Before You Start Read through each step carefully and follow the proper order Separate and count all your parts and hardware Give yourself enough room for the assembly process Have the following tools: Flat Head Screwdriver, #2 Phillips Head Screwdriver and Hammer Caution: If using a power drill or power screwdriver for screwing, please be aware to slow down and stop when screw is tight. -
Page 4: Board Identification
Board Identification Board Identification Not actual size ameriwoodhome.com... - Page 5 Board Identification Board Identification Not actual size ameriwoodhome.com...
- Page 6 Board Identification Board Identification Not actual size ameriwoodhome.com...
- Page 7 Board Identification Not actual size ameriwoodhome.com...
-
Page 8: Part List
Hardware Bag Reference number: 27121335 Part List Actual Size Not Actual Size ameriwoodhome.com... - Page 9 STEP 1 1.1 Screw (1) into (A), (B), (C) & (D) as illustrated. 1.2 Insert (3) into (C) & (D) as illustrated. 1.3 Insert (4) into (B) as illustrated. ameriwoodhome.com...
- Page 10 STEP 2 2.1 Screw (1) into (E), (F), (G) & (H) as illustrated. 2.2 Insert (3) into (E), (F), (G) & (H) as illustrated. ameriwoodhome.com...
- Page 11 STEP 3 3.1 Insert (3) into (I), (J), (L), (M), (N), (P), (Q), (R) & (S) as illustrated. ameriwoodhome.com...
- Page 12 STEP 4 illustrated. 4.1 Attach (A) to (B) with (2) & (8) as ameriwoodhome.com...
- Page 13 STEP 5 5.1 Attach (O) to (I) with (5) as illustrated. 5.2 Attach (P) to (J) with (5) as illustrated. ameriwoodhome.com...
- Page 14 STEP 6 illustrated. 6.1 Connect (G), (I), (J) & (L) together with (2) as illustrated. 6.2 Connect (H), (I), (J) & (M) together with (2) as ameriwoodhome.com...
- Page 15 STEP 7 ameriwoodhome.com...
- Page 16 STEP 8 illustrated. 8.1 Connect (E), (F) & (N) with (2) as ameriwoodhome.com...
- Page 17 STEP 9 ameriwoodhome.com...
- Page 18 STEP 10 illustrated. 10.1 Attach (O), (P) & (Q) to (A) with (5) as 10.2 illustrated. Attach (R) to (E) with (5) as 10.3 illustrated. Attach (S) to (F) with (5) as ameriwoodhome.com...
- Page 19 STEP 11 ameriwoodhome.com...
- Page 20 STEP 12 12.1 Insert (K) to (E) & (F) with (9) as illustrated. ameriwoodhome.com...
- Page 21 STEP 13 ameriwoodhome.com...
- Page 22 STEP 14 ameriwoodhome.com...
- Page 23 STEP 15 ameriwoodhome.com...
- Page 24 STEP 16 ameriwoodhome.com...
- Page 25 STEP 17 1-1/2" ameriwoodhome.com...
- Page 26 Maximum Loads This unit has been designed to support the maximum loads shown. Exceeding these load limits could cause sagging, instability, product collapse, and/or serious injury. Notice: Please apply the TV warning label to your unit so you'll always have the model's weight and TV size limits.
- Page 27 Maximum Loads This unit has been designed to support the maximum loads shown. Exceeding these load limits could cause sagging, instability, product collapse, and/or serious injury. Notice: Please apply the TV warning label to your unit so you'll always have the model's weight and TV size limits.
- Page 28 Visit your local retailer's website, rate your purchased product and leave us some feedback! We would like to extend a big "Thank You" to all of our customers for taking the time to assemble this Ameriwood Home product, and to give us your valuable feedback. ameriwoodhome.com...
- Page 29 ameriwoodhome.com...
- Page 30 27121335 1.1 Atornille (1) dentro de (A), (B), (C) & (D) como se ilustra. 1.2 Insertar (3) dentro de (C) & (D) como se ilustra. 1.3 Insertar (4) dentro de (B) como se ilustra. 2.1 Atornille (1) dentro de (E), (F), (G) & (H) como se ilustra. 2.2 Insertar (3) dentro de (E), (F), (G) &...
- Page 31 o se ilust 7.1 Una la parte (C) con (I) & (L) con (2) com o se ilust 7.2 Una la parte (E) con(J) & (L) con (2) com o se ilust 7.3 Una la parte (F) con (J) & (M) con (2) com o se ilust 7.4 Una la parte (D con (I) &...
- Page 32 ameriwoodhome.com...
- Page 33 ameriwoodhome.com...
- Page 34 27121335 Page 9 Page 10 Page 11 Page 12 Page 13 Page 14 6.1 Connecter (G), (I), (J) & (L) ensemble par (2) omm 6.2 Connecter (H), (I), (J) & (M) ensemble par (2) omm ameriwoodhome.com...
- Page 35 Page 15 Page 16 8.1 Connecter (E), (F) & (N) avec (2) omm Page 17 Page 18 10.1 10.2 10.3 Page 19 11.1 Page 20 12.1 Page 21 13.1 Page 22 Page 23 Page 24 16.1 Page 25 votre foyer. ameriwoodhome.com...
- Page 36 ameriwoodhome.com...
Need help?
Do you have a question about the 7121335COM and is the answer not in the manual?
Questions and answers