Samsung DVD-P191 User Manual
Hide thumbs
Also See for DVD-P191:
- User manual (140 pages) ,
- Service manual (62 pages) ,
- User manual (33 pages)

Related Manuals for Samsung DVD-P191


Summary of Contents for Samsung DVD-P191
- Page 1 DVD-P191 DVD Player user manual imagine the possibilities Thanks you for purchasing this Samsung product. To receive more complete service, please register your product at www.samsung.com/global/register AK68-01762Q(01)
-
Page 2: Precautions
precautions 1. Setting up 4. Disc - Refer to the identification label located on - Do not clean disc using record-cleaning the rear of your player for its proper operat- sprays, benzene, thinner, or other volatile ing voltage. solvents that may cause damage to the disc surface. -
Page 3: Table Of Contents
BEFORE YOU START TABLE OF CONTENTS Precautions .......2 Accessories Before you start ......3 Setup General Features . -
Page 4: General Features
This unit can play discs created from MP3/WMA THERE ARE QUESTIONS REGARDING files. YOUR TV SET COMPATIBILITY WITH THIS MPEG4 MODEL 525p DVD PLAYER, PLEASE CONTACT This unit can play MPEG4 formats within an avi file. SAMSUNG'S CUSTOMER SERVICE CENTER.” 4_ setup... -
Page 5: Disc Type And Characteristics
Disc Type and Characteristics This DVD player is capable of playing the following types of discs with the corresponding logos: Recording Types Disc Size Max. Playing Time Characteristics Disc Types (Logos) - DVD contains excellent sound and Single-sided 240 min. video due to Dolby Digital and MPEG- 12 Cm Double-sided 480 min. -
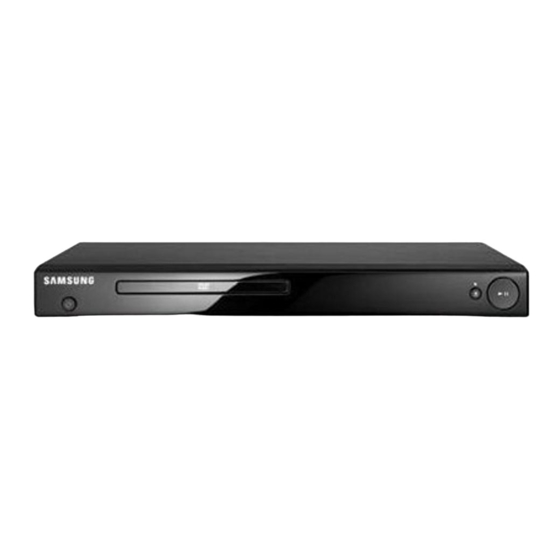
Page 6: Description
setup Description Front Panel Controls POWER ON/OFF ( OPEN/CLOSE ( )/STOP ( Turn On/Off and the player is turned On/Off. Press to open and close the disc tray/ Stops disc play. DISC TRAY PLAY/PAUSE ( Place the disc here. Begin or pause disc play. DISPLAY Operation indicators are displayed here. - Page 7 Rear Panel AUDIO OUT JACKS DIGITAL AUDIO OUT JACKS - Connect to the Audio input jacks of your television or - Use either a coaxial digital cable to connect to a com- audio/video receiver. patible Dolby Digital receiver. VIDEO OUT JACK - Use either a coaxial digital cable to connect to an - Use a video cable to connect to the Video input jack A/V Amplifier that contains a Dolby Digital, MPEG2 or...
-
Page 8: Tour Of The Remote Control
setup Tour of the Remote Control DVD Power Button Turns the power on or standby. REPEAT Button Allows you to repeat play a title, chapter, track, or disc. Returns to a previous menu. DISC MENU Button Brings up the Disc menu. BOOKMARK Button Quickly find bookmark sections of a DVD. -
Page 9: Connections
connections Choosing a Connection The following shows examples of connections commonly used to connect the DVD player with a TV and other components. Before Connecting the DVD Player - Always turn off the DVD player, TV, and other components before you connect or disconnect any cables. - Refer to the user’s manual of the additional components you are connecting for more information on those particular components. - Page 10 connections Connection to a TV (Interlace) - Connecting to your TV using Component video cables. - You will enjoy high quality and accurate color reproduction images. Component video separates the pic- ture element into black and white(Y), blue(P B ), red(P R ) signals to present clear and clean images. (Audio signals are delivered through the audio output.) Using component video cables, connect the COMPONENT VIDEO OUT terminal on the rear of the DVD player to the...
- Page 11 Connection to a TV (Progressive) Using component video cables, connect the COMPONENT VIDEO OUT terminal on the rear of the DVD player to the COMPONENT IN terminal of TV. Using the audio cables, connect the AUDIO (red and white) OUT terminals on the rear of the DVD player to the WHITE GREEN AUDIO (red and white) IN terminals of TV.
- Page 12 connections Connection to an Audio System (2 Channel Amplifier) Using the audio cables, connect the AUDIO (red and white) OUT terminals on the rear of the DVD player to the AUDIO (red and white) IN terminals of the Amplifier. Using the video signal cable(s), connect the WHITE VIDEO,,COMPONENT OUT terminals on the rear of the DVD player to the VIDEO, COMPONENT IN terminal of...
- Page 13 Connection to an Audio System (Dolby Digital, MPEG2 or DTS Amplifier) If using a coaxial cable, connect the DIGITAL AUDIO OUT (COAXIAL) terminal on the rear of the DVD player to the DIGITAL AUDIO IN (COAXIAL) terminal of the Amplifier. Using the video signal cable(s), connect the VIDEO,COMPONENT OUT terminals on the rear of the DVD player to the VIDEO,COMPONENT IN terminal of...
-
Page 14: Basic Functions
basic functions basic functions 4. Stopping Play Playing a Disc Press the STOP ( ) button during play. Before Play 5. Removing Disc - Turn on your TV and set it to the correct Video Press the OPEN/CLOSE ( ) button. Input by pressing TV/VIDEO button on the TV 6. -
Page 15: Using The Search And Skip Functions
3. Press the √/® buttons to make the desired setup and then Using the Search and Skip press the ENTER button. Functions 4. To make the screen disappear, press the CANCEL button. During play, you can search quickly through a chapter or track, and use the skip function to jump to the next selection. -
Page 16: Repeat Play
basic functions Repeat : Disc Note - Depending on a disc, the Disc Menu may not work. Repeat : Track - You can also use the Disc Menu, using the DISC MENU button on the remote control. When playing VCD the Disc Menu may not Repeat : Off work Using the Title Menu... -
Page 17: Advanced Functions
advanced functions If you are using a 4:3 TV Adjusting the Aspect Ratio (EZ View) For 16:9 aspect ratio discs - 4:3 Letter Box To play back using aspect ratio Displays the content of the DVD title in 16:9 aspect ratio. The (DVD) black bars will appear at the top and bottom of the screen. -
Page 18: Selecting The Subtitle Language
advanced functions Press √ /Audio button MPEG4 Note at remocon repeatedly to - You have to change the desired subtitle in the select the desired Audio AUDIO PCM 1/2 Disc Menu, according to discs. Press the DISC on MPEG4 then press MENU button. -
Page 19: Using The Bookmark Function
Clearing a Bookmark Using the Bookmark Function 1~3. The first 1~3 steps are the same as those for “Using the Bookmark Function” . This feature lets you bookmark sections of a DVD or 4. Press the √/® buttons to select the bookmark number you VCD so you can quickly find them at a later time. -
Page 20: Folder Selection
advanced functions Stop Open the disc tray. Root Place the disc on the tray. Close the tray. JPEG The tray closes and this Parent Folder screen displays. MUSIC Current Folder Sub-Folders : Name of currently playing file. SONG FILE 1 Peer Folders SONG FILE 2 : Current Playback Time. -
Page 21: Mpeg4 Playback
CD-R MP3/WMA file MPEG4 Playback When you record MP3 or WMA files on CD-R, please refer MPEG4 Play Function to the following. AVI files are used to contain the audio and video data. Only - Your MP3 or WMA files should be ISO 9660 or JOLIET AVI format files with the “.avi”... -
Page 22: Picture Cd Playback
advanced functions CD-R AVI file Rotation This unit can play the following video compression formats : Each time the ENTER button is pressed, the picture rotates 90 degrees clockwise. within the AVI file format: - DivX 3.11 contents Zoom - DivX 4 contents (Based on MPEG-4 Simple Profile) : Press the π/†... - Page 23 CD-R JPEG Disc - Only files with the “.jpg” and “.JPG” extensions can be played. - If the disc is not closed, it will take longer to start playing and not all of the recorded files may be played. - Only CD-R discs with JPEG files in ISO 9660 or Joliet format can be played.
-
Page 24: Changing Setup Menu
changing setup menu Using the Player Menu Language Using the Setup Menu 1. With the unit in Stop mode, press the MENU button. The Setup menu lets you customize your DVD player by 2. Press the π/† buttons to select Setup, then press the ® allowing you to select various language preferences, set or ENTER button. -
Page 25: Setting Up The Audio Options
Using the DivX Subtitle Language Using the Audio Language 1. With the unit in Stop mode, press the MENU button. 1. With the unit in Stop mode, press the MENU button. 2. Press the π/† buttons to select Setup, then press the ® 2. -
Page 26: Setting Up The Display Options
changing setup menu ❶ Dolby Digital Out Setting Up the Display - PCM : Converts to PCM(2CH) audio. Options - Bitstream : Outputs Dolby Digital or DTS via the digital output. Select Bitstream when connecting to a Display options enable you to set various video functions of Dolby Digital or DTS Decoder. -
Page 27: Setting Up The Parental Control
❹ TV System Setting Up the Parental - Auto Control - NTSC : In case of using NTSC disc The Parental Control function works in conjunction • If your TV system only has PAL-Video input, you with DVDs that have been assigned a rating, which must choose “PAL”. - Page 28 changing setup menu Changing the Password 6. Press the π/† buttons to select the Rating Level you want, then press the ® or ENTER button. e.g) Setting up in Kids Safe. 1. With the unit in Stop mode, press the MENU button. 2.
-
Page 29: Reference
2. Press the √/® buttons to select Total, then press the Firmware upgrade ENTER button. Introduction Samsung will often support the software upgrade to improve the performance of this unit to the latest sta- tus, through Samsung Internet Site (www.samsung. com). -
Page 30: Troubleshooting
reference Troubleshooting Before requesting service (troubleshooting), please check the following. Page Action Problem • Check the batteries in the remote control. They may need replacing. No operations can be • Operate the remote control at a distance of no more than 20 feet. performed with the •... -
Page 31: Specifications
Output Terminal Audio Output Digital Audio output Coaxial (S/PDIF) *Frequency Response 20Hz ~ 20Khz *: Nominal specification - Samsung Electronics Co., Ltd reserves the right to change the specifications with out notice. - Weight and dimensions are approximate. English _31... - Page 32 Contact SAMSUNG WORLD WIDE If you have any questions or comments relating to Samsung products, please contact the SAMSUNG customer care center. Region Country Contact Center Web Site CANADA 1-800-SAMSUNG(726-7864) www.samsung.com/ca North America MEXICO 01-800-SAMSUNG(726-7864) www.samsung.com/mx U.S.A 1-800-SAMSUNG(726-7864) www.samsung.com/us ARGENTINE 0800-333-3733 www.samsung.com/ar...
- Page 33 AK68-01762Q(01)
- Page 34 DVD-P191 ﺟﻬﺎﺯ ﺗﺸﻐﯿﻞ ﺩﻱﻓﻲﺩﻱ ﺩﻟﻴﻞ ﺍﳌﺴﺘﺧﺪﻡ ﺻ ﻮ ّ ﺭ ﺍﻹﻣﻜﺎﻧﻴﺎﺕ .ﺷﻜﺮﺍ ﻟﻜﻢ ﻋﻠﻰ ﺷﺮﺍء ﻣﻨﺘﺞ ﺳﺎﻣﺴﻮﻧﺞ ،ﻻﺳﺘﻼﻡ ﺃﻓﻀﻞ ﺍﻟﺨﺪﻣﺔ ﺍﻟﺮﺟﺎء ﺗﺴﺠﻴﻞ ﻣﻨﺘﺠﻜﻢ ﻓﻲ www.samsung.com/global/register AK68-01762Q(01)
- Page 35 ﺍﻻﺤﺘﻳﺎﻃﺎﺖ ٢ _ﺍﻻﺤﺘﻳﺎﻃﺎﺖ...
- Page 36 ﺠﺩﻭﻞ ﺍﻠﻤﺤﺗﻭﻴﺎﺕ ﻗﺑﻝ ﺑﺪﺀ ﺍﻠﺘﺸﻐﻴﻝ ٢ ..............ﺍﻻﺤﺘﻳﺎﻃﺎﺖ ﺍﻠﻤﻠﺤﻘﺎﺕ ٣ ..............ﻘﺑﻝ ﺑﺪﺀ ﺍﻠﺘﺷﻐﻳﻝ ﺍﻹﻋﺪﺍﺪ ٤ ..............ﻤﻳﺯﺍﺖ ﻋﺎﻤﺔ ٥ ............ﻧﻭﻉ ﺍﻠﻘﺮﺺ ﻭ ﺨﺼﺎﺋﺼﻪ ٦ ................. ﺍﻠﻭﺼﻒ ٨ ..........ﺍﺴﺗﻜﺷﺎﻒ ﻭﺤﺩﺓ ﺍﻠﺗﺤﻜﻢ ﻋﻦ ﺑ ﹸﻌﺩ ﻜﺎﺑﻝ ﺍﻠﺼﻭﺖ/ﺍﻠﻔﻴﺪﻴﻮ ﺍﻠﺘﻭﺻﻳﻼﺖ ﻮ ﺤﺩ ﺓ ﺍﻠﺘﺣﻜﻢ ﻋﻥ ﺑ ﹸﻌﺩ ٩...
- Page 37 ﺍﻹﻋﺩﺍﺩ ٤ _ﺍﻹﻋﺩﺍﺩ...
- Page 38 ٥ _ﺍﻠﻌﺭﺑﻴﺔ...
- Page 39 ﺍﻹﻋﺩﺍﺩ ﺍﻠﻭﺻﻒ ﺃﺯﺭﺍﺭ ﺗﺤﻜﻢ ﺍﻠﻠﻭﺤﺔ ﺍﻷﻣﺎﻣﻳﺔ ٣٠ ﺷﺎﺷﺔ ﺍﻠﻌﺭﺽ STANDBY/ON ( ) ٠١ ﻴﺘﻢ ﻋﺭﺽ ﻤﺅﺸﺭﺍﺕ ﺍﻠﺘﺸﻐﻴﻞ ﻫﻨﺎ ﻑﺍﻕﻱﺇ/ﻝﻱﻍﺵﺕ ﻡﺕﻱﺱﻭ ﻝﻱﻍﺵﺕﻝﺍ ﻑﺍﻕﻱﺇ/ﻝﻱﻍﺵﺕﻝﺍﺏ ﻡﻕ .ﻝﻍﺵﻡﻝﺍ ﻝﻱﻍﺵﺕ OPEN/CLOSE( ) /STOP ٠٤ ﺍﻀﻐﻃ ﻋﻠﻰ ﻫﺫﺍ ﺍﻠﺯﺭ ﻠﻓﺘﺢ ﺪﺭﺝ ﺍﻷﻗﺮﺍﺺ ﻭﺇﻏﻼﻘﻪ ٢٠ ﺪﺭﺝ ﺍﻷﻗﺭﺍﺺ .ﺿﻊ...
- Page 41 ﺍﻹﻋﺩﺍﺩ DVD ﻠﺷﻐﻝ ﺃﻗﺮﺍﺺPOWER ١ ﺍﻠﺯﺭ ﻠﺘﺸﻐﻴﻝ ﺍﻠﻭ ﺤﺩﺓ ﺃﻭ ﺇﻴﻗﺎﻒ ﺘﺷﻐﻴﻠﻬﺎ REPEAT ٢ ﺯﺭ ﻔﺻﻞ ﺃﻭ ﻤﺎﺪﺓ ﻤﺴﺠﻠﺔ ﺃﻭ ﻘﺮﺺ DISC MENU ٣ ﺯﺭ ﻹﻅﻬﺎﺮ ﻗﺎﺌﻤﺔ ﺍﻻﻗﺭ ﺍﺺ BOOKMARK ﺯﺭ ﺍﻠﻌﻼﻤﺔ ٤ ١١ ١ ) STOP ٥ ﺯﺭ ٢...
- Page 42 ﺍﻟﺘﻭﺻﻴﻼﺖ ﺍﺨﺘﻴﺎﺮ ﺇﺣﺩﻯ ﺍﻟﺗﻮﺼﻴﻼﺖ AUDIO ﺍﻷﺣﻣﺭ ﺍﻷﺻﻔﺭ ﺍﻷﺻﻔﺭ ﻛﺎﺒﻞ ﺍﻟﻓﻴﺪﻴﻭ ﻜﺎﺒﻞ ﺍﻠﺼﻭﺖ ﺍﻷﺻﻔﺭ ﺍﻷﺣﻣﺭ ﺍﻷﺒﻴﺾ ١٣-١٢ P-SCAN I-SCAN COMPOSITE/S-Video P-SCAN ➞ I-SCAN ٩ _ﺍﻠﻌﺭﺑﻴﺔ...
- Page 43 ﺍﻟﺘﻭﺻﻴﻼﺖ ﺍﻷﺒﻴﺾ ﺍﻷﺣﻣﺭ ﺍﻷﺯﺮﻖ ﺍﻷﺧﺿﺮ ﺍﻷﺣﻣﺭ ﻜﺎﺒﻞ ﺍﻠﺼﻭﺖ ﻜﺎﺑﻝ ﺍﻟﻤﻜﻮﻥ ﺍﻷﺧﺿﺮ ﺍﻷﺯﺮﻖ ﺍﻷﺣﻣﺭ ﺍﻷﺣﻣﺭ ﺍﻷﺒﻴﺾ I-SCAN ٢٦-٢٥ ٢٥-٢٦ ١٣-١٢ ١٠ _ﺍﻟﺘﻭﺻﻴﻼﺖ...
- Page 44 ﺍﻷﺒﻴﺾ ﺍﻷﺣﻣﺭ ﺍﻷﺯﺮﻖ ﺍﻷﺧﺿﺮ ﺍﻷﺣﻣﺭ ﻜﺎﺒﻞ ﺍﻠﺼﻭﺖ ﻜﺎﺑﻝ ﺍﻟﻤﻜﻮﻥ ﺍﻷﺧﺿﺮ ﺍﻷﺯﺮﻖ ﺍﻷﺣﻣﺭ ﺍﻷﺣﻣﺭ ﺍﻷﺒﻴﺾ -SCAN ٢٦-٢٥ ١١ _ﺍﻠﻌﺭﺑﻴﺔ...
- Page 45 ﺍﻟﺘﻭﺻﻴﻼﺖ ﺍﻷﺒﻴﺾ ﺍﻷﺣﻣﺭ ﻜﺎﺒﻞ ﺍﻠﺼﻭﺖ ﺍﻷﺣﻣﺭ ﺍﻷﺒﻴﺾ ﻤﺿﺧﻡ ﺍﺴﺘﺮﻴﻭ ﺜﻧﺎﺌﻲ ﺍﻠﻘﻧﻮﺍﺕ (٢٥-٢٤ _ﺍﻟﺘﻭﺻﻴﻼﺖ ١٢...
- Page 46 IN (COAXIAL) IN (COAXIAL) ﻜﺎﺒﻞ ﺍﻠﺼﻭﺖ Kabel Coaxial Tidak disediakan ٢٥-٢٤ ١٣ _ﺍﻠﻌﺭﺑﻴﺔ...
- Page 47 ﺍﻟﻭﻆﺎﺋﻑ ﺍﻷﺴﺎﺳﻳﺔ ﺗﺸﻐﯿﻞ ﺍﻟﻘﺮﺹ ٥. ﺇﺧﺮ ﺍﺝ ﺍﻠﻘﺮ ﺹ .( ) OPEN/CLOSE ﺍﻀﻐﻄ ﻋﻠﻰ ﺍﻠﺯﺮ ٦. ﺇﻴﻘﺎﻒ ﺍﻠﺘﺷﻐﻴﻝ ﻤﺆ ﻗ ﺘ ًﺎ ﻗﺒﻝ ﺍﻠﺗﺷﻐﻴﻝ ( ﺍﻠﻣﻭ ﺠﻮﺪ ﻓﻲ ) PAUSE ﺍﻀﻐﻄ ﻋﻠﻰ ﺍﻠﺯﺮ - ﺑﺘﺸﻐﻴﻝ ﺠﻬﺎﺯ ﺍﻠﺘﻠﻔﺎﺯ ﻭ ﺍﺿﺑﻃﻪ ﻋﻠﻰ ﺪﺧﻝ ﺍﻠﻔﻴﺪﻴﻭ ﺍﻠﺼﺣﻴﺢ ﺒﺎﻠﺿﻐﻂ .ﻮﺣﺪﺓ...
- Page 48 Note ﻣﻼ ﺤﻆﺔ ﺍ ﺳﺘﺣﺩﺍ ﻡ ﻮ ﻅﻳﻔﺘﻲ ﺍﻠﺒﺤﺖ ﻮﺍ ﻠﺛﺨﻂﻲ .ﻠﻠﻮﺼﻮﻝﺍﻠﻰﺍﻠﻌﻧﻮﻥﺍﻠﻄﻠﻮﺐﻘﻲ ﺤﺎﻠﺔﻋﺩﻡﻋﻮﺪﺃﻜﺛﺯﻤﻥﻗﺭﺺ ﺃﺛﻨﺎﺀﺍﻠﺗﺸﻐﻳﻞﻋﻛﻧﻚ ﺍﻟﺒﺤﺙ ﺒﺳﺭ ﻋﺓ ﺧﻼ ﻞ ﻔﺼﻞ ﺃﻭ ﻣﺎ ﺪ ﺓ ﻤﺳﺠﻟﺔ ،DVDﻋﻠﻰﺴﺑﻴﻝ ﺍﻠﺛﺎﻝ،ﻘﻲﺤﺎﻠﺔﻮﺤﻮﺩﺃﻜﺗﺮﻣﻥﻔﻴﻠﻢﻠﻰﻗﺯﺺ Title ﻭ ﺍ ﺴﺘﺧﺮ ﺍ ﻡ ﻮ ﻈﻳﻔﺔ ﺍ ﻟﺗﺧﻁﻲ ﻟﻼ ﺒﺘﻘﺎ ﻞ ﺇ ﻟﻰ ﺍ ﻟﺘﺣﺪ ﻴﺪ ﺍﻠﺘﺎ ﻠﻲ ﻳﺘﻢﺍﻠﺘﻌﺭﻒﻋﻠﻰﻛﻝﻔﻴﻠﻢ...
- Page 49 ﺍﻟﻭﻆﺎﺋﻑ ﺍﻷﺴﺎﺳﻳﺔ ﺍﺳﺘﺧﺩﺍﻢﻗﺎﺋﻤﺔﺍﻟﻌﻨﺎﻭﻴﻦ ﺍﺳﺘﺧﺩﺍﻢﻗﺎﺋﻤﺔﺍﻟﻌﻨﺎﻭﻴﻦ A-Bﺍﺳﺘﺧﺪﺍﻡﻭﻆﻳﻔﺔﺗﻜﺭﺍﺭ ﺑﻭﺣﺩﺓﺍﻠﺘﺣﻛﻡMENU،ﺍﻀﻐﻃﻋﻟﻰﺍﻟﺯﺮDVD١.ﺃﺗﻧﺎﺀﺘﺸﻐﻳﻞﻘﺮﺺ . ﺒﻮﺣﺪﺓﺍﻠﺘﺣﻛﻢ ﻋﻦ ﺑﻌﺪREPEAT ١.ﺍﻀﻐﻂ ﻋﻠﻰ ﺍﻠﺯﺭ .ﻋﻥ ﺑ ُﻌﺩ ﻋﻧﺪﺍﻠﻨﻗﻄﺔﺍﻠﺘﻲﺘﺮﻏﺏﻓﻲﺑﺪﺀﺘﻛﺮﺍﺭENTER ٢.ﺍﻀﻐﻄﻋﻠﻰﺍﻠﺯﺭ ،ﺛﻢﺍﺿﻐﻄﻋﻠﻰTitle menu ﻠﺗﺤﺪ ﻳﺩ ٢.ﺍﻀﻐﻄﻠﻰﺯﺭ π/† . ﺘﻠﻘﺎﺌﻴﺎB ﴾ﻋﻨﺪﻫﺎ.ﻴﺘﻢ ﻋﺳﺰA﴿ﺍﻠﺘﺸﻐﻳﻝ ﺃﻭﻠﺯﺭ .ﺍﻠﺯﺭ ENTER ® .﴾CANCEL﴿- ﻠﻠﺮﺟﻭﻉﺇﻠﻰ ﺍﻠﺘﺷﻌﻳﻝﺍﻠﻌﺎﺪﻱ،ﺍﻀﻐﻂﻋﻠﻰﺍﻠﺯﺮ DVD/VCD ﻣﻼ ﺤﻆﺔ ....
- Page 50 ﺍﻟﻭﻆﺎﺋﻑ ﺍﻠﻣﺗﻗﺪﻤﺔ ٣:٤ ﺇﺪﺍ ﻜﻨﺖ ﺗﺴﺗﺨﺪﻡ ﺗﻠﻔﺎﺯ ﺑﻧﺴﺑﺔﺍﻻﺭﺗﻔﺎﻉﺇﻠﻰﺍﻠﻌﺭﺾ ﻀﺒﻃ ﻨﺴﺒﺔ ﺍﻻﺮﺘﻔﺎﻉ ٳﻠﻰ ﺍﻠﻌﺮﺾ ٩ ١٦ﻠﻸﻗﺭﺍﺺ ﺫﺍﺖ ﻨﺴﺑﺔ ﺍﻻﺭ ﺘﻔﺎﻉ ﺇﻠﻰ ﺍﻟﻌﺭﺽ (EZ View) 4:3 Letter Box - ﺑﻧﺴﺑﺔ ﺍﻻﺭﺗﻔﺎﻉ ﺇﻠﻰ ﺍﻠﻌﺭﺽ ٦١ ٩ ﺴﺗﻇﻬﺭ ﺍﻷﺸﺭ ﻄﺔ ﻠﺴﻭﺪﺍﺀDVD ﻣﺤﺗﻭﻯ ﻋﻧﻭﺍﻦ ﻠﻠﺘﺷﻐﻴﻞ...
- Page 51 ﺍﻟﻭﻆﺎﺋﻑ ﺍﻠﻣﺗﻗﺪﻤﺔ √/AUDIO ﺍﺿﻐﻁ ﻋﻠﻰ ﺍﻠﺯﺮ MPEG4 RETURN ﺃﻭ ﺍﻠﺯﺮCANCEL ﺍﺿﻐﻄ ﻋﻠﻰ ﺍﻠﺯﺮ √/ AUDIO ٢ ﻹﺯﺍﻠﺔ ﺍﻠﺮﻣﺯ ﺑﻭ ﺣﺪﺓ ﺍﻠﺘﻛﻢ ﻋﻦ ﺒﻌﺪ ﺑﺷﻜﻝ ﻤﺘﻜﺮ ﻠﺘﺣﺪﻳﺪ ﺍﻠﺼﻭﺕ ﺍﻠﻣﻃﻠﻭ ﺐ MP3 1/1 AUDIO ﺛﻢ ﺍﻀﻐﻃ ﻋﻠﻰMPEG4 ﻋﻠﻰ .ENTER ﺍﻠﺯﺭ √/ RETURN ...
- Page 57 ﺘﻐﻳﻳﺭﻗﺎﺌﻤﺔﺍﻹﻋﺪﺍﺪ ﺍﺴﺘﺧﺪ ﺍﻢ ﻠﻐﺔ ﺍﻠﺼﻭﺕ .MENU ١. ﺍﺿﻐﻄ ﻋﻠﻰ ﺍﻠﺯﺭ Language Setup Page ٢. ﺍﻀﺒﻆ ﻋﻠﻰ ﺍﻠﺯ ﺭﻴﻦ ®/√ ﻠﺘﺣﺪﻳﺪ .ENTER ، ﺛﻢ ﺍﻀﻐﻄ ﻋﻠﻰ † ﺃﻭ ﺍﻠﺯﺭ Audio ﻠﺘﺣﺪﻳﺪπ/† ٣. ﺍﻀﺒﻆ ﻋﻠﻰ ﺍﻠﺯ ﺭﻴﻦ .ENTER ، ﺛﻢ ﺍﻀﻐﻄ ﻋﻠﻰ ® ﺃﻭ ﺍﻠﺯﺭ ٤...
- Page 59 ﺘﻐﻳﻳﺭﻗﺎﺌﻤﺔﺍﻹﻋﺪﺍﺪ TV System ﺇﻋﺪﺍﺪ ﺘﺤﻜﻢ ﺍﻵﺒﺎﺀ - ﺘﻟﻘﺎﺌﻲ NTSC : ﻔﻲ ﺤﺎﻠﺔ ﺍﺴﺘﺧﺪ ﺍﻢ ﻗﺮﺹNTSC - ﺍﻠﺙﻲDVD ﺒﺎﻻﺷﺘﺮ ﺍﻚ ﻤﻊ ﺃﻗﺮﺍﺺParental Control ﺘﻤﻝ ﻭﻆﻴﻔﺔ ﻔﻗﻃ ، ﻔﻴﺠﺐ ﻋﻠﻴﻚPAL • ﺇﺫﺍ ﻜﺎﻦ ﻨﻅﺎﻢ ﺍﻠﺘﻠﻴﻔﺯ ﻴﻭﻦ ﻳﺤﺘﻭ ﻱ ﻋﻠﻰ ﺪﺧﻝ ﻓﻳﺪﻴﻭ DVD ﺘﻢﺘﻌﻳﻳﻦ...
- Page 60 ، ﺛﻢ ﻀﻐﻂ ﻋﻠﻰ® ﺃﻭChange Password ﻠﺘﺤﺪﻴﺪπ/†ﺍﻀﻐﻃ ﻋﻠﻰ ﺍﻠﺯﺭ ﺍﻠﻣﻃﻠﻭﺐ ، ® ﺛﻢ ﺍﻀﻐﻂRating Level ﻠﺘﺤﺪﻴﺪπ/†٦. ﺍﻀﻐﻃ ﻋﻠﻰ ﺍﻠﺯﺭ .٤ .ENTER ﻋﻠﻰ ﺃﻭ ﺍﻠﺯﺭ .Kids Safe ﻤﺛﺎﻝ( ﺍﻹﻋﺪﺍﺪ ﻔﻲ ﺍﻠﻭﻀﻊ ..ﺃﺪﺠﻝ ﻜﻠﻤﺔ ﺍﻠﻣﺮﻮﺭ ﺍﻠﺠﺪﻴﺪﺓ. ﺃﻋﺪ ﺇﺪﺨﺎﻝ ﻜﻠﻣﺔ ﺍﻠﻣﺭﻭﺭ ﺍﻠﺠﺪﻴﺪﺓ ﻤﺠﺪﺌﺍENTER ﺍﻠﺯﺭ .
- Page 61 ﺘﺒﺪﺃ ﻋﻣﻠﻴﺔ ﺘﺤﺪﻴﺚ ﺍﻠﺑﺮ ﺍﻤﺞ Samsung ١. ﻴﺟﺐ ﺘﻧﺯ ﻳﻝ ﻣﻠﻒ ﺠﺪﻴﺪ ﻤﻦ ﺨﻼﻝ ﻤﺭﻜﺯ ﺍﻠﺘﻨﺯ ﻴﻝ ﺍﻠﻤﺘﻭ ﻔﺮ ﺑﻤﻭ ﻗﻊ ﺷﺮ ﻜﺔ - ﻔﻲ ﻤﻨﺘﺼﻒ ﻋﻣﻠﻴﺔ ﺍﻠﻧﻘﻝ ،ﺴﻴﺘﻢ ﻔﺕﺢ ﺍﻠﺪﺭ ﺝ ﺘﻠﻘﺎﺌﻳ . ﺑﻌﺩ ﺇﺠﺭ ﺍﺝ ﺍﻠﻘﺭ ﺹ، ﻴﺭ ﺠﻰ...
- Page 62 ٢٦-٢٣ ٢ە ٢٥-٢٤ ٢٦ ٢٩ _ﺍﻠﻌﺭﺑﻴﺔ...
- Page 63 ﺠﺭ ﺝ ﺍﻠﺼﻭ ﺕ ﺧﺮ ﺝ ﺼﻭ ﺕ ﺮ ﻗﻣﻲ ٠٢ ﻫﺭﺘﺯ ﺇﻠﻰ٠٢ ﻜﺘﻠﻭ ﻫﺭﺘﺯ ﺍﻠﻤﻭ ﺍﺼﻔﺎﺕ ﺍﻠﻌﺎﺪﻴﺔ ﻤﻼ ﺤﻅﺔ . ﺑﺤﻕ ﺘﻐﻴﻴﺭ ﺍﻠﻤﻮﺍﺼﻔﺎﺕﺪﻭﻦﺇﺸﻌﺎﺭSamsung Electronics Co., Ltd - ﺘﺤﺘﻔﻆ ﺷﺭ ﻜﺔ . - ﻗﻴﻢ ﺍﻠﻭﺯﻦ ﻭ ﺍﻷﺑﻌﺎﺪ ﻫﻲ ﻗﻳﻢ ﺘﻘﺭ ﻴﻴﻴﺔ _اﳌﺮﺟﻊ ٣٠...
- Page 64 BELGIUM 0032 (0)2 201 24 18 www.samsung.com/be 844 000 844 Distributor pro Českou republiku: CZECH REPUBLIC www.samsung.com/cz Samsung Zrt., česka organizační složka Vyskočilova 4, 14000 Praha 4 DENMARK 70 70 19 70 www.samsung.com/dk FINLAND 030-6227 515 www.samsung.com/fi 3260 SAMSUNG (...
- Page 65 memo...
- Page 66 AK68-01762Q(01)
Need help?
Do you have a question about the DVD-P191 and is the answer not in the manual?
Questions and answers