Advertisement
INSTALLATION

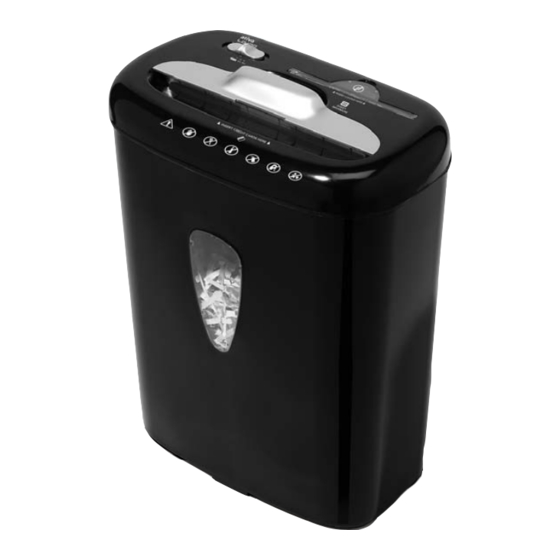
Mount the shredder securely to the rim of the waste basket. (FIGURE 1) A socket-outlet should be near the equipment and be easily accessible. Connect the power cord to any standard 120 volt AC outlet.
 ATTENTION:
This model includes a built-in safety interlock mechanism, which requires the shredder to be correctly mounted on to the included wastebasket. Located on the back center of the shredder, next to the power cord, there is a curved flap-like shape that must FIT OVER THE OUTSIDE matching ridge of the wastebasket. (FIGURE #1)
THE SHREDDER WILL NOT OPERATE UNLESS IT IS PROPERLY MOUNTED AS PICTURED!
It is not designed to operate with any other wastebaskets. An activation switch located on the head unit automatically shuts off the shredder when it is lifted or removed. The supplied wastebasket activates this switch, which allows the shredder to be operable. Lining the wastebasket with a plastic bag will interfere and may keep the shredder from functioning.

Crosscut shredders have very sharp exposed blades on the underside.
Use care when mounting the shredder on the wastebasket.
OPERATION

Using the switch located on the unit, select one of the following settings by sliding the switch either left or right. (FIGURE 2)
| I | Auto: This setting allows the shredder to be automatically started by inserting paper into the shred opening. Always feed the paper in as straight as possible. When the paper has passed through, the shredder will automatically stop. (FIGURE 2) |
| O | Off: This setting turns off all features of the shredder. For safety reasons, we recommend that you leave the shredder in the "Off" position whenever the shredder is unattended or not in use. (FIGURE 2) |
| R | Rev: In the unlikely event of a paper jam, the reverse setting can be used to help clear the cutters of paper that has not passed through. Never attempt to clear a jam by using the reverse function until you have emptied the wastebasket. (FIGURE 2) |
Never shred plastic (except credit cards and CDs), any hard materials, continuous forms, newsprint, or anything with adhesives including labels and envelopes.
While this shredder will shred staples, it is recommended that you remove them whenever possible in order to extend the life of your shredder.
Only shred credit cards by feeding them vertically within the designated area. Never feed more than one credit card at a time.
Features a CD/DVD destroyer (Figure 3):

- Lift safety cover to expose the CD/DVD entry.
- Hold the CD/DVD by the edge and feed one at a time, releasing when shredding begins.
- Shredder will stop when the entire disc has been destroyed.
- Close cover when done shredding media.
Do not hold CD/DVD with finger through the center ring while feeding into the shredder. Serious injury may occur.
Never feed more than one credit card or CD/DVD at a time.
MAINTENANCE
Keep your shredder running with ultimate reliability with the following Ativa shredder supplies:
Shredder Lubricant Sheets
To quickly and conveniently maintain shredder blade lubrication, use a Shredder Lubricant Sheet once a month.
Shredder Oil
Apply a bead of this lubricant across a sheet of paper once a month and shred it. It helps to keep the shredder blades operating well over many years of use.
Shredder Bags
Shredder bags make emptying basket faster and easier while reducing shred dust and spillage.
Oil the shredder blades every month with recommended lubricant sheets (Office Depot item number 340-960) or oil (Office Depot item number 285-661).
Do not spray or keep any aerosol products in or around shredder.
DO NOT USE CANNED AIR ON SHREDDER.
CLEANING:
- ALWAYS UNPLUG THE SHREDDER BEFORE CLEANING!
- Only clean the shredder by carefully wiping the unit with a dry soft cloth or towel.
- Do not clean or immerse shredder in water. Having the unit wet may result in damage or malfunction to the electrical components. If the shredder happens to get wet, be sure to completely dry the unit immediately with a cloth or towel.
- Never use anything flammable to clean the shredder.
This may result in serious injury or damage to the product.
TROUBLESHOOTING PAPER SHREDDERS
The shredder does not work at all
- Make sure the unit is plugged in and that the outlet it is plugged into is in good working order.
- In the event that the shredder is run continuously for too long and the motor overheats, a thermal overload switch will automatically shut the power off. If this happens, move the switch to the off position for 30 minutes or more before continuing.
The shredder runs in "Rev" mode but not in "Auto" mode.
- While in "Auto" mode, the motor will not start running until paper is inserted into the feed slot. Set the unit to "Auto" and insert paper to be shredded. It is normal for the motor to run for a moment after setting it to "Auto" but it should stop until paper is inserted. The trigger that activates the shredder in Auto mode is located directly in the center of the slot. If the paper you are inserting is narrow, it may not be hitting the switch. It is possible that the trigger, which activates the shredder, has become blocked with paper. Insert an index card, directly in the center of the feed slot, and apply force. This will usually clear any paper blocking the switch and force the switch closed.
Specifications
| Sheet Capacity | 8 sheets 20lb. bond paper* |
| Paper Shred Size | 0.22 in. x 1.84 in. pieces 5.6 mm x 46.8 mm pieces |
| Paper Entry Width | 8.7" / 220 mm |
| Credit Card & CD Capacity | 1 at a time |
| Voltage | 120V/60Hz – 2.2A |
* ONE FOLDED SHEET OF PAPER EQUATES TO 2 SHEETS OF PAPER
Heavier paper, humidity or other than rate voltage may reduce capacity.

Documents / ResourcesDownload manual
Here you can download full pdf version of manual, it may contain additional safety instructions, warranty information, FCC rules, etc.
Advertisement


Need help?
Do you have a question about the LD 100 and is the answer not in the manual?
Questions and answers