Advertisement
Quick Links
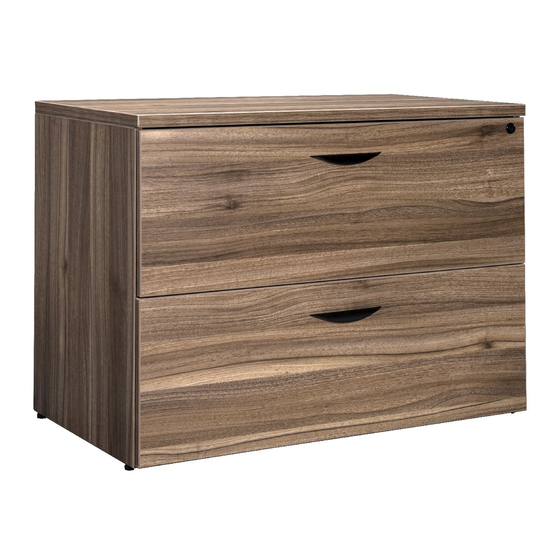
ASHTON 2 DRAWER LATERAL FILING CABINET
This design and instruction booklet is subject to copyright.
www.officeworks.com.au
For spare parts or hardware call 1300 OFFICE (1300 633 423)
ASSEMBLY INSTRUCTIONS
JBASH2DCAB
1/12
WARNING!
IT IS STRONGLY RECOMMENDED THAT THIS
PRODUCT IS PERMANENTLY FIXED TO A
WALL USING THE PROVIDED ANCHOR KIT.
1CTN
Advertisement

Related Manuals for STILFORD ASHTON JBASH2DCAB


Summary of Contents for STILFORD ASHTON JBASH2DCAB
- Page 1 ASSEMBLY INSTRUCTIONS ASHTON 2 DRAWER LATERAL FILING CABINET JBASH2DCAB WARNING! IT IS STRONGLY RECOMMENDED THAT THIS PRODUCT IS PERMANENTLY FIXED TO A WALL USING THE PROVIDED ANCHOR KIT. This design and instruction booklet is subject to copyright. www.officeworks.com.au 1CTN For spare parts or hardware call 1300 OFFICE (1300 633 423) 1/12...
- Page 2 Estimated Assembly Time: 5 minutes Customer Service Contact Details Spare Parts & Hardware (1300 633 423) 1300 OFFICE People Required General Advice 2/12...
- Page 3 Tools Required CAUTION: Do not use tools other than those required, as this can damage your new item Tools Required To secure the unit to a wall you need following tools: NOTE • Please check you have all hardware before assembling. •...
- Page 4 Parts List x1Pc Hardware List 376mm x8Pcs x4Pcs x4Pcs x2pcs x1Pc 4/12...
- Page 5 5/12...
- Page 6 Step 3 To remove drawer, pull drawer out until stopped, then simultaneously push the left plastic release lever up while pushing the right lever down, then pull the drawer out, as shown. Detail #B Detail #B 6/12...
- Page 7 Step 4 To insert drawer, fully extend both ball bearing tracks on each side and align the slide runners on the drawer with the tracks on the unit. Push the drawer into place until closed. If the drawer does not smoothly push into place, please remove and repeat insertion procedure.
- Page 8 8/12...
- Page 9 9/12...
- Page 10 10/12...
- Page 11 11/12...
- Page 12 Furniture Assembly Instructions Style Guide Warranty years Product Warranty – valid for Australian customers only Officeworks Ltd warrants that this product will be free from defects and work as intended for 15 years from the date of purchase by the original customer. If the product has any defects or does not work as intended during the Warranty Period, Officeworks will, at its election and at its expense, repair or replace the product.
Need help?
Do you have a question about the ASHTON JBASH2DCAB and is the answer not in the manual?
Questions and answers