
Related Manuals for Cleveland 3.10 MINI COMBI Series


Summary of Contents for Cleveland 3.10 MINI COMBI Series
- Page 1 SERVICE AND PARTS MANUAL Mini Combi with Easy Touch Series: OES6.10 and 3.10 MINI COMBI 1333 East 179 Street Cleveland, Ohio 44110 Phone: (216) 481-4900 7/11 1-800-338-2204 Fax: (216) 481-3782 www.clevelandrange.com...
-
Page 2: For Your Safety
This manual may be subject to new technical developments, modifications, and unforeseen errors. KEEP THIS MANUAL FOR REFERENCE The MINI Convotherm by Cleveland Combi/Oven-Steamers are intended for other than household use. For caster equipped MINIs: If the Restraining Device must be disconnected, it must be reconnected after the MINI has been returned to its originally installed position BEFORE restarting the MINI. - Page 3 CONVOTHERM by Cleveland agrees to repair or replace, at its option, f.o.b. factory, any part which proves to be defective due to defects in material or workmanship during the warranty period, providing the equipment has been unaltered, and has been PROPERLY INSTALLED, MAINTAINED, AND OPERATED IN ACCORDANCE WITH THE CONVOTHERM by Cleveland OWNER’S MANUAL.
-
Page 5: Operational Safety
INTRODUCTION For safe use of MINIs, each operator must read, understand, and follow the instructions, and heed and obey the warnings of the Installation Manual and Operators Manual, and the labels on the MINI, accessories, and supporting products. The owner(s) and operator(s) of this equipment must keep these instructions in an easily accessible location for reference and training. -
Page 6: Cleaning And Maintenance
2. CLEANING AND DAILY MAINTENANCE – Do NOT use hoses, power cleaners or pressure washers, or harsh or abrasive cleaning agents inside OR outside the cooking compartment. 3. CLEANING AGENTS – Use only genuine Convotherm by Cleveland and Cleveland Range cleaning and descaling products. -
Page 7: General Operation
The MINI cannot start unless the door is closed and latched. Cooking functions stop if the door handle is moved to the open position. The MINI Oven-Steamer can only work with a functioning door switch. If a malfunction occurs, immediately contact your quali ed Cleveland Range authorized service representative. -
Page 8: Start-Up And Shutdown Instructions
C. START-UP AND SHUTDOWN INSTRUCTIONS Do NOT attempt to operate a MINI during a power failure! Death, injury, and equipment damage can result. In the event of a power failure: 1. Turn OFF the Main External Power Switch. 2. Turn OFF Control Power Service Disconnect Switch. 3. -
Page 9: Inspecting The Cooking Compartment
E. INSPECTING THE COOKING COMPARTMENT Inspect the cooking compartment before starting a cooking operation with a MINI for proper assembly and cleanliness as follows: 1. Inspect the Drain The drain in the bottom of the cooking compartment has a removable cover. The cover prevents large food particles, debris and scale from entering and blocking the drain line. -
Page 10: Core Temperature Sensor
• Repeat the preheat process as needed to maintain constant oven temperature and high food quality. b. To use pre-heating in a recipe: Pre-heating is also a programmable function. To Pre-Heat or reheat between batches for Rethermalization: Do not place containers with liquid contents or contents that become liquid on oven racks higher than you can see into the containers. -
Page 11: Exterior Views
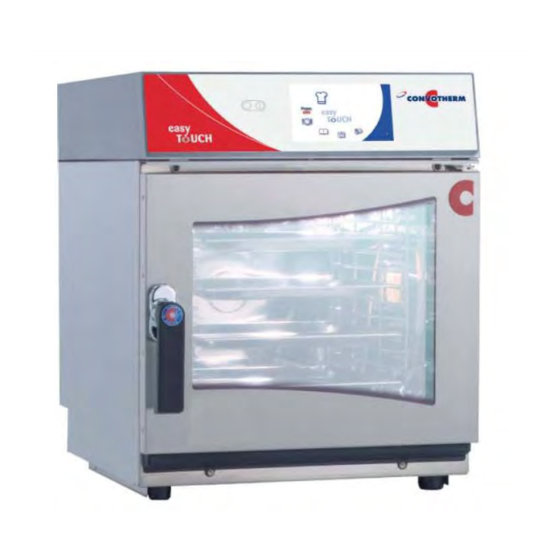
PRODUCT VIEWS AND OPERATION A. EXTERIOR VIEWS Control Panel 5. Door Drip Tray 2. Oven Light 6. Appliance Drip Tray 3. Door with Double Glass Panel 7. Legs (Required) Door Handle 8. Rating Plate CAUTION HOT! Notes: 1. Magnetic Door Switch •... -
Page 12: Control Panel Basic Operation
B. QUICK START GUIDE CONTROL PANEL BASIC OPERATION Operate Controls with HANDS Only! ALWAYS PRE-HEAT! 1. Switch on with key (1). 2. To change the settings while cooking: press keys (7) OR (8) OR (9) and adjust 2. Select cooking mode with keys (2-5). the settings with the Selector Dial (15). - Page 13 C. CONTROL PANEL DETAIL VIEW Item numbers correspond to numbers on the control panels in Figure 4-1 Operate controls with hands only! 1. ON/OFF 9. Core Temperature When the MINI is turned ON: • Set the nominal core temperature. • Self-diagnosis is performed.
-
Page 14: Cleaning The Oven Chamber
MINI oven chamber. h. Do NOT spray water into a hot oven chamber. Use only genuine Convotherm by Cleveland and Cleveland Range cleaning products. Follow the instructions and heed and obey the warnings on the labels. Other products can cause injury, present heath hazards, and damage the MINI. - Page 15 When working with cleaning agents and spray bottles: Wear suitable clothing, protective gloves and protective goggles to help protect from splashes and spills. Failure to do so can result in chemical burns on skin and in eyes. Read, understand, and heed and obey all instructions and safety information found on cleaning agent labels, Material Safety Data Sheets, and related documents and sources.
- Page 16 4) Make sure that the hanging pan racks do not become bent; otherwise grills, racks, containers and accessories will no longer be safely supported. If the hanging pan racks become bent then remove the MINI from service and contact your quali ed Cleveland Range authorized service representative at once.
- Page 17 • Ask your quali ed Cleveland Range authorized service representative about adding or setting a water treatment system. B. Semi-Automatic Cleaning of the Oven Chamber NOTE: Do NOT press the Start/Stop key while using the Semi-automatic Cleaning process. This stops the cleaning process.
- Page 18 17. After both steps have run, the second signal tone sounds. 18. Clean thoroughly behind the fan guard. Clean the fan guard in a sink or dishwasher. Remove the fan guard. See Figure 9-1. a. Push the fan guard lock in. Do NOT use the core temperature sensor (probe).
- Page 19 d. 3 = heavy soiling e. 4 = heavy soiling with Shine+ 10. Press the "Functions menu" button to con rm that Fully automatic cleaning starts. 11. Open the appliance door when prompted by the system, ensure that the oven is empty and close the appliance door so the the combi steamer starts the fully automatic cleaning program.
-
Page 20: Signal Tone
MINI SETUP NOTES: The various setup options are described in detail below. You can exit the menu at any time by pressing the Start/Stop key. To use the Setup Menu: 1. Press the Smart Key. 2. Various options appear in the display. 3. - Page 21 D. Date To set the Date from the Setup Menu: • If the power is o for more than three days, the date must be re-entered 1. Select “Date” with the Selector Dial. 2. Con rm by pressing the Smart Key. 3.
-
Page 22: Factory Default Settings
Select a di erent network address for each appliance. • The network address is required for the use of PC Control, PC-HACCP and the Convotherm by Cleveland Service System. To set the Network Address from the Setup Menu: 1. Use the Selector Dial to select “Network Address”... -
Page 23: Troubleshooting
A. Error Diagnosis System • Convotherm by Cleveland MINI Oven-Steamers are equipped with an error diagnosis system. 1. If an error occurs, the system displays an error code and a description of the error. 2. To continue operating, emergency operation is available (see below). -
Page 24: Error Messages And Remedies
B. Error Messages and Remedies Error Message on display Possible cause Remedy Not enough water Water valve closed Open water valve Solenoid valve dirt filter contaminated Remove and clean filter Solenoid valve fault Call for Service Connection area temperature Connection area ventilation fault Allow MINI to cool, or continue too high cooking at a lower oven... - Page 25 Operating Irregularities not having Error Messages (Continued) Error Possible cause Remedy Water inside the oven Drain blocked Descale Steam or water running out of base of Drain connection blocked or covered Remove object appliance (condenser). Drain blocked Rinse condenser and drain thoroughly, clean/check own drain system White or black marks inside oven Incorrect cleaning agent...
-
Page 26: Chapter 12 Emergency Operation
CHAPTER 12 EMERGENCY OPERATION • To continue to use your Convotherm by Cleveland MINI Oven-Steamer in the case of an error which cannot be solved immediately, an “Emergency Operation” function is available. This allows you to use at least some of the appliance functions despite a malfunction. - Page 27 B. Emergency Operation Methods X: Operation possible –: Operation not possible Error Message on display Steam Combi Retherm Cook Delta- & Hold Not enough water up to 356° F Connection area temp. up to 284° F up to up to up to up to too high...
-
Page 28: Cabinet Assembly
CABINET ASSEMBLY C2618931 6mm ID hose Cooling fan C7012302 baffle. Phillip screw 111111 1/4 20x1/2" SS C2016302 112138 Hose C8017012 8 m nut Leg Assembly C2619058 Leg Kit 113640 C7011060 C7011060 113376 112748 113374 112747... - Page 29 CONTROL PANEL ASSEMBLY EASY TOUCH Before S/N 1110230000900 FKC2128695...
- Page 30 CONTROL PANEL ASSEMBLY EASY TOUCH After S/N 1110230000900 FKC2128695...
- Page 31 STANDARD CONTROL PANEL ASSEMBLY...
-
Page 32: Electrical Panel Assembly
ELECTRICAL PANEL ASSEMBLY C5118285... - Page 33 CONTROL RELAY BOARD WIRE INSERTION VIEW A10:X16...
- Page 34 AC DRIVE BOARD TRIM POTS ARE TO BE SET AS SHOWN...
-
Page 35: Back Panel
BACK PANEL Part no. description 300689 CABLE,POWER,3PH,COMBI,MINI 300690 CABLE;POWER;OES;6.08; 1 PHASE 300971 ASSY, PLUG AND CORD, 1PH 10GA SO CORD, 6 50P PLUG 300972 ASSY, PLUG AND CORD, 3PH 10GA SO CORD, L15 30P... - Page 36 Part no. description 300689 CABLE,POWER,3PH,COMBI,MINI 300690 CABLE;POWER;OES;6.08; 1 PHASE 300971 ASSY, PLUG AND CORD, 1PH 10GA SO CORD, 6 50P PLUG 300972 ASSY, PLUG AND CORD, 3PH 10GA SO CORD, L15 30P...
- Page 37 OES 3.10 DOOR ASSEMBLY...
-
Page 38: Door Assembly
OES 6.10 Mini R H Door Assembly C2527089 C2529771... - Page 39 OES 6.10 Mini Door Assembly C2529775...
-
Page 40: Fan Motor Assembly
FAN MOTOR ASSEMBLY motor wire harness 300772... - Page 41 CONDENSATE BOX...
-
Page 42: Water Valve Assembly
Water Valve Assembly FK1132281... -
Page 43: Regulator Assembly
REGULATOR ASSEMBLY FK1132281 3.10 / 6.10 MINI FK1132282 6.20/10.10/10.20 FK1132283 12.20 FK1132284 20.20 Set at 17 P.S.I. - Page 44 OES 3.10 MINI LIGHT ASSEMBLY...
- Page 45 OES 6.10 MINI LIGHT ASSEMBLY...
- Page 46 CLEANING PUMP ASSEMBLY S113158...
- Page 47 OES 3.10 W/WASH WATER FLOWCHART ITEM DESCRIPTION ITEM DESCRIPTION OVEN FAN MOTOR SOLENOID CONDENSATE OVERFLOW CONDENSATE DRAIN STEAM INJECTION CONDENSATE BOX RINSE CONDENSATE BOX GASKET INJECTION REGULATOR ELEMENT INJECTION PRESSURE GUAGE WASH SPRAY ARM INJECTION PRESSURE SWITCH RINSE SPRAY HEAD FLOW REGULATOR WASH PRESSURE SWITCH CONDENSATE SPRAY NOZZLE...
Need help?
Do you have a question about the 3.10 MINI COMBI Series and is the answer not in the manual?
Questions and answers