Samsung HW-M550 User Manual
Hide thumbs
Also See for HW-M550:
- Full manual (631 pages) ,
- User manual (478 pages) ,
- Full manual (82 pages)
Table of Contents
Advertisement
Quick Links
Advertisement
Table of Contents

Related Manuals for Samsung HW-M550


Summary of Contents for Samsung HW-M550
- Page 1 USER MANUAL HW-M550...
- Page 2 Safety InforMatIon Safety WarnInGS CaUtIon • TO PREVENT ELECTRIC SHOCK, MATCH WIDE TO REDUCE THE RISK OF ELECTRIC SHOCK, DO BLADE OF PLUG TO WIDE SLOT, FULLY NOT REMOVE THE COVER (OR BACK). INSERT. NO USER-SERVICEABLE PARTS ARE INSIDE. • This apparatus shall always be connected to a REFER SERVICING TO QUALIFIED SERVICE AC outlet with a protective grounding PERSONNEL.
- Page 3 However, if there is no alternative to cutting off the 2. During thunderstorms, disconnect the AC plug from the wall outlet. Voltage peaks due plug, remove the fuse and then safely dispose of the plug. Do not connect the plug to a mains to lightning could damage the unit.
-
Page 4: Table Of Contents
You can access the customer support centre by scanning the QR code. To see the manual on your PC or mobile device, download the manual in document format from the website. (http://www.samsung.com/support) Design and specifications are subject to change without prior notice. ContentS... - Page 5 Method 2. Connecting Wirelessly ------------------------- – Connecting a TV via Bluetooth ------------------------- Connecting an external Device Connecting using an HDMI Cable ------------------------- Connecting using an Optical or Analogue Audio (AUX) Cable ------------------------- Connecting a USB Software Update ------------------------- Connecting a Mobile Device Connecting via Bluetooth ------------------------- Using the remote Control...
-
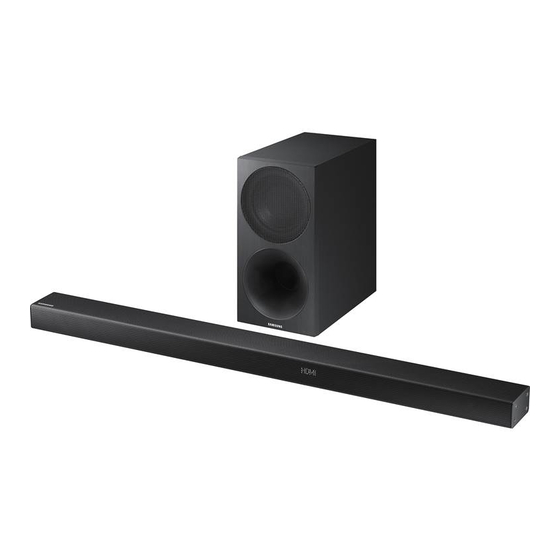
Page 6: Checking The Components
4. • For Soundbar wall mounting components, see page 18. • Micro USB to USB adapter and HDMI cables are sold separately. To purchase, contact a Samsung Service Centre or Samsung Customer Care. Inserting Batteries before using the remote Control (aa batteries X 2) Slide the battery cover in the direction of the arrow until it is completely removed. -
Page 7: Product Overview
02 ProDUCt oVerVIeW front Panel / right Side Panel of the Soundbar right Side of the Soundbar Position the product so that the SAMSUNG logo Volume is located on the top. Power Display Bottom Panel of the Soundbar DIGITAL AUDIO IN... -
Page 8: Connecting The Soundbar
03 ConneCtInG tHe SoUnDBar Connecting electrical Power Use the power components (1, 2, 3) to connect the units to electrical outlets in the following order: 1.) Subwoofer 2.) Soundbar Main Unit. See the illustrations below. • For more information about the required electrical power and power consumption, refer to the label attached to the product. -
Page 9: Connecting The Soundbar To The Subwoofer
Soundbar unit is connected properly. Connect again. See the instructions for Connection failed manual connection on page 6. Red and See the contact information for the Blinking Malfunction blue Samsung Service Centre in the manual. ENG - 5... -
Page 10: Manually Connecting The Subwoofer If Automatic Connection Fails
• If the connection process fails, the blue indicator will flash continuously. Go to Step 1 and start again. expand to true wireless surround sound by connecting the Samsung Wireless rear Speaker Kit (SWa-8500S) to your Soundbar (Sold separately). for more information, see the Samsung Wireless rear Speaker Kit manual. -
Page 11: Connecting To Your Tv
04 ConneCtInG to yoUr tV Hear TV sound from your Soundbar through wired or wireless connections. • When the Soundbar is connected to a selected Samsung TVs, the Soundbar can be controlled using the TV’s remote control. – When using optical cable, this feature can be supported by 2017 Samsung Smart TVs that support Bluetooth. -
Page 12: Connecting Using An Optical Cable
(Source) button on the right side panel or remote control, and then select the “D.In” mode. • When the Soundbar is connected to a Samsung smart TV released in 2017 or later, the Bluetooth POWER function automatically turns on to enable the Soundbar to be controlled with the TV remote control. -
Page 13: Method 2. Connecting Wirelessly
3. Select Bluetooth mode on the TV. (For more information, see the TV’s manual.) 4. Select “[aV] Samsung Soundbar Mxxx M-Series” from the list on TV’s screen. An available Soundbar is indicated with “need Pairing” or “Paired” on the TV Bluetooth device list. - Page 14 What are the Bt reaDy and Bt PaIrInG statuses? • Bt reaDy : In this mode, you can search for previously connected TVs or connect to the Soundbar from a previously connected mobile device. • Bt PaIrInG : In this mode, you can connect to a new device (while in “Bt” mode, press and hold the (Source) button for more than 5 seconds on the right side of the Soundbar or on the remote control.) noteS...
-
Page 15: Connecting An External Device
05 ConneCtInG an eXternaL DeVICe Connect to an external device via a wired or wireless network to play the external device’s sound through the Soundbar. Connecting using an HDMI Cable Bottom of Soundbar external Device HDMI IN HDMI OUT HDMI Cable (not supplied) HDMI OUT (TV-ARC) HDMI IN... -
Page 16: Connecting Using An Optical Or Analogue Audio (Aux) Cable
Connecting using an optical or analogue audio (aUX) Cable right Side of the Soundbar BD / DVD player / Set-top box / Game console DIGITAL AUDIO IN (OPTICAL) OPTICAL OUT optical Cable (not supplied) USB (5V 0.5A) - AUDIO - AUX IN audio (aUX) Cable (not supplied) -
Page 17: Connecting A Usb
2.0 USB jack (Type A) on the other end to the micro USB jack on your Soundbar. • Micro USB to USB adapter Cable is sold separately. To purchase, contact a Samsung Service Centre or Samsung Customer Care. -
Page 18: Connecting A Mobile Device
4. Play music files from the device, connected via Bluetooth, through the Soundbar. If the device fails to connect • If the previously connected Soundbar listing (e.g. “[aV] Samsung Soundbar Mxxx M-Series”) appears in the list, delete it. • In “Bt” mode, press and hold the (Source) button for more than 5 seconds on the right side panel of the Soundbar or on the remote control to switch to “Bt PaIrInG”... -
Page 19: Using The Remote Control
08 USInG tHe reMote ControL How to Use the remote Control Turns the Soundbar on and off. Power You can select from treBLe, BaSS, or aUDIo SynC. • To control the volume of the treble or bass Sound Control sound, select treBLe or BaSS in Sound Settings, and then adjust the volume between -6~+6 by using the Up/Down buttons. - Page 20 • If you press the Bluetooth PoWer button again to turn off the BT function, “off-BLUetootH PoWer” appears in the Soundbar’s display. • If the “D.In” mode is on and the Soundbar is connected to a Samsung smart TV released in 2017 or later, the Soundbar can be controlled with the TV remote control.
-
Page 21: Adjusting The Soundbar Volume With A Tv Remote Control
• After installing the Soundbar, you can adjust the Soundbar’s volume using the IR remote control that came with a Samsung TV. (If you do not want to use this function, when the Soundbar is on, press and hold the Surround button for 5 seconds. “off-tV reMote” appears in the Soundbar’s display and the function turns off.) -
Page 22: Installing The Wall Mount
09 InStaLLInG tHe WaLL MoUnt Installation Precautions • Install on a vertical wall only. • Do not install in a place with high temperature or humidity. • Verify whether the wall is strong enough to support the product’s weight. If not, reinforce the wall or choose another installation point. - Page 23 1. Place the Wall Mount Guide against the wall 3. Push a pen tip or sharpened pencil tip surface. through the centre of the a-tyPe images on • The Wall Mount Guide must be level. each end of the Guide to mark the holes for •...
- Page 24 6. Use the two Screws (M4 x L12) to attach both • The left and right mounts are different shapes. Make sure to position them Bracket-Wall Mount L and r to the correctly. Soundbar’s bottom. For a proper fit, make sure to align the bumps on the Soundbar to the holes on the brackets.
-
Page 25: Detaching The Soundbar From The Wall
Detaching the Soundbar from the Wall 1. To separate the Soundbar from the wall mount, push it in the direction of arrow, tilt it up slightly, and then pull it away from the wall as shown. • Do not hang onto the installed unit and avoid striking or dropping the unit. -
Page 26: Troubleshooting
10 troUBLeSHootInG Before seeking assistance, check the following. the unit will not turn on. Is the power cord plugged into the outlet? ; Connect the power plug to the outlet. a function does not work when the button is pressed. Is there static electricity in the air? ;... -
Page 27: Licence
11 LICenCe 12 oPen SoUrCe LICenCe notICe To send inquiries and requests regarding open sources, contact Samsung via Email Manufactured under license from Dolby (oss.request@samsung.com). Laboratories. Dolby, Dolby Audio, Pro Logic, and the double-D symbol are trademarks of 13 IMPortant Dolby Laboratories. -
Page 28: Specifications And Guide
25mW at 5.725GHz – 5.825GHz noteS • Samsung Electronics Co., Ltd reserves the right to change the specifications without notice. • Weight and dimensions are approximate. • For more information about the power supply and power consumption, refer to the label attached to the product. - Page 29 Business users should contact their supplier and check the terms and conditions of the purchase contract. This product and its electronic accessories should not be mixed with other commercial wastes for disposal. For information on Samsung’s environmental commitments and product specific regulatory obligations e.g. REACH, WEEE, Batteries, visit: http://www.samsung.com/uk/aboutsamsung/samsungelectronics/corporatecitizenship/data_corner.html...
- Page 30 EIRE UNITED KINGDOM EIRE This Samsung product is warranted for the period of twelve (12) months from the origi- his Samsung product is warranted for the period of twelve (12) months from the origi- beyond the control of Samsung. beyond the control of Samsung.
- Page 31 © 2017 Samsung Electronics Co., Ltd. All rights reserved. Contact SaMSUnG WorLD WIDe If you have any questions or comments relating to Samsung products, please contact the SAMSUNG customer care Centre. Country Contact Centre Web Site Country Contact Centre ...
Need help?
Do you have a question about the HW-M550 and is the answer not in the manual?
Questions and answers