Table of Contents
Advertisement
Advertisement
Table of Contents

Subscribe to Our Youtube Channel
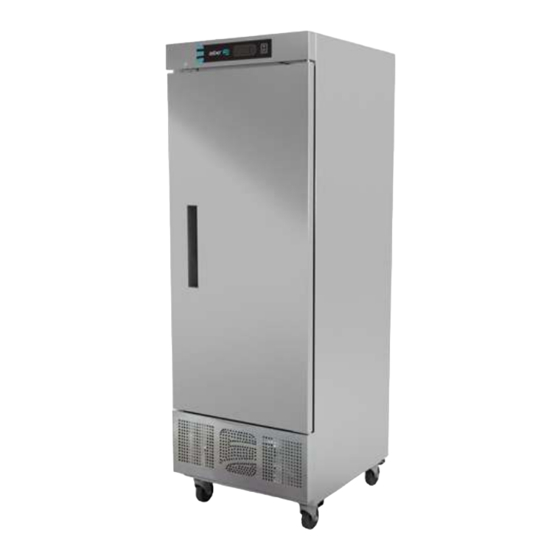
Related Manuals for ASBER ARR-17


Summary of Contents for ASBER ARR-17
- Page 1 REFRIGERATORS AND FREEZERS Manual for installation, use, and maintenance...
-
Page 2: Table Of Contents
REACH-INS SERVICE MANUAL/Rev. JUN. 2015 Contents RECEIVING AND INSPECTING THE EQUIPMENT ..................3 SPECIFICATIONS ............................ 4 DIMENSIONS ............................6 INSTALLATION ............................. 10 4.1 UNCRATING ............................. 10 4.2 LOCATION ............................10 4.3 DATA PLATE ............................. 11 4.4 INSTALLATION OF CASTORS OR OPTIONAL LEGS ................11 4.5 LEVELING ............................ -
Page 3: Receiving And Inspecting The Equipment
A NOTE FROM OUR QUALITY CONTROL MANAGER CONGRATULATIONS ON YOUR NEW PURCHASE. WE WOULD LIKE TO WELCOME YOU TO THE ASBER TEAM. THE UNIT IN FRONT OF YOU IS A GREAT PIECE OF EQUIPMENT THAT WILL BECOME ONE OF YOUR MOST RELAIBLE TOOLS IN YOUR... -
Page 4: Specifications
Capac. BTU'S Pressure in Super- Ref. Ref. Ship Model (Cu.Ft.) Shvls Suction Line* Heat** Amount Type Weight SetPoint Cut in ARR-17 1666 0° C/32°F 5°C/41°F 10-16PSIG 7°C/13°F 9.8 oz R-134a ARR-23 1666 0°C/32°F 5°C/41°F 10-16PSIG 7°C/13°F 11.3oz R-134a R-134a ARR-49 2104 0°C/32°F... - Page 5 100 ft 120 ft 140 ft 5-15P 15 amp 14 AWG 14 AWG 12 AWG 12 AWG 12 AWG 10 AWG ARR-17 2P+TT 10 amp 14 AWG 14 AWG 14 AWG 14 AWG 14 AWG 12 AWG 5-15P 15 amp...
-
Page 6: Dimensions
REACH-INS SERVICE MANUAL/Rev. JUN. 2015 DIMENSIONS ARR/ARF - 23 Page6... - Page 7 REACH-INS SERVICE MANUAL/Rev. JUN. 2015 ARR/ARF – 49 Page7...
- Page 8 REACH-INS SERVICE MANUAL/Rev. JUN. 2015 Page8...
- Page 9 REACH-INS SERVICE MANUAL/Rev. JUN. 2015 Page9...
-
Page 10: Installation
REACH-INS SERVICE MANUAL/Rev. JUN. 2015 INSTALLATION UNCRATING Remove the outer packaging. Cut the 4 clamps that hold the refrigerator to the skid. Lift the unit off the skid. If machine was laid down during this operation, remember to leave the cabinet up right for 24 hours before connecting to power source. -
Page 11: Data Plate
REACH-INS SERVICE MANUAL/Rev. JUN. 2015 DATA PLATE The data plate is located inside the cabinet, near the top front, left corner. Under any circumstances should the data plate be removed from the unit. The data plate is essential to identify the particular features of your machine and i t is of great benefit to installers, operators, and maintenance personnel. -
Page 12: Leveling
REACH-INS SERVICE MANUAL/Rev. JUN. 2015 For leveling, insert shims between the castor and the frame rail. Install the desired number of shims. Make sure the slot of the shim is in contact with the threaded stem of thecastor.FIG.2 If more than one shim is used, turn the slot of the shim approximately 90 angles. If shims are installed in line, they may slip out. -
Page 13: Electrical Connections
Do not, under any circumstances, cut or remove the ground prong from the power cord. Asber units must be properly grounded. NEVER USE AN EXTENSION CORD! Asber will not warranty any unit that has been connected to an extension cord. -
Page 14: Shelving Installation
REACH-INS SERVICE MANUAL/Rev. JUN. 2015 SHELVING INSTALLATION Hook shelf rails onto shelf pilasters Position all shelf rails equal in distance from the floor for level shelves Wire shelves are oriented so that cross support bars are facing down Note: Single door Reach-include an air flow guard on the rear of the shelves as well as a lip to maintain an air space at the rear of the cabinet Place shelves on shelf clips, making sure all corners are seated properly. -
Page 15: Electronic Control
REACH-INS SERVICE MANUAL/Rev. JUN. 2015 ELECTRONIC CONTROL After connecting your unit, turn ON rocker switch located next to the controller. The display will light up showing the temperature inside the unit. Also, the compressor and fan icons will flash for a period of three minutes. After this delay the unit will start cooling. - Page 16 REACH-INS SERVICE MANUAL/Rev. JUN. 2015 1. Push the SET button for one (1) second. You should see a flashing number. Release the button. 2. Press the up and down arrows to increase or decrease the set temperature. Then press the set button to save the new set point. Note: The maximum value you can set in the controller is: For refrigerators: 5°C (40°F), for freezers: -16°C (2°F) 3.
-
Page 17: Other Functions
REACH-INS SERVICE MANUAL/Rev. JUN. 2015 For Refrigerators EZY Value Application Temperature in °F Refrigeration Temperature in °C Refrigeration For Freezers EZY Value Application Temperature in °F Freezer Temperature in °C Freezer Temperature in °F Refrigeration Temperature in °C Refrigeration Note: Freezer equipment can be used like a refrigerator by selecting the value of the parameter “EZY”... - Page 18 REACH-INS SERVICE MANUAL/Rev. JUN. 2015 CAREL CONTROL (IR33+) The operating parameters can be modified using the front keypad. Access differs depending on the type: set point, frequently-used parameters (F) and configuration parameters (C). The type of parameter is specified in the table of parameters. Access to the configuration parameters is protected by a password for the configuration parameters that prevents unwanted modifications or access by unauthorised persons.
- Page 19 REACH-INS SERVICE MANUAL/Rev. JUN. 2015 Type C parameters include the type F parameters plus all the other control parameters. Procedure: 1. Press Prg/Mute one or more times to return to the standard display; 2. Press Prg/Mute for more than 3 seconds (if an alarm is active, the Buzzer is muted): the display will show the code PS (Password) and The number 0;...
-
Page 20: Maintenance
REACH-INS SERVICE MANUAL/Rev. JUN. 2015 MAINTENANCE Stainless Steel Care and Cleaning Proper cleaning of stainless steel requires soft cloths or plastic scouring pads. Never use steel pads, wire brushes, or scrapers! Cleaning solutions need to be alkaline or non-chloride cleaners. Any cleaner containing chlorides will damage the protective film of the stainless steel. -
Page 21: Gasket
REACH-INS SERVICE MANUAL/Rev. JUN. 2015 Never use high pressure water for cleaning t h e co n d en s er co i l . Water can damage the electrical components located near or at the condenser coil. Do not place filter material in front of condenser coil. -
Page 22: Drain
REACH-INS SERVICE MANUAL/Rev. JUN. 2015 DRAIN Each unit comes equipped with a drain pan located outside the unit. The drain pan catches the condensation produced inside the evaporator coil. If the drain hose become loose or disconnected from moving or bumping the unit, you may find a puddle of water inside/outside of the unit. -
Page 23: Wiring Diagrams
REACH-INS SERVICE MANUAL/Rev. JUN. 2015 WIRING DIAGRAMS ARF-17 Page23... - Page 24 REACH-INS SERVICE MANUAL/Rev. JUN. 2015 ARR-23 Page24...
- Page 25 REACH-INS SERVICE MANUAL/Rev. JUN. 2015 ARF 23 Page25...
- Page 26 REACH-INS SERVICE MANUAL/Rev. JUN. 2015 Page26...
- Page 27 REACH-INS SERVICE MANUAL/Rev. JUN. 2015 ARF 49 ARR 23-1G Page27...
- Page 28 REACH-INS SERVICE MANUAL/Rev. JUN. 2015 ARR 23 -1G Page28...
- Page 29 REACH-INS SERVICE MANUAL/Rev. JUN. 2015 ARR 49-2G Page29...
- Page 30 REACH-INS SERVICE MANUAL/Rev. JUN. 2015 ARR-72 Page30...
-
Page 31: Trouble Shooting
REACH-INS SERVICE MANUAL/Rev. JUN. 2015 TROUBLE SHOOTING Follow the next steps before requesting warranty service. Failure to do so, may result in service charges for you and may void your warranty: 1) Refrigerator doesn’t work: a. Check that the machine is still connected. b. -
Page 32: Limited Warranty
Equipment or any parts therefore for any cause shall be deemed to the fist-end-user purchaser (the “User) that the Asber brand equipment sold waived unless submitted by the User to Asber within (30) days after the date the hereunder, except for parts and accessories which carry the warranty of a User discovered, or should have discovered, the claim. - Page 33 San Luís Potosí, S.L.P. México C.P. 78395 Teléfono Planta S.L.P.: + 52 (444) 137 0500 Teléfono México D.F.: + 52 (55) 5082 5825 Sin costo: 01 800 00 ASBER Página Web: www.asberprofessional.com ASBER 13105 NW 47th Ave Miami, Fl. 33054 Phone: (305) 477 1680 http//:www.Asbercommercial.com...
Need help?
Do you have a question about the ARR-17 and is the answer not in the manual?
Questions and answers