Advertisement
Quick Links
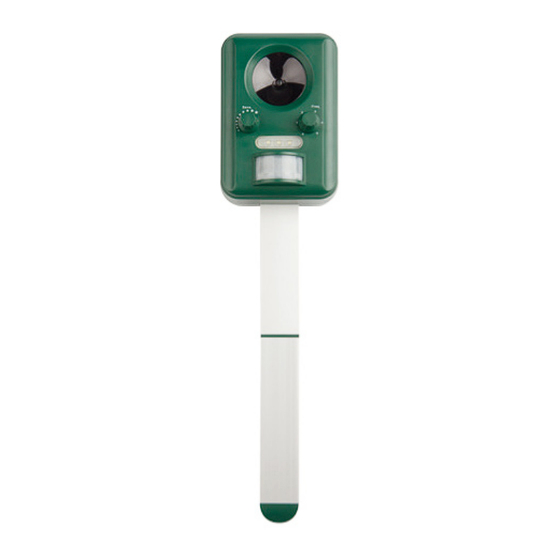
Solar animal repeller Geti GPR150
06428158
Read these instructions carefully before using the device!
1) Product description
The solar repeller is an ideal way to get rid of uninvited animal visitors in your garden. It
is a combination of a detection system that detects movements and triggers strong ultra-
sonic waves and sharp stroboscope light. Animals have a hard time adjusting to unpleas-
ant sounds and harsh light, so it is very effective at repelling them.
2) Placement and operation
Sound and light are activated when movement is detected in front of the repeller. The
device detects movement up to a distance of 8 m. It happens that people can sometimes
hear the sound. Place the repeller outside the area of human movement to avoid any
problems. Do not place this device in playgrounds.
a) Attach the tip to the body of the device and insert the repeller into the ground.
The ground must not be frozen. It is easier to install it into a wet ground.
b) There is a hook on the back of the device and the device can also be hung (e.g. on a tree,
bush, etc. – however, installation instructions must be followed). Install the repeller so
that the front faces the guarded area and the animal has a chance to retreat. If installed
inappropriately, the animal may be injured or the repeller may not fully function.
3) Set up
● Left wheel SENS: use to set the sensitivity and distance of the detection. Turning clock-
wise increases the detection area (sensitivity).
● Right wheel FREQ: frequency settings. Turning clockwise will increase the frequency.
– Position 0: Off
– Position 1: 13.5 – 17.5 kHz (repels mice and small rodents)
– Position 2: 15.5 – 19.5 kHz (repels large dogs and foxes)
– Position 3: 19,5 – 23,5 kHz (repels small dogs, cats, birds)
– Position 4: strong flashing light
– Position 5: combination of alternating frequencies and strong flashes. This mode is
only the most effective.
Warning: To change settings, you must always start from the 0-OFF position and then go
directly to the function you want to use. (if you switch from position 5 directly to position 3,
the set frequency will be different from the real position 3).
4) Batteries
This device has a built-in solar panel for maintaining and partially recharging batteries.
Batteries are included. If you need to replace the batteries, unscrew the cover on the back
of the device. Make sure the polarity is correct. Check that the batteries are fully charged
before inserting them. Close the battery compartment and secure with screws. In case of
a drop in battery voltage, the red LED light on the device starts to flash. In this case batteries
must be recharged using the rechargeable connector included in the package.
The red LED light flashes during recharging until the charging process is complete. Full red
light is on until the battery needs to be recharged again. Battery discharge is influenced by
number of launches and the location of the device outside direct sunlight. On days without
direct sunlight or shorter sunlight exposure or with frequent launches, the necessary battery
charging may not occur and therefore it is necessary to charge the device as needed using the
USB cable included in the packaging.
Safety line
Aluminium spike
5) Safety warning
● Do not install the repeller in frozen soil, mechanical damage may occur.
● If the ground is hard, dig a hole, insert the repellent, cover and press the soil around it.
● If you won´t be using the device for a long time, remove the batteries.
● Do not attempt to repair the device by yourself.
● The device is not a toy; it should not be handled by children.
DC socket
Connector for
6) Technical parameters
EN
Power supply:
Changable frequencies: 13,5 – 23,5 kHz
Sound pressure:
Detection angle:
7) Important environmental information about this product
This symbol on the device or the package indicates that disposal of the device after
its lifecycle could harm the environment. Do not dispose of the unit (or batteries) as
unsorted municipal waste; it should be taken to a specialized company for recycling.
This device should be returned to your distributor or to a local recycling service.
Respect the local environmental rules.
Solární odpuzovač zvířat Geti GPR150
Před používáním přístroje si důkladně přečtěte návod k použití!
1) Popis přístroje
Solární odpuzovač je ideální způsob, jak zbavit Vaši zahradu nezvaných zvířecích návštěv-
níků. Je kombinací detekčního systému, který detekuje pohyby a při detekci pohybu
spouští silné ultrazvukové vlny a ostré světlo na principu stroboskopu. Zvířata si na ne-
příjemný zvuk a ostré světlo jen těžko zvyknou, proto je jeho působení velmi efektivní.
2) Umístění odpuzovače a uvedení do provozu
Zvuk a světlo se aktivují pohybem před odpuzovačem. Přístroj detekuje pohyb až do
vzdálenosti 8 m. Ultrazvuk je při plašení velmi účinný. Stává se, že lidé jej mohou částečně
slyšet. Umístěte tedy odpuzovač mimo oblast pohybu lidí, vyhnete se tak nepříjemnostem.
Tento přístroj neumisťujte na dětská hřiště.
a) Na tělo přístroje nasaďte hrot a zapíchněte odpuzovač do země. Zem nesmí být zmrzlá.
Do mokré země se instalace hrotu provádí snadněji.
b) Na zadní straně přístroje je háček, přístroj lze i pověsit (např. na strom, keř atd. – je však
nutné dodržet pokyny pro instalaci). Odpuzovač instalujte tak, aby přední strana směřo-
vala na hlídaný prostor a zvíře mělo možnost ústupu. Při nevhodné instalaci může dojít
ke zranění zvířete nebo nemusí odpuzovač plnit zcela svou funkci.
3) Nastavení přístroje
● Levé kolečko SENS: Slouží k nastavení citlivosti a vzdálenosti detekce. Otočením po
směru hodinových ručiček zvětšíte oblast detekce (citlivost).
● Pravé kolečko FREQ: Nastavení frekvence. Otočením po směru hodinových ručiček zvý-
šíte frekvenci.
– Poloha 0: vypnuto
– Poloha 1: 13,5 – 17,5 kHz (odpuzuje myši a drobné hlodavce)
– Poloha 2: 15,5 – 19,5 kHz (odpuzuje velké psy a lišky)
– Poloha 3: 19,5 – 23,5 kHz (odpuzuje malé psy, kočky, ptáky)
– Poloha 4: silné záblesky
– Poloha 5: kombinace střídajících se frekvencí a silných záblesků. Tento režim je nej-
účinnější.
Upozornění: Pokud chcete změnit nastavení, musíte vždy začít z pozice OFF a poté přejít
přímo na funkci, kterou chcete využívat. (pokud přepnete z polohy 5 přímo na polohu 3, nas-
tavená frekvence bude odlišná od reálné pozice 3).
4) Baterie
Tento přístroj má vestavěný solární panel pro udržování a částečné dobíjení baterií. Bate-
rie jsou součástí balení. Pokud potřebujete baterie vyměnit, odšroubujte kryt na zadní
straně přístroje. Při vkládání nových baterií dbejte na správnou polaritu. Před vložením
baterií zkontrolujte, zda jsou plně nabité. Přihrádku na baterie uzavřete a zajistěte šroubky.
V případě poklesu napětí baterií začne červená LED kontrolka na přístroji blikat. V tomto
případě je nutné baterie nabít pomocí dobíjecího konektoru, který je součástí baleni.
LED kontrolka bliká v průběhu celého procesu dobíjení. Poté svítí plným červeným světlem
do doby, než je baterie potřeba znovu dobít. Na vybíjení baterií má vliv počet spuštění
a umístění přístroje mimo přímý sluneční svit. Ve dnech bez přímého nebo kratšího sluneč-
ního svitu nebo při častém spouštění, nemusí dojít k potřebnému nabíjení baterií a proto je
nutné dle potřeby přístroj nabít pomocí dobíjecího konektoru, který je součástí balení.
Složení hrotu
battery 3x AA NiMh 1,2V / 800mA
80 dB
110° horizontally
Nabíjecí konektor
Místo nasunutí
plašiče na hrot
CZ
Advertisement

Related Manuals for Geti GPR150

Summary of Contents for Geti GPR150
- Page 1 Solar animal repeller Geti GPR150 6) Technical parameters Power supply: battery 3x AA NiMh 1,2V / 800mA Changable frequencies: 13,5 – 23,5 kHz 06428158 Sound pressure: 80 dB Detection angle: 110° horizontally Read these instructions carefully before using the device!
- Page 2 Miesto nasunutie plašiča na hrot prodejní místo, kde jste produkt zakoupili. Solárny odpudzovač zvierat Geti GPR150 5) Bezpečnostné upozornenia Pred používaním prístroja si dôkladne prečítajte návod na použitie! ● Odpudzovač neinštalujte do zamrznutej pôdy, mohlo by dôjsť k mechanickému poško- deniu prístroja.
Need help?
Do you have a question about the GPR150 and is the answer not in the manual?
Questions and answers