JVC KS-AX3500, KS-AX3300 - Power Amplifier Manual
- Instructions (2 pages) ,
- Instructions manual (6 pages)
Advertisement
Thank you for purchasing a JVC product. Please read all instructions carefully before operation, to ensure your complete understanding and to obtain the best possible performance from the unit.
For safety....
- Do not raise the volume level too much, as this will block outside sounds, making driving dangerous.
- Stop the car before performing any complicated operations.
CAUTIONS AND NOTES
This unit is designed to operate on 12 V DC, NEGATIVE ground electrical systems.
- This unit uses BTL (Balanced Trans-formerless) amplifier circuitry, i.e., floating ground system, so please comply with the following:
- Do not connect the "
![]() " terminals of the speakers to each other.
" terminals of the speakers to each other. - Do not connect the "
![]() " terminals of the speakers to the metal body or chassis.
" terminals of the speakers to the metal body or chassis.
- Do not connect the "
- Cover the unused terminals with insulating tape to prevent them from short circuiting.
- When an extension lead is used, it should be as thick and short as possible; connect it fi rmly with insulating tape.
- Be sure to leave an appropriate space between the antenna (aerial) and the wires of this unit.
- When replacing the fuse, only use a 25 A fuse for KS-AX3500 and 30 A fuse for KS-AX3300.
- Do not let pebbles, sand or metallic objects get inside the unit.
- To keep the heat dissipation mechanism running effectively, wipe the accumulated dust off periodically.
- Listening to the tape, radio, CD or MD, etc. with the volume on loud for a long period of time will exhaust the battery, while the engine is turned off or while the engine is idling.
 " terminals of the speakers to each other.
DO NOT disassemble the units since there are no user serviceable parts inside.
INSTALLATION
The following illustration shows a typical installation. However, you should make adjustments corresponding to your specific car. If you have any questions or require information regarding installation kits, consult your "JVC IN-CAR ENTERTAINMENT" car audio dealer or a company supplying kits.

- Mount on a fi rm surface, such as in the trunk room or under the front seat.
- Since heat is generated in this unit, do not mount near infl ammable objects. In addition, mount in an area that will not prevent the unit from dissipating heat.
- Do not mount the unit in the places subject to heat such as near a radiator, in a glove compartment or in insulated areas such as under a car mat that will prevent the unit from dissipating heat.
- When mounting this unit, be sure to use the screws provided. If any other screws are used, there is a risk of loosening the unit or damaging parts inside it.
TERMINAL CONNECTIONS
When making the terminal connections...
Properly fix the terminal with the screw provided by turning it in the direction as illustrated.
Note
When you tighten the screw, make sure that the screw is securely fi xed in place to prevent disconnection of the terminal. Avoid over-tightening as it may cause damage to the screw or its head slot.

POWER SUPPLY


To prevent short circuits while making connections, keep the battery's negative terminal disconnected.
- When using a power cord, be sure to place the 30 A fuse near the battery as shown.
- Connect the lead wire (purchased separately) through which power is supplied directly to the battery's "
![]() " terminal only after all the other connections have been made.
" terminal only after all the other connections have been made.
 " terminal only after all the other connections have been made.
The lead wire connected to the + B terminal of this unit should have a cross-section of more than 5 mm2. Be sure to use a ring terminal (optional) for secure connection.
- If you have any questions regarding the thickness of the power cord, etc., consult your nearest "JVC IN-CAR ENTERTAINMENT" car audio dealer.
When connecting a unit without a remote lead (a), connect to the accessory circuit of the car which is activated by the ignition switch. In this case, noise may occur when the car receiver is turned on or off. To avoid this noise, do not turn on or off the car receiver itself. You can turn on or off the car receiver along with the on/off operation of the ignition switch.
If you use JVC car receiver with a remote lead (b), connect to the REM terminal on this unit.
If the POWER/PROTECTOR lamp lights in red, it indicates incorrect speaker wiring or connections. In normal status, the POWER/PROTECTOR lamp lights in green. Make sure to correct speaker wiring and other connections.
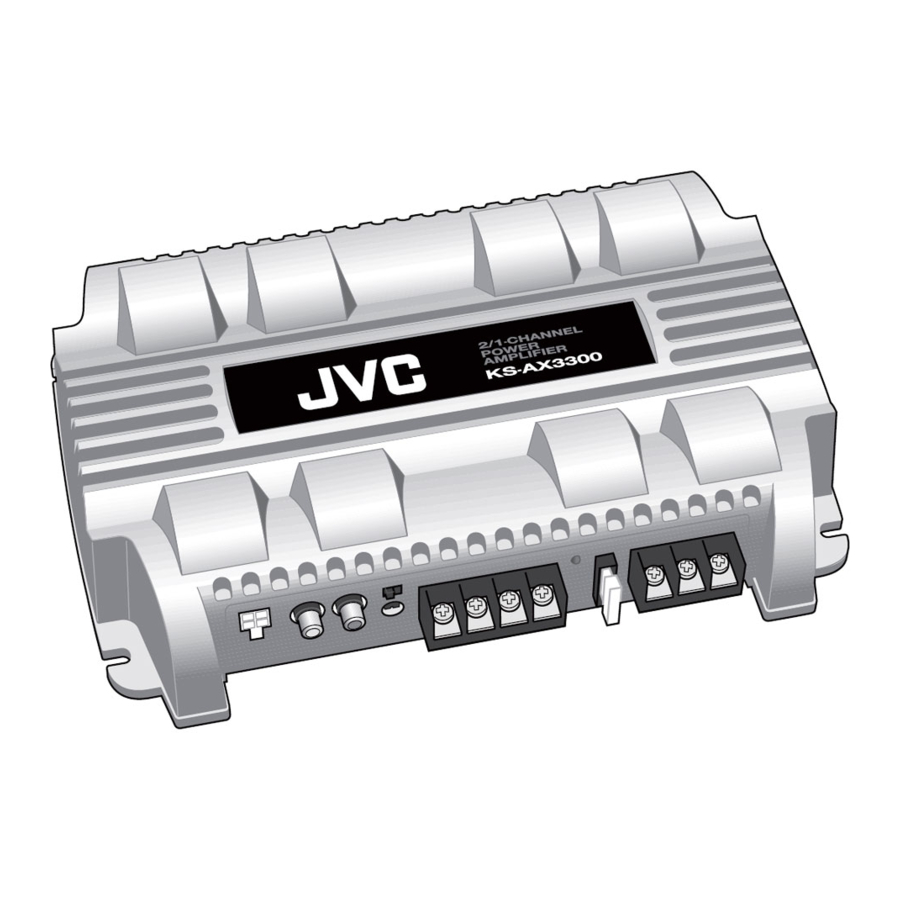
CONTROLS

- Crossover fi lter switch
OFF: Normally, set to this position. (Preset to this position at the factory.)
ON: (For LPF switch) Set to this position when you want to turn on the LPF (Low-pass fi lter) switch. You can use the following terminals for a subwoofer system.
KS-AX3500: REAR SPEAKER OUTPUT
KS-AX3300: SPEAKER OUTPUT
(For HPF switch—only for KS-AX3500)
Set to this position when you want to turn on the HPF (High-passfilter) switch. The low frequency signals are not applied to the left/ right speaker when a subwoofer is connected.
- Input LEVEL controller
The input level can be adjusted with this control when this unit is connected to other source equipments. Turn it in the clockwise direction when the output level of the car audio seems low.
SPEAKER SYSTEMS
This amplifier provides two types of speaker connections: Normal mode and Bridge mode. You can choose either type of connections depending on the speakers confi guration equipped on your car.
Make sure to comply with the following notes:
- Be sure not to connect the "
![]() " terminals of the speakers to a common point.
" terminals of the speakers to a common point. - If the ground wire is common to both left/right and front/rear speaker wirings, this unit cannot be used. Always use the independent lead wires for the speakers to be used. In this case, redo the wirings.
- Use the speakers with an impedance of 2 Ω to 8 Ω (4 Ω to 8 Ω: when used in Bridge mode).
- Use the speakers which have suffi cient power to the unit.
 " terminals of the speakers to a common point.
SPEAKER CONNECTIONS
Connection varies depending on the number of the speakers used in your car. Select the appropiate connection referring to the diagrams below.
Before connecting:Securely connect all the parts. If the connections are loose, due to contact resistance etc., heat will break out and may cause an accident. Secure and cover the cords with insulating tape and run them under the car mats.
- When your receiver is equipped with Line Output, connect the Line Output (through the receiver) to the LOW INPUT jacks on this unit.
- When your receiver is NOT equipped with Line Output, connect the speaker connector (through the receiver) to the HIGH INPUT terminal on this unit.

*1 Not supplied for this unit. *2 BRIDGE MODE: Be sure to connect the line output from the receiver to the left (L) jack on this unit.
TROUBLESHOOTING
For more details, consult your "JVC IN-CAR ENTERTAINMENT" car audio dealer.
The POWER/PROTECTOR lamp does not light.
- Confirm if the fuse is blown.
- Confirm if the ground lead is connected securely to a metal part of the car.
- Make sure that the equipment connected to this unit is turned on.
- Use a relay if your system employs too many amplifiers.
- Confirm the battery voltage (11 V to 16 V).
The POWER/PROTECTOR lamp lights in red and/or the unit heats up abnormally.
- Confirm if the impedance of the connected speaker is suitable.
- Confirm if the speaker wirings are short-circuited.
- Leave the unit turned off for a while as it cools down.
No sound is heard.
- Confirm if the POWER/PROTECTOR lamp lights in green.
- Is the remote turn-on line lead connected correctly?
- Are RCA pin cords connected to the LOW INPUT jacks?
- Is the speaker input connector from the receiver connected to the HIGH INPUT terminal?
- Is this amplifier grounded?
Alternator noise is heard.
- Keep the power connecting leads away from the RCA pin cords.
- Keep the RCA pin cords away from other electrical cables in the car.
- Confirm if the ground lead is connected securely to a metal part of the car.
- Confirm if the negative speaker leads are touching the car chassis.
- Confirm if the noise originates in the receiver.
- Replace the plugs or use plugs with load resistors.
- Connect a bypass capacitor across the accessory switches (horn, fan, etc.).
Noise when connected to AM (MW/LW) tuner.
- Move the speaker and power leads away from the antenna (aerial) lead.
- Depending on the manufacturer and model of the car, speaker wiring may have been finished when purchased. If the ground wire is common to both left and right speakers, this unit cannot be used. In this case, redo the speaker wiring.
SPECIFICATIONS
Power Output
KS-AX3500: 55 W RMS × 4 channels at 4 Ω and ≤ 1% THD + N
KS-AX3300: 65 W RMS × 2 channels at 4 Ω and ≤ 1% THD + N
Signal-to-Noise Ratio 86 dBA (reference: 1 W into 4 Ω)

Maximum Power Output
KS-AX3500: 580 W
KS-AX3300: 320 W
Load Impedance
4 Ω (2 Ω to 8 Ω allowance)
4 Ω (4 Ω to 8 Ω allowance) (Bridge mode)
Frequency Response
5 Hz to 50,000 Hz ( +0, –3 dB)
Input Sensitivity/Impedance 1 V/20 kΩ (0.3 V to 6 V, variable)
Distortion
Less than 0.005% (at 1 kHz)
Power Requirement
DC 14.4 V (11 V to 16 V allowance)
Grounding system
Negative ground
Dimensions (W/H/D)
KS-AX3500: 347 mm × 54 mm × 222 mm (13- 11 / 16 in. × 2- 3 / 16 in. × 8- 3 / 4 in.)
KS-AX3300: 259 mm × 54 mm × 172 mm (10- 1 / 4 in. × 2- 3 / 16 in. × 6- 13 / 16 in.)
Mass (approx.)
KS-AX3500: 2.8 kg (6.2 lbs.)
KS-AX3300: 1.6 kg (3.6 lbs.)
Supplied Accessories
Speaker input connector × 1
Mounting Screw (φ 4.0 × 20 mm ( 13 / 16 in.)) × 4
Design and specifications are subject to change without notice

Documents / ResourcesDownload manual
Here you can download full pdf version of manual, it may contain additional safety instructions, warranty information, FCC rules, etc.
Advertisement


Need help?
Do you have a question about the KS-AX3500 and is the answer not in the manual?
Questions and answers