Advertisement
Quick Links
IMPORTANT - RETAIN FOR FUTURE REFERENCE - READ CAREFULLY.
Tools Needed
Helpline
If you have any problems with this product or require
any replacement fittings please contact Customer
Services Tel: 0333 777 8999
Regrettably self assembly items cannot be returned once assembly is part or fully completed unless the item is found
to be faulty. Should you need to return the unassembled product, please repack in the original packaging.
IMPORTANT
• We suggest you spend a short time reading through this leaflet and then follow the simple step by step instructions.
• Carefully check that you have all parts before beginning assembly.
• Keep fittings out of children's reach and keep children well away from the construction area.
• We recommend that the packaging is used to protect the surfaces during assembly.
• A minimum of
2
persons is required to assemble this product.
• Wall fixings are not included.
• The maximum load this shelf/these shelves can hold is 10 kg.
• Not suitable for use in bathrooms.
• We recommend the use of the wall attachment strap provided for safety reasons.
• Do not use this item if any structual part is broken or missing.
PRODUCT INFORMATION
• Made from MDF with painted finish.
• Made in Poland.
CARE INSTRUCTIONS
• For general cleaning, periodically dust with a soft cloth.
• Do not rub or scrub the surface when cleaning.
• Always use a non-silicone based furniture polish. Silicone in furniture polishes can break down the lacquer finish.
• Use non-silicone beeswax to maintain the shine.
• Do not use furniture polish.
• Use a furniture oil periodically to maintain the finish and prevent the oil from drying out.
• Any spills should be removed immediately with a soft clean damp cloth and dried immediately.
• Ensure the product is protected with mats and coasters when items are placed on the surfaces, to prevent scratching
or damage.
• Do not put hot dishes directly on the surfaces of the item.
• Avoid keeping furniture in direct sunlight or close to any heat sources as this can cause cracking, discolouration or
warping.
• Never drag pieces of furniture across the floor as this will cause damage to the joints.
• All assembly fixings should always be tightened properly and periodically check all fixings and tighten if necessary.
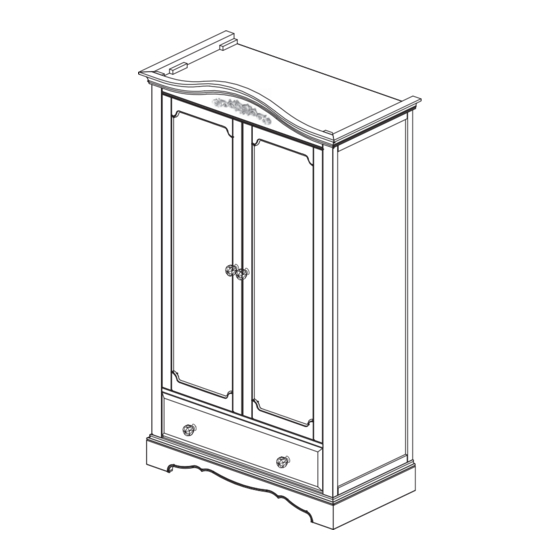
ISABELLA WHITE GENTS ROBE
ASSEMBLY INSTRUCTIONS.
Page 1 of 10
var2 Gents Robe White 01 2014-05-12
Advertisement

Subscribe to Our Youtube Channel
Related Manuals for Next ISABELLA WHITE GENTS ROBE


Summary of Contents for Next ISABELLA WHITE GENTS ROBE
- Page 1 ISABELLA WHITE GENTS ROBE ASSEMBLY INSTRUCTIONS. IMPORTANT - RETAIN FOR FUTURE REFERENCE - READ CAREFULLY. Tools Needed Helpline If you have any problems with this product or require any replacement fittings please contact Customer Services Tel: 0333 777 8999 Regrettably self assembly items cannot be returned once assembly is part or fully completed unless the item is found to be faulty.
- Page 2 FITTINGS B x 34 CA x 4 CB x 30 EA x 2 EB x 12 EC x 4 F x 16 GC x 4 D9,5 ø4x25 mm ø8x42 mm ø15x12 mm ø15x15 mm ø 4x12 mm ø4x16 mm ø4x20 mm Panel Fixator Cambolt...
- Page 3 STEP ONE 1. Insert 8 x cambolts (B) into rails 3 & 4. 2. Insert 10 x cambolts (B) into side panels 1 & 2. 3. I nsert x cam locks C ( B) nto side panels 1 & 2. Ensure the arrow indicators are pointing towards the panel edges when inserting before tightening with a screwdriver.
- Page 4 STEP FOUR 1. Insert 6 x guide hinges (HG) into side panels 1 & 2 tighten with a screwdriver. 2. Insert 2 x hanging rail holders HR ) into side panels 1 & 2 using 2 x screws (EA) tighten with a screwdriver.
- Page 5 STEP SEVEN 1. Attach rail 7 and partition 6 to the side panel 1 and side panel 2. 2. Tighten the camlocks (CB) to lock cambolts (B). 3. Attach the assembled unit to bottom panel 8. 4. Tighten the camlocks (CB) to lock cambolts (B). STEP EIGHT 1.
- Page 6 STEP NINE 1. Insert 6 x cambolts (B) into top panel 10. STEP TEN Attach top panel 10 to the assembled unit and ighten the camlocks (C ) to lock cambolts (B). STEP ELEVEN 1. Attach wooden blocks 11(x2) to side panels 1 & 2 using 4 x screws (JE) and tighten with a screwdriver.
- Page 7 STEP TWELVE 1. Secure back panel 9 using 16 x panel fixators (F) as shown on the pictures. 2. Tighten 4 x screws (RB) to the back of rail 7. 3. Tighten 4 x screws (RD) to the back of partition 6. STEP THIRTEEN 1.
- Page 8 STEP FIFTEEN 1. Attach drawer side panels & 1 to drawer f ront 15 and t ighten the camlocks (C ) to lock cambolts (B). 2. Slide drawer bottom panel into the grooves in the drawer side panels & 1 . .
- Page 9 STEP SEVENTEEN 1. Attach 6 x Cabinet hinges (HB) to the doors 19 & 20 using 12 x screws (EB) and tighten with a screwdriver. 2. Attach 2 x magnetic latches (UB) onto doors 19 & 20 using 4 x screws (LA). STEP EIGHTEEN 1.
- Page 10 1. Push the thin edge of the wedge (T) under the appropriate corner of the wardrobe in order to level up the item. 2. Once levelled, break off unused sections of the wedges. Next Retail Ltd, Desford Road, Leicester, LE19 4AT Page var2 Gents Robe White 01 2014-05-12...
Need help?
Do you have a question about the ISABELLA WHITE GENTS ROBE and is the answer not in the manual?
Questions and answers