Table of Contents
Advertisement
Available languages
Available languages
Quick Links
Opening your life
MANUAL DE USUARIO
Abre puertas de garaje
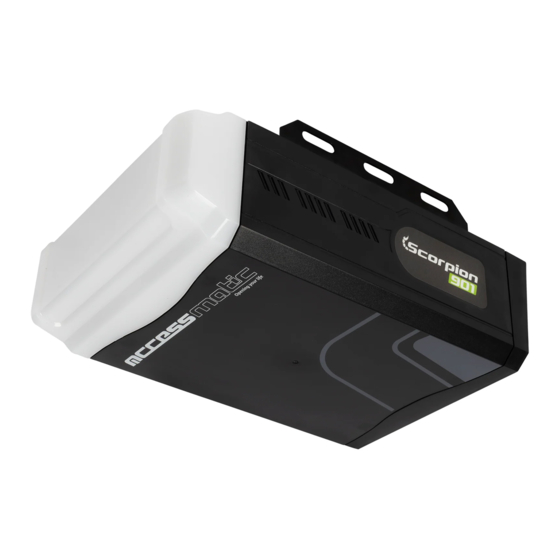
901
ADVERTENCIA
Por favor lea el manual detenidamente antes de la instalación el uso del producto. La instalación de su nueva puerta debe ser realizada
por una persona técnicamente calificada o licenciada. Tratar de instalar o reparar el motor sin tener la calificación técnica puede resultar
en severas lesiones personales, muerte y/o daños a la propiedad.
Advertisement
Chapters
Table of Contents

Related Manuals for Accessmatic Scorpion 901


Summary of Contents for Accessmatic Scorpion 901
- Page 1 Opening your life MANUAL DE USUARIO Abre puertas de garaje ADVERTENCIA Por favor lea el manual detenidamente antes de la instalación el uso del producto. La instalación de su nueva puerta debe ser realizada por una persona técnicamente calificada o licenciada. Tratar de instalar o reparar el motor sin tener la calificación técnica puede resultar en severas lesiones personales, muerte y/o daños a la propiedad.
-
Page 2: Table Of Contents
Opening your life CONTENIDO Manual de instalación y propietarios Instalación del operador y el riel Programación del operador Cambio la batería nueva Desbloqueo manual del carro Advertencia Especi caciones técnicas Garantía... -
Page 3: Manual De Instalación Y Propietarios
Opening your life Manual de instalación y propietarios 1. Funciones Un botón para controlar apertura, detener y cerrar. La luz se enciende al abrir o cerrar la puerta, tres minutos después la luz se apaga automáticamente. El funcionamiento está controlado por un programa informático. Pruebe la fuerza de apertura o cierre de la puerta, las funciones opcionales son fotoceldas, cierre automático, bloqueo de puerta, etc. -
Page 4: Instalación Del Operador Y El Riel
Opening your life 3.2 Instalación del operador y el riel Figura 2 Cuando haya instalado la posición abierta - cerrada, para evitar la situación de desplazamiento causada por un pequeño ajuste de rebote y muchas veces de resistencia, puede colocar el mecanismo de parada cuando la puerta alcanza la posición completamente abierta, consulte los pasos de instalación a continuación: 1. - Page 5 Opening your life Figura 4 5. Panel de control Figura 5 6. Terminales y conexiones opcionales Figura 6...
-
Page 6: Programación Del Operador
Opening your life 7. Programación del operador 7.1 Preparación 7.1.1 Mantenga el trolley bloqueado, tire y empuje la puerta con la mano, asegúrese de que el coche se conecte con el ensamble. 7.1.2 Encienda la energía, la luz de cortesía está encendida durante varios segundos, al mismo tiempo, el LED muestra el número del 99 al 11. - Page 7 Opening your life 7.6 Fotoceldas 7.6.1 Mantenga presionado "SET", se muestra "P1". 7.6.2 Presione "UP" dos veces, se muestra "P3". 7.3.3 Presione “SET” para mostrar la situación actual. Presione “UP” una vez que muestre “” H1, Las fotoceldas estarán habilita- das.
-
Page 8: Cambio La Batería Nueva
Opening your life 8.2.1 Problema Causas Solución 8.2.2 La cadena hace ruido. La cadena está demasiado oja. Ajuste la tuerca M8 consultando 3.2.C. 8.2.3 El motor no funciona. El enchufe no está bien conectado o el fusible está roto. Veri que el enchufe o reemplace el fusible. 8.2.4 Después de con gurar las posiciones de apertura y cierre, el motor no funciona. -
Page 9: Advertencia
Opening your life - En la posición desbloqueada, las puertas solo se pueden mover a velocidad media. - El aparato no debe ser utilizado por niños o personas con capacidades físicas, sensoriales o mentales reducidas, o con falta de experiencia y conocimiento, a menos que hayan sido supervisadas o instruidas. - Los niños supervisados no deben jugar con el aparato. -
Page 10: Especi Caciones Técnicas
Opening your life Especi caciones técnicas Modelo Modelo SC901 SC901 110V (60 Hz) 110V (60 Hz) Voltaje de entrada Voltaje de entrada 1/2 HP (900 N) 1/2 HP (900 N) Potencia nominal Potencia nominal 2,3 A 2,3 A Corriente nominal Corriente nominal 24V DC 24V DC... -
Page 11: Garantía
Parte eléctrica Si el motorreductor del equipo adquirido por el clien- En la línea accessmatic garantía de 3 años y Elite garan- te, presenta algún daño por defectos de fabrica o tía de 2 años abarca tarjetas y partes eléctricas, H. - Page 12 Para más detalles consulte en la página la política de garantías de la GARANTÍA 5D Consideraciones especiales 1. Los mantenimientos o visitas que ofrece Accessmatic en instalaciones no incluyen los viáticos requeridos para llegar al sitio donde se encuentra operando el equipo. Dichos viáticos deberán ser asumidos por el cliente.
- Page 13 Opening your life USER MANUAL Garage door opener WARNING Please read the manual carefully before installation using the product. The installation of your new door must be carried out by a technically quali ed or licensed person. Attempting to install or repair the motor without technical quali cation can result in severe personal injury, death, and / or property damage.
- Page 14 Opening your life CONTENT Installation and owners manual Installing the operator and rail Programming the operator Change new battery Manual unlocking of the carriage Warning Technical speci cations Warranty...
-
Page 15: Installation And Owners Manual
Opening your life Installation and owners manual 1. Functions Micro intellectual control. One button to control open, stop and close. The light in on while opening or closing the door, three minutes later the light is o automatically. The running is controlled by computer program. Test the force of open or close the door, the optional functions are photo beam, auto close, lock door, etc. -
Page 16: Installing The Operator And Rail
Opening your life 3.2 Installing the operator and rail Figure 2 When you have installed the open – close position, in order to prevent the travelling shift situation caused by small rebound adjustment and many times of resistance, you can attach the stopping mechanism when door reached it fully opened position, please refer to below installation steps: 1. - Page 17 Opening your life Figure 4 5. Control panel Figure 5 6. Optional terminals and connections Figure 6...
-
Page 18: Programming The Operator
Opening your life 7. Programming the operator 7.1 Preparing 7.1.1 Keep trolley locked, pull and push the door by hand, make sure the trolley connects with the shuttle- 7.1.2 Turn on the power, the courtesy light is on for several seconds, at the same time, the LED displays the number from 99 to 11. - Page 19 Opening your life 7.7 Auto – close ON/OFF 7.7.1 Press and hold “SET”, it displays “P1”. 7.7.2 Press “UP” three times, it displays “P4”. 7.7.3 Press “SET” to show current situation. Press “UP” to increase the auto – close one minute or press “DOWN” to decrease one minute.
-
Page 20: Change New Battery
Opening your life 8.2.6 The Wall button works well, but the transmitter doesn´t work. No transmitter learning or transmitter battery is power o . Code referring to 6.4 or change new transmitter battery. 8.2.7 Transmitter distance is too short. The transmitter battery is nearly power o . Change new battery. -
Page 21: Warning
Opening your life Warning: Important safety instructions. It is important for the safety of persons to follow all instructions. Save these instructions. - Do not allow children to play with controls, Keep remote controls away from children. - Watch the moving door and keep people away until the door is completely opened or closed. - Take care when operating the manual release since an open door may fall rapidly due to weak or broken springs, or being out of balance. -
Page 22: Technical Speci Cations
Opening your life Technical speci cations Model SC901 110V (60 Hz) Power Input 1/2 HP (900 N) Rated power 2,3 A Nominal current 24V DC Nominal voltage 140 mm/s Speed 100 kg Max. weight... -
Page 23: Warranty
Geared motor Electrical part If the gearmotor of the equipment purchased by the In line with accessmatic 3-year guarantee and Elite customer shows any damage due to manufacturing 2-year guarantee covers electrical cards and parts, H. defects or misadjustment, it will replace the required UJUETA S.A is committed to replacing or repairing any... - Page 24 For more details, see the guarantee policy of the 5D WARRANTY on the page Special considerations 1. The maintenance or visits o ered by Accessmatic in facilities do not include the travel expenses required to reach the site where the equipment is operating. Said travel expenses must be borne by the client.
- Page 25 Opening your life...
- Page 26 Opening your life Opening your life Opening your life Opening your life Opening your life Opening your life www.accessmatic.com www.accessmatic.com www.accessmatic.com...
Need help?
Do you have a question about the Scorpion 901 and is the answer not in the manual?
Questions and answers