Table of Contents
Advertisement
Available languages
Available languages
Quick Links
Opening your life
MANUAL DE USUARIO
MOTORES DE
GARAJE
1000
P
RO
ADVERTENCIA
Por favor lea cuidadosamente y entienda este manual y las instrucciones de seguridad antes de la instalación. El motor NO CERRARÁ si el sistema
de seguridad del sensor óptico está activado si no se instala y alinea de la forma correcta.
Advertisement
Table of Contents

Related Manuals for Accessmatic Fox1000 Pro


Summary of Contents for Accessmatic Fox1000 Pro
- Page 1 Opening your life MANUAL DE USUARIO MOTORES DE GARAJE 1000 ADVERTENCIA Por favor lea cuidadosamente y entienda este manual y las instrucciones de seguridad antes de la instalación. El motor NO CERRARÁ si el sistema de seguridad del sensor óptico está activado si no se instala y alinea de la forma correcta.
-
Page 2: Table Of Contents
1000 Opening your life INDICE Recomendaciones importantes de seguridad Descripción del producto y características Recomendaciones de preinstalación Instalación (Soporte de pared y soporte de la puerta) Instalación (Riel de acero - C) Instalación (Ensamble conjunto de rieles de acero en C) Ensamble del respaldo de batería para Riel -C Desconexión manual para riel -C Instalación (Riel de acero - T) -
Page 3: Recomendaciones Importantes De Seguridad
1000 Opening your life VERIFIQUE y REVISE DIARIAMENTE el motor de acuerdo a las indicaciones de la etiqueta de seguridad, para GARANTIZAR UNA OPERA- CIÓN SEGURA. Conserve este manual para referencias futuras. RECOMENDACIONES IMPORTANTES DE SEGURIDAD EL INCUMPLIMIENTO DE LAS SIGUIENTES RECOMENDACIONES DE SEGURIDAD PODRÍAN OCASIONAR LESIONES PERSONALES GRAVES, DAÑOS A LA PROPIEDAD O INCLUSO LA MUERTE. -
Page 4: Descripción Del Producto Y Características
1000 Opening your life Tenga cuidado al operar manualmente, ya que una puerta abierta puede caer rápidamente debido al desbalance, debilidad o ruptura de los resortes. - Examine con frecuencia la instalación, en particular revise los cables, los resortes y los montajes en busca de signos de desgaste, daño o desbalance. - Page 5 1000 Opening your life 9. Arranque suave / Parada suave La velocidad de rampa ascendente y descendente al inicio y al nal de cada ciclo reduce la tensión en la puerta y en el motor de apertura para prolongar su vida útil, y permitir operaciones más silenciosas. 10.
-
Page 6: Recomendaciones De Preinstalación
1000 Opening your life RECOMENDACIONES DE PRE- INSTALACION 1. La puerta del garaje debe poder levantarse y cerrarse fácilmente con la mano y sin mucho esfuerzo. Una puerta bien balanceada y con resorte es fundamental para la correcta instalación. 2. El motor de apertura de la puerta de garaje no puede corregir una puerta de garaje mal instalada y no debe usarse como una solución para una puerta "difícil de abrir". -
Page 7: Instalación (Riel De Acero -C)
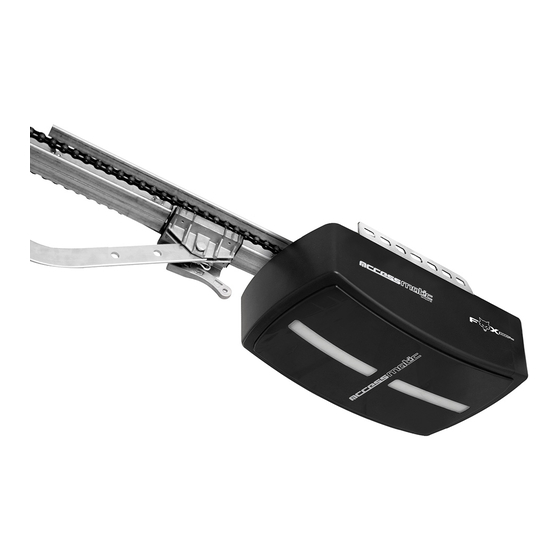
1000 Opening your life INSTRUCCIONES DE INSTALACION Montaje del soporte de pared y del soporte de la puerta (Fig.2) Soporte de pared: cierre la puerta del garaje, mida el ancho de la puerta del garaje en la parte superior y marque el centro. En la pared interior ubique y monte el soporte de pared entre 2 cm y 15 cm por encima de la puerta. -
Page 8: Instalación (Ensamble Conjunto De Rieles De Acero En C)
1000 Opening your life PASO 1 (Fig.3) Conecte la cabeza del motor de apertura a la pista de acero. Ensamble los 2 soportes colgantes en "U" con las tuercas de 6 mm suminis- tradas. PASO 2 (Fig.3) Coloque la pista de acero y el ensamble de la cabeza del motor de apertura en el centro del piso del garaje, con la cabeza abierta lo más alejada de la puerta. -
Page 9: Ensamble Del Respaldo De Batería Para Riel -C
1000 Opening your life 3 piezas de acero del Riel C 2 piezas de Riel: Como se muestra en la Fig. 6, deslice el riel A en el brazo, deslice el riel B en el brazo. 3 piezas de Riel: Como se muestra en la Fig.7, deslice el riel C en el brazo, deslice el riel D en el brazo;... -
Page 10: Desconexión Manual Para Riel -C
1000 Opening your life DESACOPLAMIENTO MANUAL PARA RIEL - C El motor de apertura está equipado con un cordón de liberación manual para desacoplar el volante y mover la puerta manualmente mientras se mantiene el mango hacia abajo (Fig. 15). Tire de la manija para desconectar el volante. Para volver a activar la puerta, simple- mente mueva el motor de apertura en modo automático o mueva la puerta manualmente hasta que el carro se enganche en el volante de la cadena. -
Page 11: Instalación (Ensamble Conjunto De Rieles De Acero En T)
1000 Opening your life PASO 1 (Fig. 17) Conecte la cabeza del motor de apertura al riel de acero - T. PASO 2 (Fig. 17) Coloque el conjunto de la cabeza del abridor y el per l en T de acero en el centro del piso del garaje, con la cabeza abierta más alejada de la puerta. - Page 12 1000 Opening your life...
- Page 13 1000 Opening your life PASO 5: PREPARACION DE LA CADENA...
- Page 14 1000 Opening your life PASO 6: ALINEACION DE LA CADENA AL PIÑON PASO 7: ALINEACION DE LA CADENA A LA POLEA...
- Page 15 1000 Opening your life...
-
Page 16: Ensamble Del Respaldo De Batería Para Riel -T
1000 Opening your life ¡Felicitaciones! Ahora el Ensamble del Riel T ya está terminado. Pero, por favor, tenga en cuenta lo siguiente: después de completar la instalación, es posible que observe una caída de la cadena cuando la puerta está completamente cerrada. La cadena debe regresar a la posición que se muestra en la gura cuando la puerta está abierta. Nota: Demasiada o muy poca tensión provocará... -
Page 17: Desconexión Manual Para Riel -T
1000 Opening your life Figura 20 Figura 21 DESACOPLAMIENTO MANUAL DEL RIEL - T El motor de apertura está equipado con un cordón de liberación manual para desacoplar el volante y mover la puerta manualmente mientras se mantiene presionada la manija (Fig. 22). Tire de la manija para desconectar el volante. Para volver a activar la puerta, simple- mente accione el motor de apertura de forma automática o mueva la puerta manualmente hasta que el carro se enganche en el volante de la cadena. -
Page 18: Intercambio Entre Riel T Y Riel C
1000 Opening your life INTERCAMBIO ENTRE EL RIEL -T Y EL RIEL - C Cambio del Riel T al Riel C PASO 1: Retire la base del rodamiento del piñón. PASO 2: Fije el manguito del eje del motor y luego conecte el Riel - C al motor de apertura. PASO 3: Ensamble los 2 soportes colgantes en "U"... -
Page 19: Menú De Instrucciones
1000 Opening your life Visualización de las instrucciones del menú Opening your life CONFIFURACION DE LAS CARACTERISTICAS: a) Mantenga presionado el botón SET hasta que aparezca en la pantalla "1", luego suelte el botón. 1000 b) Presione el botón UP /DOWN, luego visualizara en la pantalla "1-E". Opening your life c) Presione el botón SET para con rmar la función que necesita establecer, luego ingresa a la interfaz para la con guración detallada de la función designada. - Page 20 1000 Opening your life INSTRUCCIONES DE PROGRAMACIÓN Opening your life 1. PROGRAMACIÓN DE LOS LÍMITES DE APERTURA & CIERRE a) Mantenga presionado el botón SET para ingresar a la función de con guración hasta que aparezca en pantalla "1" y luego suelte el botón. 1000 b) Presione el botón SET nuevamente.
- Page 21 1000 Opening your life Opening your life 2. AJUSTE DE LA FUERZA DE OBSTRUCCIÓN PRECAUCIÓN: El ajuste de la fuerza de obstrucción se establece automáticamente durante la programación. Normalmente no es necesario ningún ajuste. 1000 a) Mantenga presionado el botón SET hasta que aparezca "1" en la pantalla, luego Opening your life presione el botón UP hasta que aparezca "2"...
- Page 22 1000 Opening your life 4. CIERRE AUTOMÁTICO Y CONFIGURACIÓN DE LA HORA NOTA: recomendamos utilizar Photo Beams de seguridad en cualquier instala- Opening your life ción en la que esté habilitada la función de cierre automático. 1000 a) Mantenga presionado el botón SET hasta que aparezca "1" en la pantalla, luego presione el botón ARRIBA hasta que aparezca en la pantalla "4"...
- Page 23 1000 Opening your life 5. CONFIGURACIÓN DE LAS CONDICIÓNES DE CIERRE AUTOMÁTICO Opening your life a) Mantenga presionado el botón SET hasta que aparezca en la pantalla "1", luego para ingresar a este ajuste de funciones presione el botón UP hasta que aparezca en pantalla "5"...
- Page 24 1000 Opening your life 7. CONFIGURACIÓN DE LA ALTURA DE RETROCESO Opening your life a)Mantenga presionado el botón SET hasta que aparezca "1" en la pantalla, luego para ingresar a este ajuste de funciones presione el botón UP hasta que aparezca en la pantalla "7"...
- Page 25 1000 Opening your life 8. CONFIGURACIÓN DE APERTURA PARCIAL/ ALTURA Opening your life a) Mantenga presionado el botón SET hasta que aparezca "1" en la pantalla, luego para ingresar a este ajuste de funciones presione el botón UP hasta que aparezca "8"...
- Page 26 1000 Opening your life 9. CONFIGURACIÓN DE LA FUNCIÓN DE RECONOCIMIENTO DE LOS BOTONES DEL Opening your life TRANSMISOR a) Mantenga presionado el botón SET para ingresar a esta función. Aparecerá en 1000 la pantalla "9” y luego suelte el botón. Opening your life b) Presione el botón SET nuevamente.
- Page 27 1000 Opening your life Opening your life B. CONFIGURACIÓN DEL PASO DE ALTURA DE RETROCESO a) Mantenga presionado el botón SET hasta que aparezca "1" en la pantalla, luego 1000 para ingresar a este ajuste de funciones presione el botón UP hasta que aparezca "B"...
- Page 28 1000 Opening your life Opening your life D. CONFIGURACIÓN DE ENCENDIDO / APAGADO DE LA CELULAR Nota: asegúrese de que la fotocelda haya sido instalada correctamente y use 1000 contactos normalmente cerrados en los terminales de los accesorios del motor de apertura ( g.24-25) Opening your life También tenga en cuenta que la función Photo beam debe desactivarse si el...
- Page 29 1000 Opening your life E. CONFIGURACIÓN DEL CONTADOR DE CICLOS DE ALARMA DE MATENIMIENTO Opening your life a) Mantenga presionado el botón SET hasta que aparezca "1" en la pantalla, luego para ingresar a este ajuste de funciones presione el botón UP hasta que aparezca "E"...
- Page 30 1000 Opening your life Conexión del Photo Beam (opcional) - g 24, g. 25 Conexión del interruptor de control (opcional) - g 24 Observación 1. Luz (luz de precaución) debe ser inferior a 25W 2. PB (botón externo) debe ser "NO".
-
Page 31: Introducción Y Aplicación Del Terminal
1000 Opening your life Introducción de otro terminal y aplicaciones 1. Interfaz O / S / C disponible (Fig26, Fig. 27) Agregue un nuevo botón O / S / C para abrir o cerrar la puerta. 2. Función de luz Parpadeante (Fig26, Fig. 27) Hay una interfaz correspondiente a esta función y provee un voltaje de luz parpadeante de 24V-35V. -
Page 32: Especi Caciones Técnicas
1000 Opening your life ESPECIFICACIONES TECNICAS FX1000 Voltaje de entrada 110V / 50- 60 Hz / 220V / 50 – 60 Hz. Fuerza de arrastre Máxima 1000N Área máxima de la puerta 15.0 m ² Peso máximo de la puerta (Balanceado) 100Kg Altura máxima de la puerta 2400 - 3500 mm... -
Page 33: Listado De Piezas Para Riel De Apertura Tipo C
1000 Opening your life LISTA DE PARTES PARA EL RIEL DE APERTURA - C MODELo Fox 1000 C RIEL EN C V0120... - Page 34 1000 Opening your life INGLES ESPAÑOL ITEM CODE PARTE COVER CUBIERTA PLASTICA PRINCIPAL AUACREPFX1000-001 COVER LED CUBIERTA LUZ LED AUACREPFX1000-002 Luz L.E.D. AUACREPFX1000-003 POWER BOARD TARJETA DE PODER AUACREPFX1000-004 CONTROL PANEL COVER 2 CUBIERTA PANEL DE CONTROL 2 AUACREPFX1000-005 CONTROL PANEL COVER 1 CUBIERTA PANEL DE CONTROL 1 AUACREPFX1000-006 PANEL STICKER...
-
Page 35: Listado De Piezas Para Riel De Apertura Tipo T
1000 Opening your life MODELO FOX 1000 RIEL EN T V0120 – 01/06/2020... -
Page 36: Fallas Comunes Y Sus Soluciones
1000 Opening your life No. PARTE INGLES ESPAÑOL ITEM CODE Cover Cubierta plástica principal AUACREPFX1000-001 Cover LED Cubierta luz L.E.D. AUACREPFX1000-002 Luz L.E.D. AUACREPFX1000-003 Power board PCB 1 AUACREPFX1000-004 Control Panel cover 1 Cubierta panel de control 1 AUACREPFX1000-005 Control Panel cover 2 Cubierta panel de control 2 AUACREPFX1000-006 Panel Sticker... - Page 37 1000 Opening your life FALLA PRESENTADA CAUSA DE LA FALLA SOLUCIONES 1. Verifique si el enchufe del motor está energizado 1. Fuente de alimentación No funciona para abrir 2. Verifique si el fusible está roto 2. El cable de conexión está suelto la pantalla LCD no brilla 3.
- Page 38 1000 Opening your life La puerta se mueve sola hacia La función de fotocelda ha sido 1. Desac�ve la función de fotocelda si no hay ningún arriba. No trabaja hacia abajo y la ac�vada pero no se ha conectado disposi�vo de fotocelda conectado. (Consulte el pantalla muestra.
- Page 39 1000 Opening your life...
- Page 40 Opening your life USER MANUAL GARAGE MOTORS 1000 WARNING Please read and understand this manual and the safety instructions carefully before installation. The engine WILL NOT CLOSE if the optical sensor security system is activated if it is not installed and aligned correctly.
- Page 41 1000 Opening your life INDEX Important safety recommendations Product Description and Features Pre-installation recommendations Installation (Wall bracket and door bracket) Installation (Steel rail - C) Installation (C-Steel Rail Assembly) Battery Back Assembly for -C Rail Manual disconnect for -C rail Installation (Steel rail - T) Installation (T-steel rail assembly assembly).
- Page 42 1000 Opening your life FAILURE TO COMPLY WITH THE FOLLOWING SAFETY RECOMMENDATIONS MAY RESULT IN SERIOUS PERSONAL INJURY, DEATH AND / OR PROPERTY DAMAGE. 1. PLEASE READ CAREFULLY AND ADHERE TO ALL SAFETY AND INSTALLATION RECOMMENDATIONS. 2. The opener is designed and manufactured to meet local regulations. The installer must be familiar with local regulations required in respect of the installation of the opener.
- Page 43 1000 Opening your life - Take care when operating the manual release since an open door may fall rapidly due to weak or broken springs, or being out of balan- - Frequently examine the installation, in particular check cables, springs and mountings for signs of wear, damage or imbalance. Do not use if repair or adjustment is needed since a fault in the installation or an incorrectly balanced door may cause injury.
- Page 44 1000 Opening your life 9. Soft start / Soft stop Ramping speed up and down at the start and end of each cycle reduces stress on the door and opener for longer life, and makes for quieter operations. 10. Auto-Close Auto- Close ensures peace of mind and keeps your house secure by automatically closing the door upon entering or exiting the garage.
- Page 45 1000 Opening your life PRE-INSTALLATION RECOMMENDATIONS 1. The garage door must be able to be lifted and closed easily by hand and without much e ort. A well balanced and spring loaded door is essential for correct installation. 2. The garage door opener cannot compensated for a badly installed garage door and should not be used as a solution for a "hard to open"...
- Page 46 1000 Opening your life 30mm minimum clearance INSTALLATION INSTRUCTIONS Mount Wall Bracket and Door Bracket (Fig.2) Wall Bracket - Close the garage door and meas ure the garage door width at the top and mark the cent re. Locate and ount the wall bracket 2cm-15cm above the door on the insidewall.
- Page 47 1000 Opening your life STEP1 (Fig.3) Attach the opener head to the steel track. Assembly the 2 “U” Hanging brackets with 6mm nuts supplied. STEP2 (Fig.3) Place the steel track and opener head assembly centrally on the garage oor, with the open head furthest away from the door. Lift the front of the track up to the door bracket.
- Page 48 1000 Opening your life 3 Parts Steel C-rail 12 Parts rail: As Fig.6, slide the A rail into the sleeve, slide the B rail into the sleeve. 3 Parts rail: As Fig.7, slide the C rail into the sleeve, slide the D rail into the sleeve; slide the E rail into the sleeve. Cut the plastic thread;...
- Page 49 1000 Opening your life MANUAL DISENGAGEMENT FOR C -RAIL The opener is equipped with a manual release cord to disengage shu ttle and move door by hand while holding the handle down (Fig .15). Pull on the handle to disengage the shuttle. To re-engage the door simply run opener in automatic mode or move door by hand until the trolley engages in the chain shuttle.
- Page 50 1000 Opening your life STEP1 (Fig. 17 ) Attach the opener head to the steel T-Rail . STEP2 (Fig. 17 ) Place the steel T-rail and opener head assembly centrally on the garage oor, with the open head furthest away from the door. Lift the front of the rail up to the door bracket.
- Page 51 1000 Opening your life...
- Page 52 1000 Opening your life STEP5: Prepare the Chain...
- Page 53 1000 Opening your life STEP6: Align the Chain on the Sprocket STEP7: Align the Chain on the Pulley...
- Page 54 1000 Opening your life STEP8: Tighten the chain...
- Page 55 1000 Opening your life Congratulations! The T-Rail Assembly is now complete. But please note the following: After completing the installation, you may notice a chain drop when the door is fully closed. The chain should return to the position shown in the gure when the door is open. Note: Too much or too little voltage will cause excessive noise.
- Page 56 1000 Opening your life Fig. 20 Fig. 21 MANUAL DISENGAGEMENT FOR T-RAIL The opener is equipped with a manual release cord to disengage shuttle and move door by hand while holding the handle down (Fig 22). Pull on the handle t o disengage the shuttle. To re-engage the door simply run opener in automatic mode or move door by hand until the trolley engages in the chain shuttle.
- Page 57 1000 Opening your life EXCHANGE BETWEEN T-RAIL AND C-RAIL Change T-Rail to C -Rail STEP1: Take o the sprocket bearing base. STEP2: Fix the motor shaft sleeve and then attach the C - Rail to the opener. STEP3: Assemble the 2 “U” Hanging brac kets with 6mm nuts supplied. Cambio del Riel C al Riel T PASO 1: Retire los 2 soportes en "U".
- Page 58 1000 Opening your life Display menu instructions Opening your life a) Hold down the SET button until "1" appears in the display, then release the button. 1000 b) Press the UP / DOWN button, then "1-E" will appear on the screen. c) Press the SET button to con rm the function you need to set, then enter the Opening your life interface for detailed setting of the designated function.
- Page 59 1000 Opening your life Opening your life 1. PROGRAMMING OF THE OPEN AND CLOSE LIMITS a) Hold down the SET button to enter the setup function until "1" appears on the display, and then release the button. 1000 b) Press the SET button again. The opening motor is now in programming mode. then you will see "n"...
- Page 60 1000 Opening your life Opening your life 2. ADJUSTMENT OF THE OBSTRUCTION FORCE CAUTION: The obstruction force setting is automatically established during programming. Normally no adjustment is necessary. 1000 a) Hold down the SET button until "1" appears on the display, then press the UP Opening your life button until "2"...
- Page 61 1000 Opening your life 4. AUTOMATIC CLOSING AND TIME SETTING NOTE: We recommend using Security Photo Beams in any installation where the Opening your life automatic shutdown feature is enabled. 1000 a) Hold down the SET button until "1" appears on the display, then press the UP button until "4"...
- Page 62 1000 Opening your life 5. CONFIGURATION OF THE AUTOMATIC CLOSING CONDITIONS Opening your life a) Hold down the SET button until "1" appears on the display, then to enter this function setting press the UP button until "5" appears on the display, then release the button.
- Page 63 1000 Opening your life 7. SETTING THE RETURN HEIGHT Opening your life a) Hold down the SET button until "1" appears on the display, then to enter this function setting press the UP button until "7" appears on the display and then release the button.
- Page 64 1000 Opening your life 8. PARTIAL OPENING / HEIGHT CONFIGURATION Opening your life a) Hold down the SET button until "1" appears on the display, then to enter this function setting press the UP button until "8" appears on the display and then release the button.
- Page 65 1000 Opening your life 9. CONFIGURATION OF THE RECOGNITION FUNCTION OF THE TRANSMITTER Opening your life BUTTONS a) Hold down the SET button to enter this function. "9" will appear on the screen, 1000 and then release the button. Opening your life b) Press the SET button again.
- Page 66 1000 Opening your life Opening your life B. SETTING THE BACKSPACE HEIGHT PASS a) Hold down the SET button until "1" appears on the display, then to enter this 1000 function setting press the UP button until "B" appears on the display and then release the button.
- Page 67 1000 Opening your life Opening your life D. CELL PHONE ON / OFF CONFIGURATION Note: make sure the photocell has been installed correctly and use normally 1000 closed contacts on the terminals of the opening motor accessories ( g. 24-25) Also note that the Photo beam feature should be disabled if the Photo beam has Opening your life NOT been installed, otherwise the door cannot be closed, and the LED display will...
- Page 68 1000 Opening your life E. CONFIGURATION OF THE MAINTENANCE ALARM CYCLE COUNTER Opening your life a) Hold down the SET button until "1" appears on the display, then to enter this function setting press the UP button until "E" appears on the display and then release the button.
- Page 69 1000 Opening your life Photo Beam connection (optional) - g 24, g. 25 Control switch connection (optional) - g 24 Observation 1. Light (caution light) should be less than 25W 2. PB (external button) must be "NO".
- Page 70 1000 Opening your life Introduction of another terminal and applications 1. Available O / S / C interface (Fig26, Fig. 27) Add a new O / S / C button to open or close the door. 2. Flashing light function (Fig26, Fig. 27) There is an interface corresponding to this function and it provides a ashing light voltage of 24V-35V.
- Page 71 1000 Opening your life TECHNICAL SPECIFICATIONS FX1000...
- Page 72 1000 Opening your life PARTS LIST FOR OPENING RAIL - C MODEL Fox 1000 C C RAIL V0120...
- Page 73 1000 Opening your life INGLES ESPAÑOL ITEM CODE PARTE COVER CUBIERTA PLASTICA PRINCIPAL AUACREPFX1000-001 COVER LED CUBIERTA LUZ LED AUACREPFX1000-002 Luz L.E.D. AUACREPFX1000-003 POWER BOARD TARJETA DE PODER AUACREPFX1000-004 CONTROL PANEL COVER 2 CUBIERTA PANEL DE CONTROL 2 AUACREPFX1000-005 CONTROL PANEL COVER 1 CUBIERTA PANEL DE CONTROL 1 AUACREPFX1000-006 PANEL STICKER...
- Page 74 1000 Opening your life MODEL FOX 1000 T RAIL V0120 – 01/06/2020...
- Page 75 1000 Opening your life No. PARTE INGLES ESPAÑOL ITEM CODE Cover Cubierta plástica principal AUACREPFX1000-001 Cover LED Cubierta luz L.E.D. AUACREPFX1000-002 Luz L.E.D. AUACREPFX1000-003 Power board PCB 1 AUACREPFX1000-004 Control Panel cover 1 Cubierta panel de control 1 AUACREPFX1000-005 Control Panel cover 2 Cubierta panel de control 2 AUACREPFX1000-006 Panel Sticker...
- Page 76 1000 Opening your life...
- Page 77 1000 Opening your life...
- Page 78 Opening your life www.accessmatic.com...
Need help?
Do you have a question about the Fox1000 Pro and is the answer not in the manual?
Questions and answers