Table of Contents
Troubleshooting

Subscribe to Our Youtube Channel
Related Manuals for Valor 54TS


Summary of Contents for Valor 54TS
- Page 1 Heavy Tilt Manual Heavy Tilt Bed Owner Manual Models: 54TS (17.5”) 42TS (6+) 54TS (22.5”) 40TS (6+) 60TS (17.5”) For warranty information contact Valor Trailers at (208) 810-4900 Or find us on our website: www.valortrailers.com...
-
Page 2: Table Of Contents
Table of Contents Introduction ................................5 Purpose ............................5 Follow Vehicle and Axle Weight Ratings ................5 Understand Design and Safety Factors .................. 6 Vehicle Load and Handling Limits ................... 6 Meaning of Alert Symbols and Signal Words ................ 8 Table 1: Alert Symbols and Signal Words .......................... - Page 3 Sub-Assembly Components ....................19 Pintle Eye or Ball-Type Coupling ....................19 King Pin ............................20 Jack Assembly ..........................20 Cushion Cylinder ..........................20 Deck Latch ............................20 Figure 3: Adjusting Hook Receiver on Tilt Deck ........................20 Deck Hinge Assembly ........................21 2.3 Rear Impact Guard ........................
- Page 4 Electrical ........................... 34 Harnesses and Lights ........................34 Junction Block ..........................34 Electrical Connection ........................34 Air Brake System ........................34 Preventive Maintenance ........................ 35 Manual Brake (Free Stroke) Adjustment ..................37 Slack Adjuster Function Test ......................38 Brake Lubrication ........................... 38 Trailers with Tilt Decks ......................
- Page 5 www.valortrailers.com PHONE: 208-810-4900 Rev 05/20/2022...
-
Page 6: 1.0 Introduction
Awareness and knowledge of safe vehicle operating limits will ensure you can enjoy the maximum utility and productivity from your Valor Trailer. Do not operate the trailer until you have read and fully understand this instruction and operating manual. -
Page 7: Understand Design And Safety Factors
SAFETY ALERT Valor trailers should not be loaded past the rated capacity and should be loaded in consideration of the load warning sticker. It is your responsibility to understand how load distribution affects your trailer’s load-carrying capacity. - Page 8 diminished braking capacity, and will severely alter the vehicle’s normal handling characteristics. To use these vehicles safely, the load limits on the certificate label should not be exceeded. Adequate tongue weight (TW) is required for trailers to tow correctly. TW is the measurement of downward force that the tongue of the trailer exerts on the hitch ball of the tow vehicle.
-
Page 9: Meaning Of Alert Symbols And Signal Words
Weather conditions can be a major factor in the cause of accidents. Rain, ice, snow, high winds, and poor visibility combined with excessive speed, sudden lane changes—or other factors that put lateral forces into a tow vehicle and trailer combination—may contribute significantly to an accident. Slippery roads can increase stopping distances and reduce the ability to control the vehicle. -
Page 10: Uncaging Air Brakes (For Trailers With An Air Brake System)
Alert Symbols and Signal Words Signal Words Definition Symbol WARNING! indicates a potentially WARNING! hazardous situation which, if not avoided, could result in death or serious injury. CAUTION! indicates a potentially CAUTION! hazardous situation which, if not avoided, might result in minor or moderate injury. CAUTION used without the safety alert symbol indicates a potentially hazardous CAUTION... - Page 11 Removal of Release Tool Assembly Step Action Apply approximately 70 pounds per square inch (PSI) of air pressure to the brake system; this should be sufficient to remove the spring pressure and loosen the release tool assemblies. NOTE: The release tools can be removed without applying air pressure to the brake system, although the removal process is easier if air is applied.
-
Page 12: Reporting Safety Defects
If NHTSA receives similar complaints, it may open an investigation; and if it finds that a safety defect exists in a group of vehicles, it may order a recall and remedy campaign. However, NHTSA cannot become involved in individual problems between you, your dealer, or Valor Industries. -
Page 13: Pre-Trip Inspection
Pre-Trip Inspection There are some items on every vehicle combination that require no special knowledge, training, or sophisticated equipment to inspect—and can be and should be inspected prior to every trip Perform the following inspection in Table 3 prior to your departure. Table 3: Pre-Trip Inspection ✓... -
Page 14: Required Trailer Hookup Procedures
Required Trailer Hookup Procedures The consequences of not properly hooking the trailer to the tow vehicle can be very serious. Failure to adhere to the information in this section could lead to the trailer becoming detached, the trailer brakes and/or lights not working correctly, or other unsafe situations. -
Page 15: Additional Trailer Loading Precautions
CAUTION Trailer Loading Practices The consequences of ignoring proper trailer loading practices can be very serious. Failure to adhere to the information in this section could lead to unsafe handling, diminished braking capacity, or other unstable trailer characteristics, which could result in an accident-causing property damage, bodily injury, or death. It is the operator’s responsibility to take whatever steps that are necessary to load the trailer properly—even when it is not easy to calculate the total load or determine the load center of gravity... -
Page 16: Trailers With Tilt Decks
2. Always set brakes on the tow vehicle and trailer—before loading and unloading—and use chock blocks as an added safety precaution. 3. Before securing equipment, always lower booms, loaders, and buckets. The parking brake on the equipment being transported must be engaged, where applicable. Note: Always make sure you are under the maximum allowable height clearance. -
Page 17: Section 1 Operations (Continued)
Section 1 Operations (continued) Securing Loads with Chains Note: Only five-sixteenths inch or three-eighths inch grade 70 transport chains are to be used with chain slots. When securing loads with chains, the chains should not exceed the angles shown in the illustrations below. -
Page 18: Section 2 Maintenance
Allow ample time for brakes to cool between applications (roughly one mile at 40 mph). This allows the brake shoes and magnets to slightly “wear-in” to the drum surfaces. (Recommendation from AXN Axle). For further details see the attached manual in the Valor Dealer Packet. - Page 19 Perform the following in Table 6 to complete steps the various stages of periodic maintenance Table 6: Periodic Maintenance Checklist Step ✓ Periodic Maintenance Checklist Pre-Trip Inspection Lube wear areas on hitch. Examine frame and tongue members for evidence of damage or cracked welds. Check suspension for bent or broken springs, damaged components, and loose or missing fasteners.
-
Page 20: Structural Components
Step ✓ Periodic Maintenance Checklist Special Accident or Overload: Check all structural components for damage. Check tires and wheels for damage. Check axle alignment. Rear Impact: Check impact guard components for damage- see page 21. Skidding: Check tires for flat spots. Structural Components Subframe Other than for periodic or special inspections, and washing, the trailer subframe requires no... -
Page 21: King Pin
King Pin Check the king pin for cracks, wear, and/or damage. Regularly apply a coating of grease to the fifth wheel to prevent accelerated wear. Always ensure the fifth wheel is completely latched before transport. Jack Assembly Every six months, lubricate the jack as follows: 1. -
Page 22: Deck Hinge Assembly
Deck Hinge Assembly Check the hinge assembly frequently for cracked welds; this assembly is highly stressed during loading and unloading. Grease the deck hinges every six months—or earlier, if service dictates. Apply grease to the fittings (one per side) until fresh grease becomes visible. 2.3 Rear Impact Guard Your trailer may be fitted with an energy absorbing Rear Impact Guard (RIG) system that retracts automatically when the deck is tilted for loading and unloading. - Page 23 Figure 4: Properly Located Rear Impact Guard , shows the typical dimensions for a properly located RIG. Properly Located Rear Impact Guard www.valortrailers.com PHONE: 208-810-4900 Rev 05/20/2022...
-
Page 24: Running Gear
Running Gear Suspension The suspension on your trailer is a heavy duty, leaf spring, underslung type. The leaf springs are not directly attached to the trailer but are free to float against the wear pads of the hangers and rockers. Spring seat adjusters or adjustable radius rods are employed to keep the axles in alignment. - Page 25 TORQUE REQUIREMENTS! Follow all torque requirements! Do not use any component with visibly worn or damaged threads. Failure to follow these safety alerts can lead to loss of vehicle control, property damage, serious personal injury or death. Item Size Description Oiled Torque Dry Torque 1 1/8"...
-
Page 26: Axle Alignment
Axle Alignment Verify that the forward axle is centered on the trailer; W1 = W2. Check the distance from the coupler or faceplate center to the forward axle end on both sides, and adjust the left radius rod (or spring seat adjusters for slipper type suspension if necessary (the right radius rod is of fixed length)) so that X1 is equal to X2, the difference should not vary more than 1/16”. -
Page 27: Brake Drum Inspection
Brake Drum Inspection Clean and inspect the brake drums whenever relining the brakes. To be suitable for further service, the brake drum should pass the following checks: 1. The brake surface should be free of scoring, excessive heat checks and free of cracks. 2. -
Page 28: Brake Drum Troubleshooting Chart
Brake Drum Troubleshooting Chart www.valortrailers.com PHONE: 208-810-4900 Rev 05/20/2022... -
Page 29: Brake Drum Troubleshooting Chart (Continued)
Brake Drum Troubleshooting Chart (continued) www.valortrailers.com PHONE: 208-810-4900 Rev 05/20/2022... -
Page 30: Axle End Component Cleaning And Inspection
Axle End Component Cleaning and Inspection Refer to the supplied manufacturer’s manual for specifics. Axle End Component Assembly Refer to the supplied manufacturer’s manual for specifics. Wheel Bearing Adjustment Refer to the supplied manufacturers manual for specifics. Wheel Bearing Lubrication Refer to the supplied manufacturers manual for specifics. -
Page 31: Wheel Torquing Procedures
6. Offset. This refers to the relationship of the center line of the tire to the hub face of the axle. Care should be taken to match a replacement wheel with the same offset wheel as originally equipped. Failure to match offset can result in reduced carrying capacity of your axle. - Page 32 Install the flange nuts and tighten to the Stage 1 torque value in the following chart using the sequence shown, and then tighten the flange nuts to the Stage 2 torque value (if applicable) and then the full Stage 3 torque value in sequence. Trailer Model Torque Range (all values in Ft-lbs.) Stage 1...
-
Page 33: Tires
Tires Before mounting tires onto wheels make certain that the rim size and contour is approved for the tire as shown in the Tire and Rim Association Yearbook or the tire manufacturers catalog. Also make sure the tire will carry the rated load. If the load is not equal on all tires due to trailer weight distribution, use the tire rated for the heaviest wheel position. -
Page 34: Tire Wear Diagnostic Chart
Tire Wear Diagnostic Chart www.valortrailers.com PHONE: 208-810-4900 Rev 05/20/2022... -
Page 35: Electrical
Electrical Harnesses and Lights The electrical harnesses in the trailer run within the frame members and require no maintenance. The oval stop/turn/taillights and the round clearance lights are all of the sealed type and do not have a separately replaceable bulb. If a light does stops working, first check the plug at the light for voltage (with a test lamp or voltmeter) to verify that the electrical system is functioning properly. -
Page 36: Preventive Maintenance
Whenever it becomes necessary to jack the trailer it is up to you to ensure that the trailer or axle is supported securely. Use blocks or jack stands on solid ground, especially if you are going to be working under the trailer. Preventive Maintenance 1. - Page 37 www.valortrailers.com PHONE: 208-810-4900 Rev 05/20/2022...
-
Page 38: Manual Brake (Free Stroke) Adjustment
Manual Brake (Free Stroke) Adjustment DISENGAGING THE PAWL! You must disengage a pull pawl or remove a conventional pawl before rotating the manual adjusting nut, or you will damage the pawl teeth. A damaged pawl will not allow the slack adjuster to automatically adjust brake clearance. Replace damaged pawls before putting the vehicle in service. -
Page 39: Slack Adjuster Function Test
Slack Adjuster Function Test 1. Remove the slack adjuster from the axle. 2. Using a torque wrench that measures in in-lb., rotate the adjusting nut counterclockwise 22 turns. This is enough turning of the adjusting nut to rotate the camshaft gear 1 full revolution. -
Page 40: Trailers With Tilt Decks
Trailers with Tilt Decks Tilt Deck trailers are designed to tilt open or tilt closed with one person’s weight. Outside temperatures can affect the speed the deck tilts at due to effects on the density of the fluid in the cushion cylinder. Periodic inspections should occur looking for wear, damage, or cracked welds. As an item of routine maintenance apply grease to all grease fittings until fresh grease becomes visible. -
Page 41: Section 3 Parts Manual
Section 3 Parts Manual Section Title Page Major Sub-Assemblies 3.1.1 Drawbar Eye/Lunette Eye 3.1.2 Jack Assembly 3.1.3.1 Non-Stationary Deck Latch 3.1.3.2 Stationary Deck Latch 3.1.4 Deck Hinge 3.1.5 Cushion Cylinder Rear Impact Guard Running Gear 3.4.1 Toolbox 3.4.2 Wheels and Tires Electrical 3.5.1 Electrical Plug... -
Page 42: Section 3.1.1 Drawbar Eye/Lunette Eye
Section 3.1.1 Drawbar Eye/Lunette Eye Ref. Part # Description Quantity C-000372-HT-P- Drawbar 3” ID, 4 Bolt w. 25/32” holes H-000203-U-P-X 3/4-16 x 2.5” Cap Screw. Gr. 8, Zinc H-000205-U-P-X 3/4” Lock Washer, Zinc C-000204-U-P-X 3/4-16 Hex Nut, Gr. 8, Zinc www.valortrailers.com PHONE: 208-810-4900 Rev 05/20/2022... -
Page 43: Section 3.1.2 Jack Assembly
Section 3.1.2 Jack Assembly Ref. Part # Description Quantity C-000433-HT-P-X Jost Jack Assembly H-000217-U-P-X CAP SCREW 5/8-11 x 1 1/2, GR5 ZINC H-000012-U-P-X FLAT WASHER 5/8, GR8 ZINC H-000014-U-P-X HEX NUT 5/8-11, GR5 ZINC H-000011-U-P-X CAP SCREW 5/8-11 x 1 3/4, GR5 ZINC H-000013-U-P-X LOCK WASHER 5/8, ZINC H-000225-U-P-X Stl. - Page 44 Section 3.1.3 Non-Stationary Deck Latch Ref. Part # Description Quantity C-000515-HT-V-X Latch Hook C-000514-HT-V-X Latch Handle SA-000207-HT-V-X Latch Arm C-000371-HT-P-X Latch Pin H-000226-U-P-X Glide Latch Bearing 1 x 1/2 x 1-3/8 H-000211-U-P-X E-Clip H-000207-U-P-X Cap Screw 3/4-16 x 1-1/2, Gr. 8 Zinc H-000010-U-P-X WIRE LOCK CLEVIS PIN (0.375 X 2.5") C-000393-HT-V-X...
-
Page 45: Section 3.1.4 Stationary Deck Latch
Section 3.1.4 Stationary Deck Latch Ref. Part # Description Quantity C-000238-HT-V-X Latch Hook C-000239-HT-V-X Latch Link SA-000096-HT-F-X Latch Arm SA-000073-HT-F-X Latch Handle Assy. C-000371-HT-P-X Groove Pin H-000211-U-P-X E-Clip Glide Latch Bearing 1 x 1/2 x 1-3/8 H-000226-U-P-X Roll Pin 3/8 x 1 1/2", Steel H-000035-UT-P-X SA-000088-HT-F-X Latch Hook Assy. -
Page 46: Section 3.1.5 Deck Hinge
Section 3.1.5 Deck Hinge Ref. Part # Description Quantity C-000382-HT-V-X Hinge Pin H-000229-U-P-X Cap Screw 3/8-16 x 3- 1/4", Gr. 5 Zinc H-000019-U-P-X Nylock 38"-16, Gr. 2 Zinc www.valortrailers.com PHONE: 208-810-4900 Rev 05/20/2022... -
Page 47: Section 3.1.6 Cushion Cylinder
Section 3.1.6 Cushion Cylinder Ref. Part # Description Quantity 4 x 16 Cushion Cylinder C-000435-HT-V-X www.valortrailers.com PHONE: 208-810-4900 Rev 05/20/2022... -
Page 48: Section 3.2 Rear Impact Guard
Section 3.2 Rear Impact Guard Ref. Part # Description Quantity Light Bar Bracket (17.5) C-000312-HT-V-X Light Bar Bracket (22.5) C-000312-HT-V-X Rig Hinge Pin SA-000094-HT-F-X Rig Light Bar SA-000072-HT-F-X Cap Screw 1/2-20 x 1 1/4, GR5 H-000209-U-P-X Flat Washer 1/2, Gr8 Zinc H-000042-U-P-X Nut, 1/2-20, GR. - Page 49 Section 3.2 Rear Impact Guard www.valortrailers.com PHONE: 208-810-4900 Rev 05/20/2022...
- Page 50 www.valortrailers.com PHONE: 208-810-4900 Rev 05/20/2022...
-
Page 51: Section 3.3 Running Gear
Section 3.3 Running Gear Ref. Part # Description Quantity 25K Axle (17.5 Tires) C-000272-HT-V-X 25K Axle ABS (17.5 Tires) C-000279-HT-V-X Torque Arm Assy – Non-Adj. C-000291-HT-V-X Spring Seat 5RD, 75 HI C-000304-HT-V-X Torque Arm Assy – Adj., 19.25” LG C-000440-HT-V-X Flange Locknut, 1-14 Gr. - Page 52 Section 3.2 Running Gear www.valortrailers.com PHONE: 208-810-4900 Rev 05/20/2022...
- Page 53 Section 3.2 Running Gear www.valortrailers.com PHONE: 208-810-4900 Rev 05/20/2022...
-
Page 54: Section 3.4 Toolbox
Section 3.4 Toolbox Ref. Part # Description Quantity Tool Box Lid SA-000063-HT-F-X 90 Degree Mounting Bracket C-000379-HT-P-X Gas Spring SA-000075-HT-P-X Pan Head Screw 10-24 x 1/2, Zinc H-000227-U-P-X Nylon Lock Nut, 10-24, Zinc H-000228-U-P-X www.valortrailers.com PHONE: 208-810-4900 Rev 05/20/2022... -
Page 55: Section 3.5 Wheels And Tires
Section 3.5 Wheels and Tires Ref. Part # Description Quantity 17.5 Wheel Assembly (215/75 R17.5 LRH) C-000457-HT-P-X 22.5 Wheel Assembly (255/70 R22.5 LRJ) C-000473-HT-V-X Wheel, 17.5 x 6.75 C-000278-HT-V-X Wheel, 22.5 x 6.75 C-000473-HT-V-X-RIM 17.5 Wheel Assembly (235/75 R17.5 LRJ) C-000434-HT-V-X 32 48 48 48 M22 Flanged Nut... -
Page 56: Section 3.6 Electrical Plug
Section 3.6 Electrical Plug Ref. Part # Description Quantity Plug, 7-Pin 15-730 PERMAPLUG www.valortrailers.com PHONE: 208-810-4900 Rev 05/20/2022... -
Page 57: Section 3.7 Electrical Harnesses And Lights
Section 3.7 Electrical Harnesses and Lights Ref. Part # Description Quantity C-000414-HT-V-X 7 Way Front Harness C-000420-HT-V-X Rig Bar Harness C-000092-UT-V-X Light Bar Harness C-000410-HT-V-X Tail Marker Harness, 12” C-000418-HT-V-X Front Marker Harness, 24” C-000409-HT-V-X ABS Fault Harness C-000411-HT-V-X Mid Marker Harness, 66” C-000419-HT-V-X Center Main Harness w/ Air-Elec C-000474-HT-V-X... -
Page 58: Section 3.7.1 Wiring Diagrams
Section 3.7.1 Wiring Diagrams www.valortrailers.com PHONE: 208-810-4900 Rev 05/20/2022... -
Page 59: Section 3.7.2 Wiring Diagrams
Section 3.7.2 Wiring Diagrams 40TS (6+) 42TS (6+) 54TS/60TS (17.5”) 54TS (22.5”) www.valortrailers.com PHONE: 208-810-4900 Rev 05/20/2022... - Page 60 www.valortrailers.com PHONE: 208-810-4900 Rev 05/20/2022...
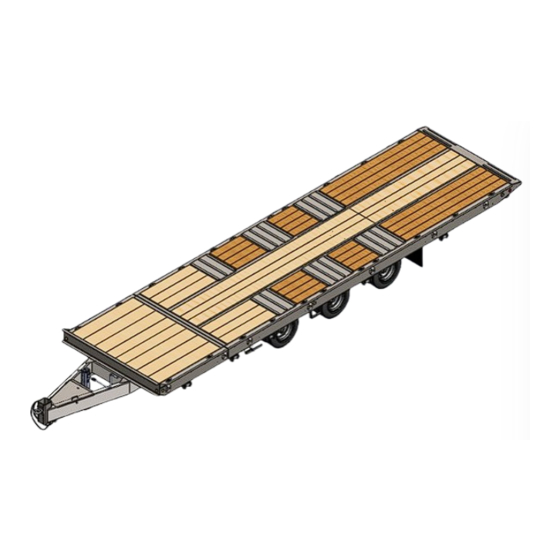
- Page 61 Section 3.8 Decking Ref. Part # Description Quantity C-000128-HT-F-X Fir Board 2” x 10” x 183-91/6” C-000128-HT-F-X Fir Board 2” x 7-5/8” x 183-9/16” C-000128-HT-F-X Fir Board 2” x 10” x 102” C-000128-HT-F-X Fir Board 2” x 7-5/8” x 102” C-000128-HT-F-X Fir Board 2”...
- Page 62 www.valortrailers.com PHONE: 208-810-4900 Rev 05/20/2022...
- Page 63 Section 3.9 Air Brake System Ref. Part # Description Quantity C-000436-HT-P-X Emergency Glad-hand- Aluminum C-000436-HT-P-X Service Glad-hand- Aluminum Hose Assembly-28”-3/8”ID Hose-3/8” Fxd & 3/8” C-000399-HT-P-X Swivel Ftg & Adptr. Hose Assembly-32”-3/8”ID Hose-3/8” Fxd & 3/8” C-000400-HT-P-X Swivel Ftg & Adptr. Hose Assembly-54”-3/8”ID Hose-3/8”...
-
Page 64: Section 3.9.1 Air Brake System
Section 3.9.1 Air Brake System 40T (6+) 42TS (6+) www.valortrailers.com PHONE: 208-810-4900 Rev 05/20/2022... -
Page 65: Section 3.9.2 Air Brake System
Section 3.9.2 Air Brake System 54TS/60TS (17.5”) 54TS (22.5”) www.valortrailers.com PHONE: 208-810-4900 Rev 05/20/2022... - Page 66 This page is intentionally left blank www.valortrailers.com PHONE: 208-810-4900 Rev 05/20/2022...
Need help?
Do you have a question about the 54TS and is the answer not in the manual?
Questions and answers