Table of Contents
Advertisement
Advertisement
Table of Contents

Subscribe to Our Youtube Channel
Summary of Contents for Planar PX2230MW
- Page 1 PX2230MW LCD Touch Monitor USER'S GUIDE www.planar.com...
-
Page 2: Table Of Contents
Content Operation Instructions...1 Unpacking Instructions ...2 Safety Precautions..2 Front View of the Product ...3 Rear View of the Product ...4 Quick Installation ..5 Basic Operation and Calibration/Reset Instructions...6 Advanced Operation—OSD Menu...8 Supporting Timing Modes ... 11 Technical Information ... -
Page 3: Operation Instructions
Industries Alliance at WWW.EIAE.ORG. For lamp WWW.LAMPRECYCLE.ORG. According to WEEE regulation, this TFT Touchscreen LCD Monitor can't be handled as normal trash in Europe when it is out of usage. Please refer to the recycle information on Planar’s website to handle it. ed technician. -
Page 4: Unpacking Instructions
Near any appliance generating a strong magnetic o In direct sunlight. If smoke, abnormal noise or odor emits from your TFT Touchscreen LCD Monitor, remove the power cord immediately and call your service center. Never remove the rear cover of your TFT Touchscreen LCD Monitor. The display unit inside contains high-voltage parts and may cause electric shock. -
Page 5: Front View Of The Product
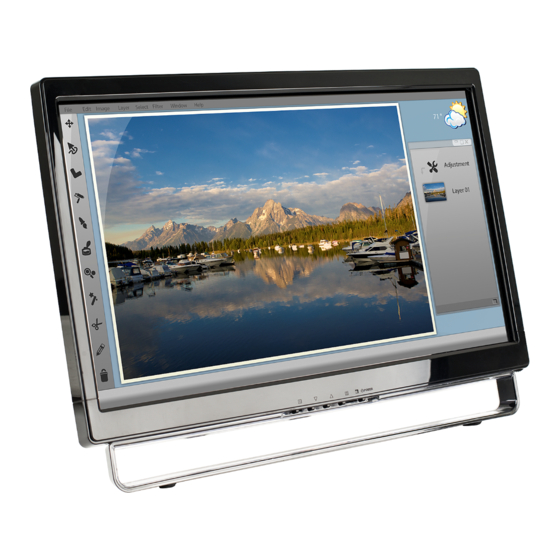
Front View of the Product OSD Turn On/ O ① Volume Adjust/ Scroll Down/ Adjust Decrease ② Preset Mode/ Scroll UP/ Adjust Increase ③ Input select/ C ④ Power On/ O ⑤ LED Indicator ⑥ ① ② ③ ④ ⑤⑥ Selection... -
Page 6: Rear View Of The Product
Rear View of the Product Power Input ⑦ Audio Input ⑧ DVI Input (DVI 24 pin) ⑨ VGA Input (D-Sub 15 pin) ⑩ USB – Type A to B ⑪ ⑦ ⑧ ⑨ ⑩ ⑪... -
Page 7: Quick Installation
Quick Installation 1. Connect either VGA or DVI Video Source from the monitor to the computer. Make sure both monitor and computer are powered OFF. Connect the power cord to a properly grounded AC outlet,then to the monitor. 3. Power-ON computer and then POWER-ON the monitor 4. -
Page 8: Basic Operation And Calibration/Reset Instructions
Option 1: OSD lock – all 4 buttons are locked except the “POWER” button. Press and hold the 1 button and the ▲ button for 10 seconds to lock the OSD buttons. The TFT Touchscreen LCD Monitor will show an “OSD Lock Out” message for 3 seconds and the message will disappear automatically. - Page 9 Repeat this step to unlock. PX2230MW Calibration/Reset Instructions: The PX2230MW is available with USB connection. It is Microsoft® Windows® 7 HID (Human Interface Device) compatible if you use the USB touch screen interface. No additional software driver is required. Calibration is a simple process and can be invoked by running Tablet PC Settings from Control Panel and clicking the Calibrate button.
-
Page 10: Advanced Operation-Osd Menu
Advanced Operation—OSD Menu You can use the OSD menu to adjust various settings for your TFT Touchscreen LCD Monitor. Press the 1 button to display the OSD Menu, and use ▲▼ to select the desired OSD menu. Short Cuts Function from the button(s) Auto Image Adjust: Tune) and Clock (H. - Page 11 Preset Mode: Provides an optimum display environment depending on the contents displayed. It contains 5 user-selectable presets. Standard is for general windows environment and monitor default setting. Game optimized for PC game environment. Cinema optimized for movie and video environment.
- Page 12 Language Select: To allow users to choose from available languages. Press ▼ or ▲ button to select between horizontal and vertical OSD OSD Position: Position adjustment. H. Position: To horizontally adjust the OSD position. ▲: move OSD to the right, ▼: move OSD to the left. V.
-
Page 13: Supporting Timing Modes
Note: 1. DVI supports 480i, 480p, 576i, 576p, 720p, 1080i, and 1080p. 2. Simultaneously press 1 and 2 keys on monitor panel to switch between similar PC timings. Similar PC Timing on list below: 720 x 400 @ 70Hz / 640 x 400 @ 70Hz Warning: Do not set the graphic card in your computer to exceed these maximum refresh rates. -
Page 14: Technical Information
Technical Information LCD Panel Power Management Displayable Resolution Pixel Dimension LCD Display Color Tilt Active Display Area Temperature Compliance Power Speaker Touchscreen Technology Touchscreen Interface Touch Method Supported O/S 21.5” TFT On: 48 Watts (maximum) Standby Mode: < 1 Watt O : <... -
Page 15: Wall-Mount Installation Instructions
Turn the power OFF then disconnect the cables from the TFT Touchscreen LCD Monitor before performing the procedure below. 1. Lay the TFT Touchscreen LCD Monitor face down on a soft surface. 2. Remove the two pieces of flake and Hinge Cover. -
Page 16: Troubleshooting
Make sure all signal cables are installed. Power on but no screen image Make sure the video cable supplied with the TFT Touchscreen LCD Monitor is tightly secured to the video output port on back of the computer. If not, tightly secure it. -
Page 17: Product Registration And Technical Support
Register Your Planar Products Today Thank you choosing Planar. To assure you receive all the ben of your Planar product and services, register your Planar product today. Visit our website to register your product at http://www.planar.com/support/product_registration.html Cables, Replacement Lamps, Accessories cables, replacement lamps and accessories for your Planar projector, LCD monitor, touch screen or other Planar products visit our online store at www.PlanarOnline.com or... - Page 18 2001170840P 020-1024-00A...


Need help?
Do you have a question about the PX2230MW and is the answer not in the manual?
Questions and answers