
Related Manuals for MAKSIWA RBB.4G

Summary of Contents for MAKSIWA RBB.4G
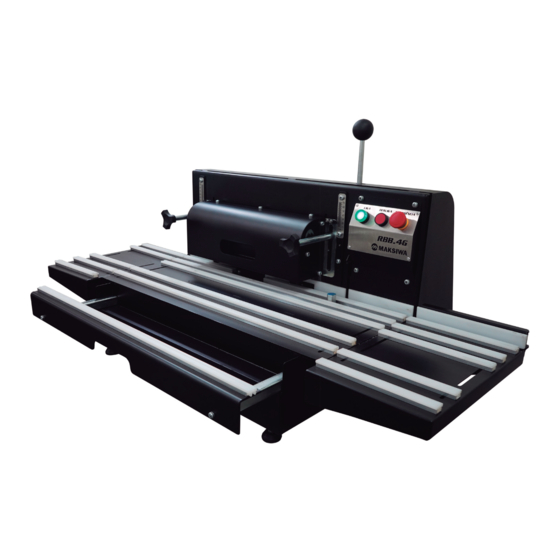
- Page 1 RBB.4G Edge Trimmer with 4 Groups INSTRUCTION MANUAL ATTENTION: READ THIS MANUAL BEFORE USING THE MACHINE.
- Page 2 Congratulations, you just purchased the RBB 4G Maksiwa Edge Trimmer, which was developed with the Maksiwa’s highest standards of technology and quality. The RBB 4G Maksiwa Edge Trimmer allows you to have the highest productivity in woodworking. It should be noted that to use this machine with maximum effi ciency, you should read and understand the instructions in this manual.
- Page 3 Furthermore, the manual must be kept to hand and within the vicinity of the machine so that it is accessible to operators when using, maintaining or repairing the machine. Maksiwa International Inc. 4100 N Powerline Rd, Suite D3 Pompa-...
-
Page 4: Table Of Contents
Contents General..................................05 Symbol legend ..............................05 1.2 Information on the operating instructions ....................05 Liability and warranty.............................05 Copyright................................06 1.5 Spare parts..............................06 1.5 Disposal .................................06 2. Safety Regulations...............................07 2.1 Workspace..............................07 Personal Safety.............................07 Machine Safety..............................04 Description................................10 Specifi cations ..............................10 4. Installation................................11 4.1Electric Installation ............................11 4.2 Assembly ................................11 4.3 Adjustments ..............................14 5. -
Page 5: General
1 General 1 General 1.1 Symbol legend Important technical safety instructions in this manual are marked with symbols. These instructions for work safety must be followed. In all these particular cases, special attention must be paid in order to avoid accidents, injury to persons or material damage. -
Page 6: Copyright
1 General manual must be read carefully before commencing any work on or with this machine. The manufacturer shall not be liable for damage and/or faults resulting from the disregard of instructions in the manual. The text and images do not necessarily represent the delivery contents. The images and graphics are not depicted on a 1:1 scale. -
Page 7: Safety Regulations
2 Safety Regulations 2 Safety Regulations Read all instructions in this manual. Failure to follow all instructions listed below may result in personal injury and equipment damage. WARNING: When using electrical equipment, always follow the safety precautions to reduce risk of fi re, electric shock and personal injury. The manufacturer declares that they are not liable for damages to person(s) or object(s) which may be caused by failure to comply with the safety regulations. - Page 8 2 Description • The motor of this machine can emit sparks, and can ignite fl ammable gases. • Extension cables. Make sure your extension cord is in good condition. When using an extension, be sure of their ability to transmit the electrical current used by your product. An undersized cord will cause drop in voltage resulting in loss of power and overheating.
- Page 9 CAUTION: Do not connect the unit to the power outlet until all instructions have been read and understood. Always tighten the adjustment tabs before using the machine. Think: “I can prevent accidents”. Do not operate the machine unless the guards are in their proper places. Always use protective goggles.
-
Page 10: Description
3 Description 3 Description the RBB 4G Maksiwa Edge Trimmer are intended perform the cutting, refi ning, scraping and polishing of edge bands applied to MDF sheets and similar, providing a perfect fi nish to your projects. 3.1 Specifi cations RBB 4G Maksiwa Edge Trimmer •... -
Page 11: Installation
• The RBB.4G is designed to operate indoors and must be placed on a fi rm, stable and level surface. 1. You will receive your machine crated. 2. Remove the machine from the crate with all the parts and accessories that go with it. - Page 12 4 Installation 5. Then install the ball handle rod. This part must be threaded into the insert that is inside the hole shown below. Make sure it is fi rmly and securely tightened. 6. Assemble the two side tables. You will receive two auxiliary side tables, as shown in the following picture: Each of the tables must be bolted on the threaded holes, indicated in the previous photo.
- Page 13 4 Installation To align the tables, use a square or similar tool. Align the side tables along the central table, making sure that both sides are perfectly aligned. Adjustment is made by tightening or loosening the screw shown below. Remember that the adjustment must be made on both sides of the auxiliary table.
-
Page 14: Adjustments
The operations carried out by the RBB.4G Trimmer, as with any other machine, may pose risks to the operator if the safety and adjustment instructions are not respected. These instructions are written with the understanding that the operator has the necessary knowledge and skills to operate this equipment. - Page 15 5 Operation 2. Adjust the feed height according to the thickness of the part to be passed, using the scales on both sides. 3. Also use the guides provided x 2 (one for each side) to make the height adjustment, according to the thickness of the MDF in which the treim will be made.
-
Page 16: Operation
5 Operation 4. After turning on the machine, place the piece to be trimmed against the stop. The stop is in the correct position to cut the ends of the panel, as it is aligned with the blade. 5. Cut the edgebanding by pressing down on the ball handle rod. Always do this before trimming each side of a piece. - Page 17 5 Operation 6. Slightly lift the part you are using so that it push down on the stop. 7. Guide panel along the equipment extension. Even though it has feed rollers, we recommend that you support the panel through complete trimming process by hand, especially with panels that exceed the size of the table.
-
Page 18: First Tests
5 Operation 5.2 Adjustments Your equipment will be pre-adjusted. Still, some adjustments will be necessary on a regular basis, such as blade adjustments or changing parts. NOTE: All adjustments must be made with the machine off and the power cord unplugged. Guillotine Knife adjustment 1. - Page 19 To make the adjustment fi rst lift the feed assembly to its max height (70 mm). Note that for the adjustment of screws E, F and G, the RBB.4G comes with a wrench with a specifi c size for this adjustment.
- Page 20 5 Operation Vertical Movement - To move the scraping bit vertically , loosen Bolt D. If you want to LOWER the scraper, tighten Bolt A and loosen B. If you want to LIFT the scraper, tighten screw B and loosen A. At the end of the adjustment, tighten again bolt D.
-
Page 21: Maintenance
Pay attention to the wear of the Buffer and clean/ change it whenever necessary. Electric panel Never move or service the electrical panel with the machine turned on or plugged in. Look for Maksiwa authorized technical assistance when you need to handle the electrical panel. -
Page 22: Explode View
7 Exploded View 7 Exploded View Complete Assembly ITEM Item Trata Qtde ANDERSON Des. Aprov. Conjunto: RBB.4G Parte: MONTAGEM FIN... - Page 23 7 Exploded View Item Description Part Nº MAIN TABLE ASSEMBLY KNIFE SUPPORT ASSEMBLY CONTROL PANEL 4096 ROUTER SUPPORT ASSEMBLY HEIGHT ADJUSTMENT KNOB REAR COVER ASSEMBLY INFEED EXTENSION TABLE ASSEMBLY OUTFEED EXTENSION TABLE ASSEMBLY FRONT EXTENSION ASSEMBLY DRIVE ASSEMBLY POLISHING SUPPORT ASSEMBLY PHILLIPS PAN HEAD MACHINE SCREW M6X12 ZB THREAD 1.0 HEIGHT ADJUSTMENT GUIDE...
- Page 24 ENTRY MAIN HEX N LEVEL M8 X ROUN 1.0MM ELECT HOLE= FLAT H ZB TH SLIDE TABLE RECEP DUST HEX R THREA SCRAP N° REF DESCR Item Tratamento Qtde ANDERSON Form. Des. Aprov. Esc. Conjunto: RBB.4G Parte: MONTAGEM MESA PRINCIPAL...
- Page 25 7 Exploded View Main Assembly Item Description Part Nº STRUCTURE ASSEMBLY 2295 MANUAL STOP ASSEMBLY FLUSH SCRAPPER ASSEMBLY ENTRY GUIDE MAIN GUIDE HEX NUT M8 ZB THREAD 1.25 2470 LEVELING FOOT BOLT 4013 M8X30 3339 ROUND KNOB M6X14 THREAD 1.0 7448 ELECTRIAL COUPLING ID=9MM / HOLE=13MM/ 3906...
- Page 26 A - 2 Form. Des. 1 : 1 Aprov. Esc. Conjunto: MAKSIWA IND. E COM. DE MÁQUINAS L RBB.4G RUA NELSON ARGENTA, 436 - COLOMBO - PR - BRASI FONE/FAX: [55] (41) 3621-3218 / 9912-2241 www.maksiwa.com.br - maksiwa@maksiwa. c om.br Parte: Item Description Part Nº...
- Page 27 Form. Des. 1 : 1 Aprov. Esc. Conjunto: MAKSIWA IND. E COM. DE MÁQUINAS L RBB.4G RUA NELSON ARGENTA, 436 - COLOMBO - PR - BRASI FONE/FAX: [55] (41) 3621-3218 / 9912-2241 www.maksiwa.com.br - maksiwa@maksiwa. c om.br Parte: Ref. Orig.
- Page 28 Esc. FREQUÊNCIA Conjunto: MEIO DE CONTROLE REGISTRO MÍNIMA C.Q. MAKSIWA IND. E COM. DE MÁQUINAS LTDA. RBB.4G RUA NELSON ARGENTA, 436 - COLOMBO - PR - BRASIL 3 Ciclos MICRÔMETRO LIBER. DO LOTE FONE/FAX: [55] (41) 3621-3218 / 9912-2241 "...
- Page 29 7 Exploded View Drive Assembly Item Description Part Nº PHILLIPS PAN HEAD MACHINE SCREW M6X12 ZB THREAD 1.0 FLAT WASHER M6 ZB HEX SCREW M6X10 ZB THREAD 1.0 3346 MOTOR SUPPORT ASSEMBLY 7753 GEAR MOTOR ASSEMBLY DRIVE COVER 2292 BLACK GEAR PULLEY (MOD. SX-50 SIDE 2330 38X24X16) PLASTIC GEAR SPACER...
- Page 30 Proj4 Form. Des. 1:6,67 Aprov. Esc. Conjunto: MAKSIWA IND. E COM. DE MÁQUINAS LTDA. RBB.4G RUA NELSON ARGENTA, 436 - COLOMBO - PR - BRASIL Item Description Part Nº FONE/FAX: [55] (41) 3621-3218 / 9912-2241 www.maksiwa.com.br - maksiwa@maksiwa. c om.br Parte: Ref.
- Page 31 Form. Des. 1 : 1 Aprov. Esc. Conjunto: MAKSIWA IND. E COM. DE MÁQUINAS LTDA. RBB.4G RUA NELSON ARGENTA, 436 - COLOMBO - PR - BRASIL FONE/FAX: [55] (41) 3621-3218 / 9912-2241 www.maksiwa.com.br - maksiwa@maksiwa. c om.br Parte: Ref. Orig.
- Page 32 Form. Des. 1 : 1 Aprov. Esc. Conjunto: MAKSIWA IND. E COM. DE MÁQUINAS LTDA. RBB.4G RUA NELSON ARGENTA, 436 - COLOMBO - PR - BRASIL FONE/FAX: [55] (41) 3621-3218 / 9912-2241 www.maksiwa.com.br - maksiwa@maksiwa. c om.br Parte: Ref. Orig.
- Page 33 MOLA TRA. E- 0,8 DE-8 DI-6,4 C-65 74 5804 ESPIRAS GALVANIZADA PORCA SEXTAVADA M6 ZB PASSO 1,0 PARAFUSO SEXTAVADO 3701 INTERNO M6X16 CB CILINDRICA ZB FACA COM FIO DESTOPO FITA RBB.4G 7645 CHAPA VG 3,0X19X120MM PINO FACA DESTOPADOR 7762 MANIPULO ESFERA BAQUELITE ROSCA INT. 3/8 UNC N°...
- Page 34 Form. Des. 1 : 1 Esc. Aprov. Conjunto: MAKSIWA IND. E COM. DE MÁQUINAS LTDA. RBB.4G RUA NELSON ARGENTA, 436 - COLOMBO - PR - BRASIL FONE/FAX: [55] (41) 3621-3218 / 9912-2241 www.maksiwa.com.br - maksiwa@maksiwa. c om.br Parte: Ref. Orig.
- Page 35 Form. Des. 1 : 1 Aprov. Esc. Conjunto: MAKSIWA IND. E COM. DE MÁQUINAS LTDA. RBB.4G RUA NELSON ARGENTA, 436 - COLOMBO - PR - BRASIL FONE/FAX: [55] (41) 3621-3218 / 9912-2241 www.maksiwa.com.br - maksiwa@maksiwa. c om.br Parte: Ref. Orig.
- Page 36 Form. Des. 1 : 1 Aprov. Esc. Conjunto: MAKSIWA IND. E COM. DE MÁQUINAS LTDA. RBB.4G RUA NELSON ARGENTA, 436 - COLOMBO - PR - BRASIL FONE/FAX: [55] (41) 3621-3218 / 9912-2241 www.maksiwa.com.br - maksiwa@maksiwa. c om.br Parte: Ref. Orig.
- Page 37 Form. Des. 1 : 1 Aprov. Esc. Conjunto: MAKSIWA IND. E COM. DE MÁQUINAS LTDA. RBB.4G RUA NELSON ARGENTA, 436 - COLOMBO - PR - BRASIL FONE/FAX: [55] (41) 3621-3218 / 9912-2241 www.maksiwa.com.br - maksiwa@maksiwa. c om.br Parte: Ref. Orig.
- Page 38 Anderson Form. Des. 1 : 1 Aprov. Esc. Conjunto: MAKSIWA IND. E COM. DE MÁQUINAS LTDA. RBB.4G RUA NELSON ARGENTA, 436 - COLOMBO - PR - BRASIL FONE/FAX: [55] (41) 3621-3218 / 9912-2241 www.maksiwa.com.br - maksiwa@maksiwa. c om.br Item Description Part Nº...
- Page 39 Form. Des. 1 : 1 Aprov. Esc. Conjunto: MAKSIWA IND. E COM. DE MÁQUINAS LTDA. RBB.4G RUA NELSON ARGENTA, 436 - COLOMBO - PR - BRASIL FONE/FAX: [55] (41) 3621-3218 / 9912-2241 www.maksiwa.com.br - maksiwa@maksiwa. c om.br Parte: Ref. Orig.
- Page 40 Form. Des. 1 : 1 Aprov. Esc. Conjunto: MAKSIWA IND. E COM. DE MÁQUINAS LTDA. RBB.4G RUA NELSON ARGENTA, 436 - COLOMBO - PR - BRASIL FONE/FAX: [55] (41) 3621-3218 / 9912-2241 www.maksiwa.com.br - maksiwa@maksiwa. c om.br Parte: Ref. Orig.
- Page 41 05/07/2019 Form. Des. 1:2,86 Esc. Aprov. Conjunto: MAKSIWA IND. E COM. DE MÁQUINAS L RBB.4G RUA NELSON ARGENTA, 436 - COLOMBO - PR - BRASIL FONE/FAX: [55] (41) 3621-3218 / 9912-2241 www.maksiwa.com.br - maksiwa@maksiwa. c om.br Parte: Ref. Orig. Des.Nr.
- Page 42 Data Form. Des. 1:6,67 Aprov. Esc. Conjunto: MAKSIWA IND. E COM. DE MÁQUINAS LTDA. CONJUNTO RBB-4G RUA NELSON ARGENTA, 436 - COLOMBO - PR - BRASIL FONE/FAX: [55] (41) 3621-3218 / 9912-2241 www.maksiwa.com.br - maksiwa@maksiwa. c om.br Parte: Ref. Orig.
-
Page 43: Wiring Diagram
8 Wiring Diagram 8 Wiring Diagram LIST OF ELEC C C O O N N T T A A C C T T O O R R C C O O I I L L X X C C 1 1 - - P P O O W W E E R R C C O O N N N N E E C C T T O O R R CODE DESCRIPTION 10 AMP FUSE... - Page 44 8 Wiring Diagram...
-
Page 45: Warranty Terms
9 Terms of Warranty 7 Terms of Warranty MAKSIWA assures the owner that their equipment, identifi ed by the Serial number issued on the Warranty Terms. The equipment under warranty, for two (2) years, is as followed: 1. The warranty period begins on the date of the Warranty Terms below. - Page 46 Imported by: Maksiwa International Inc. 4100 N Powerline Rd, Suite D3 Pompano Beach, Florida ZIP Code: 33073 Telephone: +1 (754) 205-6717 | Call us free: +1 (844) 319-6594 E-mail: tech@maksiwa.com www.maksiwa.com...
Need help?
Do you have a question about the RBB.4G and is the answer not in the manual?
Questions and answers