TCL Sweeva 6500 User Manual
Robot vacuum
Hide thumbs
Also See for Sweeva 6500:
- User manual (156 pages) ,
- Quick start manual (49 pages) ,
- User manual (98 pages)
Table of Contents
Advertisement
Advertisement
Table of Contents

Related Manuals for TCL Sweeva 6500


Summary of Contents for TCL Sweeva 6500
- Page 1 6000/6500...
- Page 3 Sweeva 6000/6500 User Manual Thank you for purchasing this product. Please read the user manual carefully before use, and keep it properly.
-
Page 4: Table Of Contents
Sweeva 6000/6500 User Manual Contents 1. Safety Instructions 7. Daily Maintenance Operational instructions Clean the dust box Safety precautions Clean the rolling brush About child safety Clean the side brush About the battery Clean the universal wheel Scope of use Clean the charging electrode Disclaimers Clean up the dust channel... - Page 5 6. If the user manual is missing, please contact your local dealer or call the after-sales service department to obtain an electronic user manual. Due to the constant improvement of the product, the actual product shall prevail. Our company reserves the right to update the product. Website: www.tcl.com...
-
Page 6: Safety Instructions
WARNING—This product contains a UV-C emitter that can not be replaced, do not stare at the lamp. To turn on/off the UVC function, open the TCL Home app and toggle the on/off switch on the product’s control page. Never expose skin or eyes directly to UVC LED for risk of injury. Should you believe the UVC is not functioning properly or is exposed from any side other than the underside of the vacuum, please contact support immediately using the “Support”... -
Page 7: About Child Safety
Safety Instructions Before use, remove fragile objects, and arrange scattered wires on the floor for fear of affecting the normal operation of the sweeper. The charging dock and self-emptying dustbin shall be placed against the wall and on a flat floor. When the product is working, removal of the charging dock or self-emptying dustbin will affect the normal recharging of the machine. -
Page 8: About The Battery
Safety Instructions About the battery Only the batteries provided by the manufacturer are applicable to the product. The battery shall be removed when the product is discarded. Steps to remove the battery: A. Make sure to disconnect the power of the machine when removing the battery; B. - Page 9 Safety Instructions Disclaimers E. The product model on the warranty card does not match that of the product to be repaired or is altered; F. Damage caused by irresistible factors such as natural disasters; G. Product failure or damage caused by unexpected factors or man-made causes (including operational errors, liquid ingress, improper plugging/unplugging, scratching, handling, bumping, input of inappropriate voltage, etc.).
-
Page 10: Package Information
Package Information Main machine Charging dock × 1 + Power adapter × 1 Self-Emptying Dustbin × 1 + dust bag × 3 (Sweeva 6000) (Sweeva 6500) User manual × 1 Cleaning brush × 1 Side brush × 2 Filter × 1... -
Page 11: Product Description
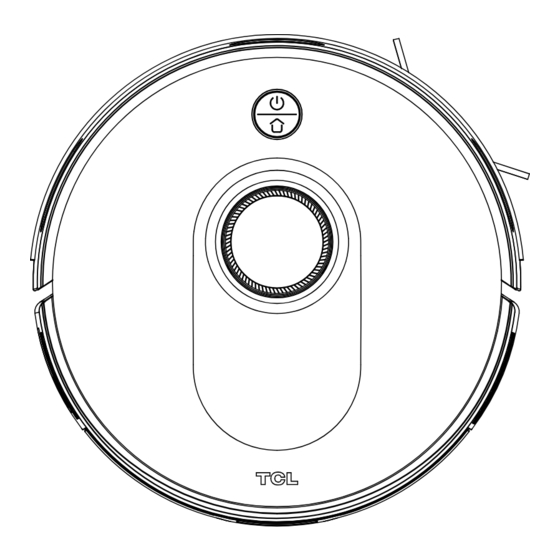
Product Description Button light interaction Cleaning/Switch button • Press and hold for 3 seconds to turn on/off the machine. • Press once to start cleaning. Recharging button • Press once to return for recharging. • Press and hold for 15 seconds to restore factory settings. Recharging button + Cleaning/Switch button •... - Page 12 When the main machine is not connected to the charging dock. Off: Power off or the main machine and the charging dock are correctly connected. Self-Emptying Dustbin (Sweeva 6500) Self-Emptying dustbin indicator Solid white light: When the main machine is not connected to the self-emptying dustbin.
-
Page 13: Introduction Of Main Modules
Product Description Introduction of Main Modules Radar Front cover Middle shell Button Charging pole pieces Recharging Recharging sensor Dust box release button sensor Dust collection port Filter opening Along-the-wall Front bumper sensor Anti-drop sensor Dust box Filter opening opening Side brush Charging electrode Caster UV-C lamp... - Page 14 Product Description Introduction of Main Modules Top cover Open the top cover to put in/take out the dust bag. Fan filter Dust bag compartment Recharging and s e l f- em p t y in g sensor Charging and self-emptying Dust bag handle sensing Vacuum button...
-
Page 15: Installation Instructions
Installation Instructions ① Installation and placement of Sweeva 6000 charging dock Connect the charging dock with the power adapter, and Note: Install the charging dock in a position where the robot be sure to organize the adapter cable to prevent the robot vacuum can easily reach. - Page 16 Installation Instructions ② Installation and placement of Sweeva 6500 self-emptying dustbin Place the self-emptying dustbin against and perpendicular Place the charging dock against and perpendicular to the to the wall on a level, hard floor, then insert the power plug wall on a level, hard floor, without obstacles within 1.5m in...
- Page 17 Installation Instructions ⑤ Startup and charging NOTE: For initial use, press and hold the “ ” button for 3 seconds The color of the power indicator indicates the to turn on the machine. The main machine needs to be fully charged (approxi- battery level: Blue light: ≥15% mately 4 hours) to ensure normal operation.
-
Page 18: App Download And
APP Download and Network Operation (Optional) ① Download ③ Add a device Search for “TCL Home” in the mobile app store to download Before setting the Wi-Fi, please make sure that the main machine and Wi-Fi network meet the following requirements. - Page 19 APP Download and Network Operation (Optional) Wi-Fi connection failure If you cannot use your smart phone to control the main machine, please try the following solutions. If the problem persists, please contact our customer service personnel in time. Wi-Fi status Cause Solution indicator...
-
Page 20: Operating Instructions
Operating Instructions Power on/off Start cleaning Press and hold the button for 3 seconds to turn on the If the battery is too low, the cleaning cannot be started, machine. please charge first and then start the cleaning. Press and hold the button for 3 seconds to turn off the Before cleaning, all cables on the floor shall be organized to machine. - Page 21 Operating Instructions Pause During the operation of the robot vacuum, the operation will pause by pressing any button. Charging Automatic recharging: After the cleaning task is completed, it will automatically return for charging. Manual recharging: a. At the time of pause, you need to press the button for automatic recharging;...
- Page 22 Operating Instructions Relocation and regeneration of a map System resetting When the robot vacuum is moved or the surrounding environ- In the standby mode, press and hold the button for 15 ment changes significantly, the robot vacuum will try to seconds to reset the system.
- Page 23 Operating Instructions Zone cleaning mode (only applicable to the App) 1. Room cleaning: The robot vacuum will clean one or 3. Spot cleaning: Click the cleaning position, then the robot more rooms checked on the zooming map in the APP. vacuum will clean in the 1.5m×1.5m area centered on this position, and return to the charging dock after cleaning Room2...
-
Page 24: Daily Maintenance
Daily Maintenance Clean the dust box Clean the dust box Empty the dust box, put the dust box close to the trash can, ① and tap the dust box gently to knock off the excess dirt. Disassemble the removed filter assembly, take out the ②... -
Page 25: Clean The Side Brush
Clean the universal wheel Charging dock Self-Emptying Dustbin (Sweeva 6000) (Sweeva 6500) As hair is entangled on the universal wheel or dust particles adhere to it easily, be sure to clean the universal wheel regularly or as needed. Charging Pull the universal wheel upwards. -
Page 26: Clean Up The Dust Channel
Daily Maintenance Clean up the dust channel Replace the dust bag If the channel is blocked by foreign matter, it is recommended to unplug the power cord, turn the dust chamber, refer to the figure below, remove the transparent cover of the dust channel with a screwdriver, and clean out the foreign matter. - Page 27 Daily Maintenance Clean the UV-C lamp Please clean the UV-C lamp regularly, and wipe off the dust on the charging electrode with a soft dry cloth or cleaning brush. Warning: Turn off the power before cleaning.
-
Page 28: Exceptions And Self-Check
Exceptions and Self-check When the product works abnormally, the red indicator light on the main machine will flash, and the relevant voice prompts will be heard at the same time. Please follow the voice prompts to solve the problem. Voice Prompt Solution •... - Page 29 Voice Prompt Solution The machine is tilted. Please • The machine is tilted at the time of startup. Please place the machine on a level floor and place the machine on a level restart it. floor and restart it. The along-the-wall sensor is •...
-
Page 30: List Of Faults
List of Faults When the main machine fails, the red indicator light on the main machine will flash, and the relevant voice prompts will be heard at the same time. If you still cannot solve the fault according to the prompts, please contact our after-sales service department. -
Page 31: Technical Specifications
Technical Specifications Functional parameters of the main machine Functional parameters of accessories Operating voltage Power adapter and Charging dock 14.52V Input voltage Battery Lithium battery 100-240V AC Operating hours Approx. 180min (standard level) Input current 0.6A MAX Operating humidity range ≤90%RH Output voltage Noise... -
Page 32: Environmental Statement (Optional)
Environmental Statement ■ Names and contents of harmful substances in the product Harmful Substances Component Name Hexavalent Polybrominated Polybrominated Lead Mercury Cadmium chromium biphenyl diphenyl ethers (Pb) (Hg) (Cd) (Cr (VI)) (PBB) (PBDE) Shell component Internal plastic parts Metal parts Electrical components and control components Dry battery...
Need help?
Do you have a question about the Sweeva 6500 and is the answer not in the manual?
Questions and answers